The Scheduling tab
The Scheduling tab is where you plan and schedule future releases of content to your audience. Using the concepts of events and editions, you can specify when and where content will be published. A choice of views are available from the scheduling tab, allowing you to choose the way in which you want to work:
- Calendar view - which provides a month by month overview of your planned events and editions
- List view - which shows the events and editions in a list
- Timeline - displays events and editions in a time period you choose, from one week to one year
Here we'll provide an overview of the Scheduling tab, and how to use the Timeline. For information about how to plan, preview and schedule content using the calendar, see Scheduling content.
Get started with the Scheduling tabLink copied!
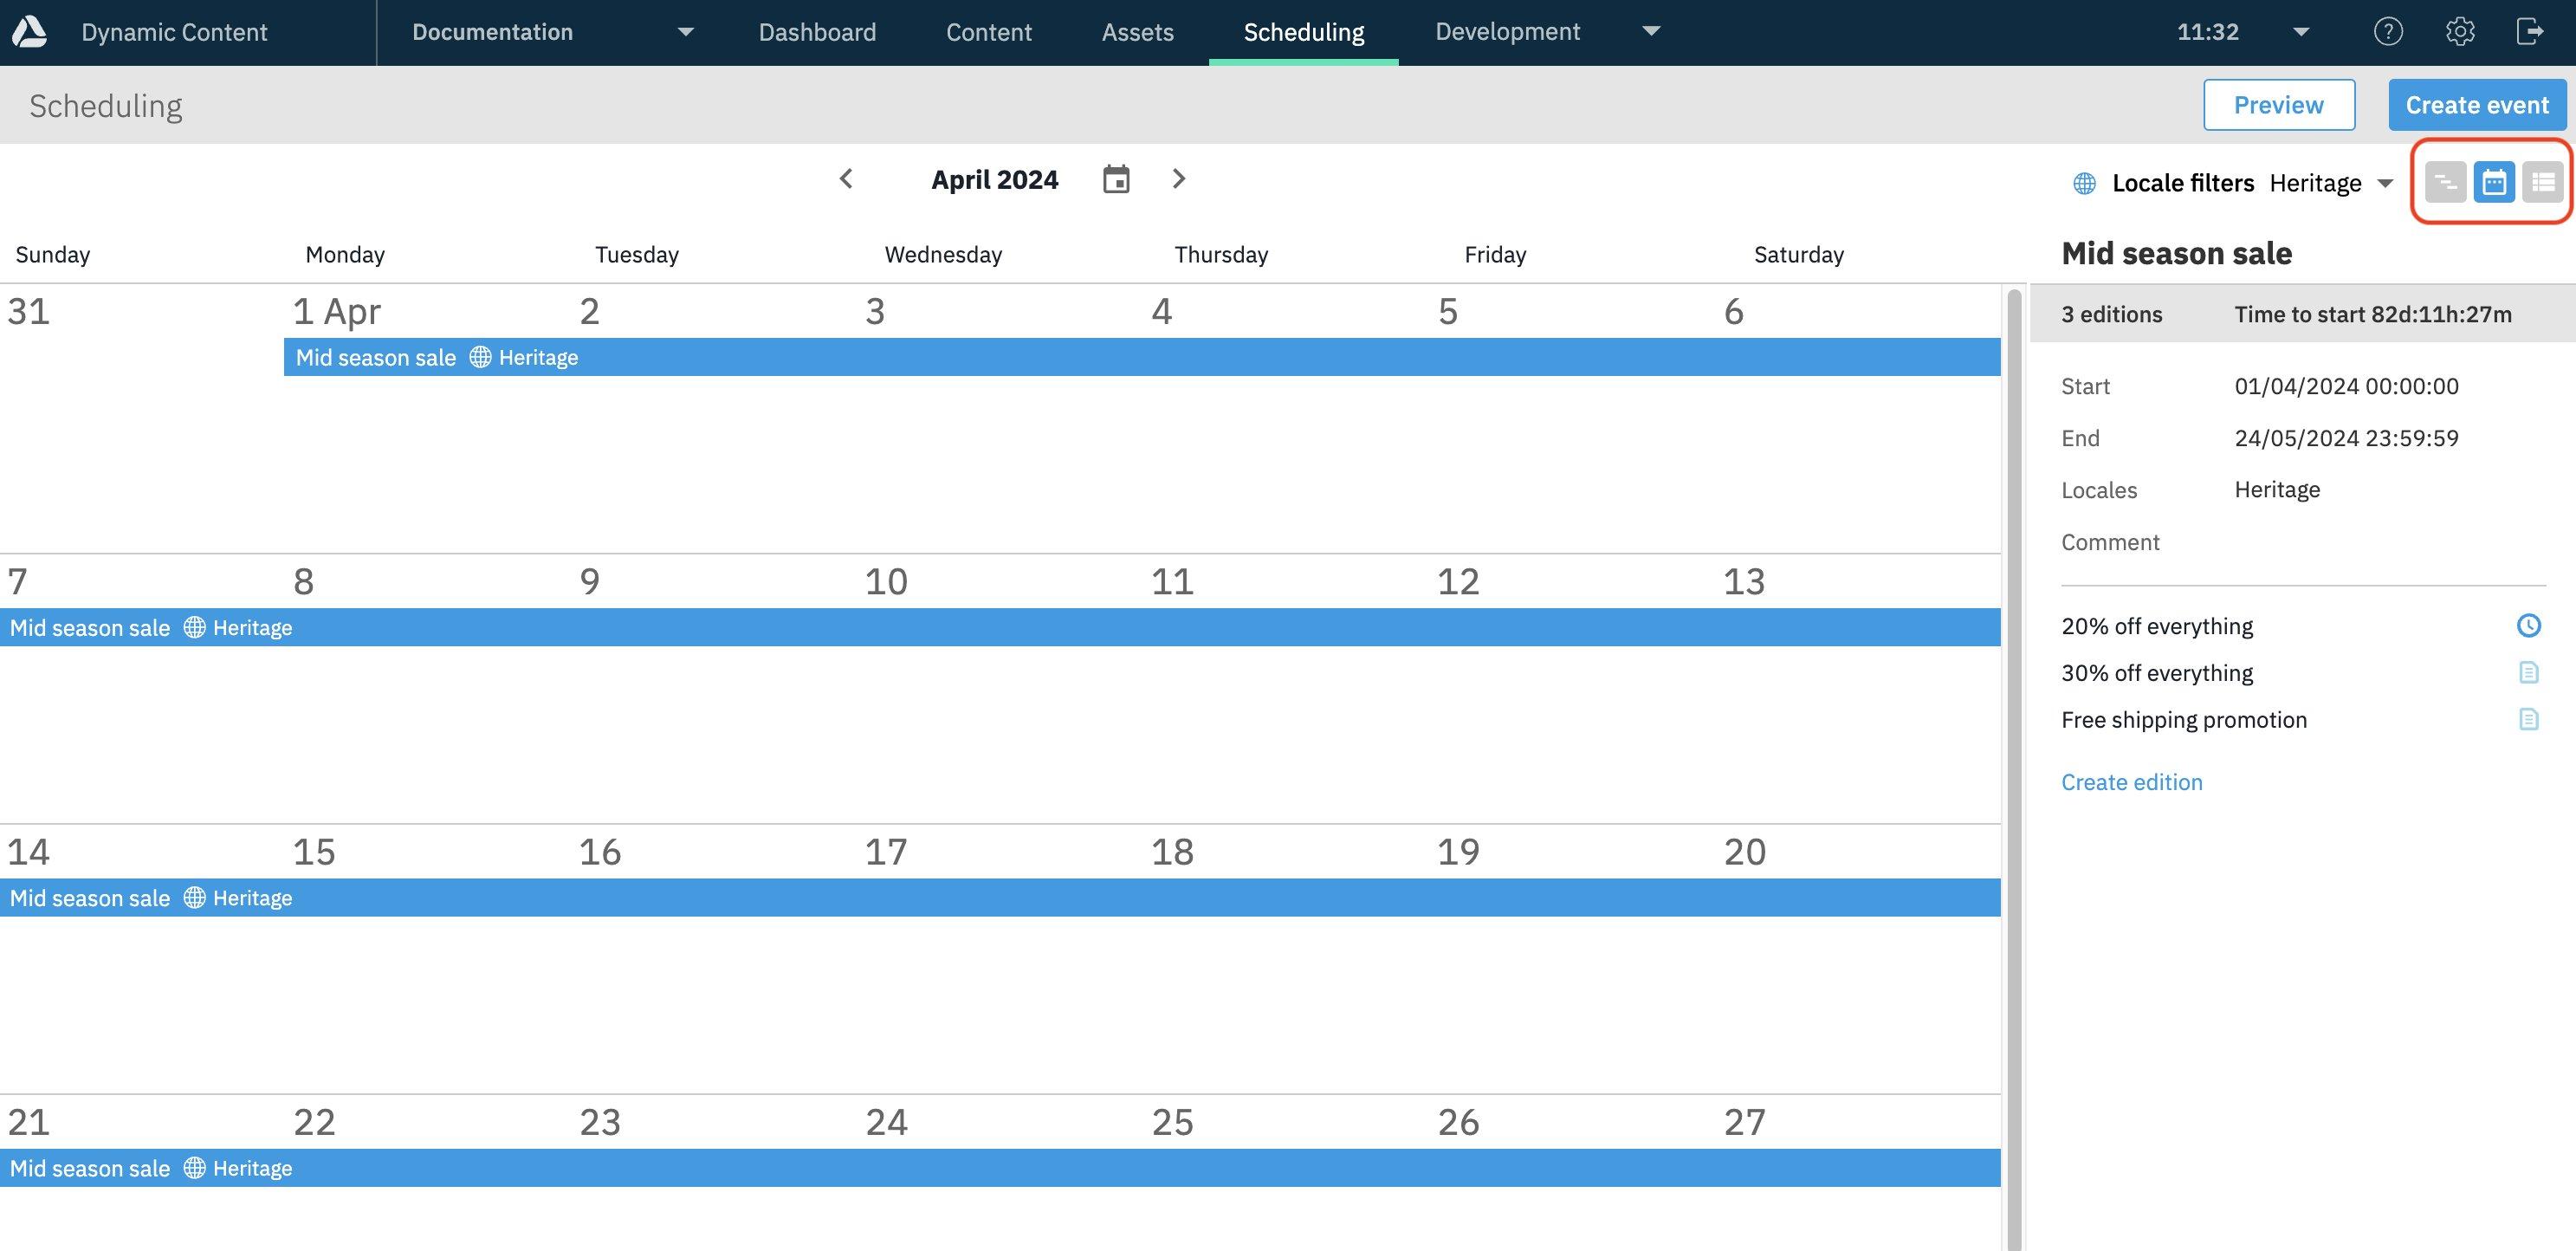
When you open the Dynamic Content Scheduling tab, a list of events in the month you've chosen to view is displayed. You can select an event by clicking anywhere within its duration in the calendar. A list of the editions within this event will be shown on the right of the window.
In the example below an event has been selected and the three editions it contains are shown, together with an icon reflecting their status. Two of the editions are in draft mode and shown with a light blue icon, and one edition has been scheduled and as a result is displayed with a clock icon.
Switching the scheduling viewLink copied!
You can switch between the timeline, calendar and list views by choosing one of the icons on the top right of the window, as highlighted in the example. The timeline icon is on the left, with the calendar view icon in the middle and the list view icon on the right.
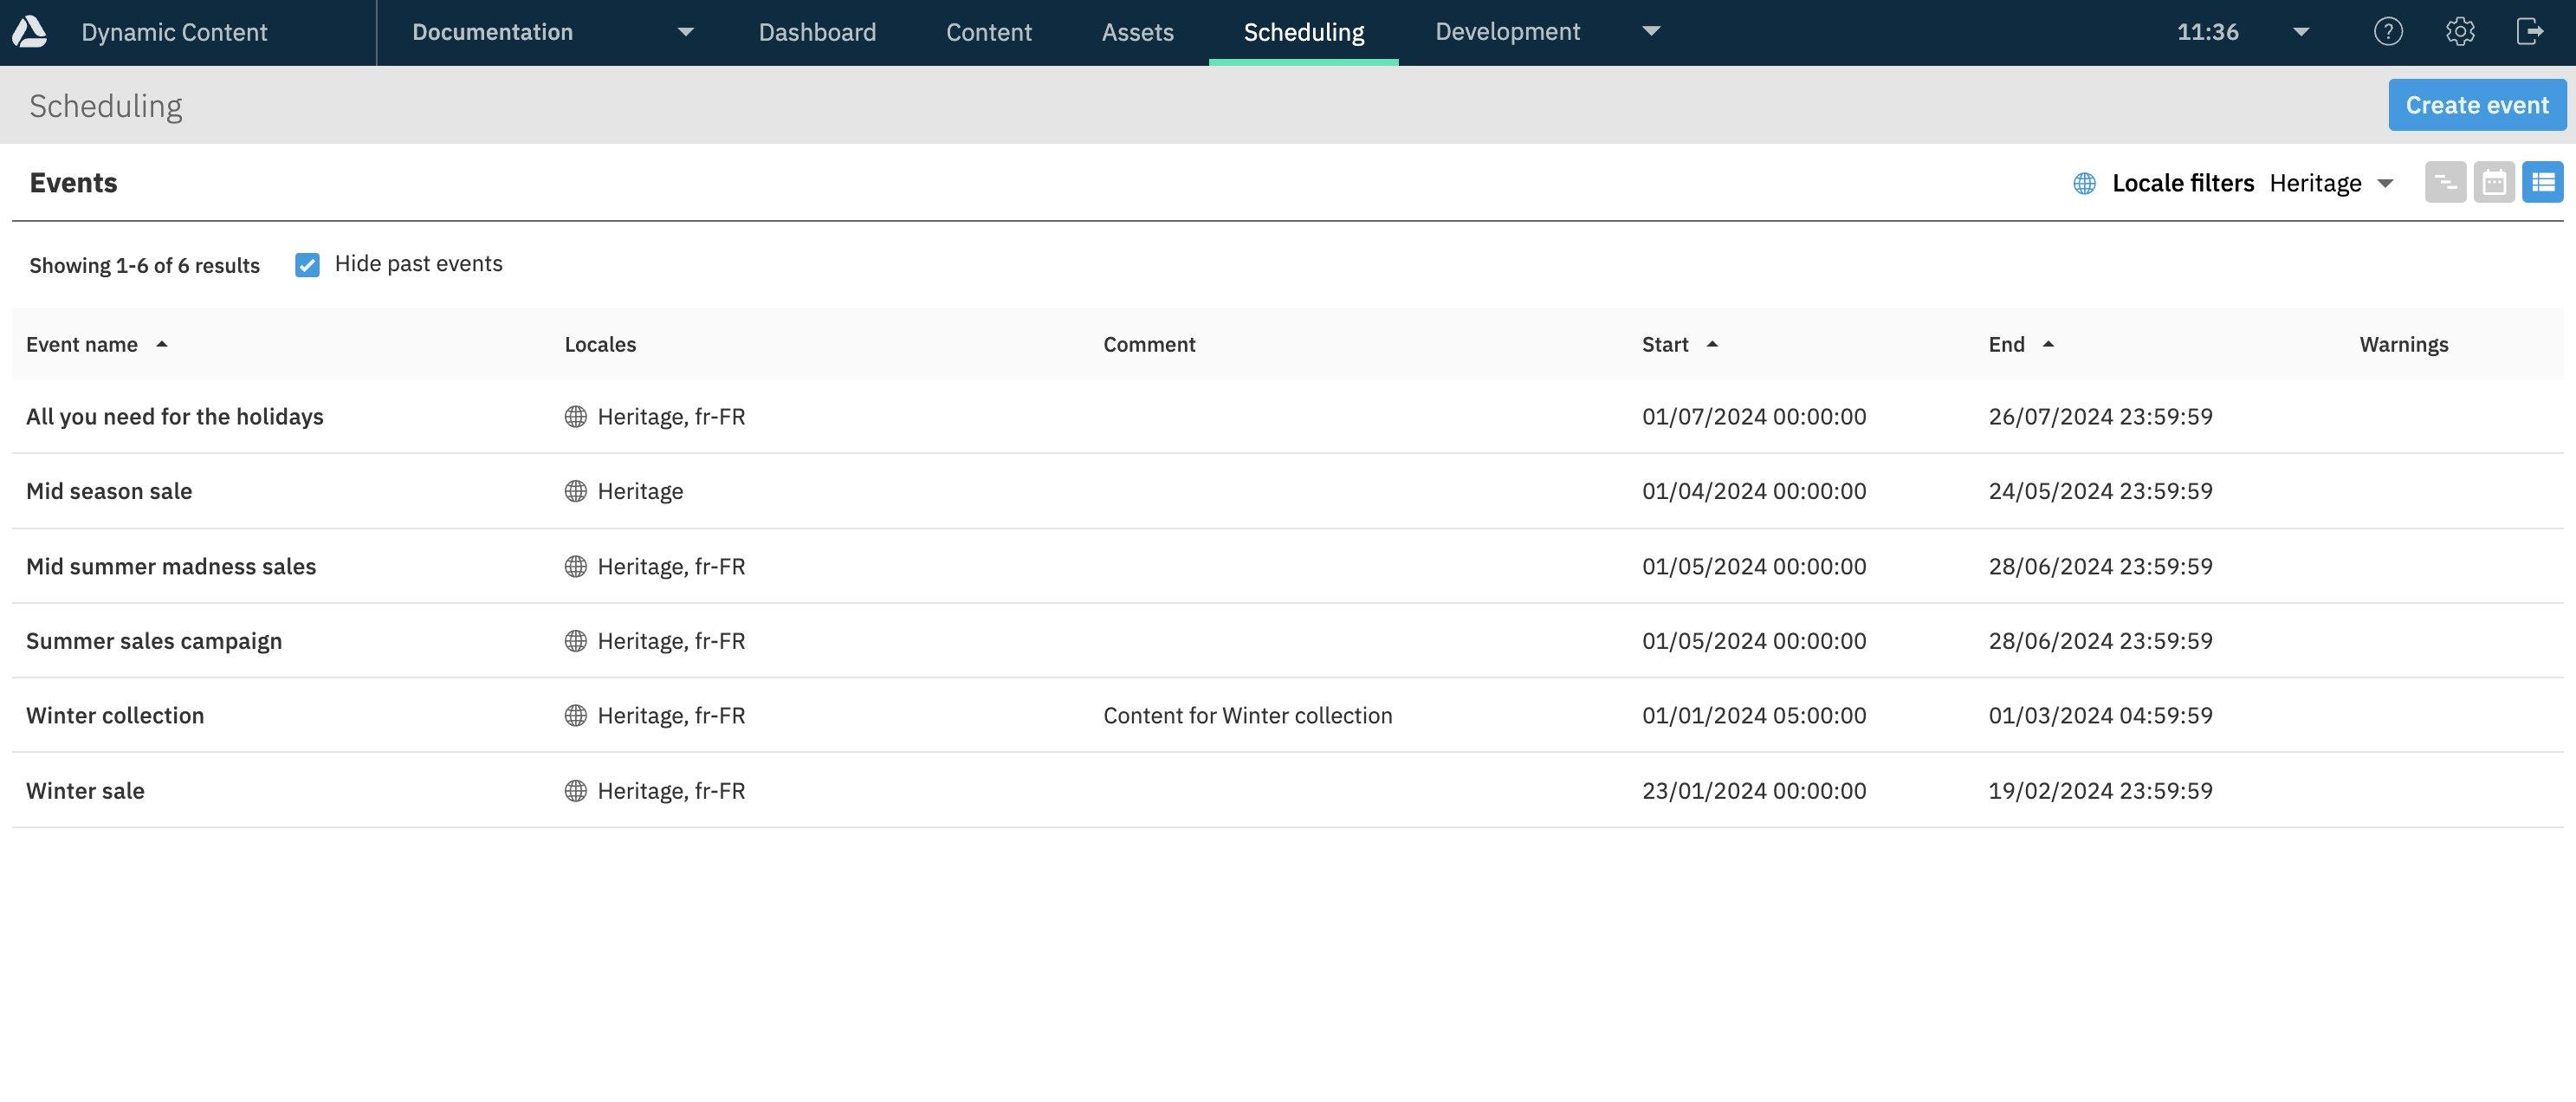
Here's an example of the Scheduling tab with the events displayed as a list. You can choose to hide expired events. The same features for viewing and editing events are available whether you are using the calendar view, timeline or the list view.
Managing events and previewing contentLink copied!
To create a new event, select the "Create event" button at the top of the window or right-click anywhere outside an existing event and choose "Create event" from the contextual menu.
From the calendar and timeline, you can also choose to preview content. See Previewing content.
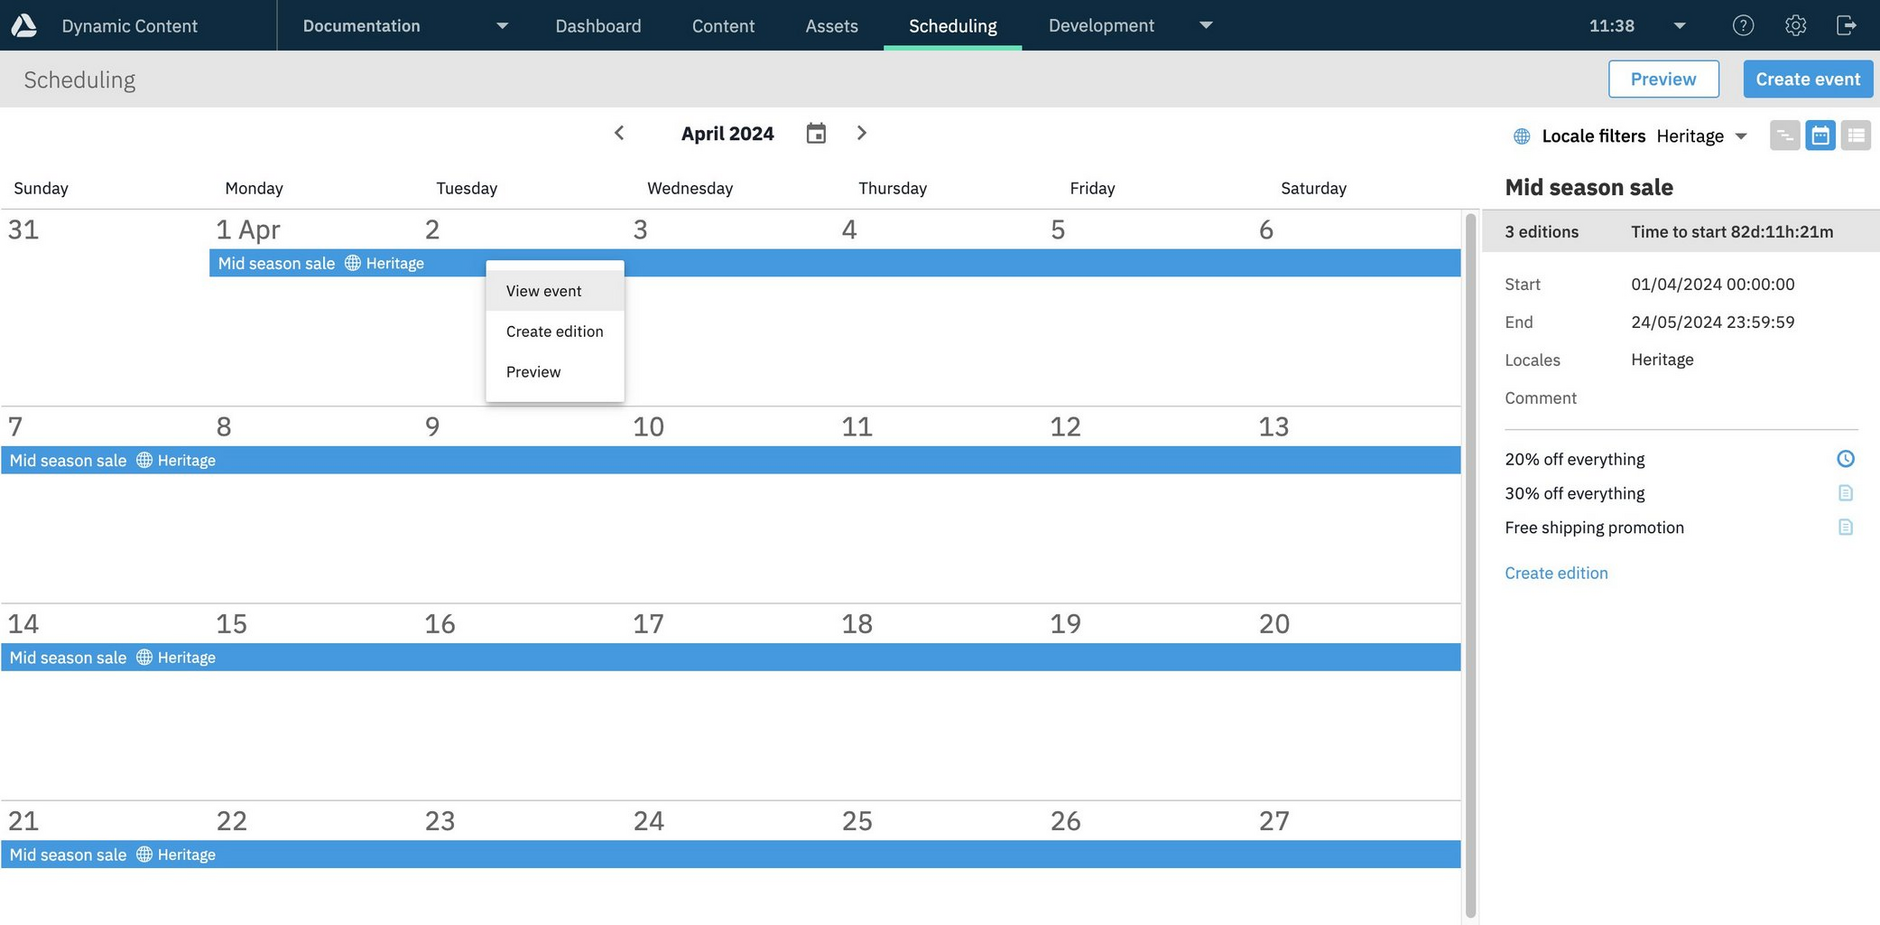
To view or delete an event, or add an edition, either double-click anywhere inside the event in the calendar or select it, right-click and choose "view event" or "create edition" from the contextual menu.
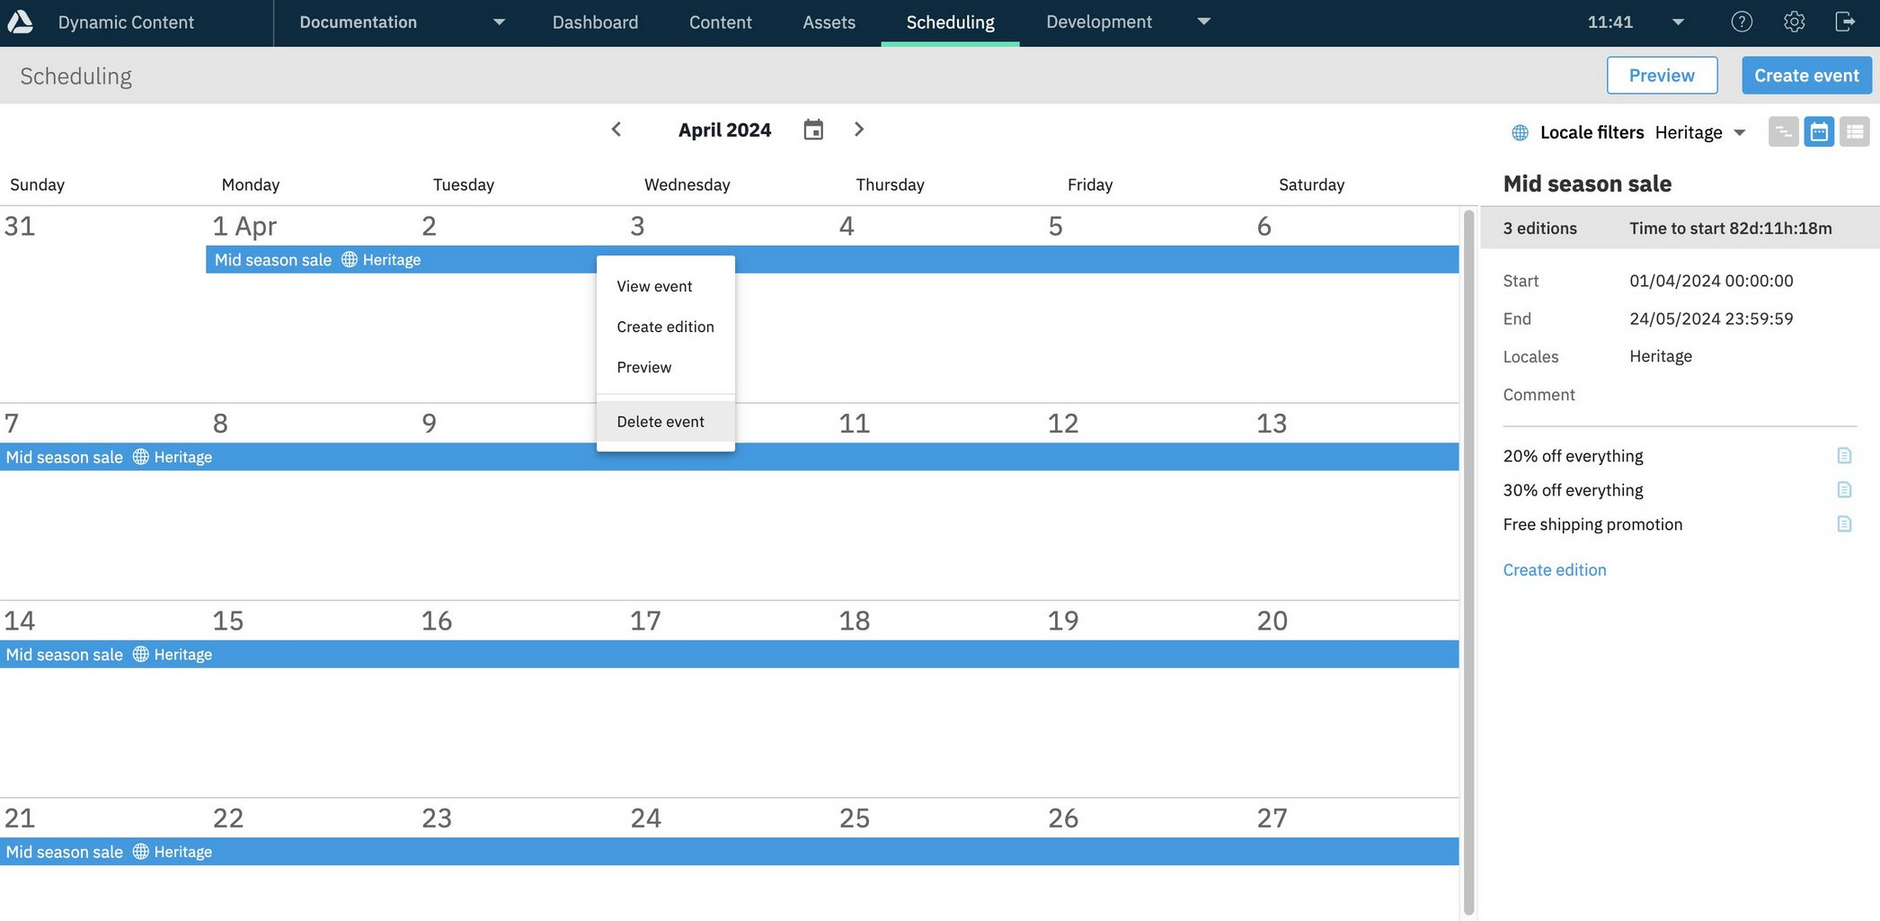
Note that "Delete event" will only be available if all of the event's editions are unscheduled.
Filtering events by localeLink copied!
If you have locales assigned to your hub, then you can assign locales to events and filter the calendar, list and timeline views by locale, showing only those events that match the filter. This is useful if you want to focus on those events containing content for particular locales.
Choose "Locale filter" at the top of the window and select the locales for the events that you want to display.
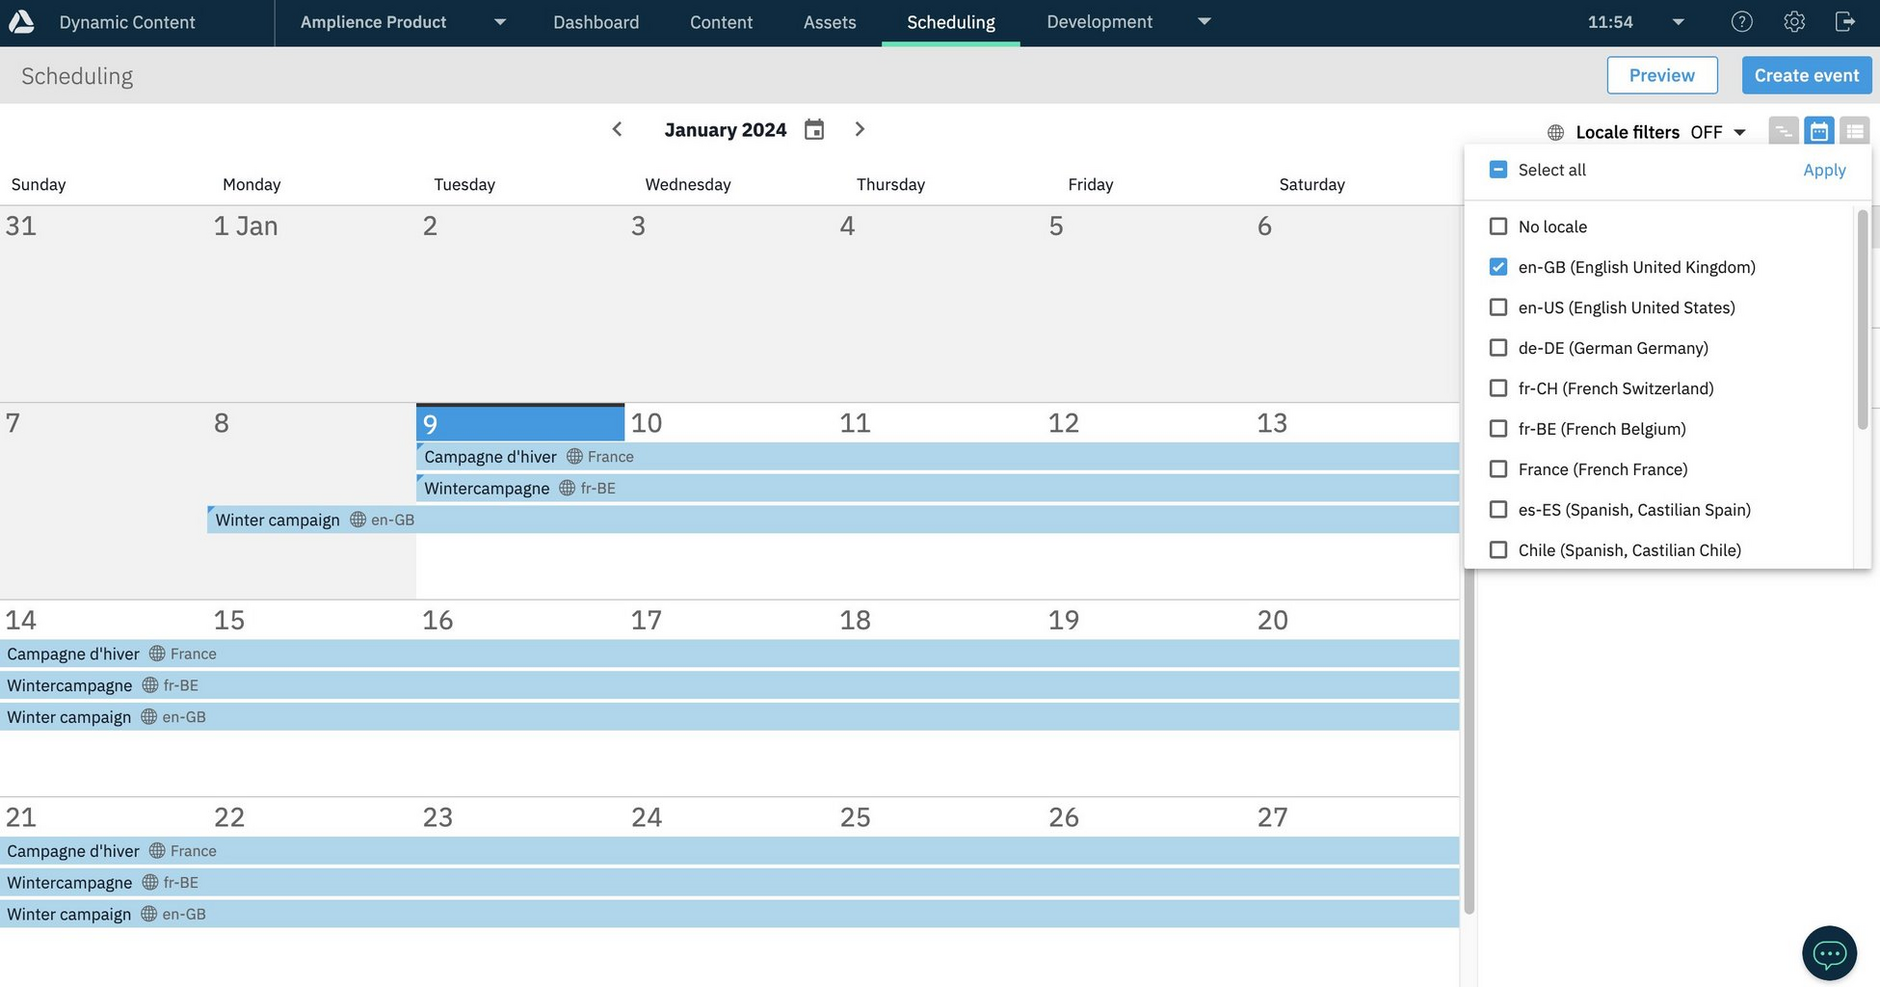
In the example below the Locale Filter is off and the calendar shows events with a combination of en-GB, fr-FR and fr-BE locales. To focus on just the events assigned the en-GB locale, we can choose "en-GB English" from the Locale filters menu.
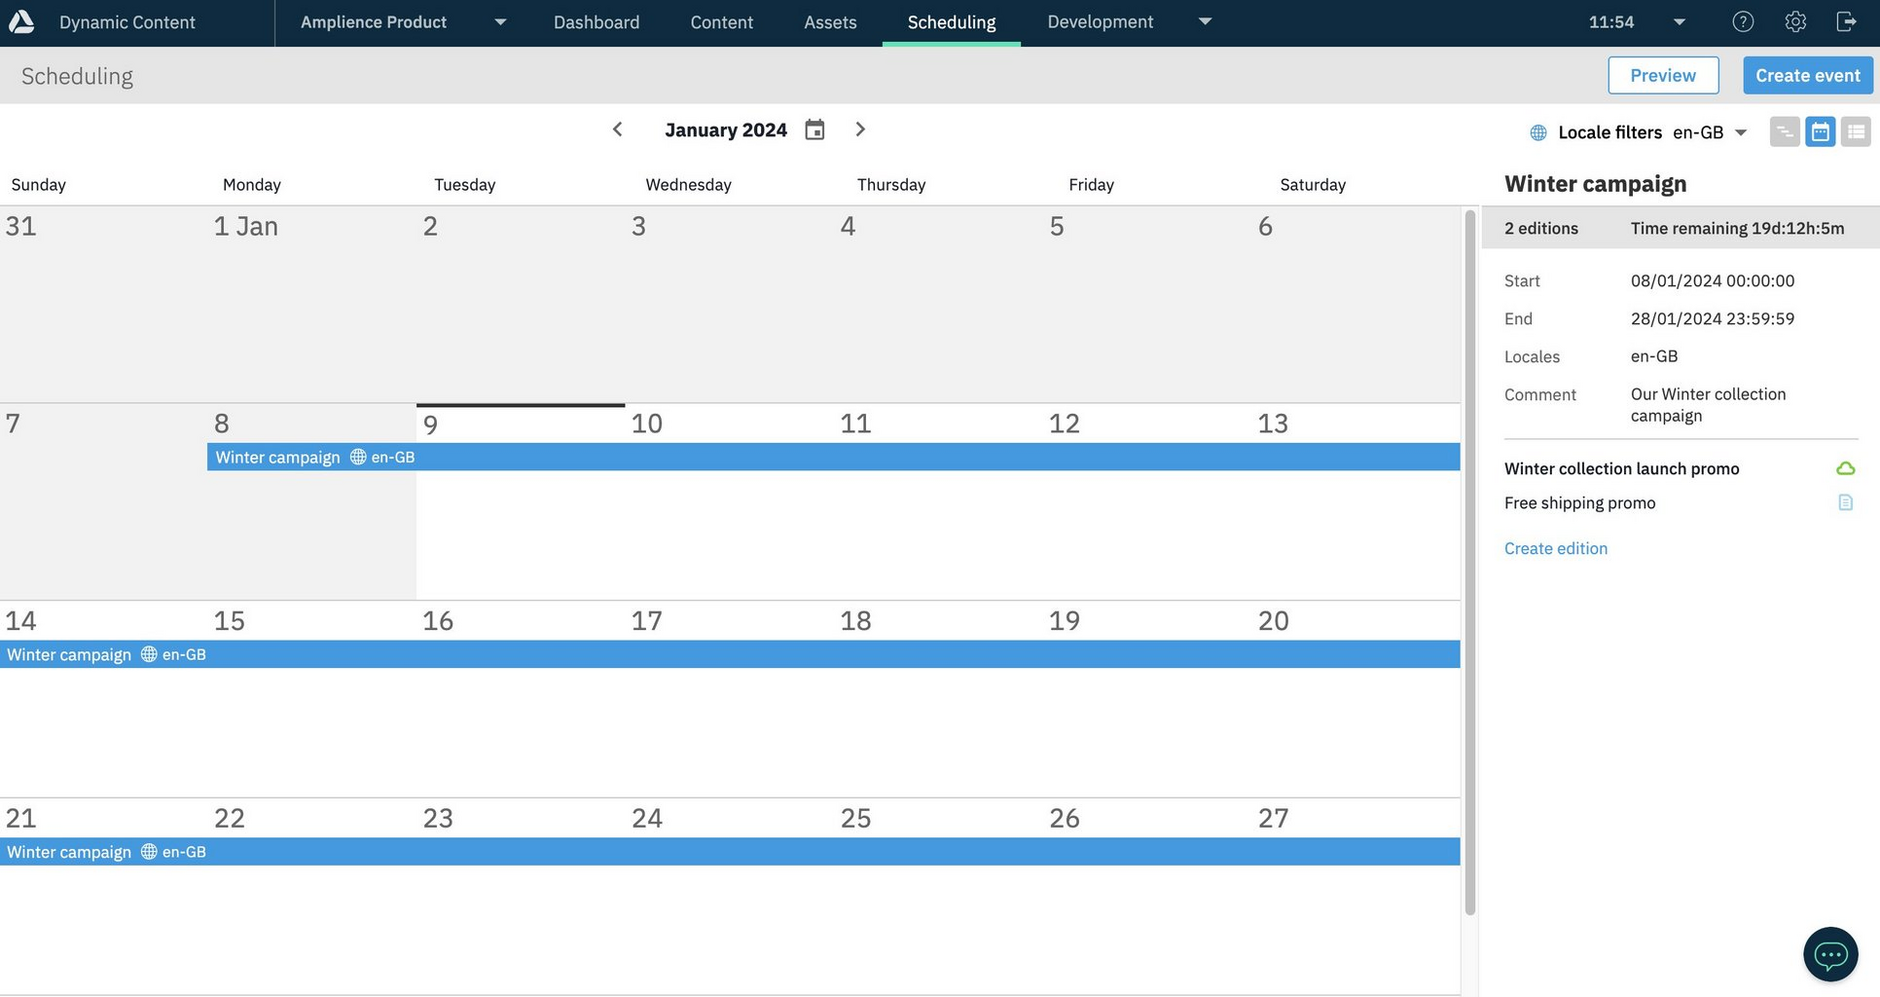
When we apply the filter, the view is refreshed with only those events assigned with a en-GB locale shown. You can also filter by multiple locales and include those events with no assigned locale.
The TimelineLink copied!
The timeline allows planners to view events, editions and slots within a specified time period from one week to one year. Within the selected time period you can also zoom in, allowing you to focus on the events and editions that you're most interested in. The timeline also provides access to the same functionality as the calendar and list views, including creating and editing events and editions and viewing previews.
If you have locales added to your hub, then you can assign one or more locales to an event and filter the timeline (as well as the calendar and list views) by locale. This allows you to focus on the events containing editions with content for the particular locales you're working with.
You can also choose slots to filter the timeline, so that only the events and editions containing the selected slots are displayed.
The timeline provides a more flexible time frame than the calendar view, allowing planners to more easily view the upcoming events for a particular season, not just one calendar month, or to focus on a particular week and expand the detail of individual editions within that time period.
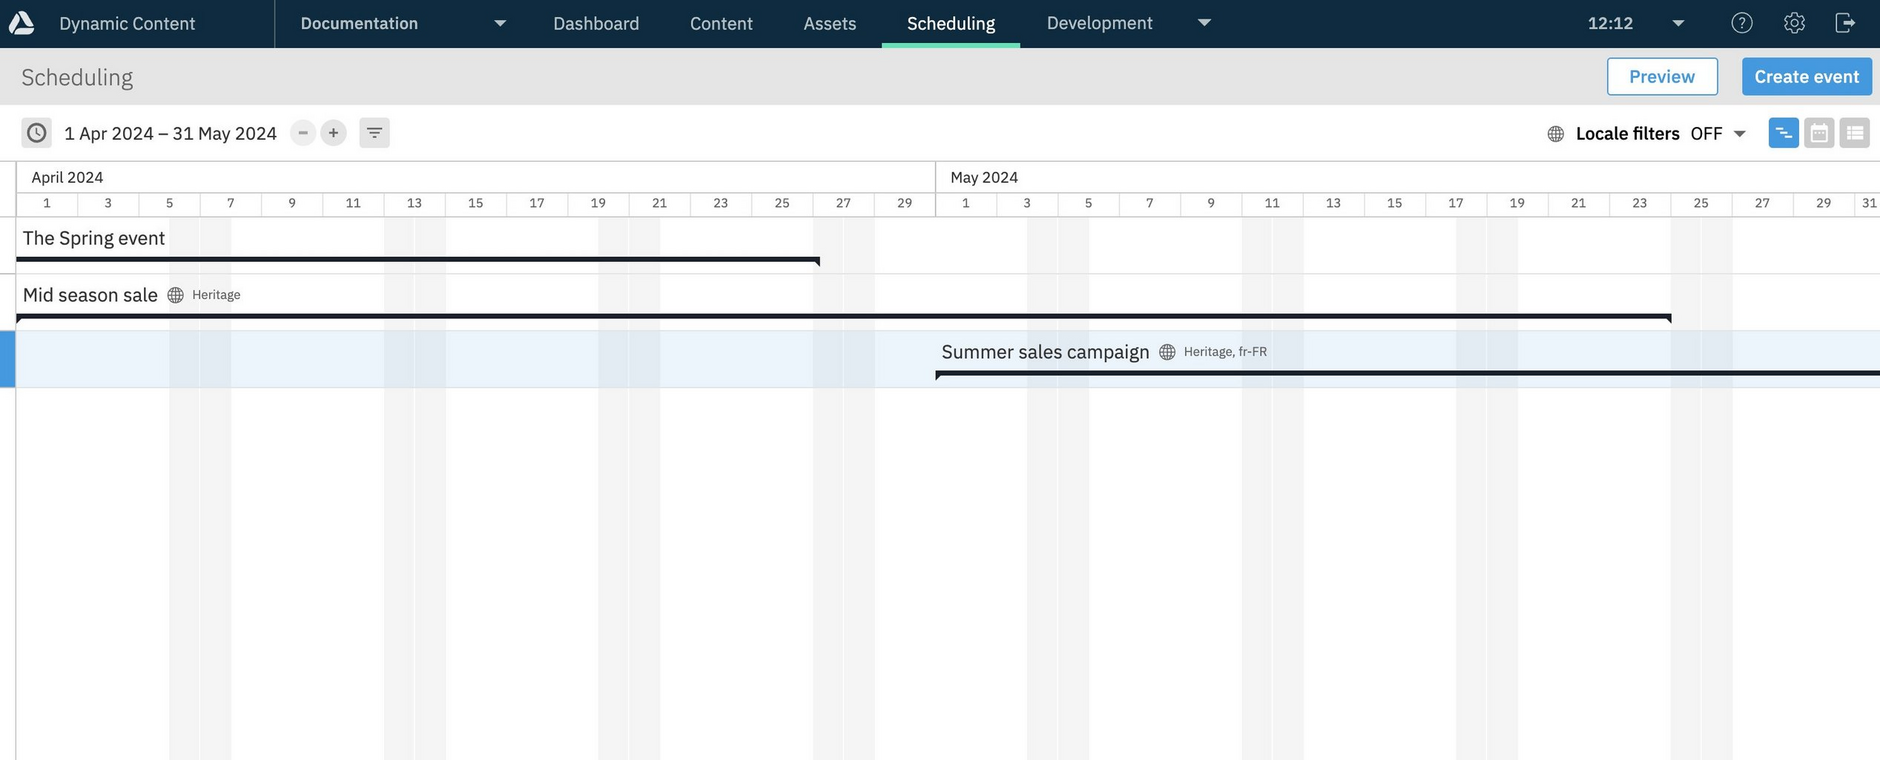
The timeline view shows the events within the chosen time period. When first opened, the timeline defaults to displaying events within a time period of one month from the current date, but will remember the last time period you chose.
Creating, viewing and editing events and editionsLink copied!
To create a new event from the timeline view, select the "Create event" button at the top right of the window.
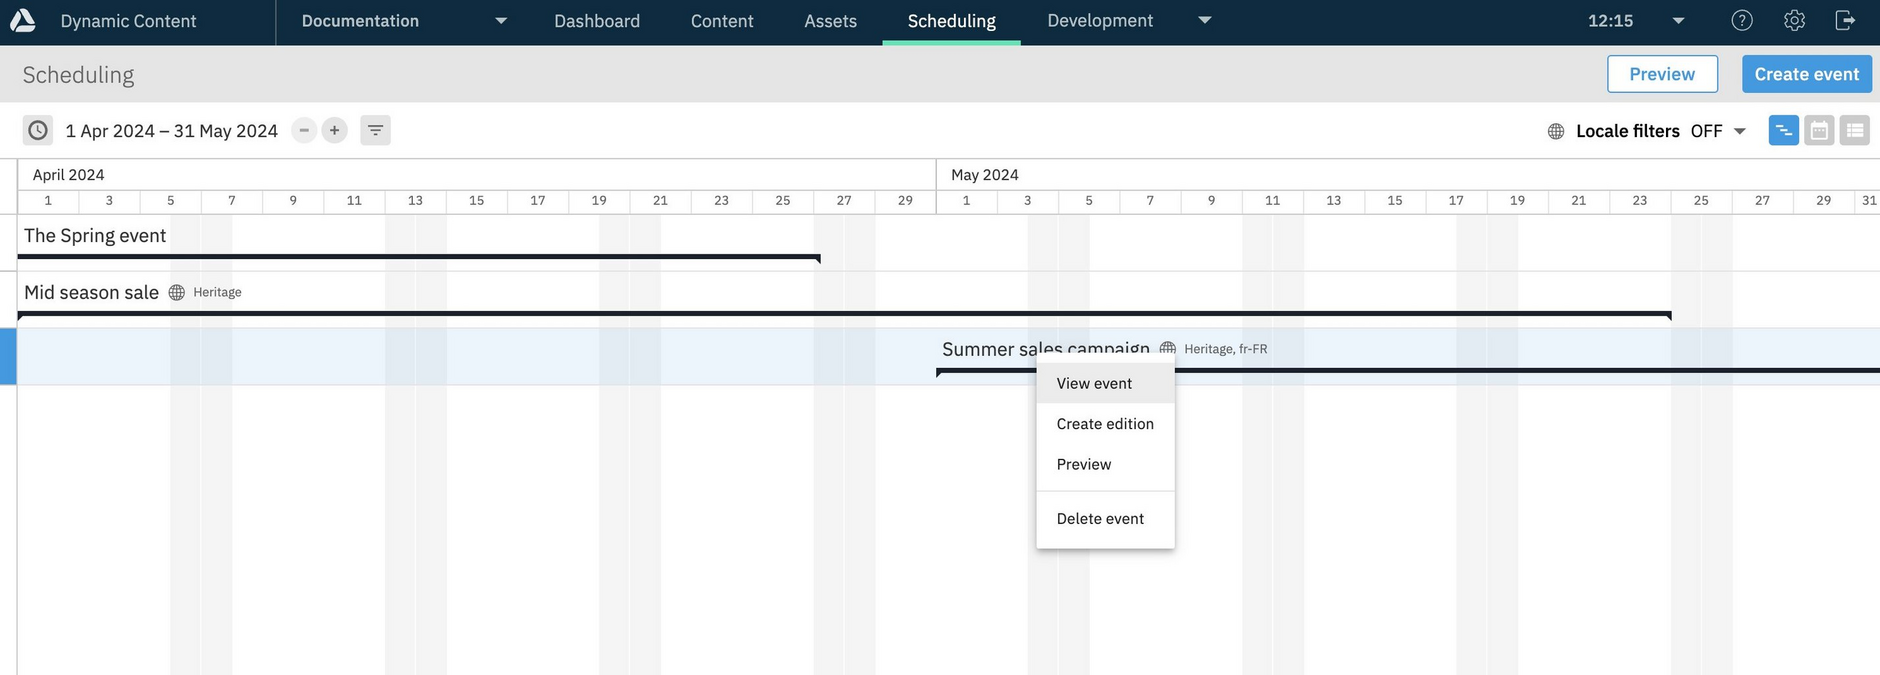
Right-clicking an event displays the event menu, from which you can open the event editing window, create an edition, preview content or delete an event. Single clicking in the event name opens the event editing window.
The Delete event menu option is shown only for events that can be deleted, that is, events that don't have scheduled editions.
Expanding eventsLink copied!
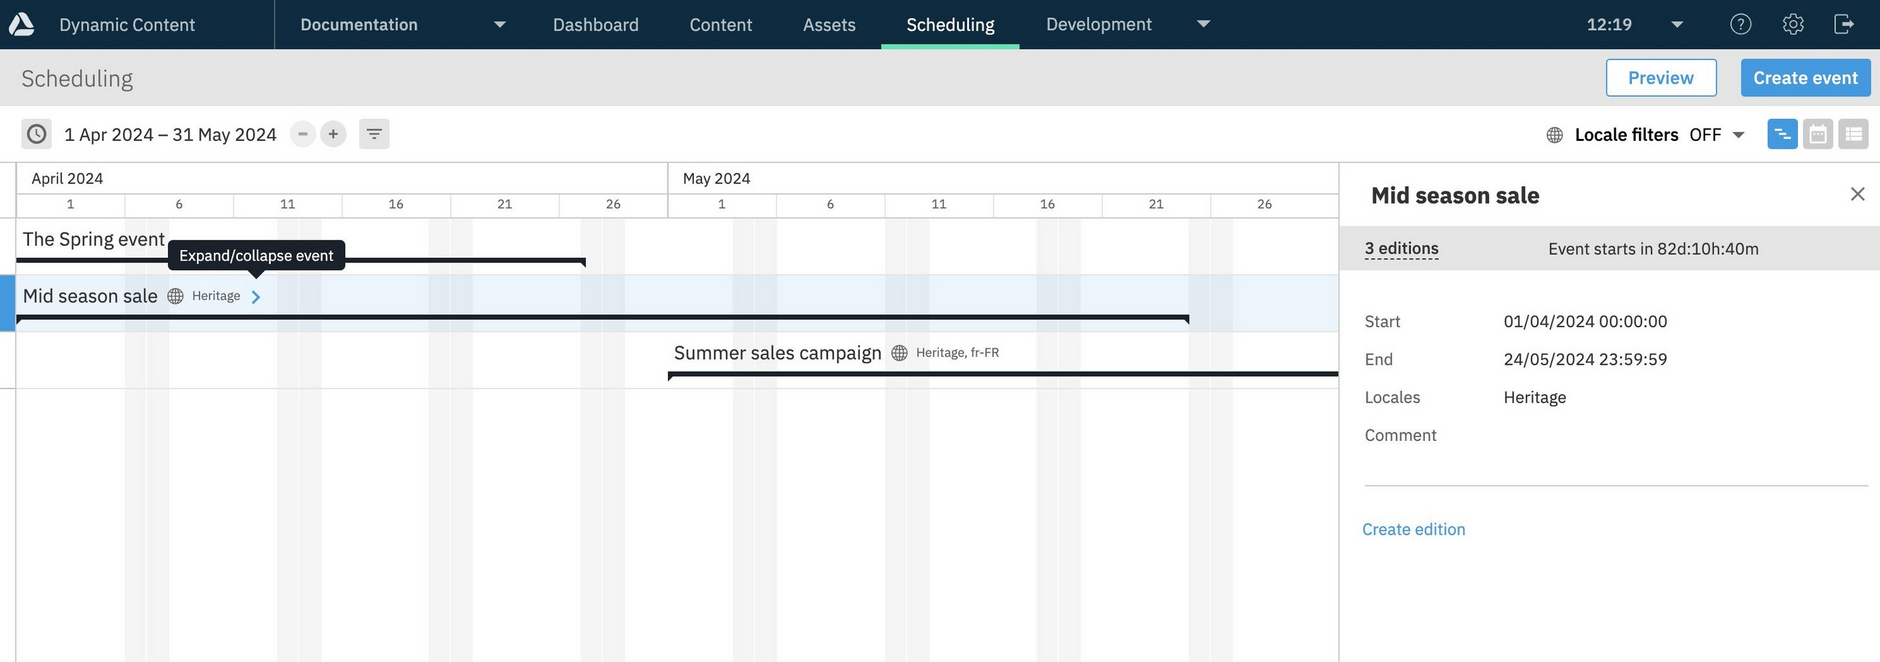
Click the expand/collapse icon to the right of each event containing an edition within the current time frame to view the editions. The icon becomes visible for events with editions, when you move the cursor onto the same line as the event name. You can also expand/collapse an event by clicking in the area on the left side of the timeline.
Here's an example showing the expand/collapse icon for an event. The event details pane is displayed (to the right) because the event is selected.
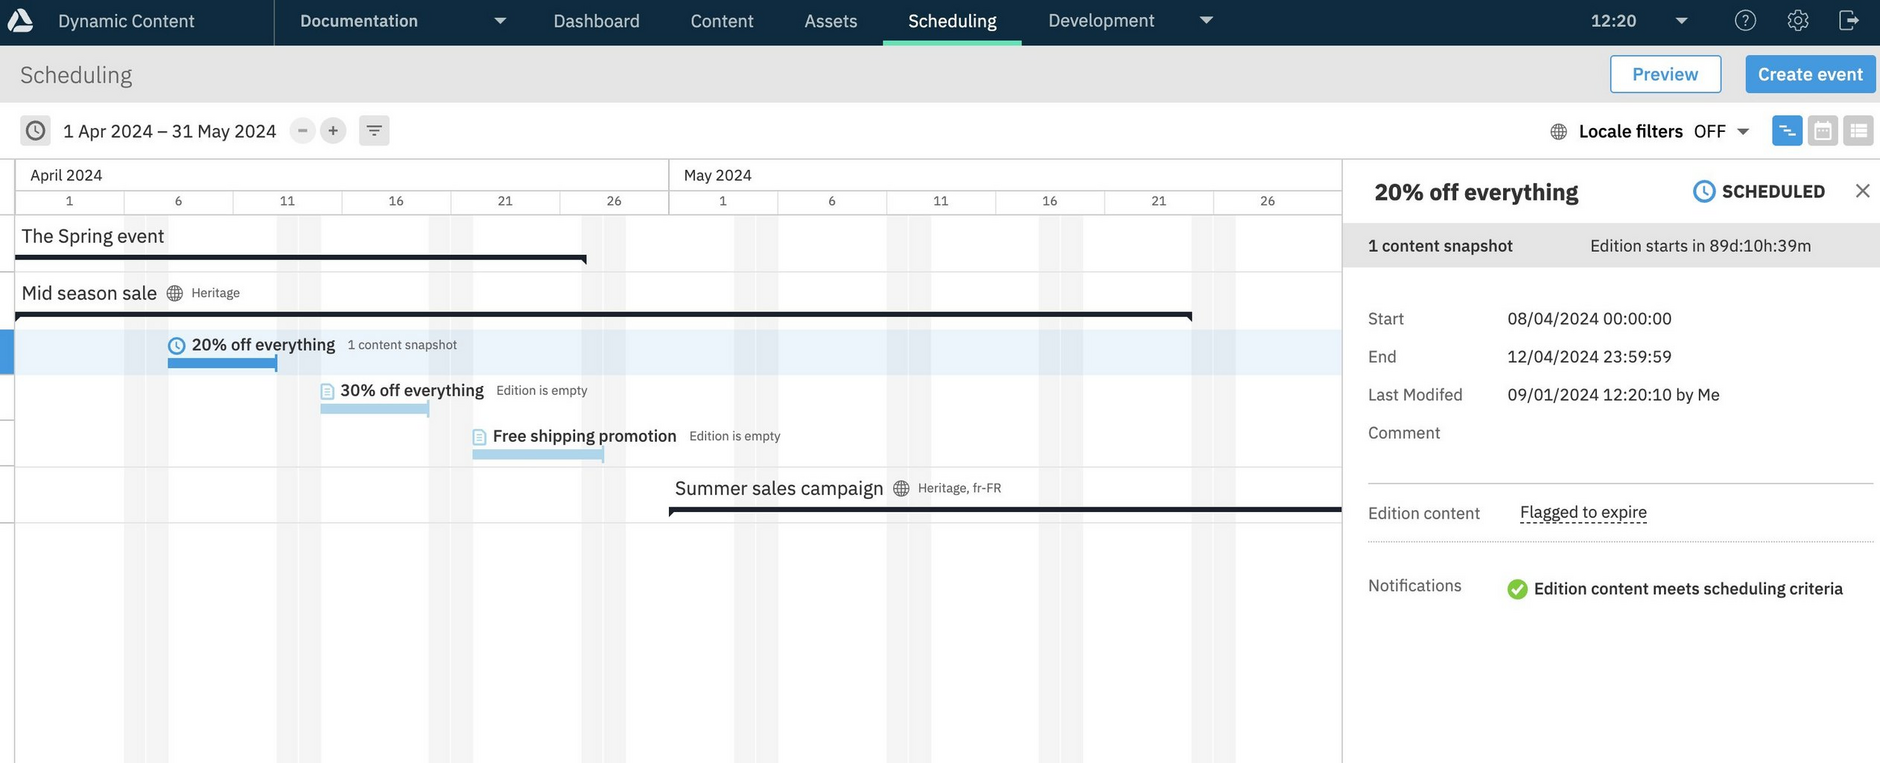
This timeline shows events expanded to show editions.
To help you to know the state of editions at a glance they are color coded:
- Light blue - the edition is in draft mode
- Darker blue (with clock icon to left of name )- the edition is scheduled
- Green - the edition is published
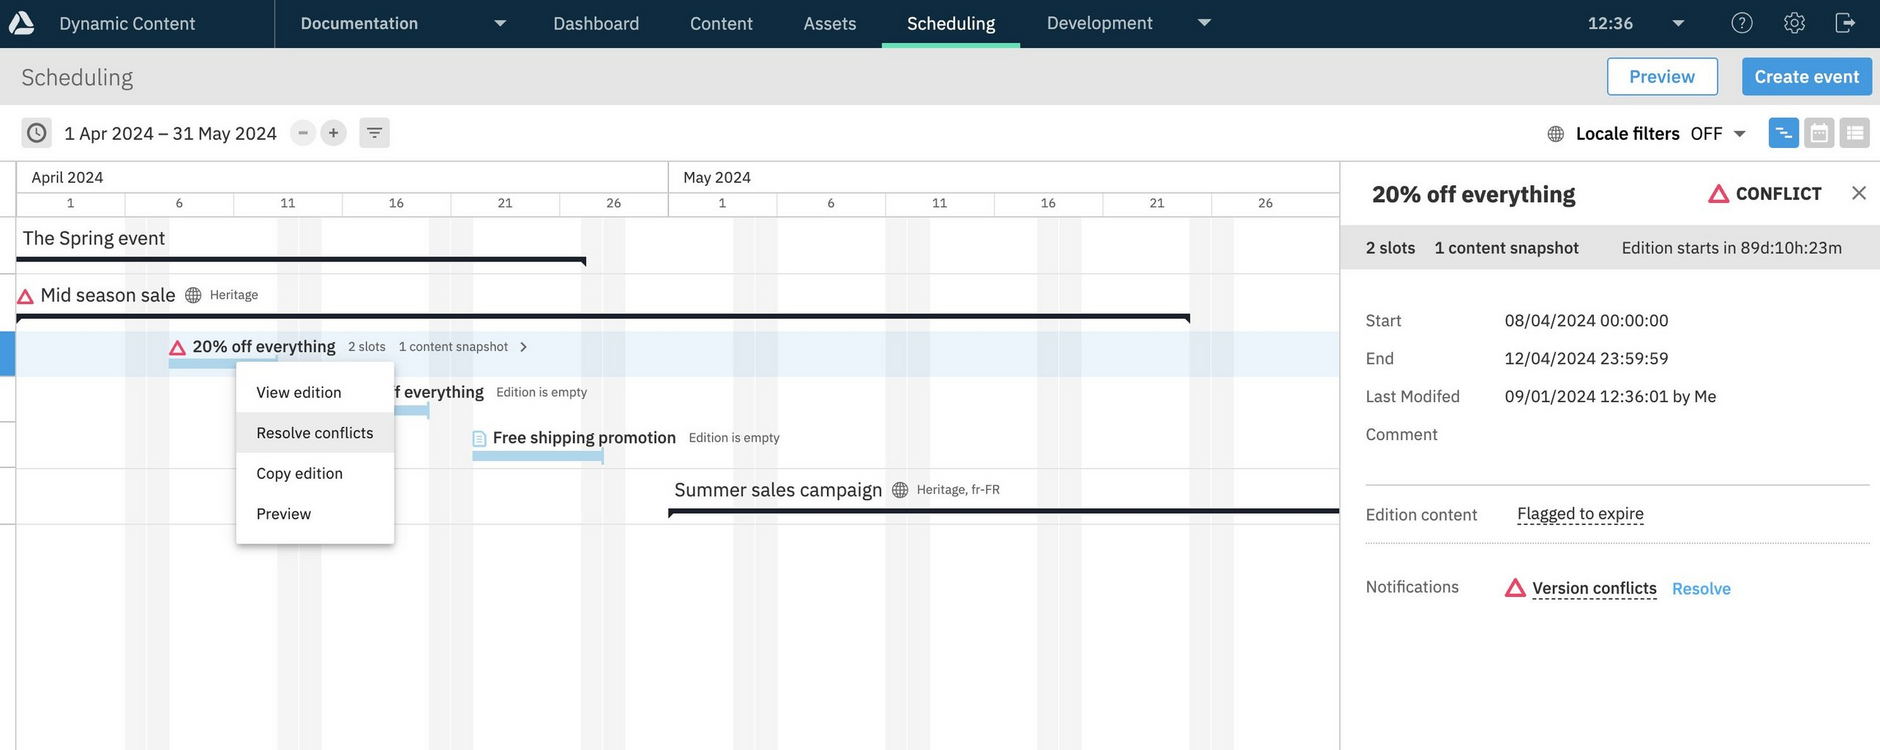
- Red exclamation mark - the edition has a version conflict. See Resolving version conflicts.
Right-clicking an edition displays the edition menu, allowing you to view or copy an edition and open the content preview dialog. If the edition contains a version conflict, then the "resolve conflicts" option is also shown. Read more about Version conflicts.
Event and edition detailsLink copied!
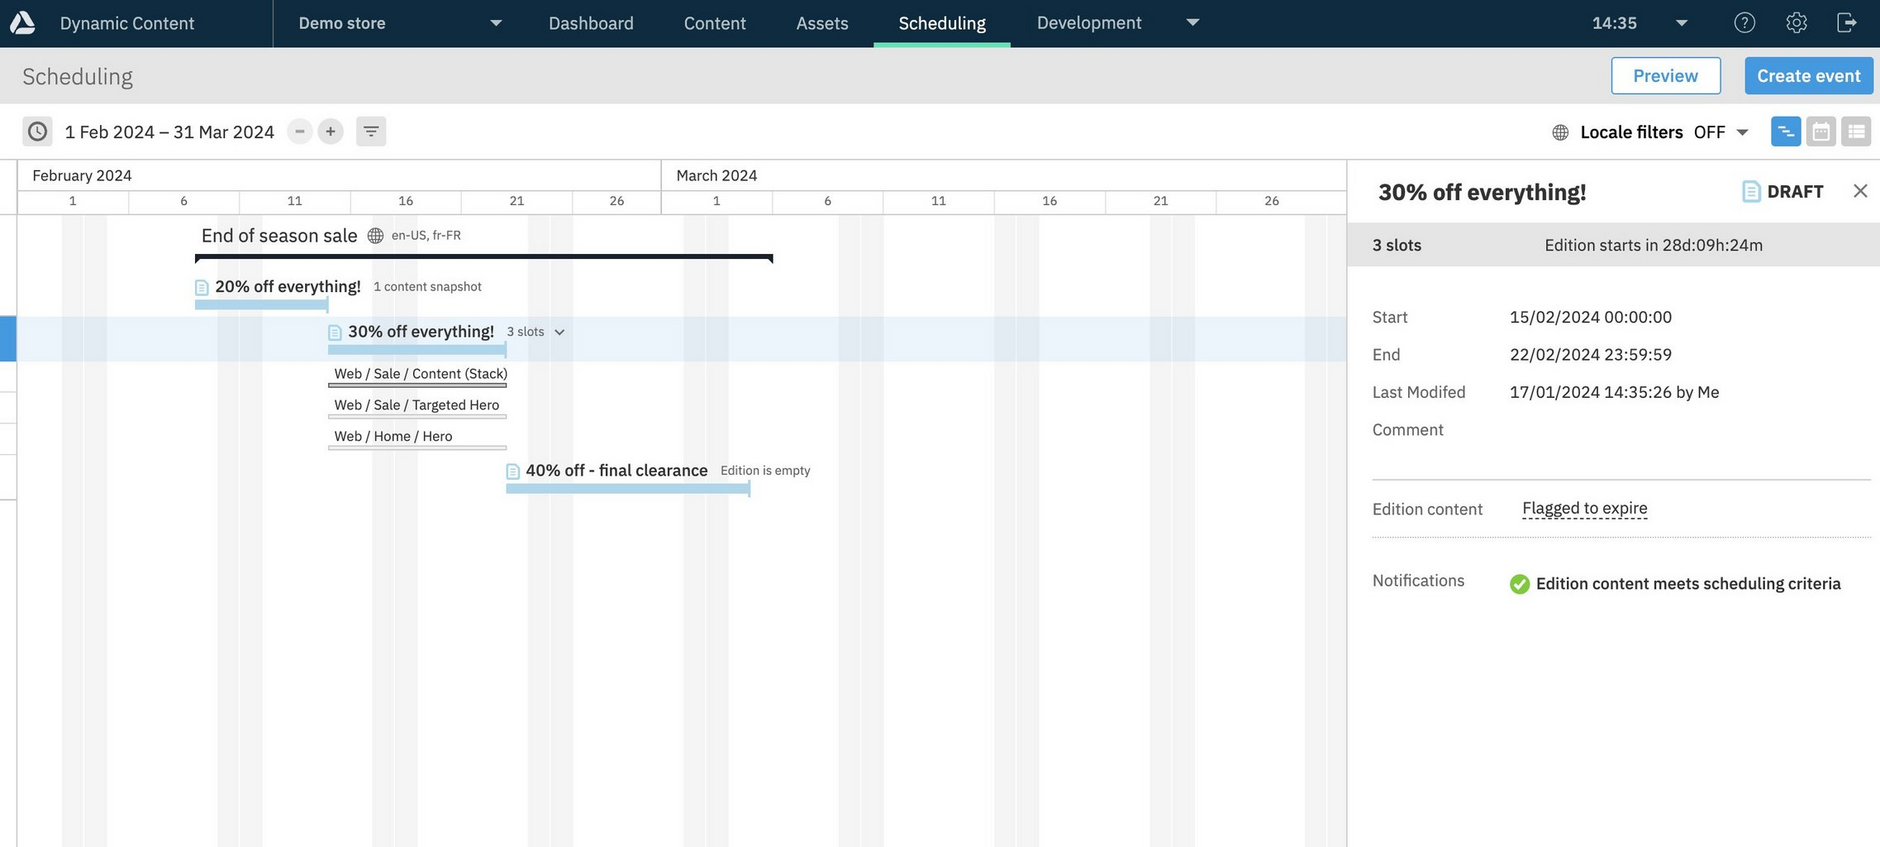
Clicking anywhere except the title within the line containing an event or edition will open up a details pane, providing information about the selected item.
In the example shown below the "20% off everything" edition is selected and the details pane shows the edition start and end date, the modification date and the edition preview status.
A single click in the edition name opens the edition editing window.
Expanding an edition shows the content and slots that it contains. See Viewing and filtering slots in the timeline for more details.
Filtering the timeline by event localeLink copied!
To filter the timeline by locale, choose "Locale filter" at the top of the window and select the locales for the events that you want to display. Note that the locale filter is shown only if you have locales assigned to your hub. See Locales.
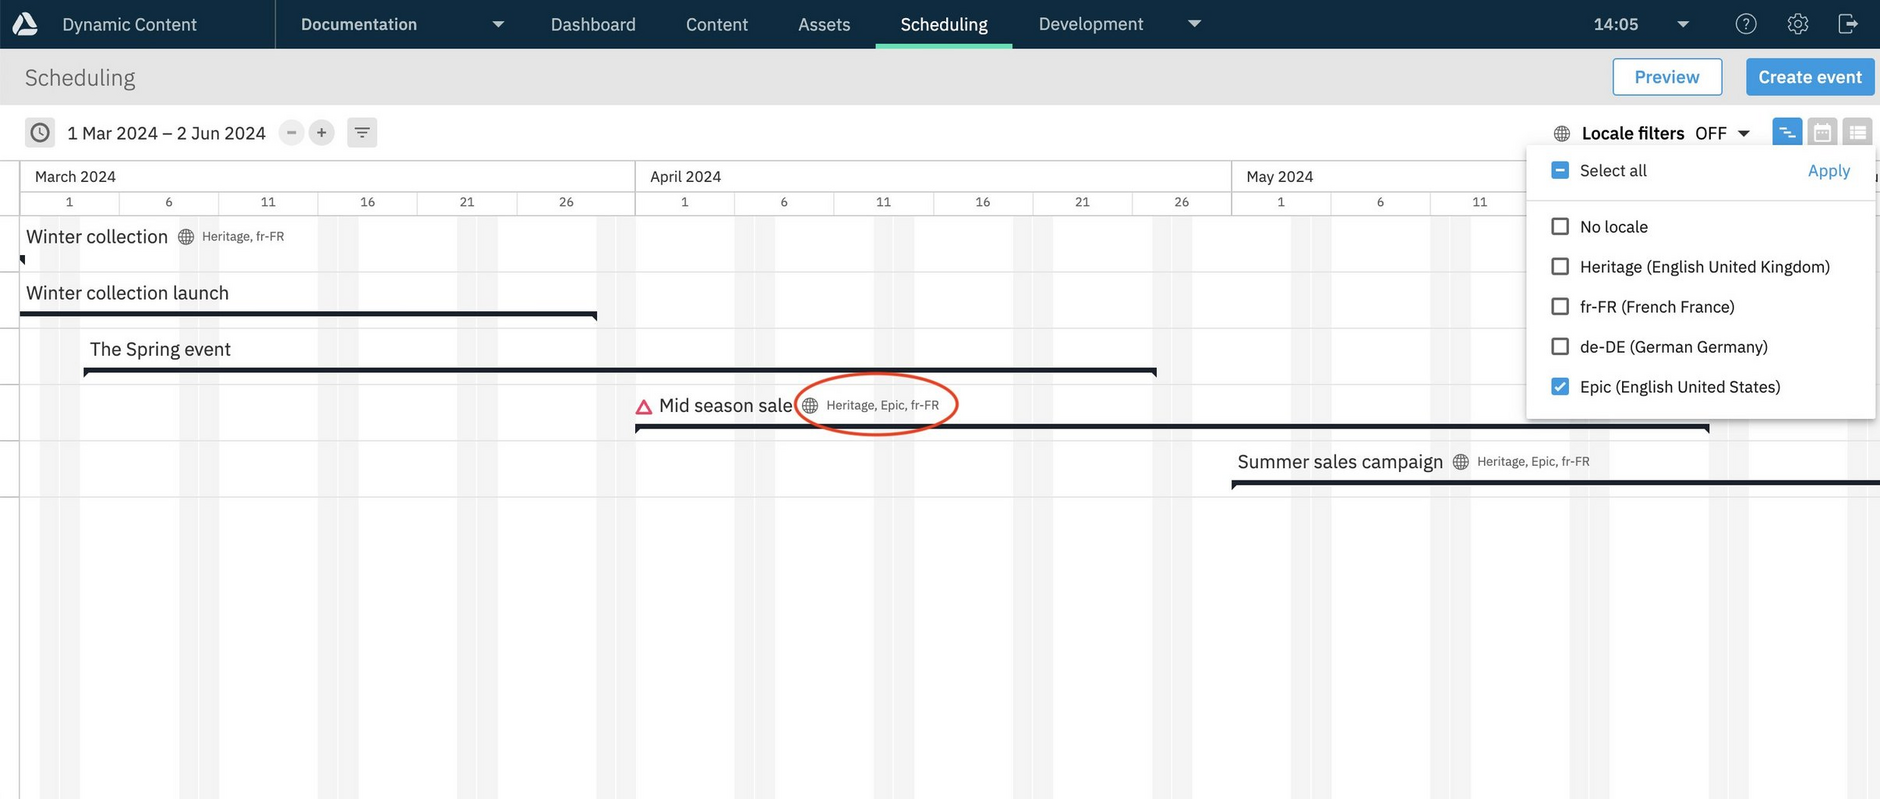
In the example below the Locale Filter is off, which means none of the locale filters are currently applied. The timeline shows events with a combination of English and French locales. Notice, our locale list (top right of page) shows custom locale labels instead of locale codes for some of the locales. To focus on just the events assigned the en-US locale, we are choosing "Epic (English United States)" from the Locale filters menu.
On the Timeline, locale identifiers are displayed to the right of event names. Where you are using custom locale labels (as this example is), they are displayed instead of the locale codes. See Locales.
When the locale filter is applied, the view is refreshed with only those events assigned with an en-US (Epic) locale shown. You can also filter by multiple locales and include those events with no assigned locale.
Viewing and filtering slotsLink copied!
In the timeline you can expand editions to show the slots that they contain and easily identify which slots require content, or those that are invalid. You can also select one or more slots to use to filter the timeline, so that only the editions containing the selected slots are displayed.
Viewing slotsLink copied!
When creating an edition with slots, you need to know which slots must be populated with content. Expanding the edition, provides you with a quick way of identifying which slots require content.
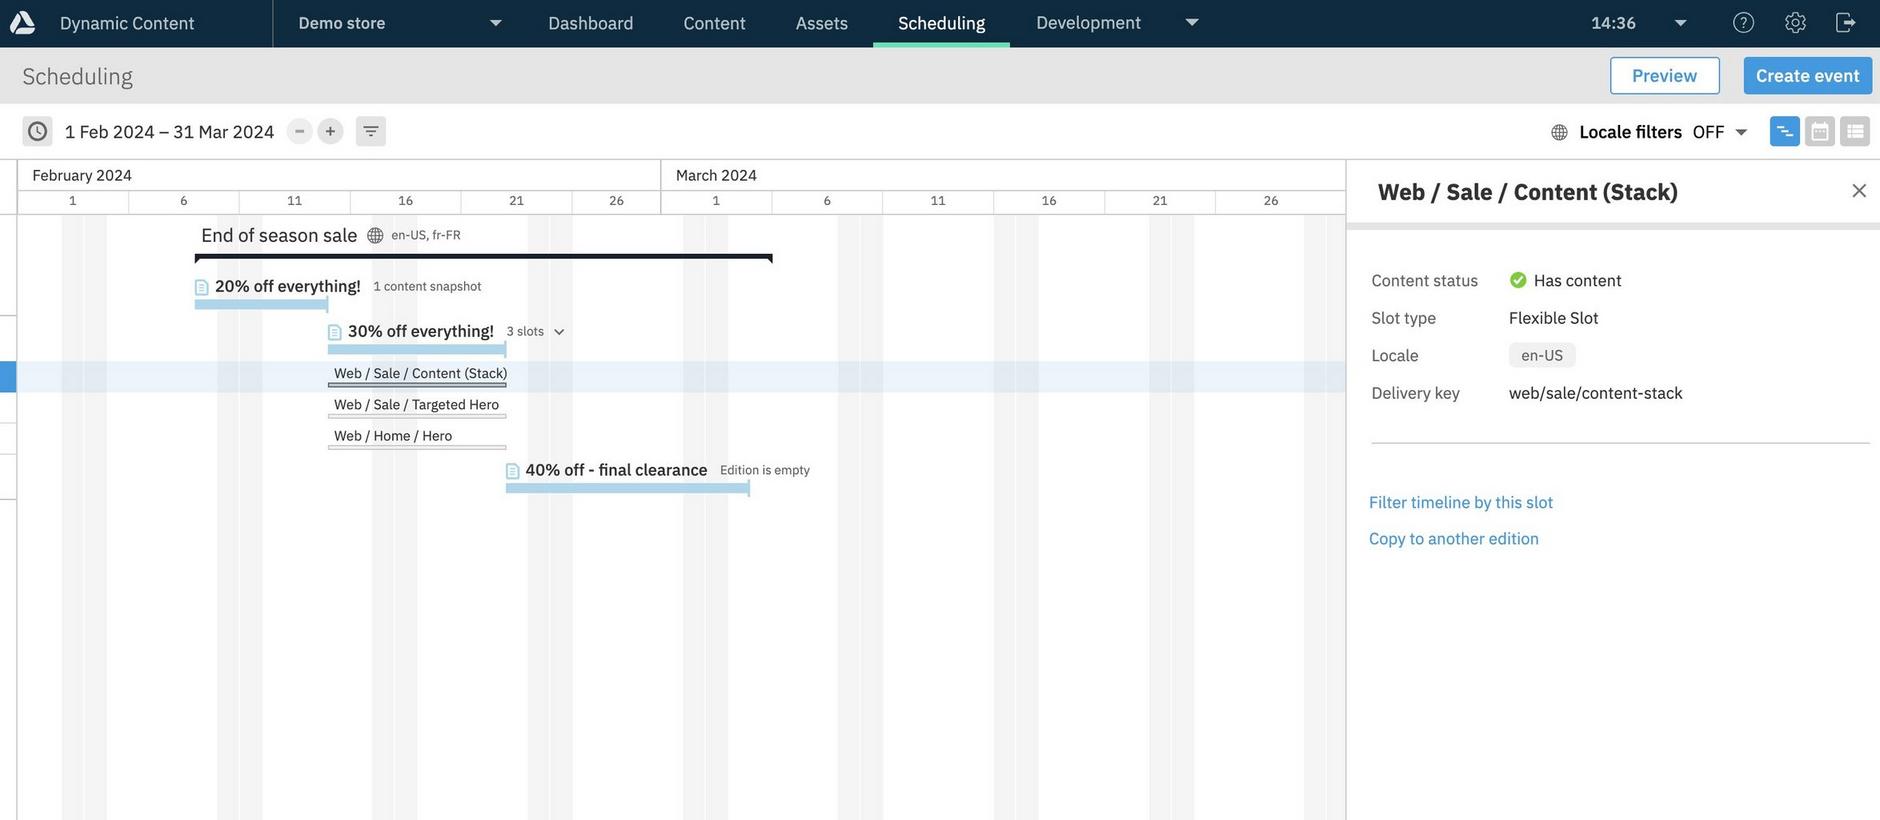
When you expand an edition, a solid status bar indicates if a slot contains content. In the image below, the "30% off everything" edition contains three slots, two of which are empty.
In the same way as edition and event details are displayed, clicking anywhere within the line containing the slot and outside a slot title displays the slot details pane. The "Web / Sale / Content (Stack)" slot contains content and is shown with a green tick indicating that it is valid. A slot' status may also be empty and valid, empty and require content, or contain version conflicts.
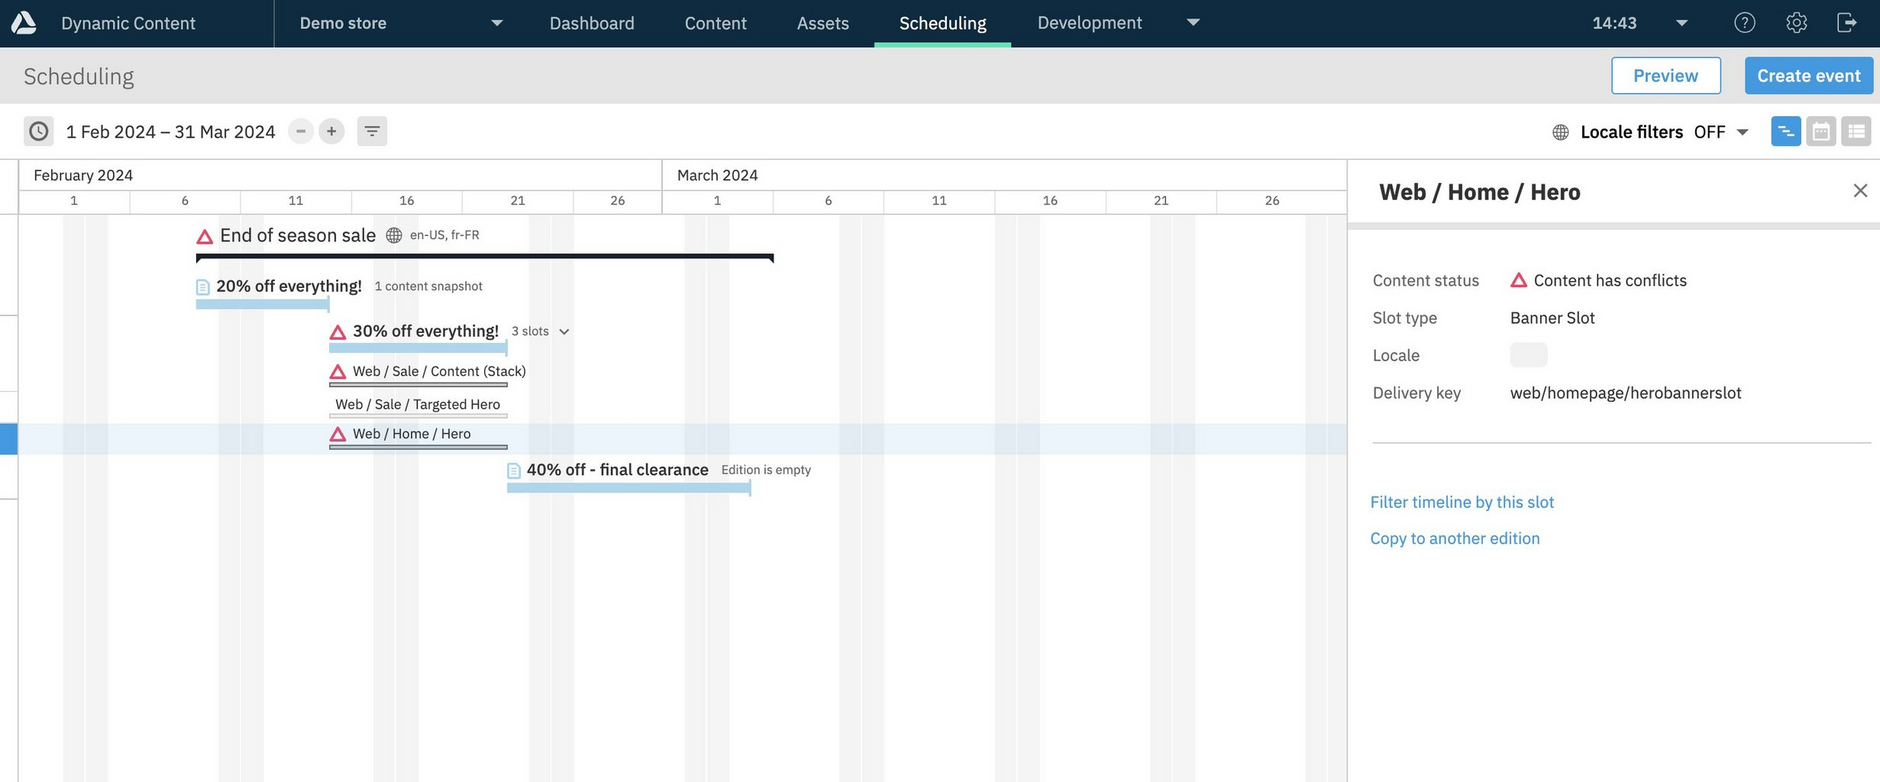
This example shows a slot that contains version conflicts, that is, two or more versions of the same content.
Clicking a slot title opens the edition within which the slot is contained.
Filtering the timeline using slotsLink copied!
You can choose to focus the timeline view on one or more slots, so that only the events and editions containing the selected slots will be displayed. This "slot centric" view provides a way of showing when content is added to the selected slots over the chosen time period, together with the editions to which the slots are added. By focusing on particular slots, it makes it easier to track when the content changes in the areas of your website or app that these slots represent.
The state of the timeline, including the slots being used as filters, the timeframe and the expand/collapse status of events and editions is preserved until you log out of the Dynamic Content app.
Choosing the slots to use as filtersLink copied!
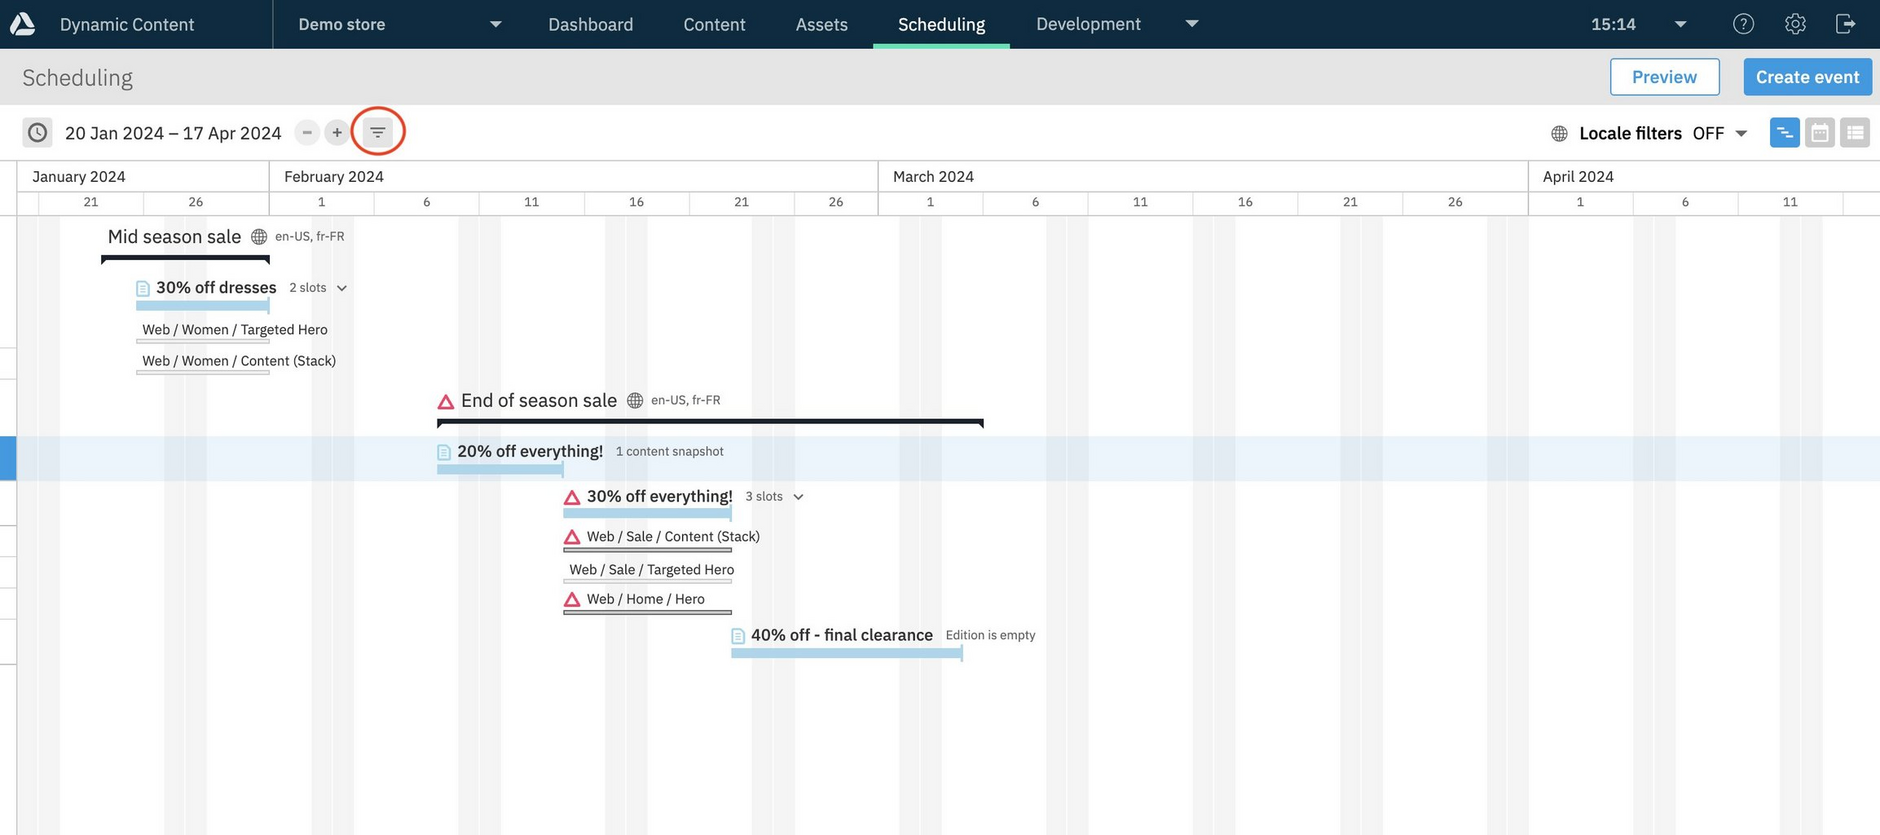
To choose one or more slots to use as filters, click the icon to the right of the timeframe, as highlighted below.
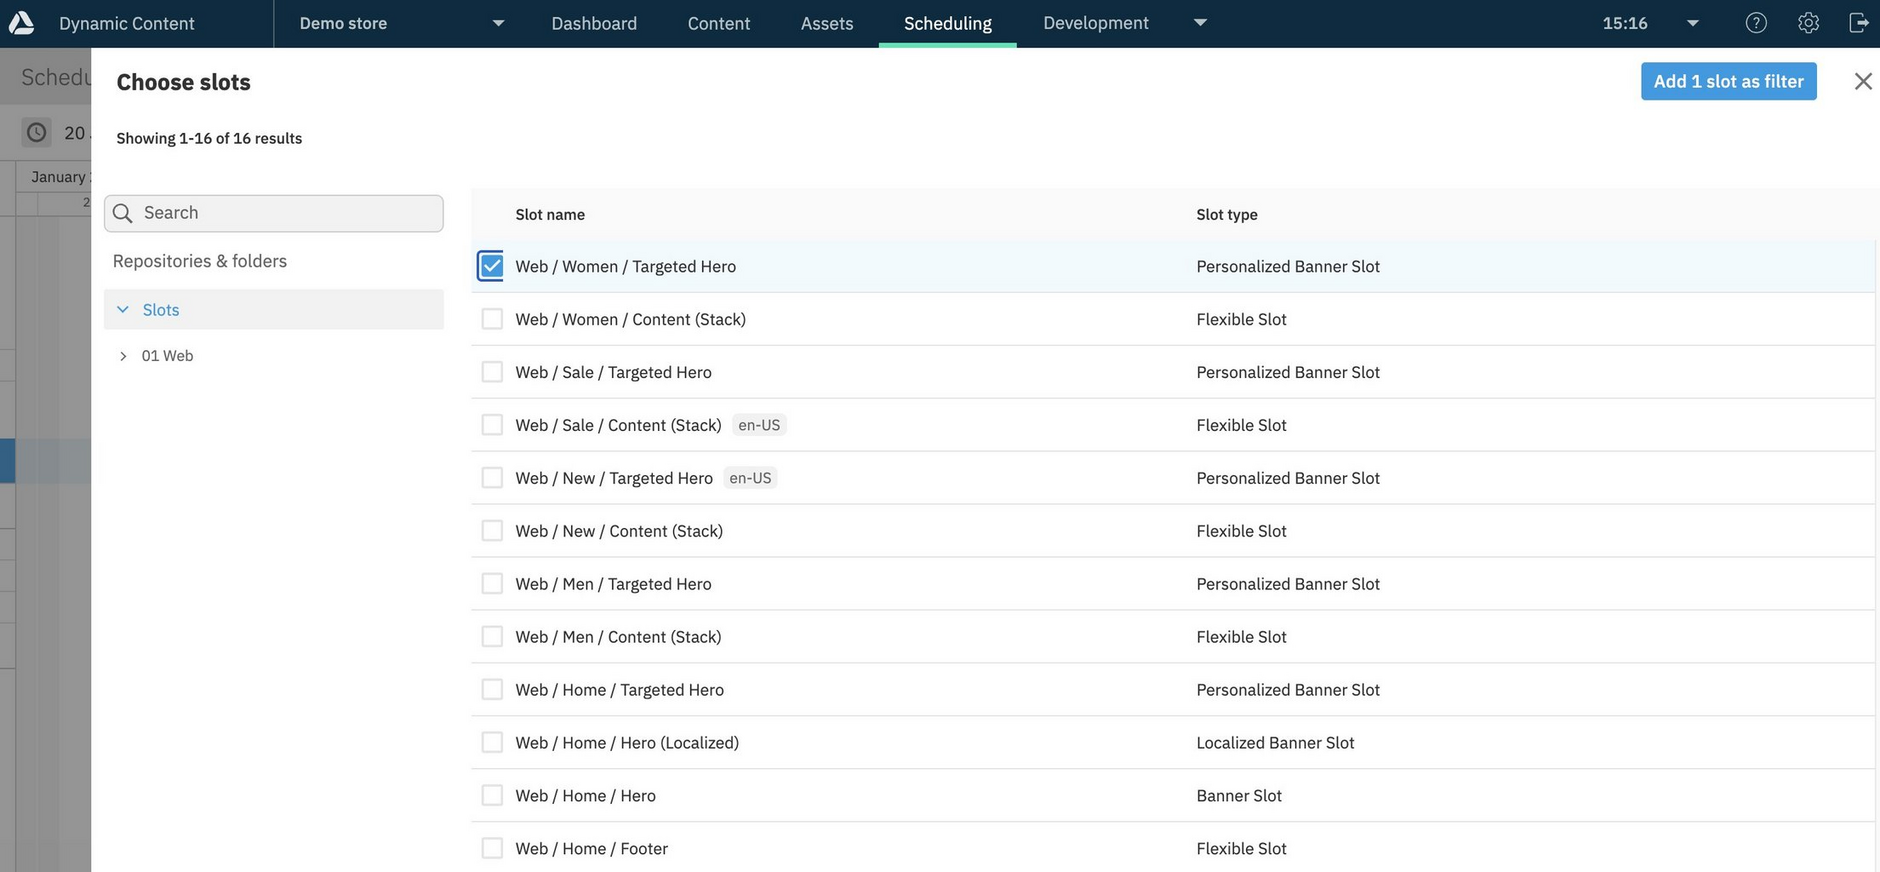
The slot browser is displayed, allowing you to choose one or more slots to use as filters. In this example, one slot is selected, "Web / Women / Targeted Hero". Click "Add 1 slot as filter" to apply this filter to the timeline view.
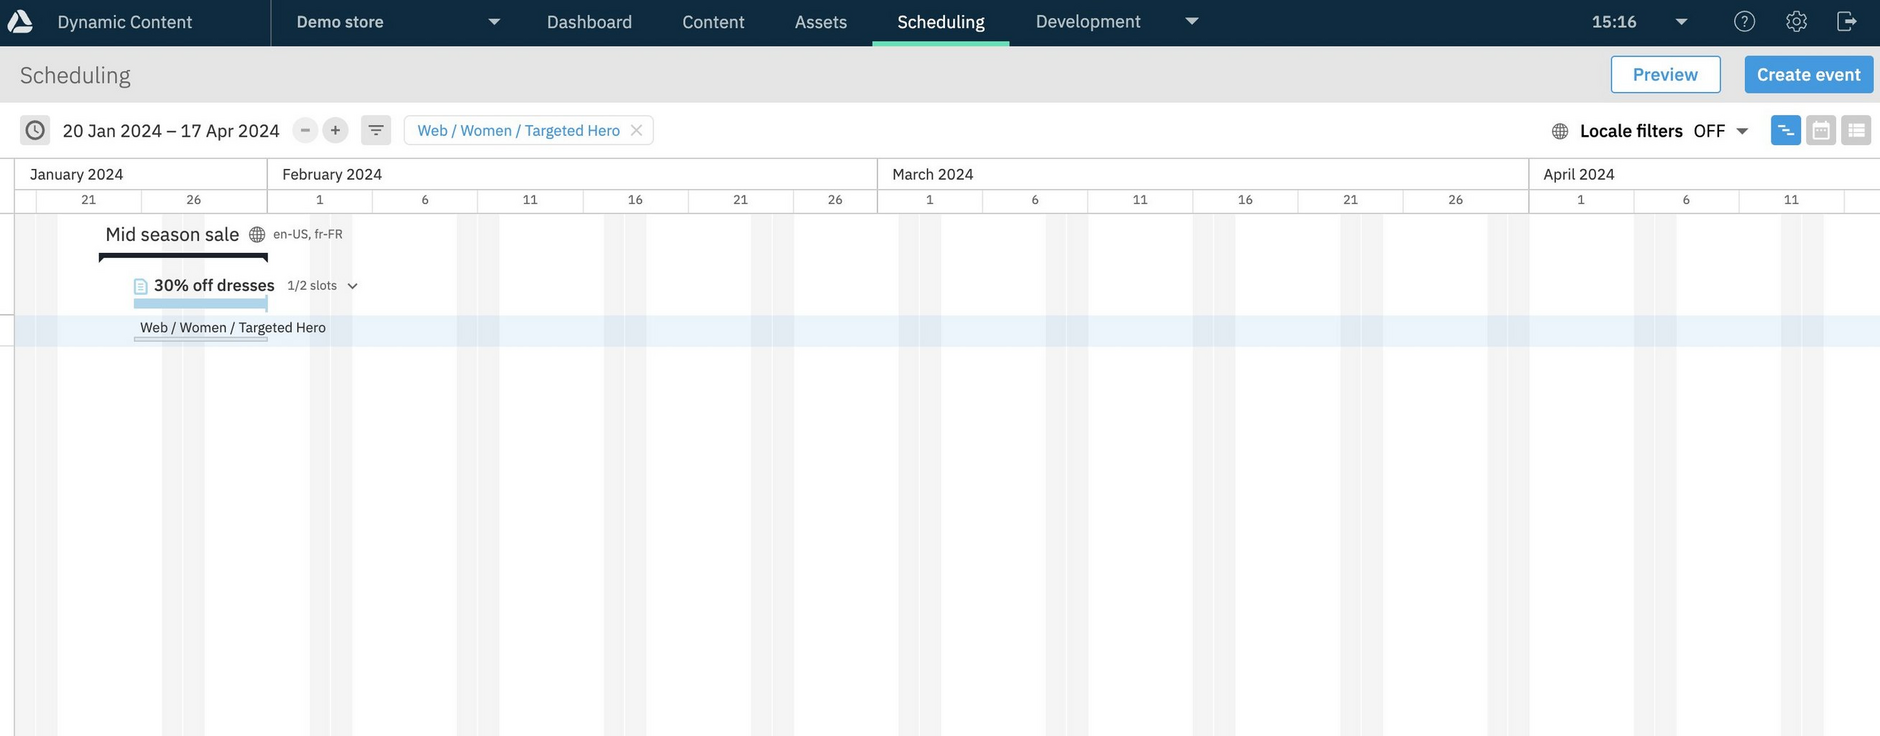
The timeline view is refreshed and shows only the editions containing the slots you chose. The slots chosen as filters are displayed at the top of the window.
When an edition is in its collapsed state, the total number of slots in the edition is displayed. For an expanded edition, the slot count reflects how many slots are actually displayed, for example in the "30% off dresses" edition, 1 of 2 slots are shown, because the other slot was not included in the filters.
Only the slots used as filters, in this case just the "Web / Women / Targeted Hero", are shown when the edition in which they are contained is expanded.
Copying slotsLink copied!
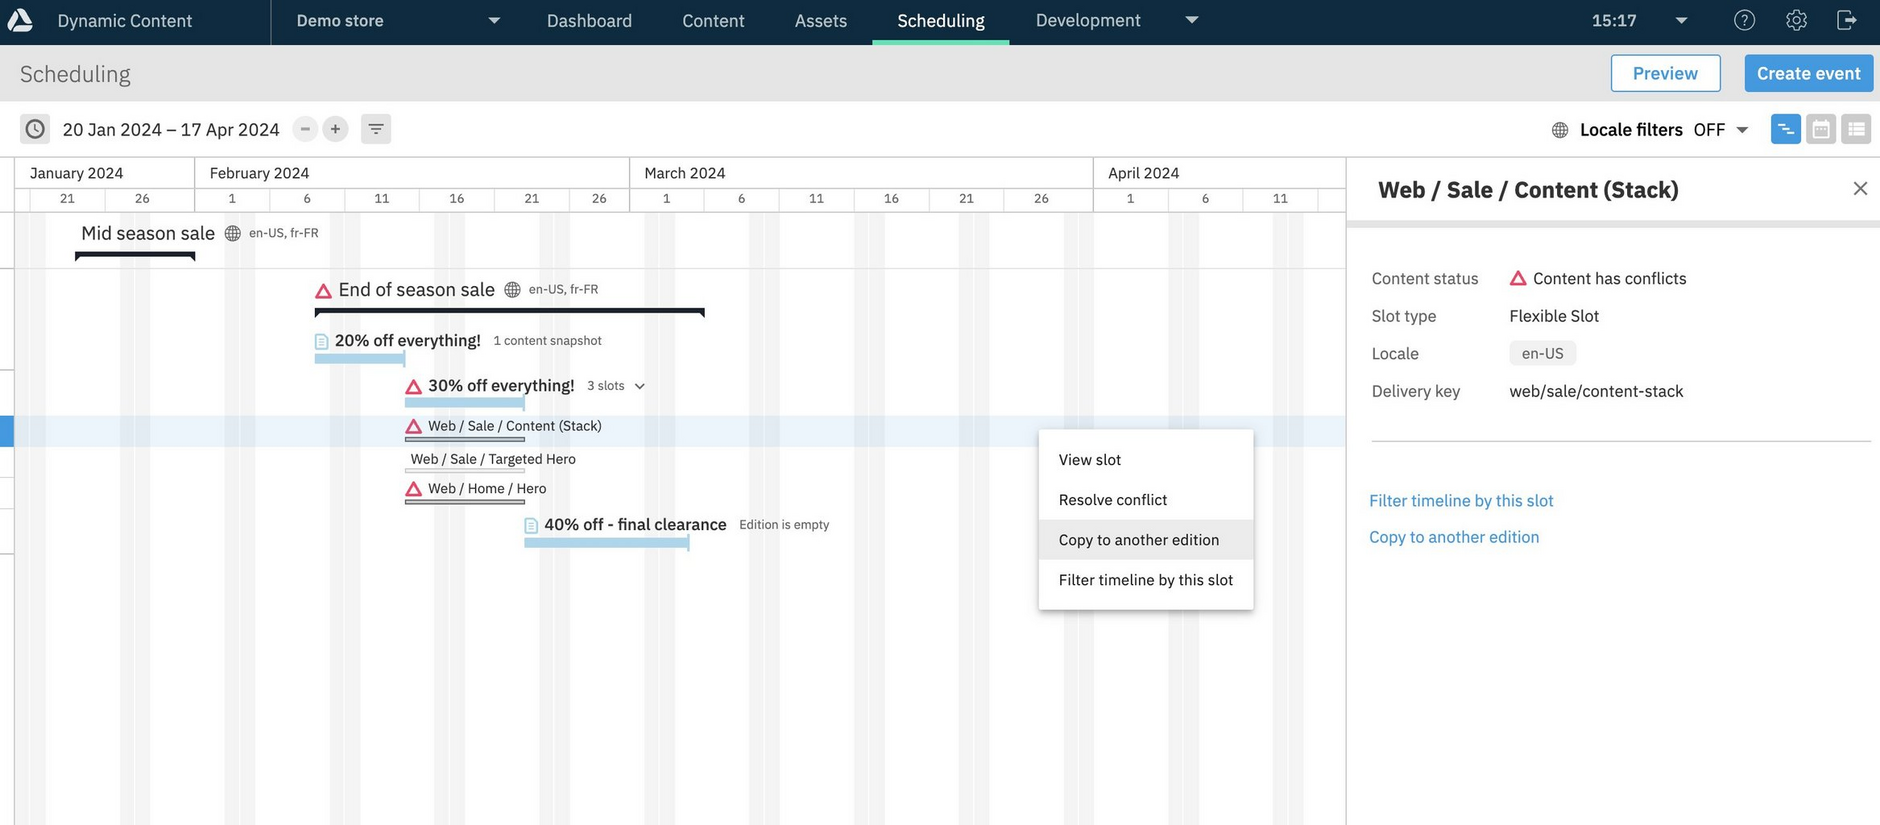
You can copy a slot from the timeline, either from its contextual menu or from the sidebar shown when the slot is selected.
For more information see copying slots.
Choosing the time frameLink copied!
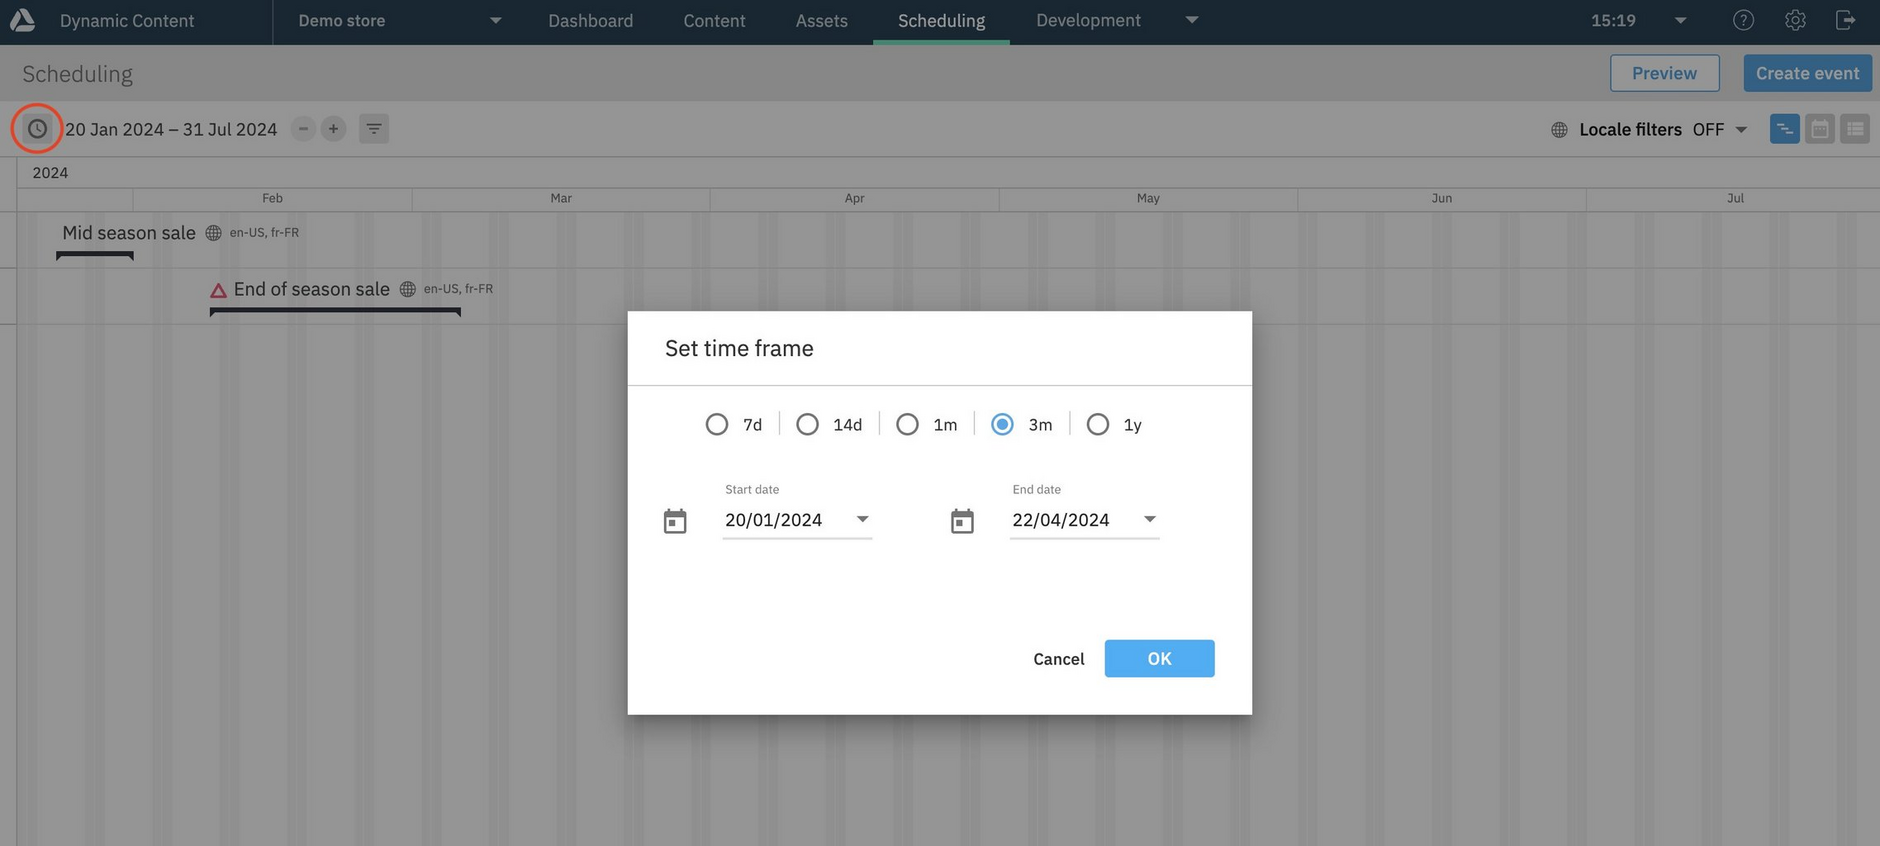
You can set a time frame for the timeline, by clicking the time frame icon at the top left of the page. A dialog is displayed for you to choose the time frame. You can specify a time frame between one week and one year.
In the example shown below, a time frame of 3 months is chosen.
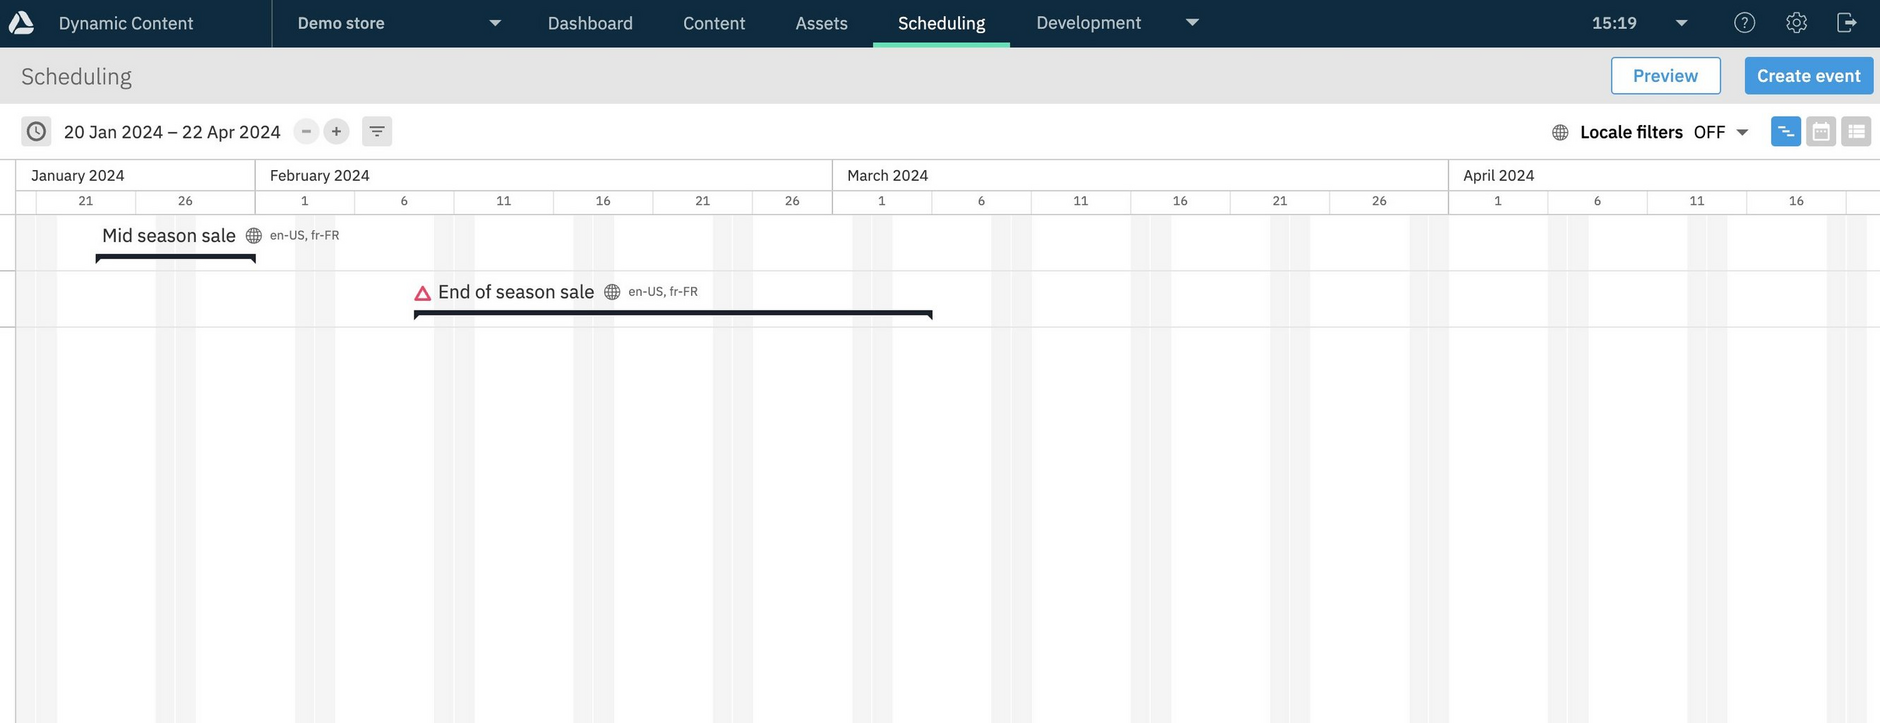
The events within the chosen 3 month time frame are then displayed. This is a useful way of providing an overview of events in a particular season, all the events for your summer content campaigns, for example.
Notice that any events containing editions which contain errors, such as version conflicts, are marked with a red triangle.
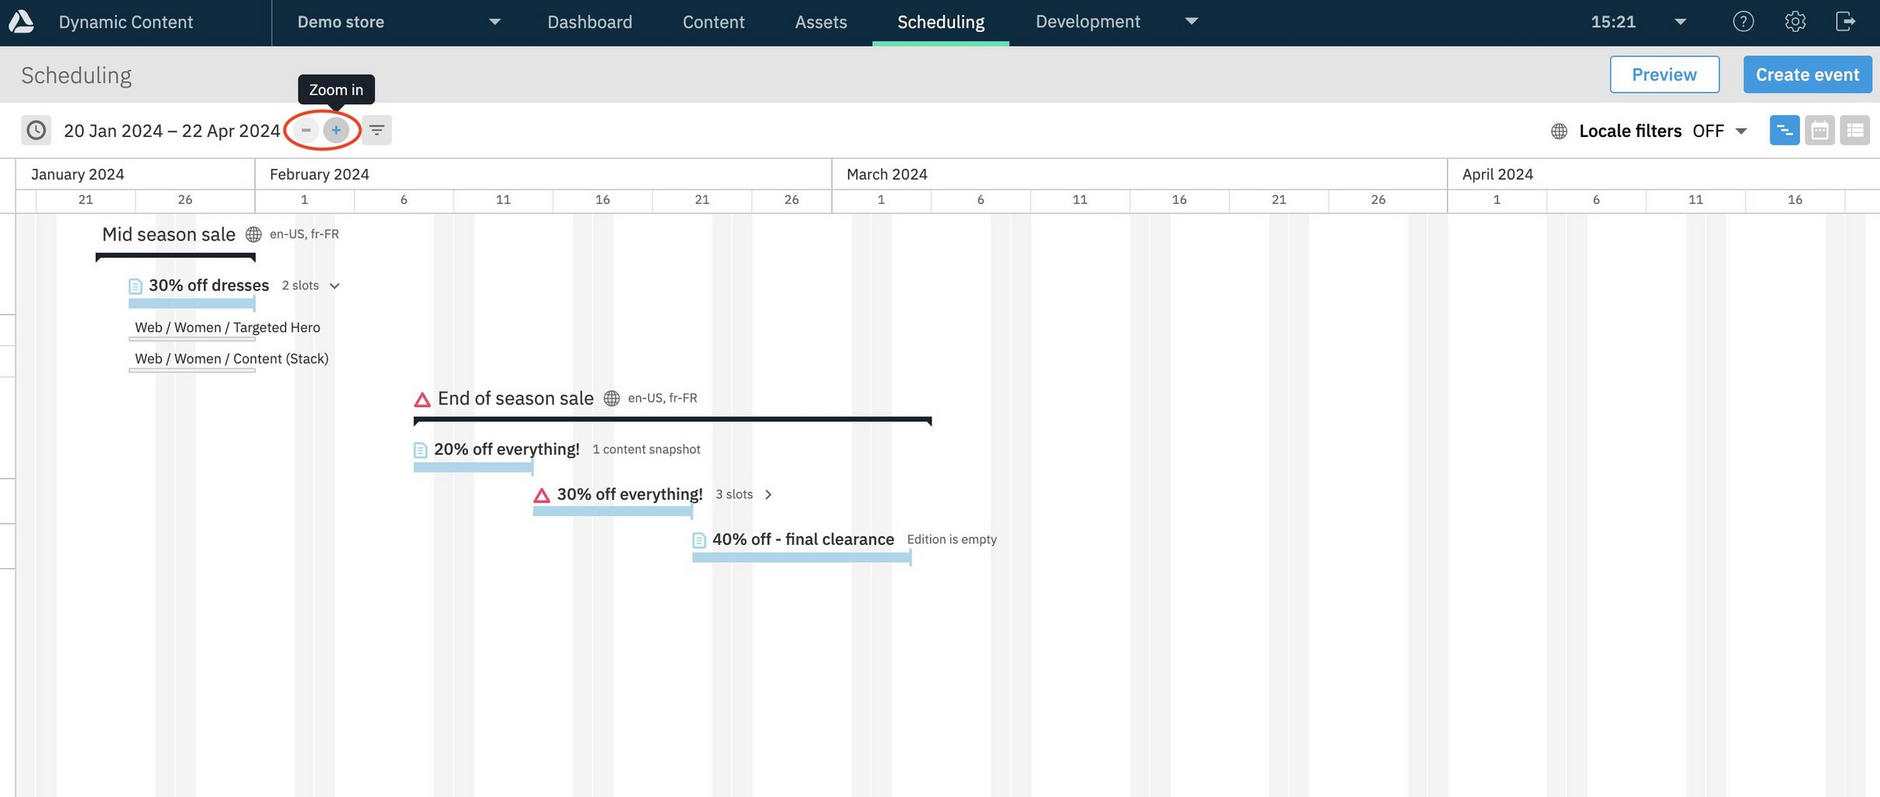
If you want to temporarily focus on a shorter period of time, without changing the time frame, you can use the zoom in/ zoom out buttons.
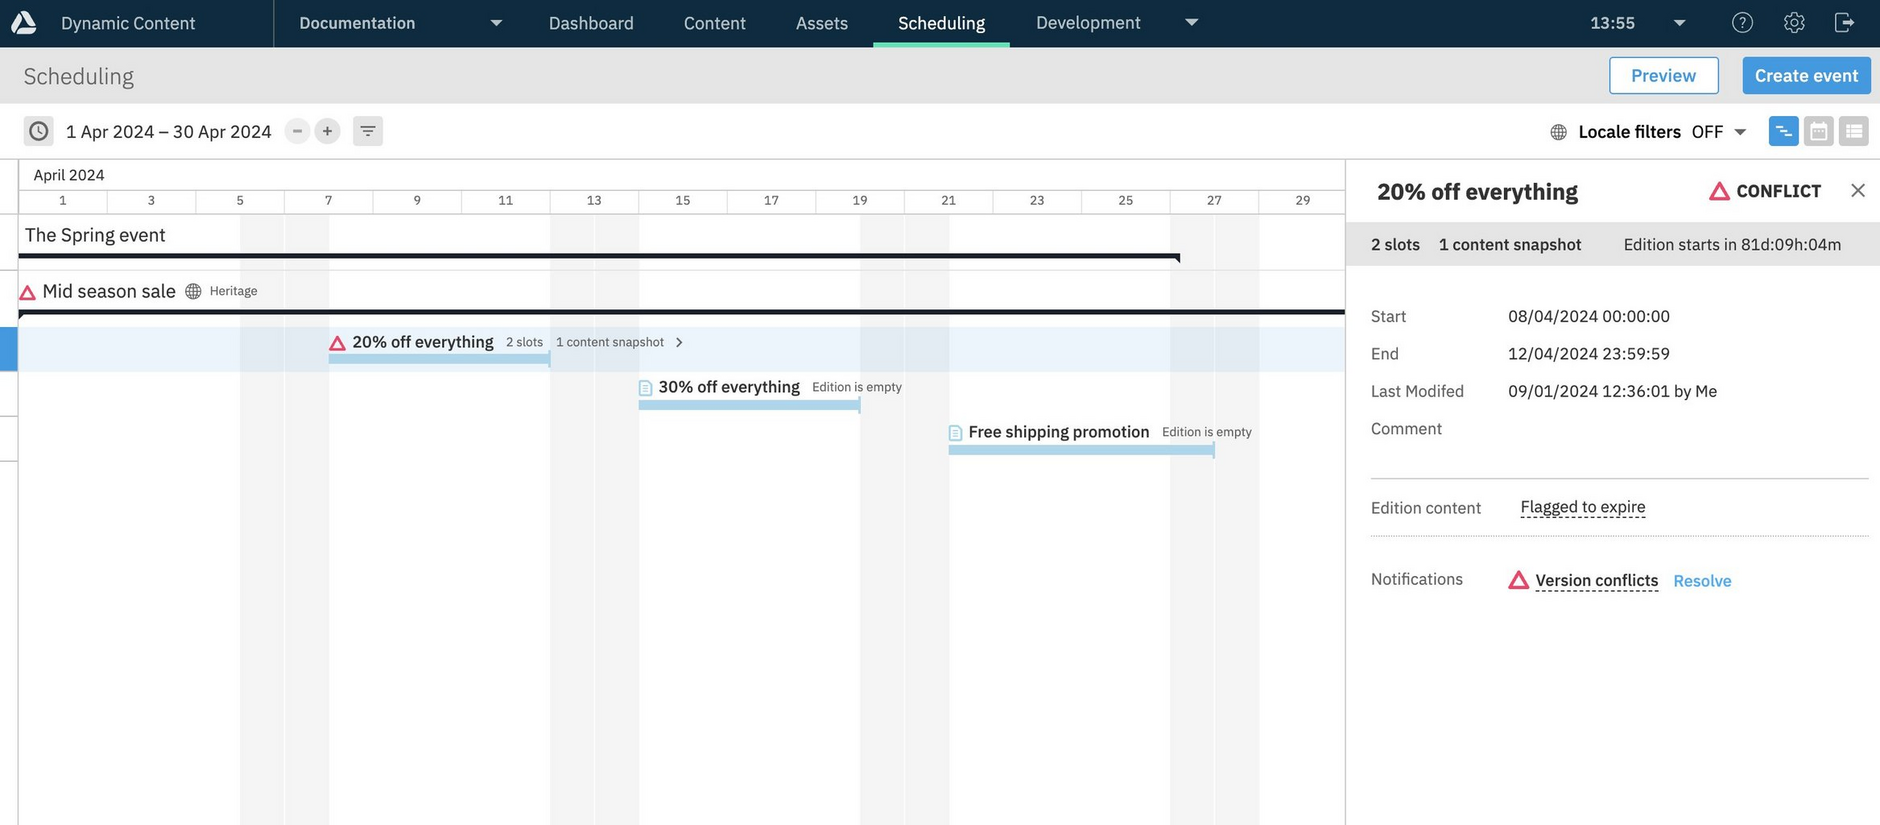
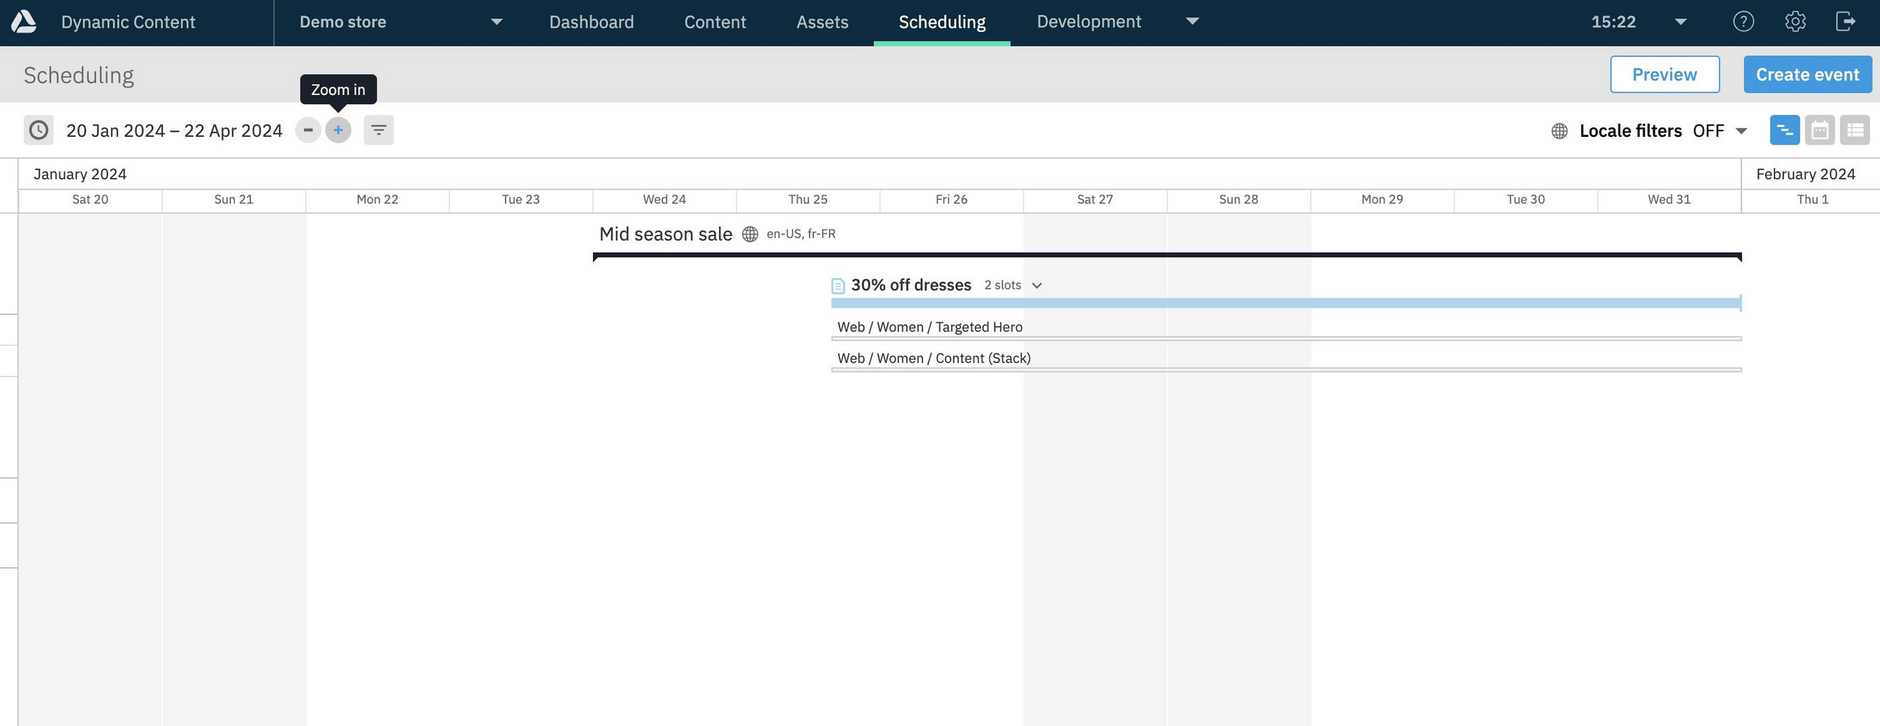
Zooming in will focus the timeline on a smaller number of days, by a week at a time. In the example below, the view is zoomed to show two weeks. This is particularly useful if you have overlapping editions and want a more detailed view of what is scheduled to go live and when.
Content previewLink copied!
There are several ways that you can choose to display a content preview from the timeline view:
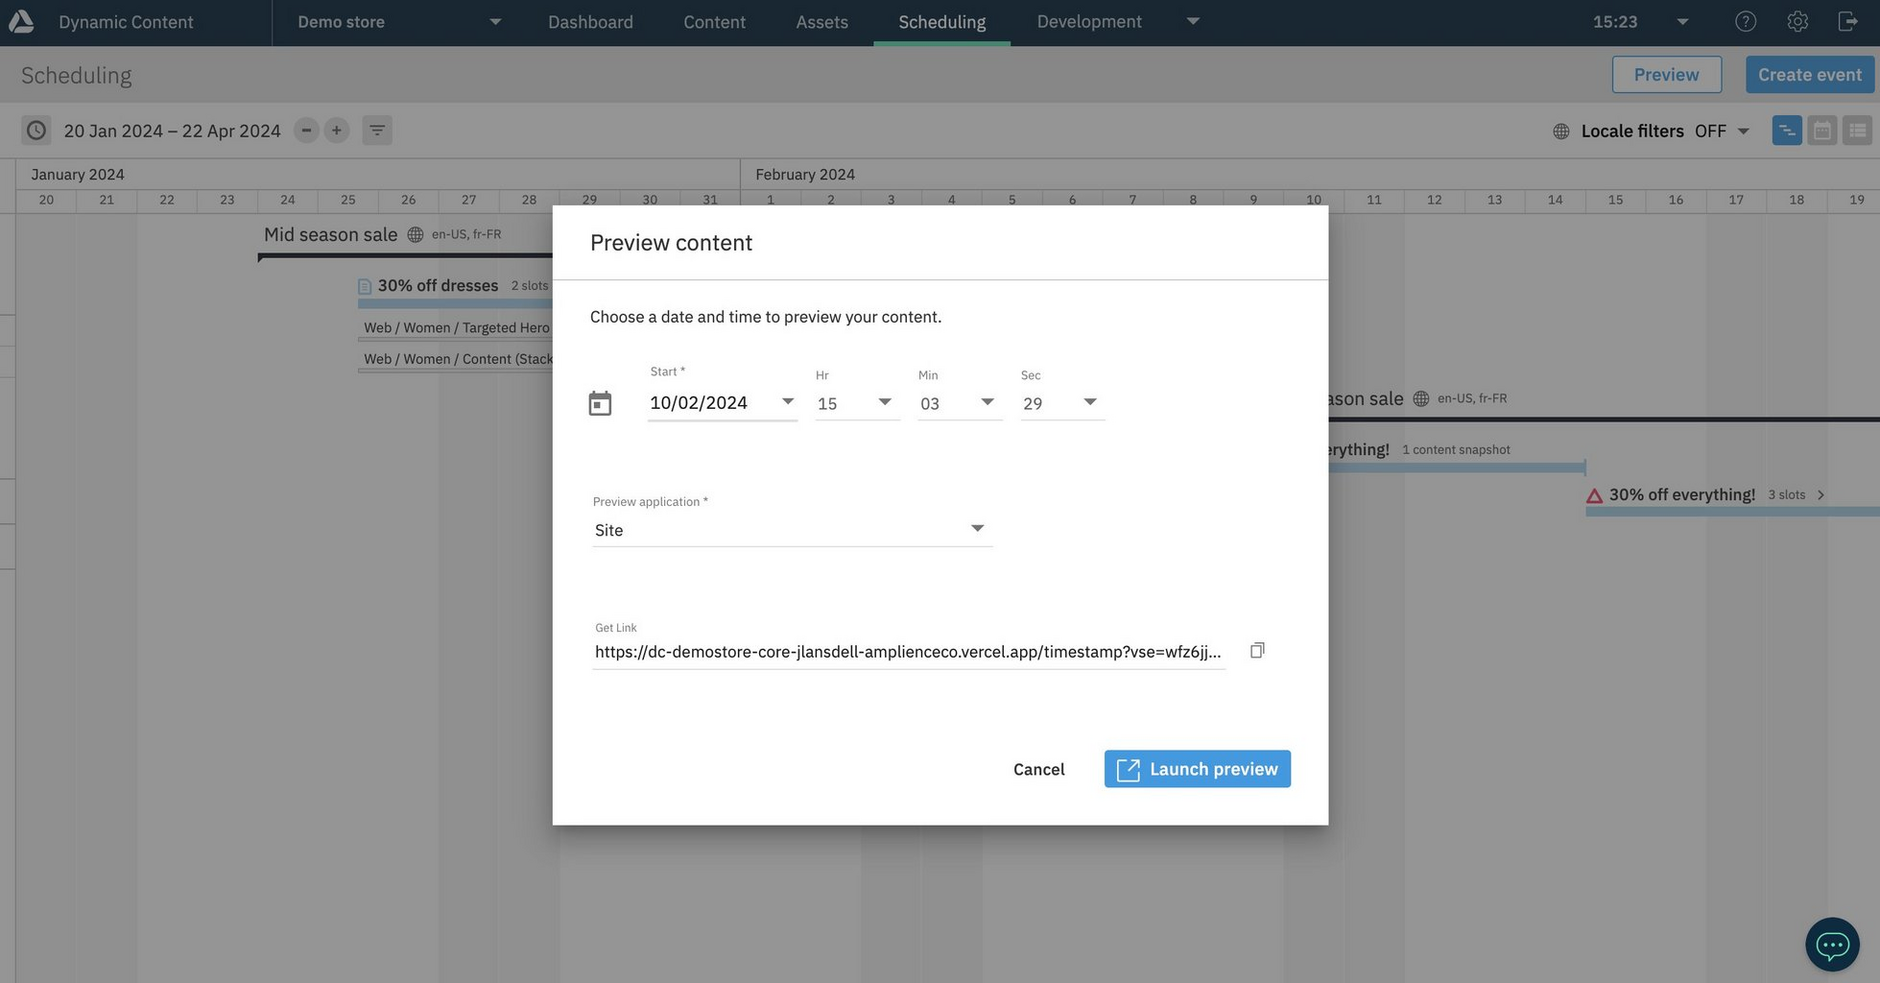
- Click on any date at the top of the window and the Content preview dialog is displayed with the start date defaulting to the selected date.
- Right-click within an event or edition and choose "Content preview".
If you choose a date in the past, the preview will be set to start on the current date.
You can also click the "Preview" button at the top right of the window to open the Content preview dialog.
In the example below, clicking on February 10th at the top of the window, opens up the Preview content dialog with this as the start date.
