Schema editor, Salesforce Commerce Cloud integration setup UI
Release date: 13th March 2019
In this release we've introduced several features that make it easier for developers to work with Dynamic Content. Our new schema editor lets you quickly create and manage your content type schemas within Dynamic Content, provides shortcuts to save you time and includes a preview feature to help you make sure your schema is structured exactly the way you want.
We've also improved the process for setting up and editing a Salesforce Commerce Cloud (SFCC) Dynamic Content integration. Developers and systems integrators can now set up integrations with an easy to use user interface.
There's also a new developer landing page in the Dynamic Content app, providing more information and links to the developer features of the entire Amplience platform including our APIs and SDKs.
Note that you will need developer permissions to access the features under the development menu in the Dynamic Content app. Contact your Customer Success Manager if you do not have access to a feature you require.
The Schema EditorLink copied!
The new schema editor makes it easier to create and edit content type schemas. Schemas can still be created and stored externally to Dynamic Content in AWS, GitHub or whatever hosting service you choose, but the editor allows you to create, edit and manage schemas within your Dynamic Content hub.
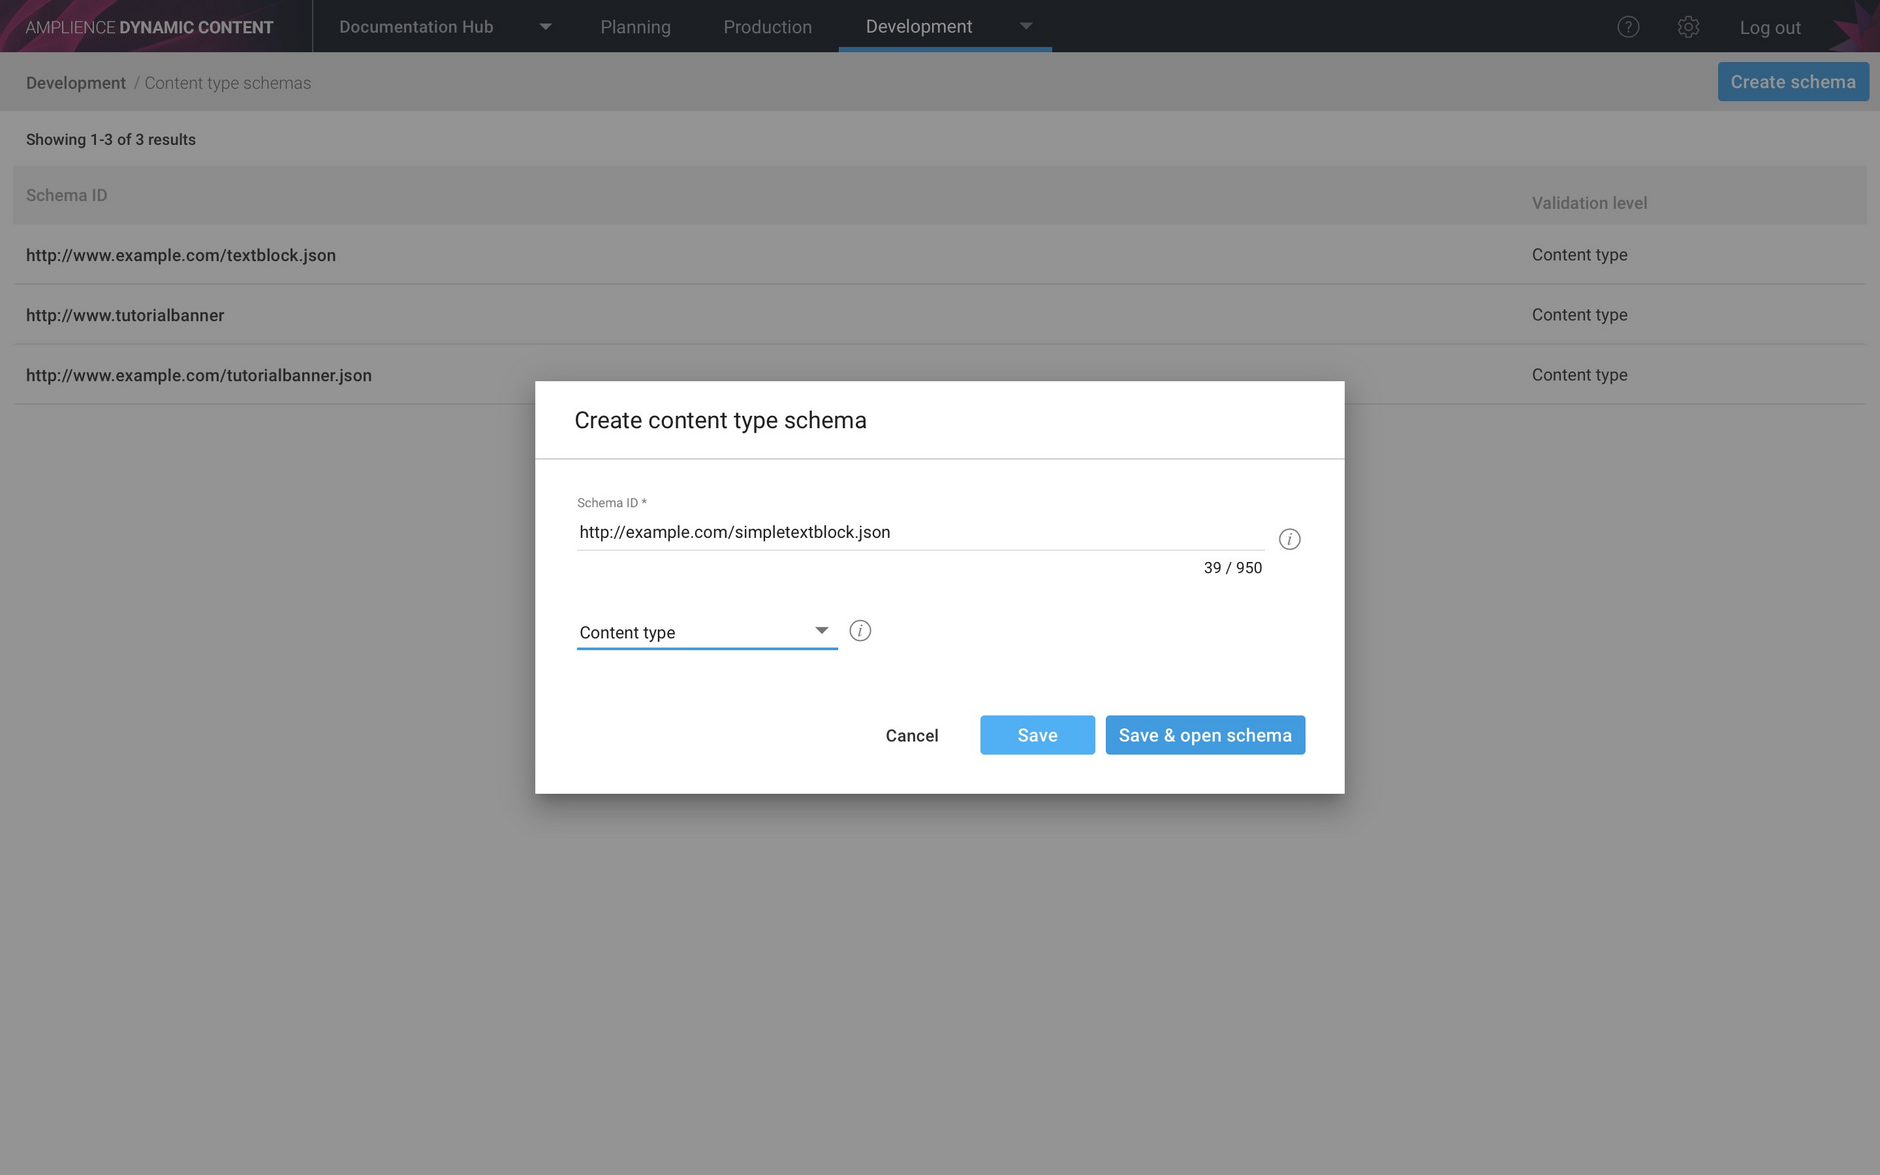
To create or edit a content type schema, choose "Content type schemas" from the development menu in the Dynamic Content app and either open an existing schema or click the "Create schema" button to create a new one.
When you create a schema you must provide a valid URL. This can be anything you like and is never resolved, but it must be in a valid URL format so that the schema conforms to the JSON schema standard. This URL is then used to register the schema as a content type.
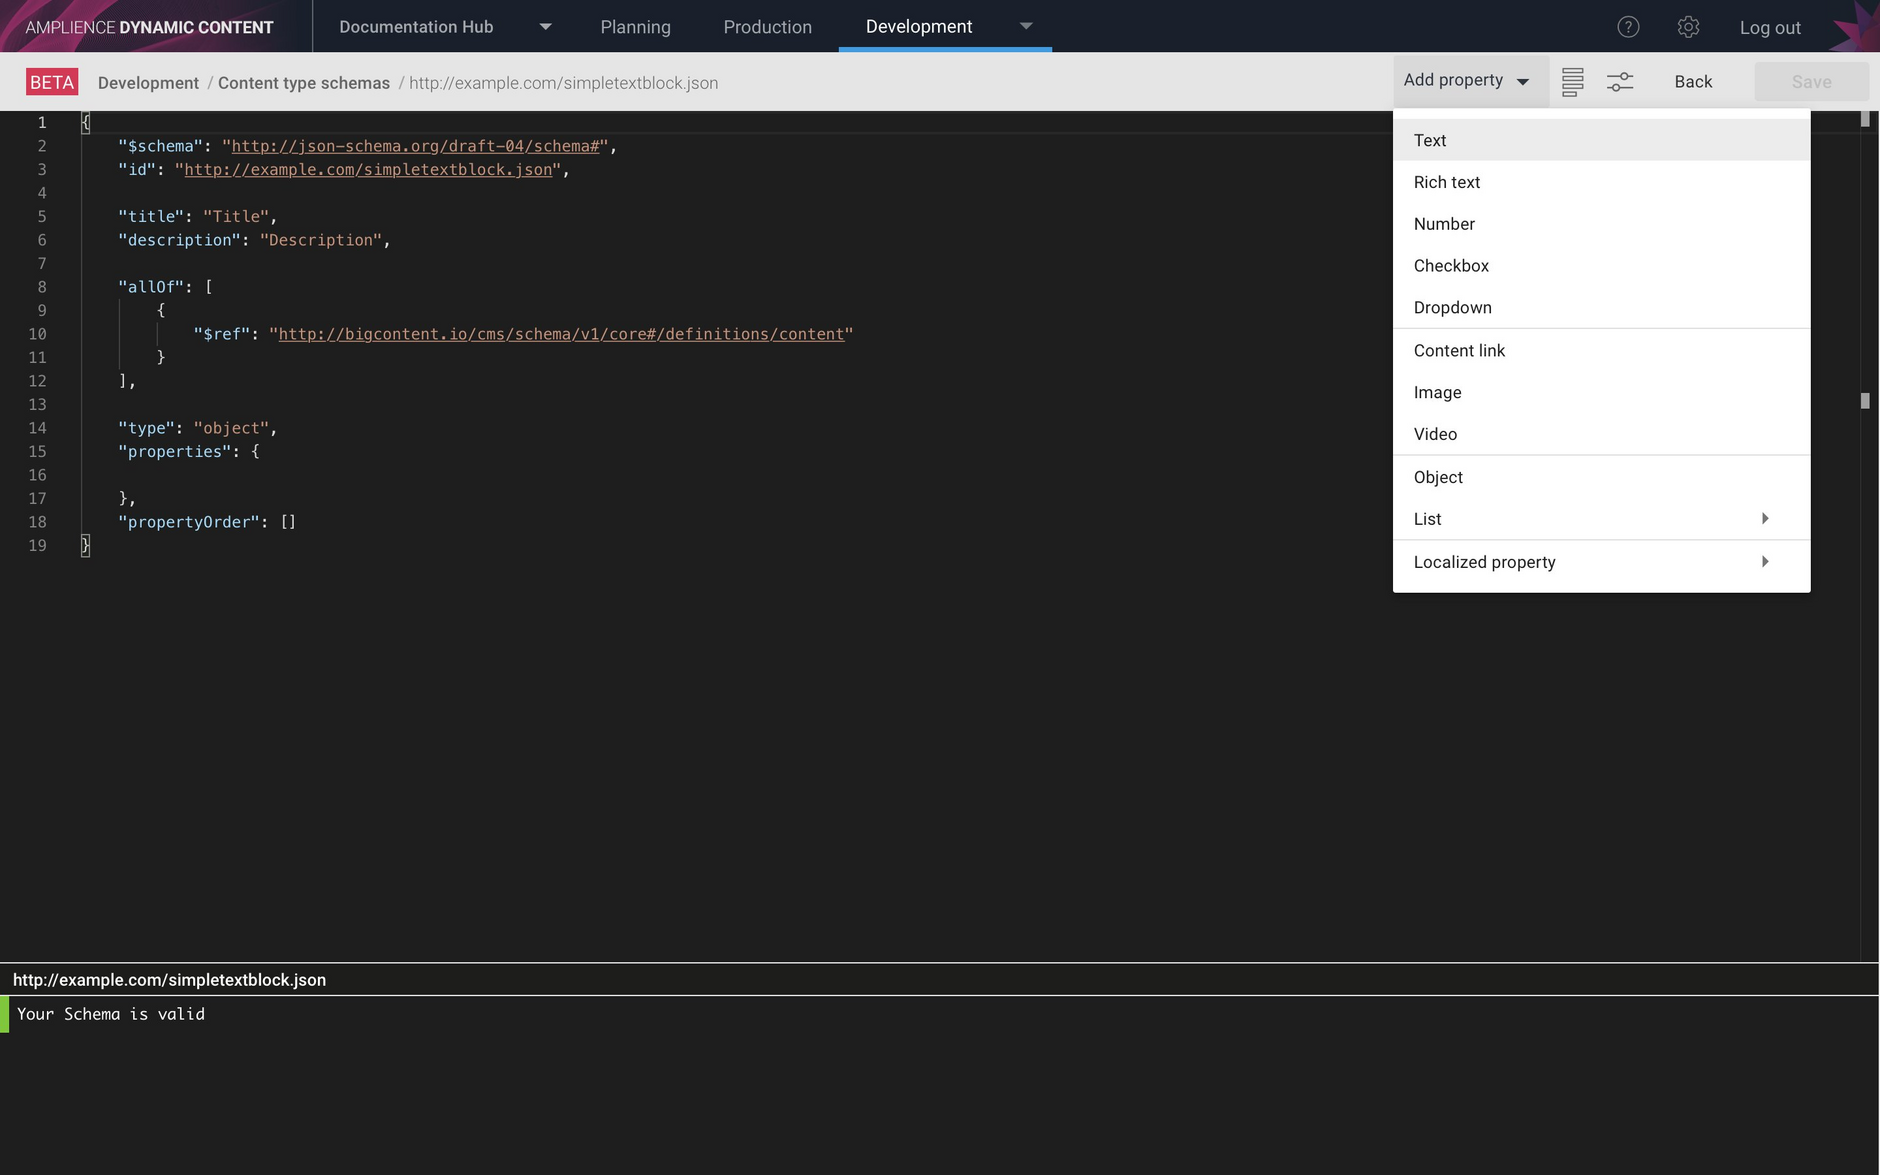
The schema editor includes snippets for most common property types, validates your syntax as you type and includes a preview feature that lets you see how content created using a schema will look in the content form. You can also use the editor for creating slot type schemas, as well as managing partials, or common definitions that can be used in many different schemas.
The image below shows how you can add a property to a schema using one of the built in snippets. You can add simple properties such as text and numbers and more complex properties including arrays and localized properties. Choose a property from the menu and it will be added to the schema with some default values which you then edit.
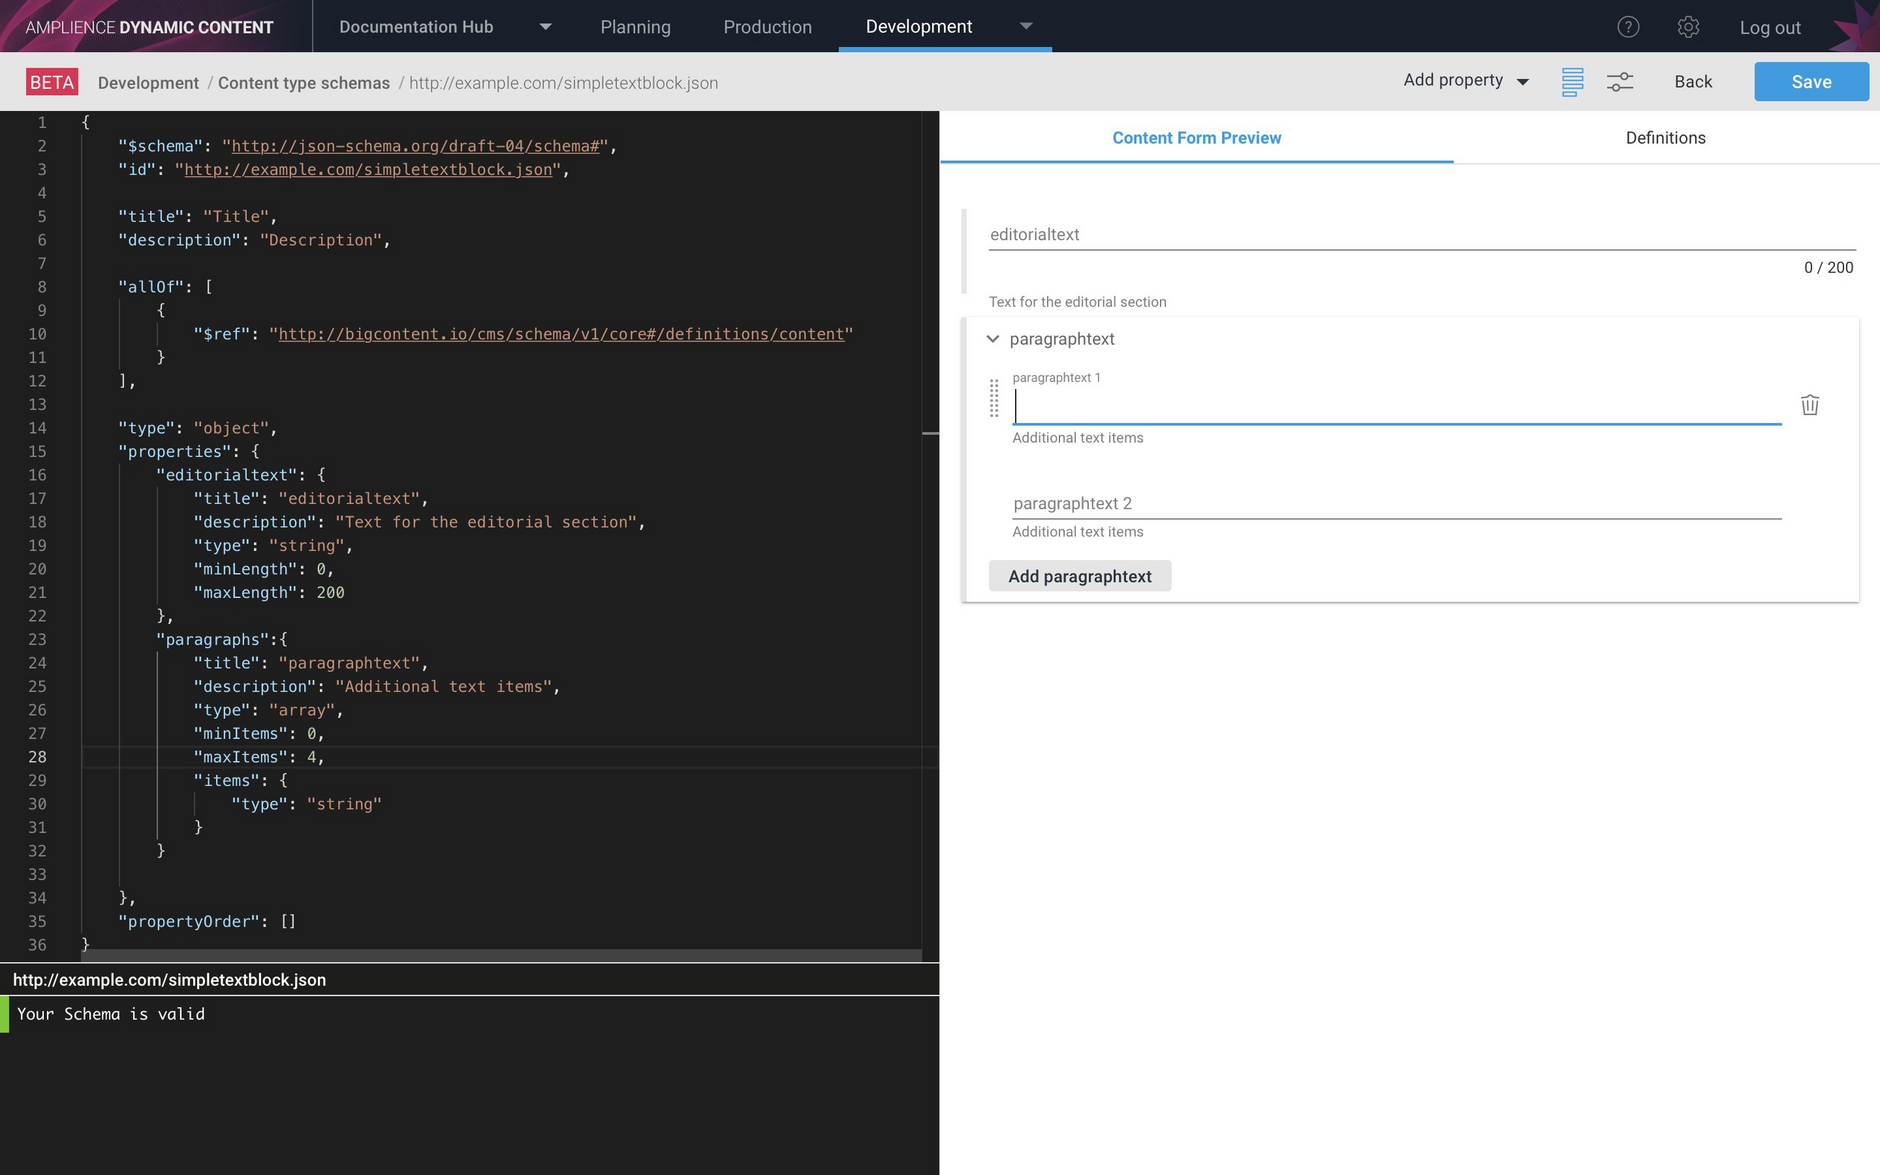
You can show a preview of how a content type registered from this schema will look in the content form by clicking the "preview" icon shown below.The preview also applies any validation that you have defined for a property.
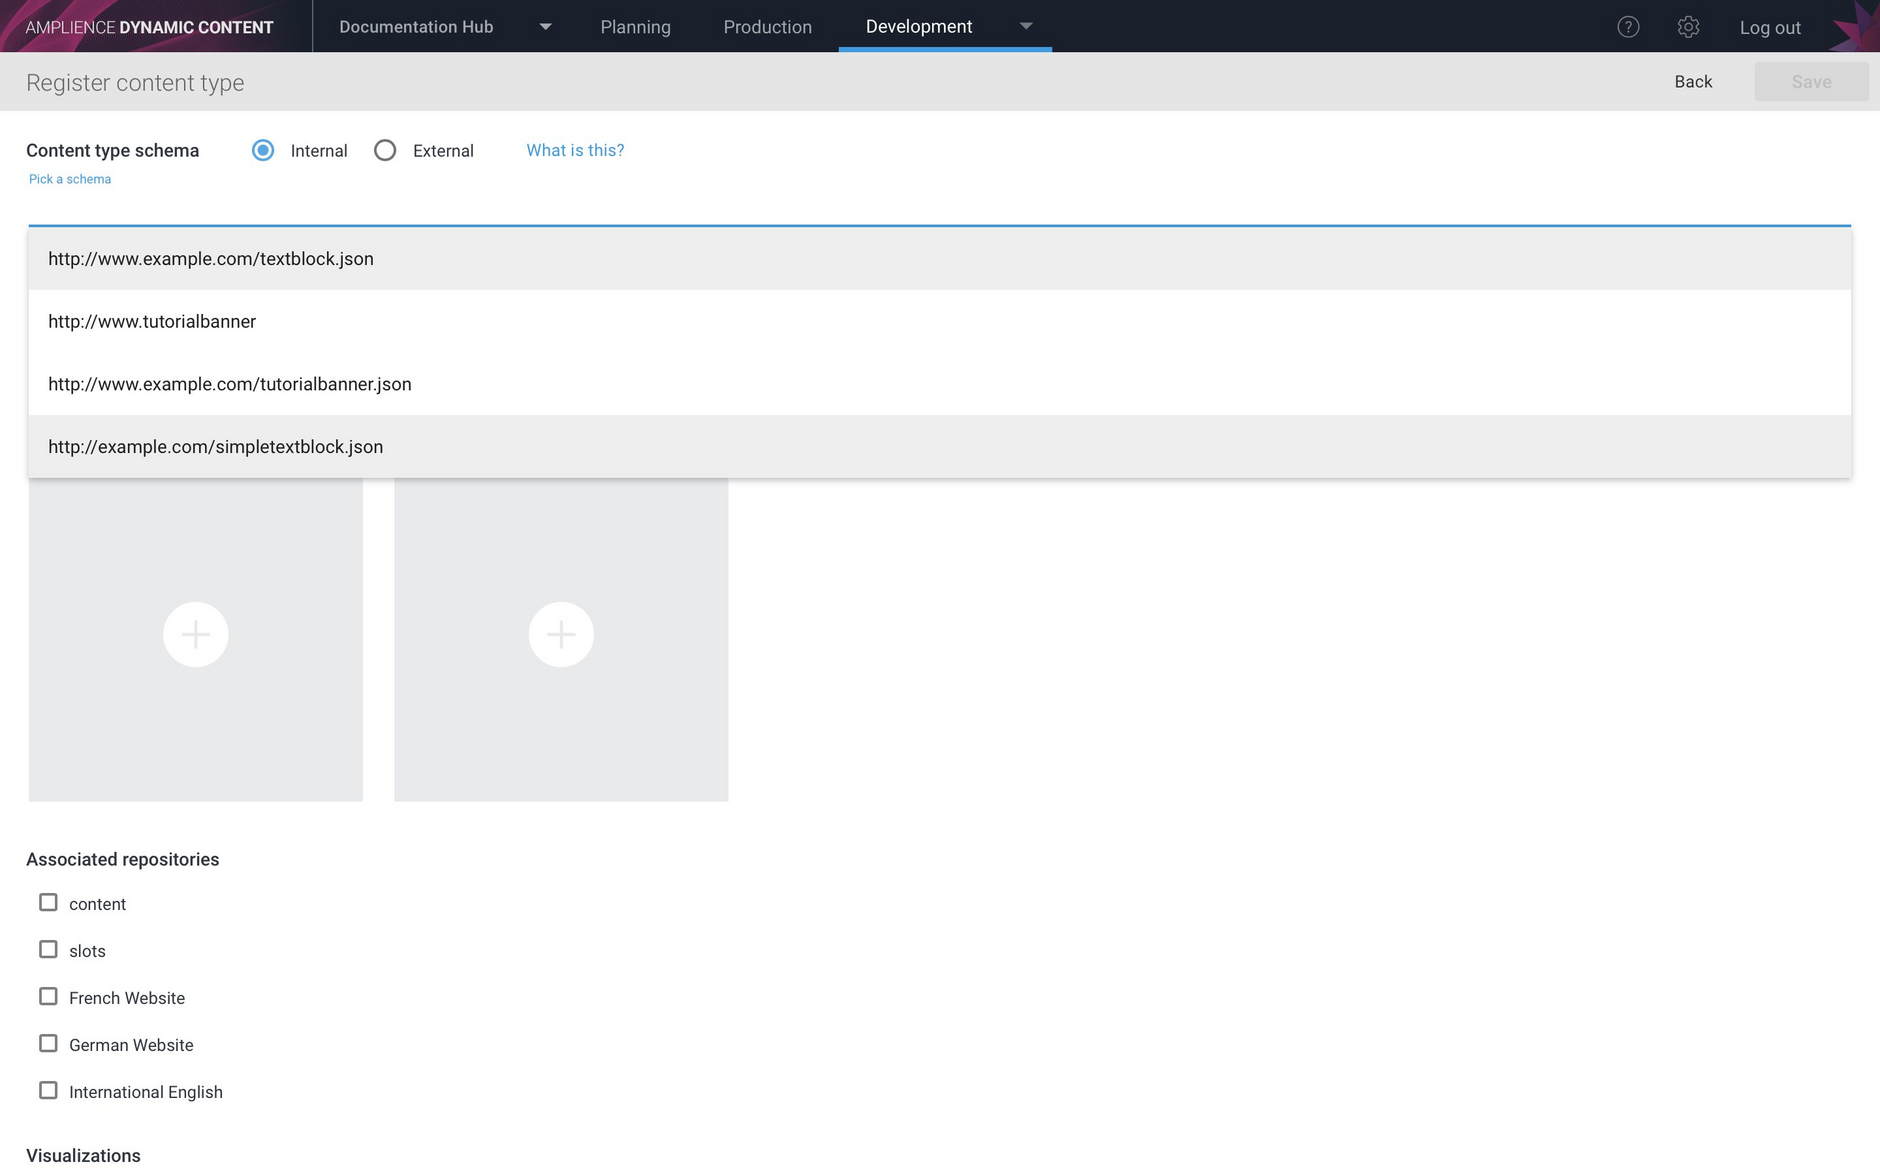
After you've created your schema, the next step is to register it as a content type from which users will create content. We've updated the "Register content types" window (available from the "Content Types item in the Development menu) to support registration of both internal schemas created using the schema editor and schemas hosted on external hosting services.
Registering a content type from an internal schema is shown below.
Once registered, the content type is available in the production view for the user to use to create content.
For much more detail about creating and editing schemas and examples of creating content type schemas and slot schemas see the schema editor section.
Salesforce Commerce Cloud integration setup user interfaceLink copied!
You can now create a new Dynamic Content SFCC integration or edit an existing one via a user interface. Choose "Integration" from the Development menu in the Dynamic Content app and from the integrations home page click "View or add Salesforce Commerce Cloud integrations" as shown in the image below.
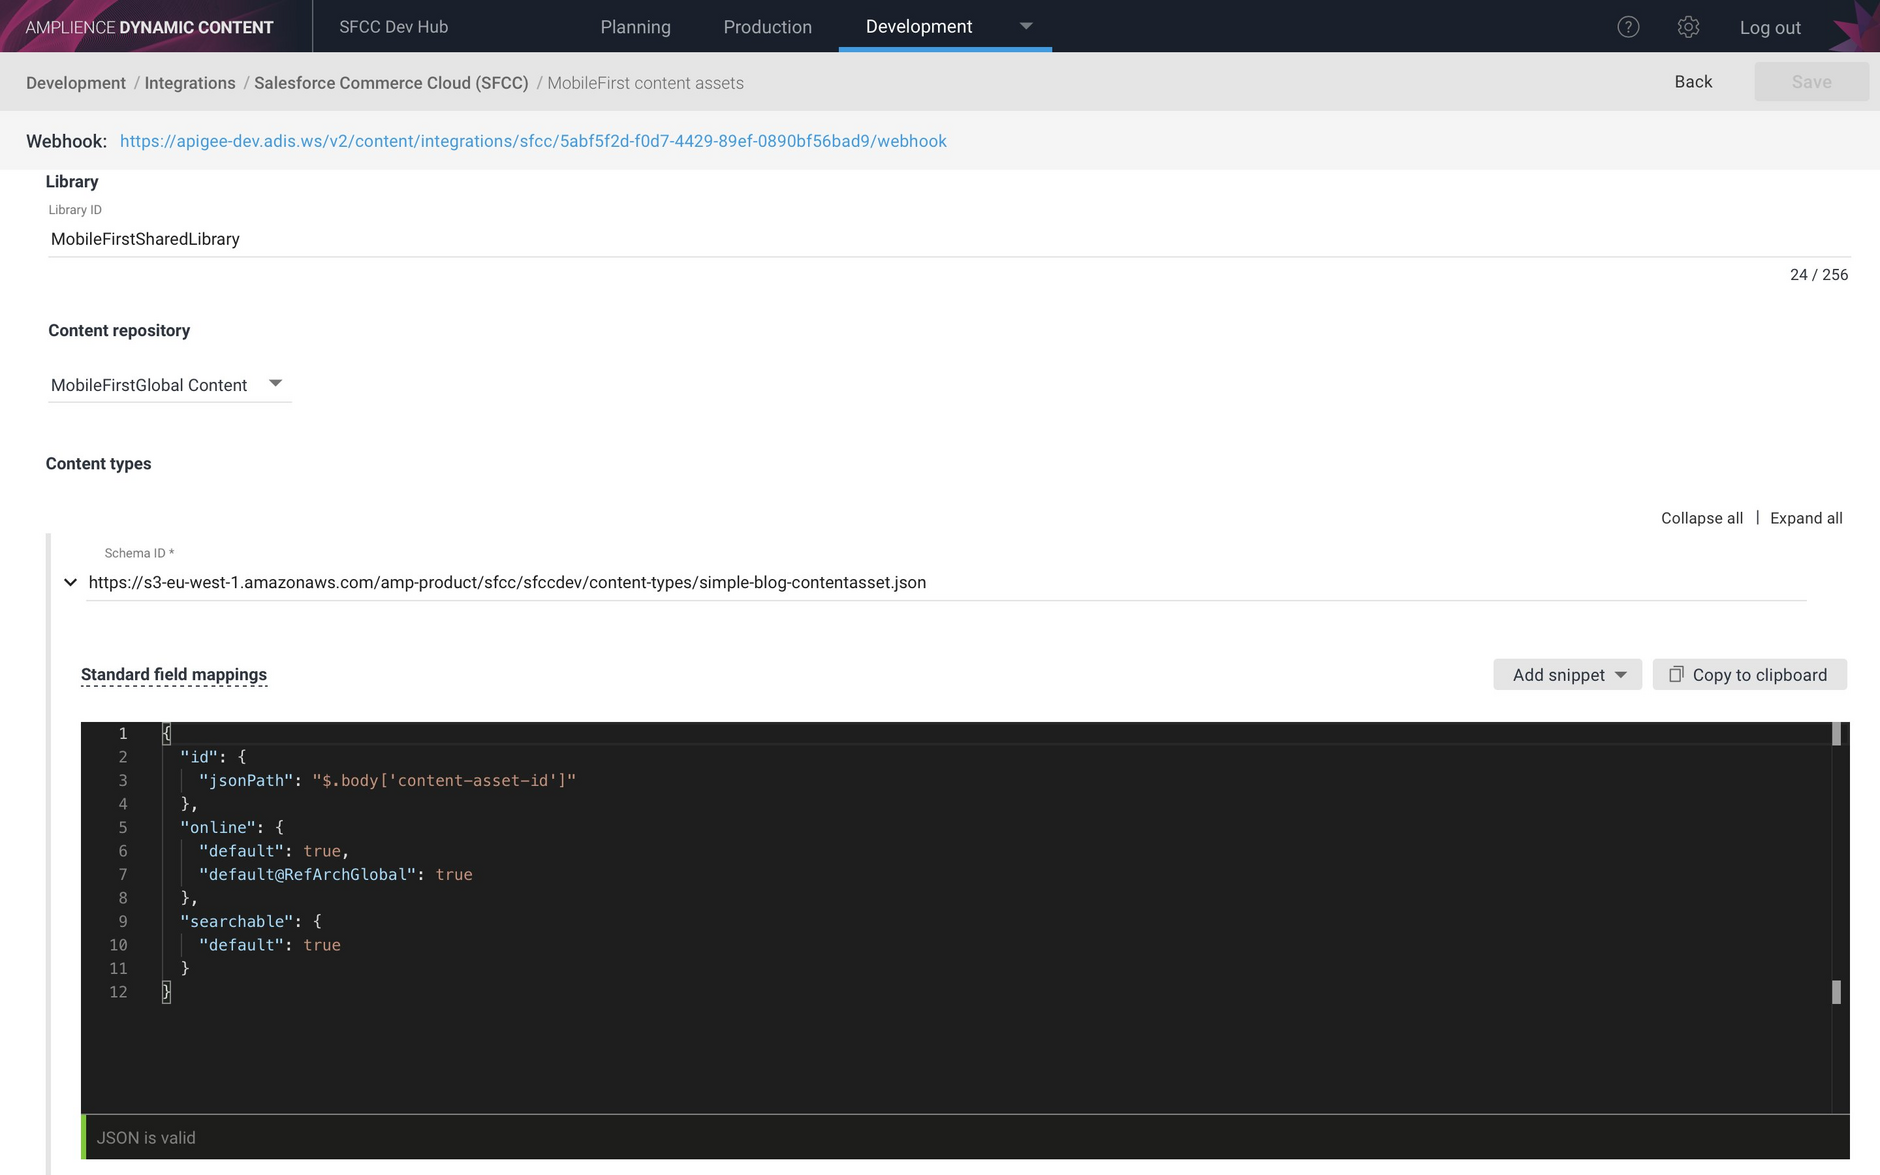
A list of the integrations set up on your hub is displayed. From here you can view and edit integrations and add a new one. The user interface provides fields to enter the settings you need to configure, including field mappings for content asset integrations and locales for supporting localization in both content slot and content asset integrations.
The set up of a content asset integration, including the mappings for a supported content type, is shown below. When you enter mappings you can also make use of shortcuts provided by the code editor to help you get the syntax correct.
You can find more information about setting up both content slot and content asset integrations on the Setting up a SFCC integration page.
New developer landing pageLink copied!
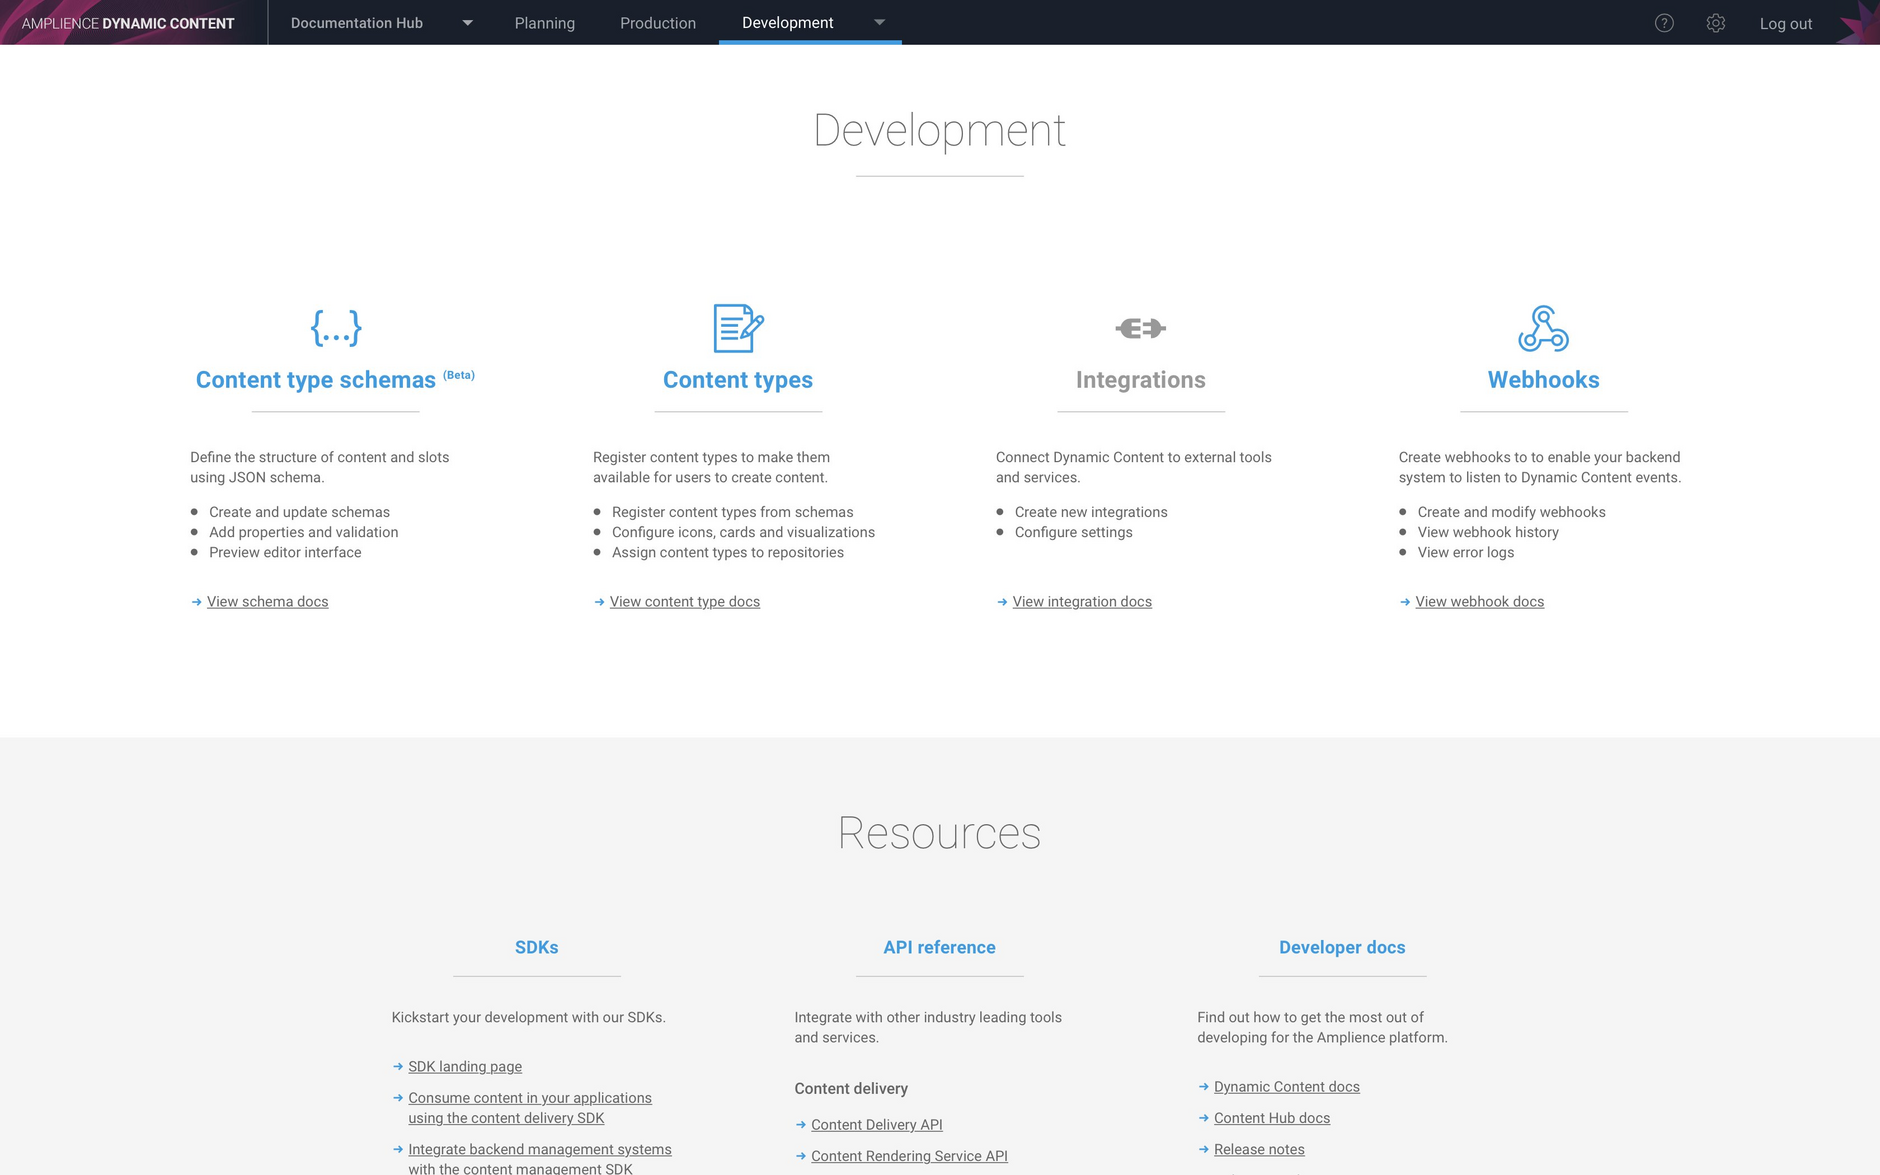
We've added a new developer home page to provide easy access to the features in the development section, as well as documentation, API references and SDKs. You can access the home page by clicking the "Development" menu title.
Note that if you do not currently have access to a feature listed on the development home page, the link to the feature will not be enabled.
Content Delivery SDKLink copied!
The new Dynamic Content Delivery SDK gives you a head start for writing both client side and server side code that consumes content using the Content Delivery API.
The SDK is designed to be used with JavaScript, Typescript and Node.js. It includes features to help you fetch content and slots using the Content Delivery Service, retrieve localized content, work with unpublished content, making it easier to create visualizations and preview apps, and make use of the Content Rendering service to transform content to HTML.
We'll be adding tutorials soon to help you get the most out of the SDK.
Color pickerLink copied!
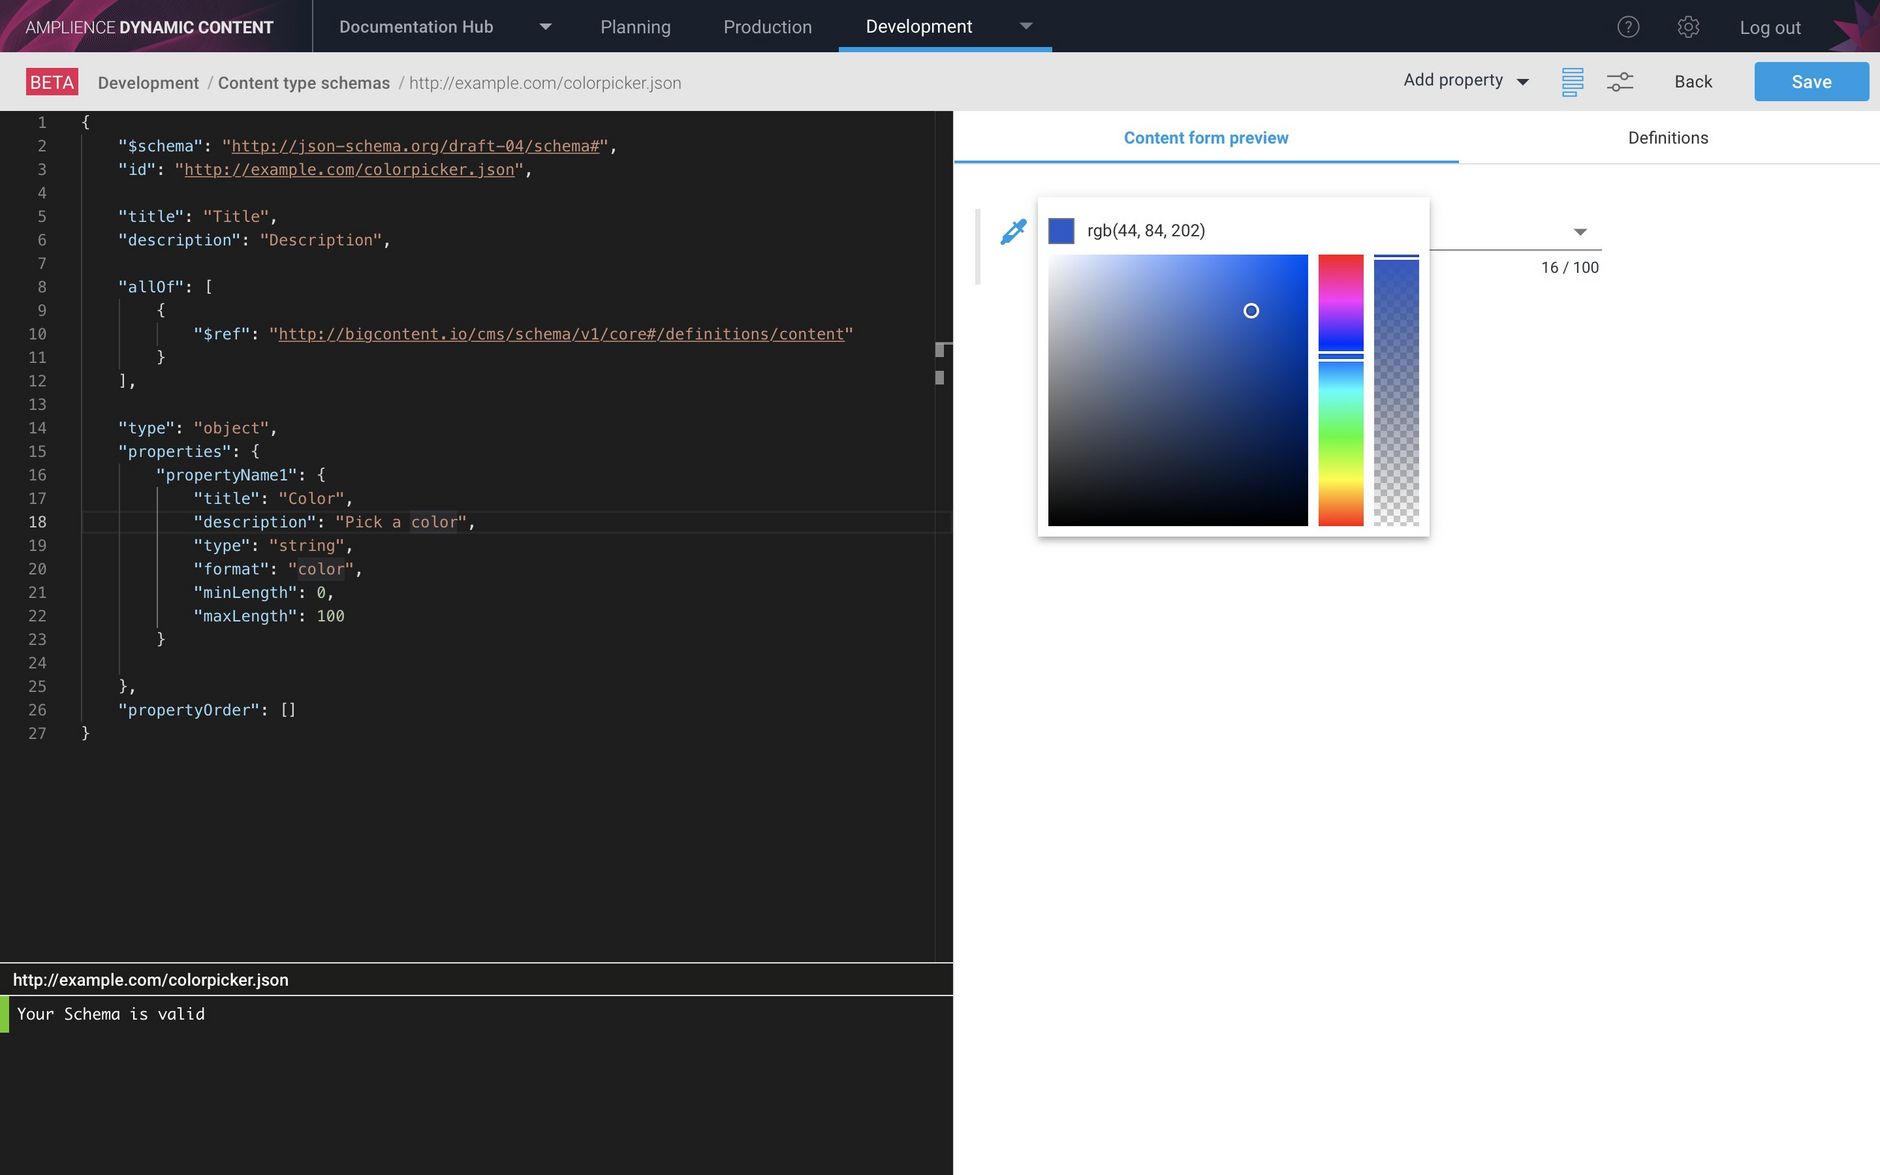
We've added a color format to strings that will display a color picker in the content form or schema editor to allow the user to choose a color rather than having to enter the RGB values themselves.
To use the color picker add a string property to your content type schema and specify the format as color.
This will then be shown in the preview window of the Schema editor as follows:
Content item status enhancementsLink copied!
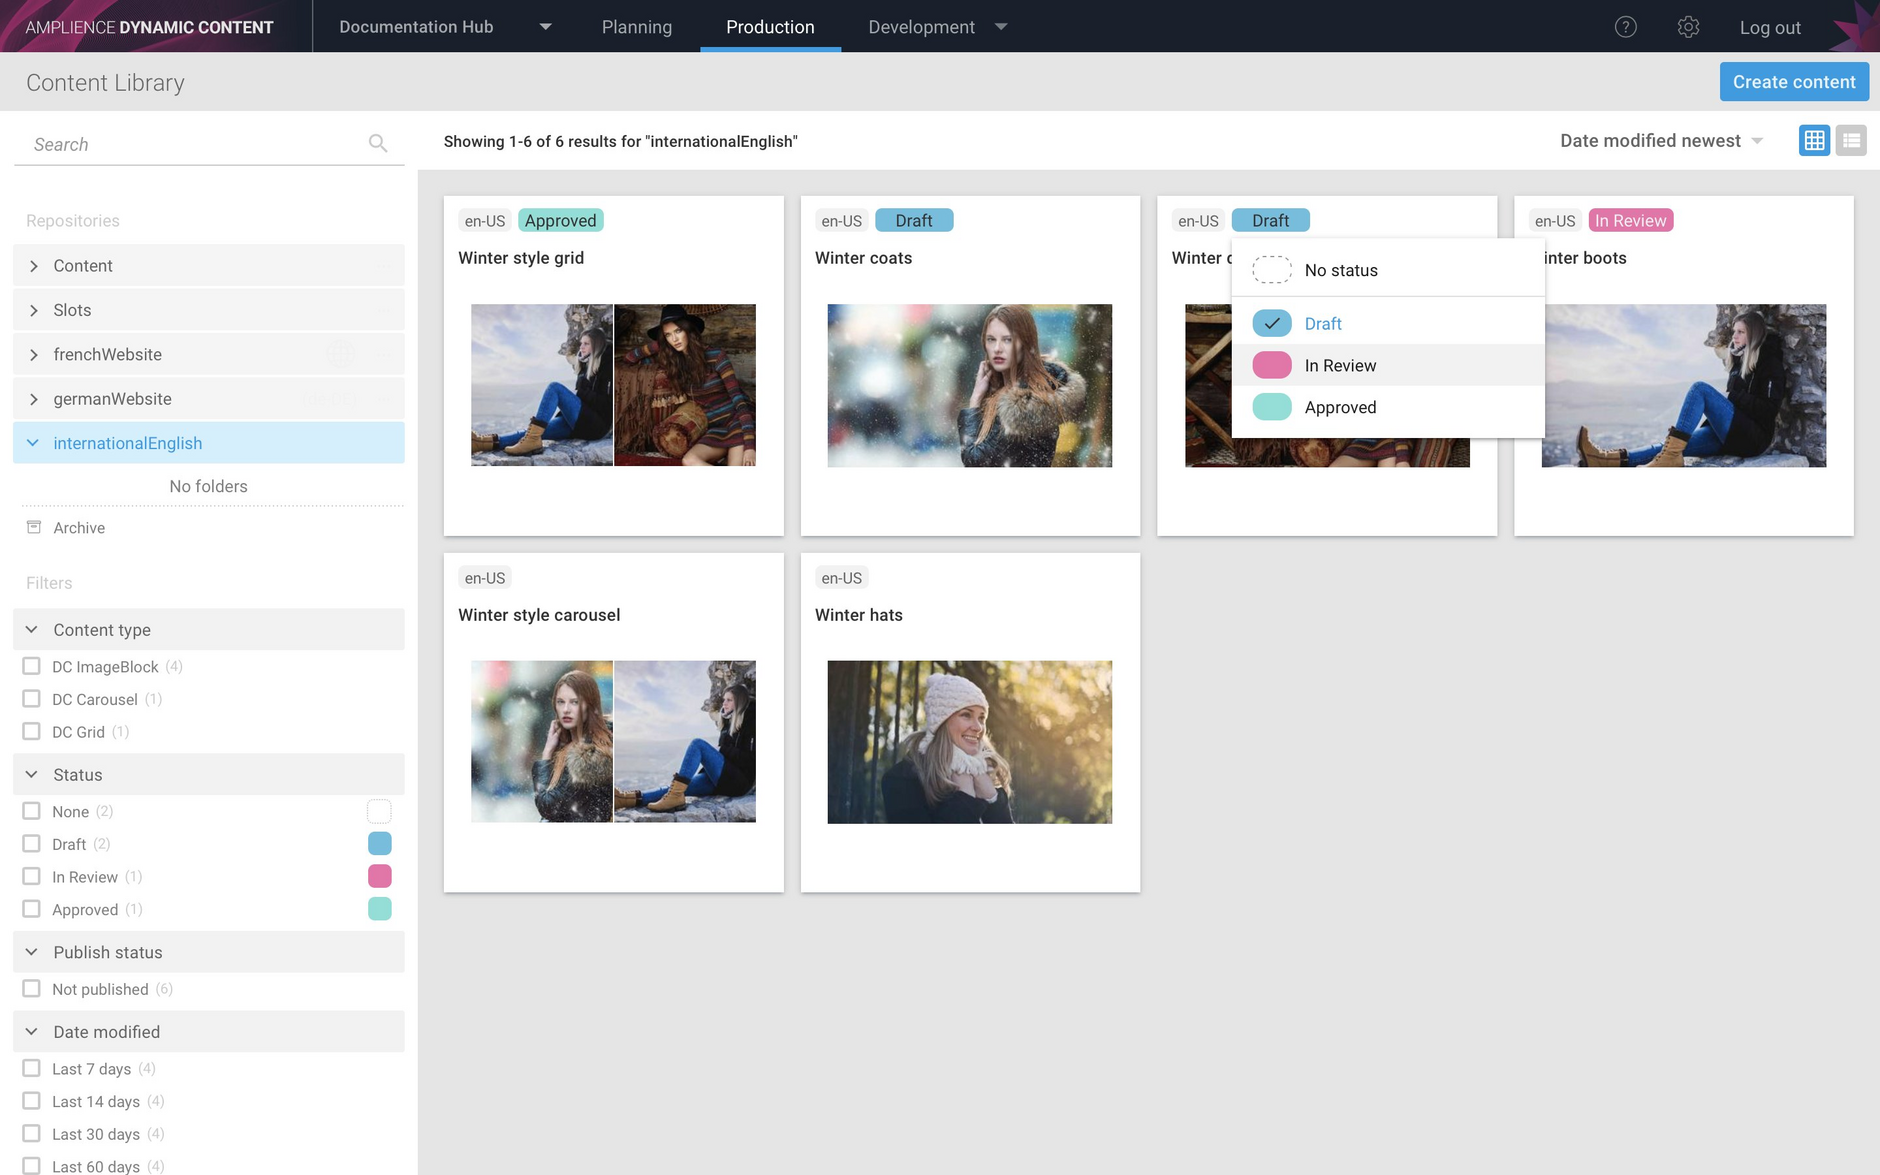
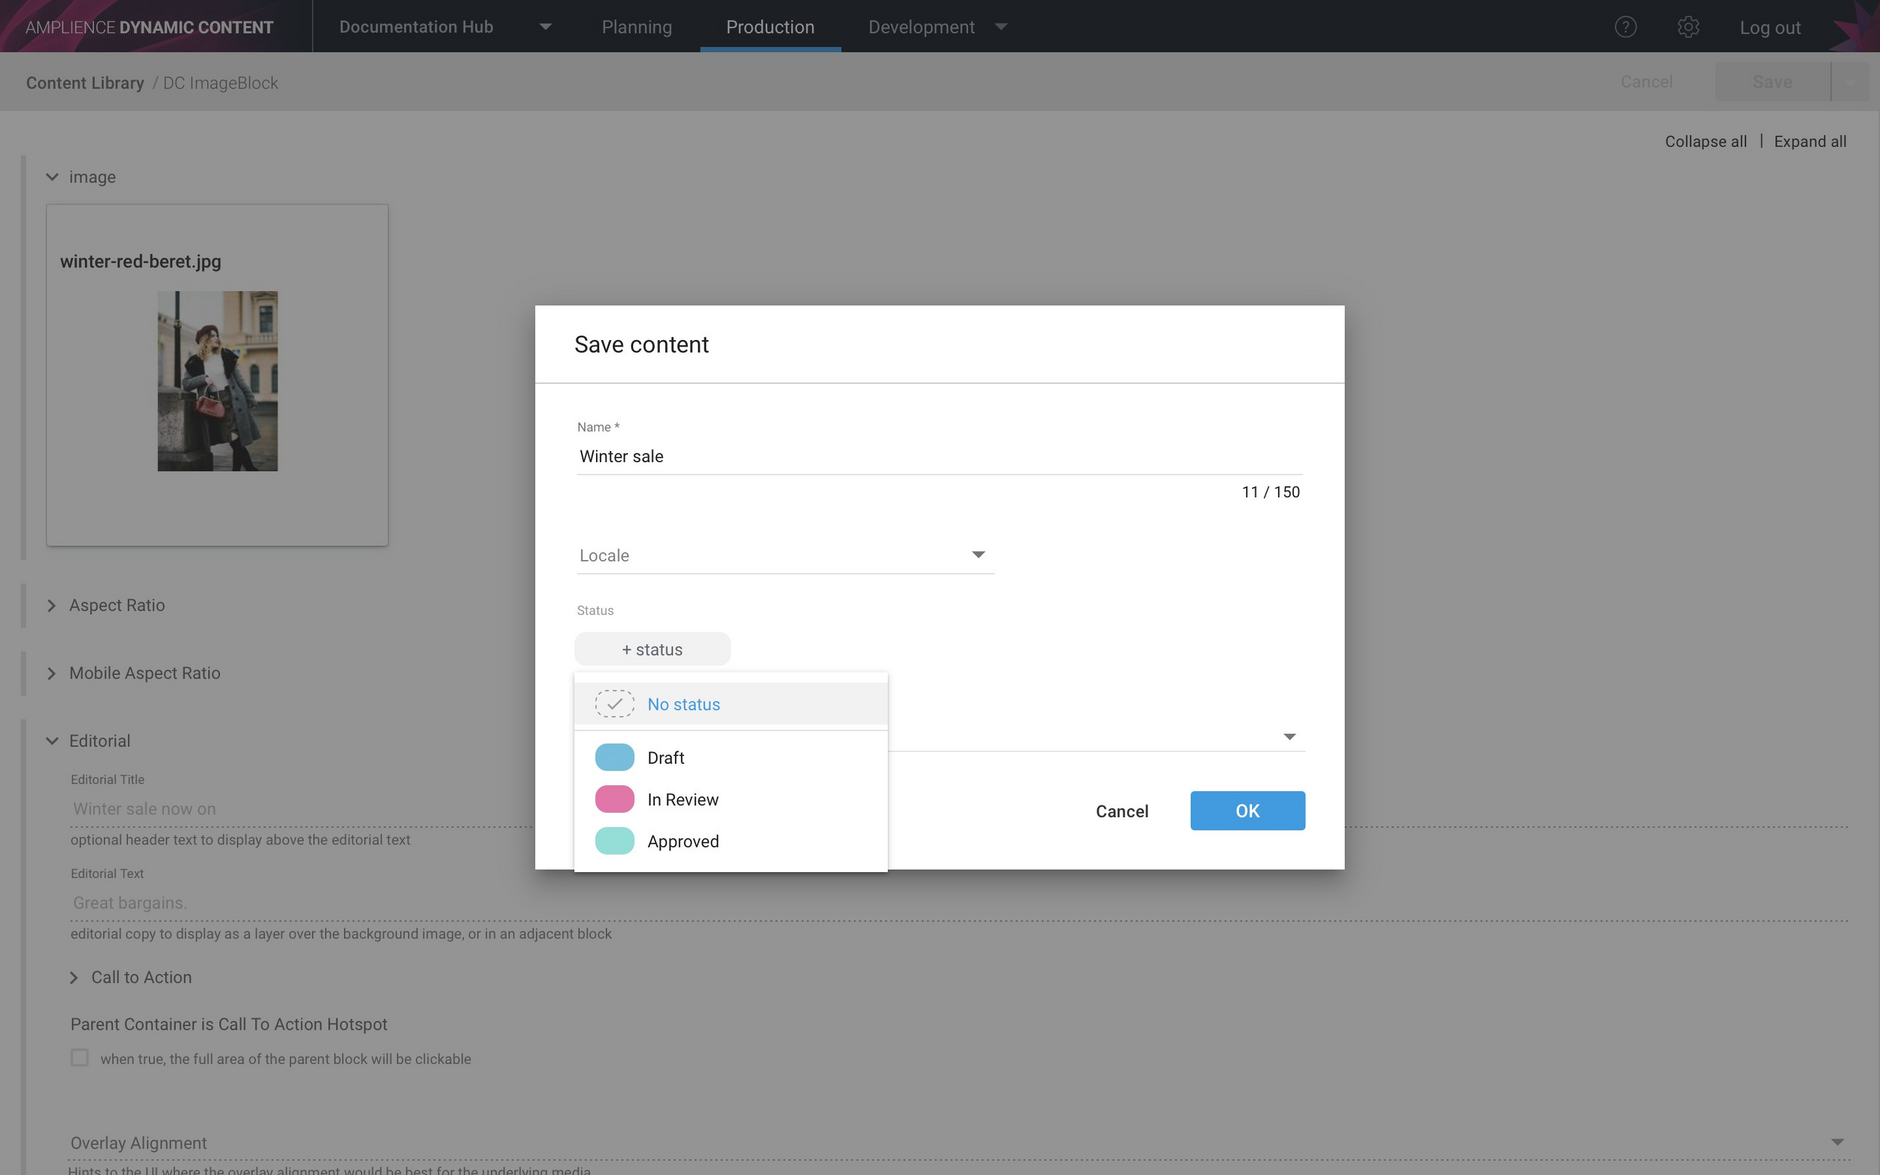
In this release the content item status feature has been enhanced: an item's status is now shown on its card in the Content Library and you can assign a status to a content item when it's created. From the card you can also change an item's status or assign a status to an item that does not have one set.
The example below shows how to update an item's status from the contextual menu on its card.
A status menu is now shown in the Save content dialog and from here you can choose the status to assign to the item.
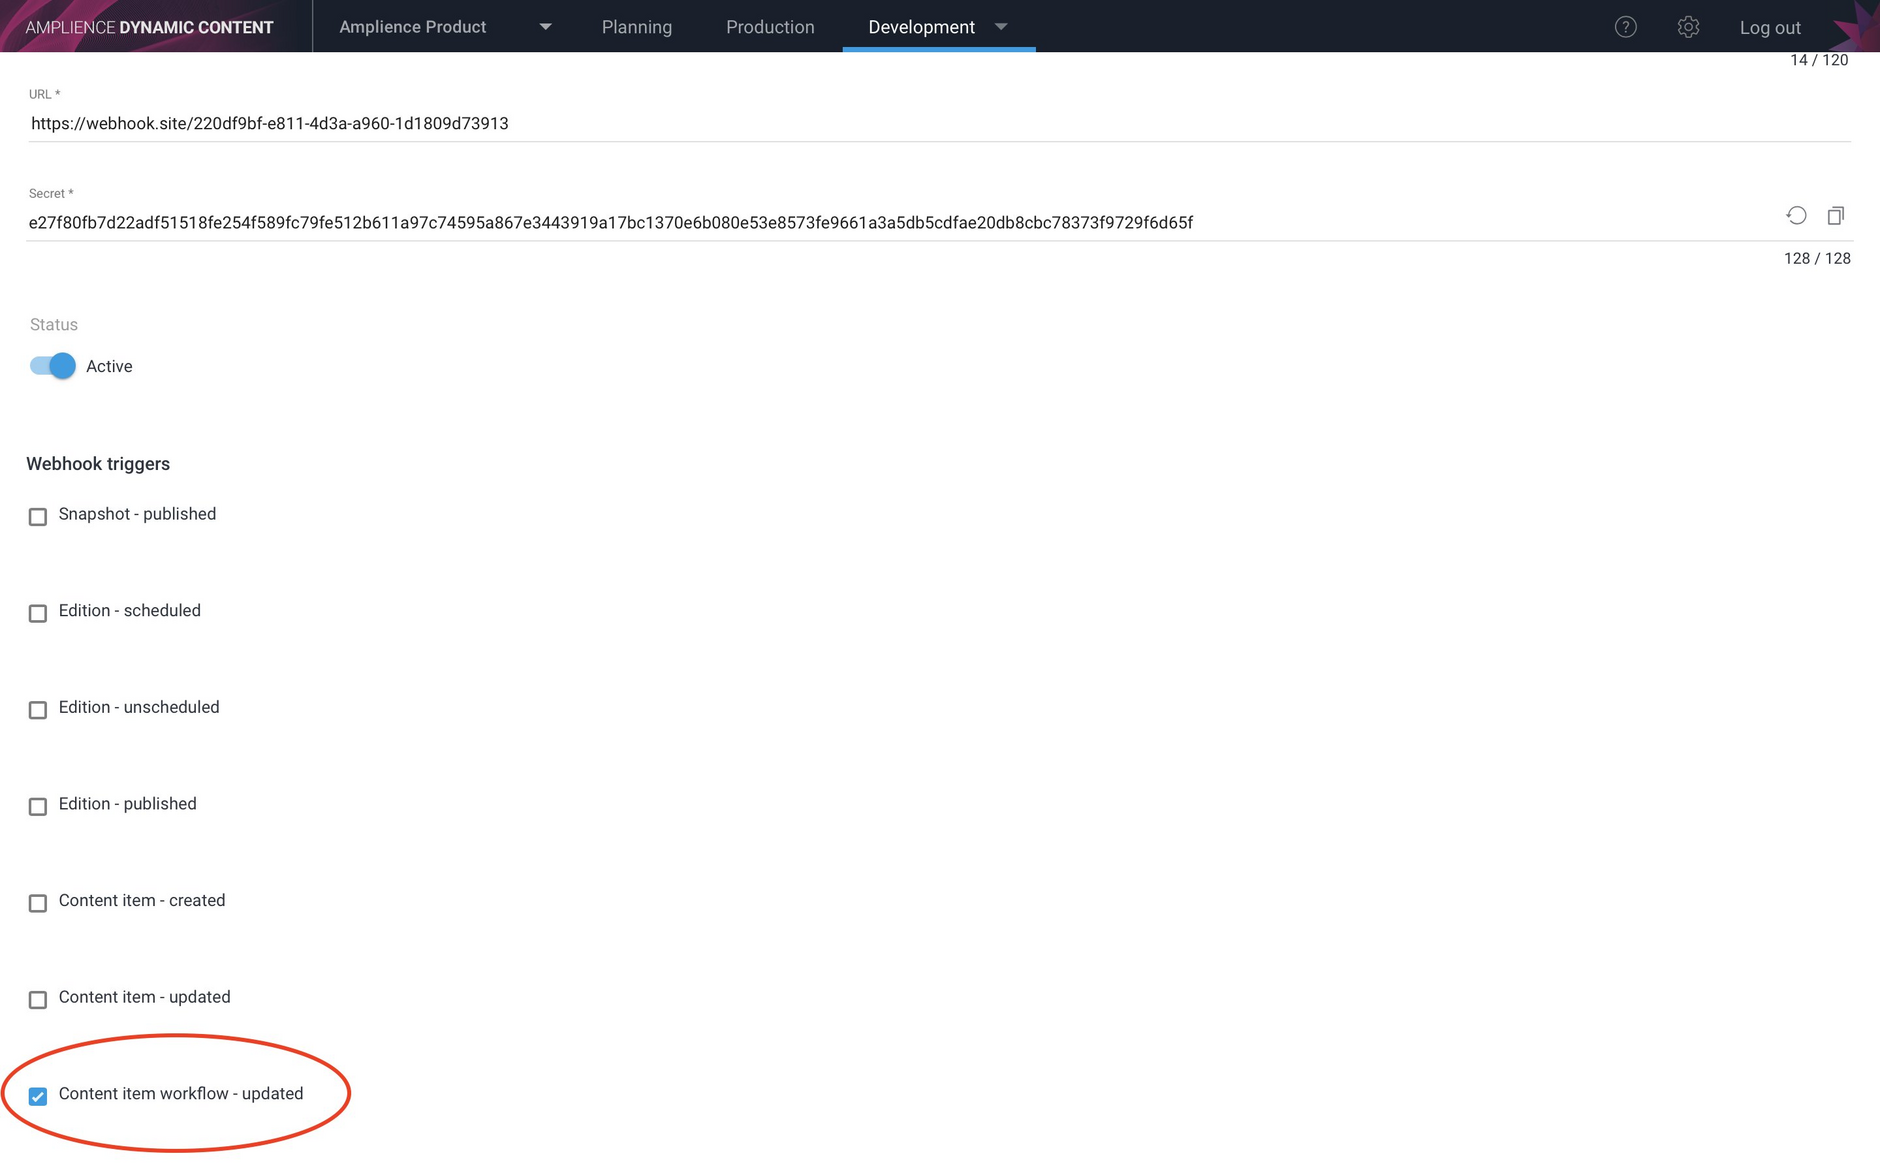
Content item workflow - updated webhook eventLink copied!
A new webhook event has been added to allow developers to be notified when a content item's status is updated. This opens up all kinds of possibilities for creating integrations to support a custom workflow. For more information about creating and viewing webhooks see the webhooks page.

