Setting up a SFCC integration
On this page we'll show you how to add a SFCC integration from the Dynamic Content app. Some of the set up is the same for both content slot and content asset integrations, but to configure a content asset integration requires some additional steps, as explained on the content assets page.
You will also need to include a SFCC client ID and secret. For more details of how to set this up in SFCC Business Manager see the Setting up an API client section.
For an example of setting up an integration see the setting up an integration: end to end example video.
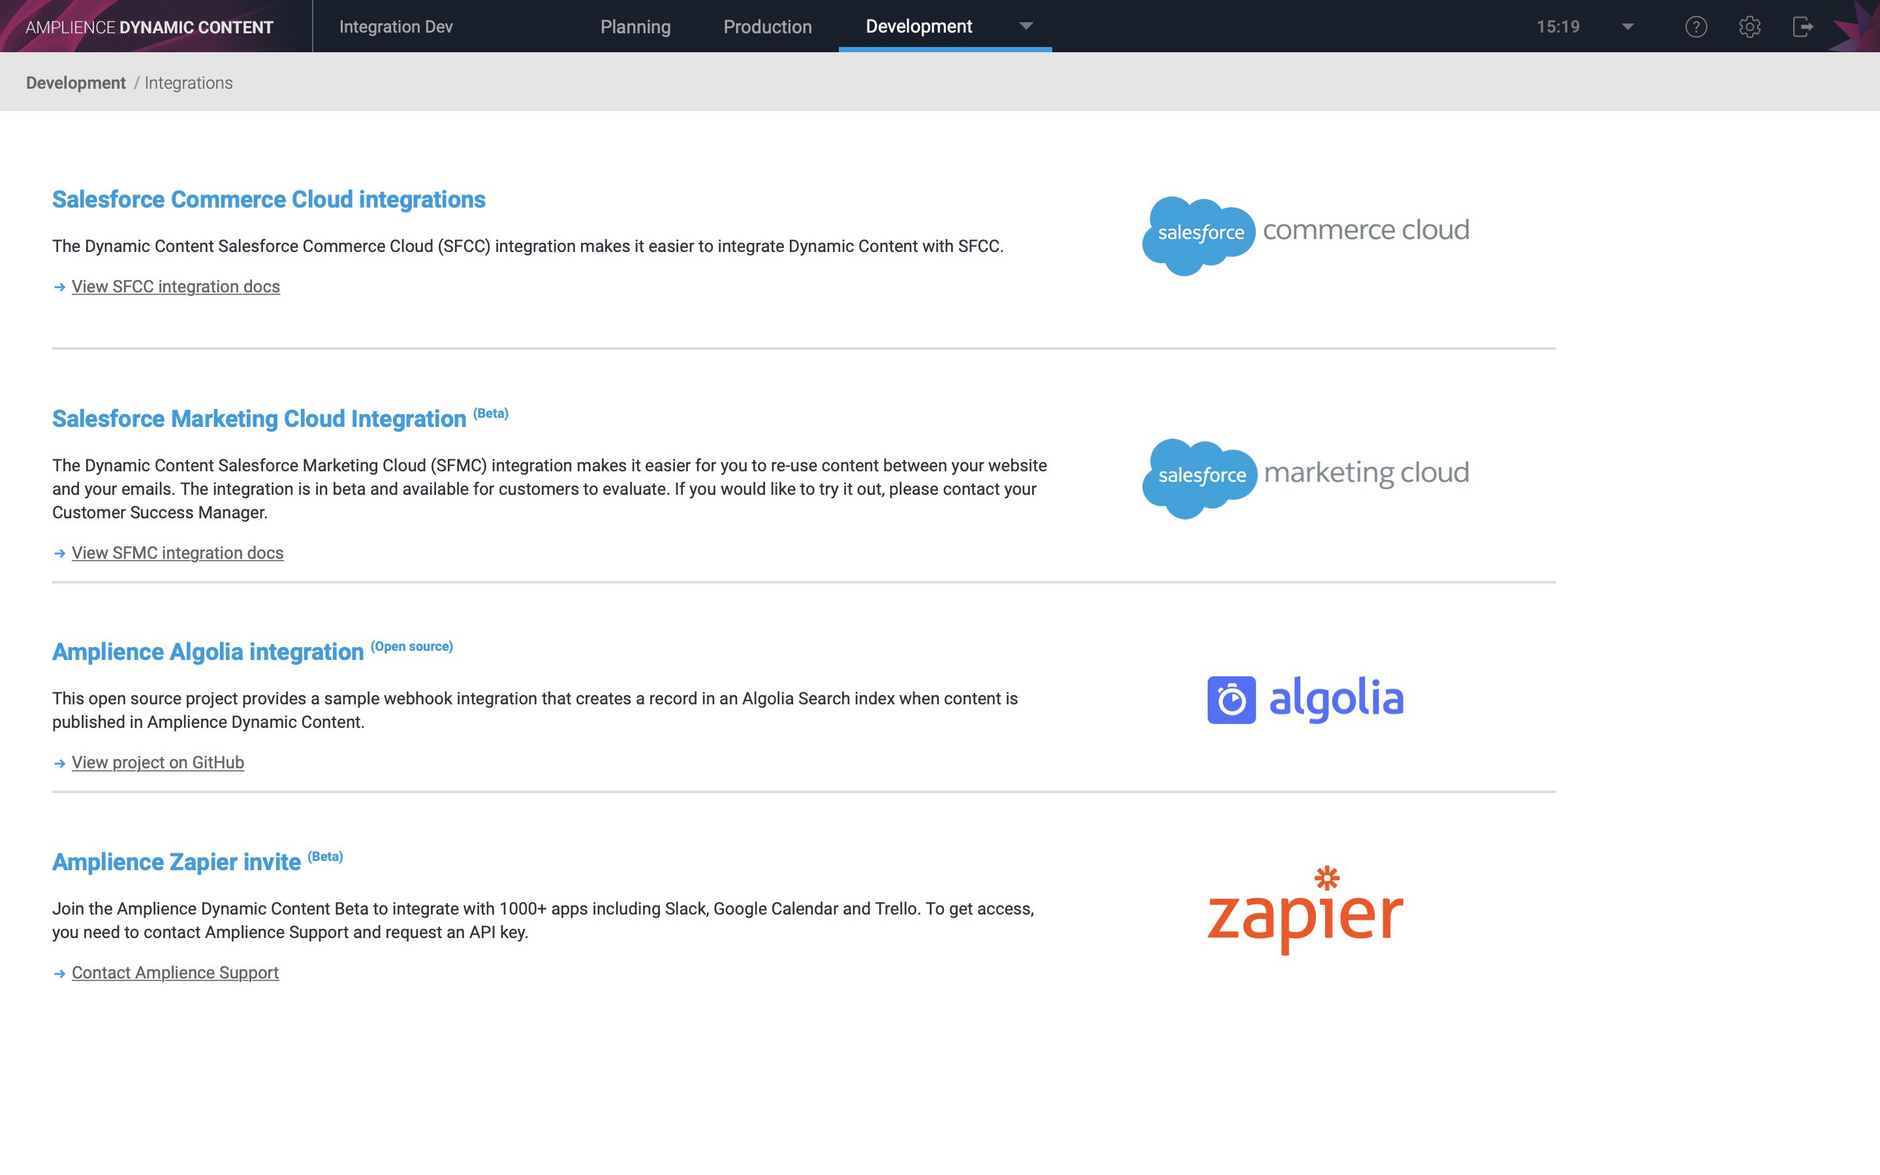
To configure a new Dynamic Content SFCC integration, choose "Integration" from the Development menu in the Dynamic Content app. From the integrations home page click "Salesforce Commerce Cloud integrations".
A list of the integrations set up on your hub is displayed. From here you can view and edit existing integrations and add a new one.
To add a new integration click the "Add Integration" button as shown in the image below.
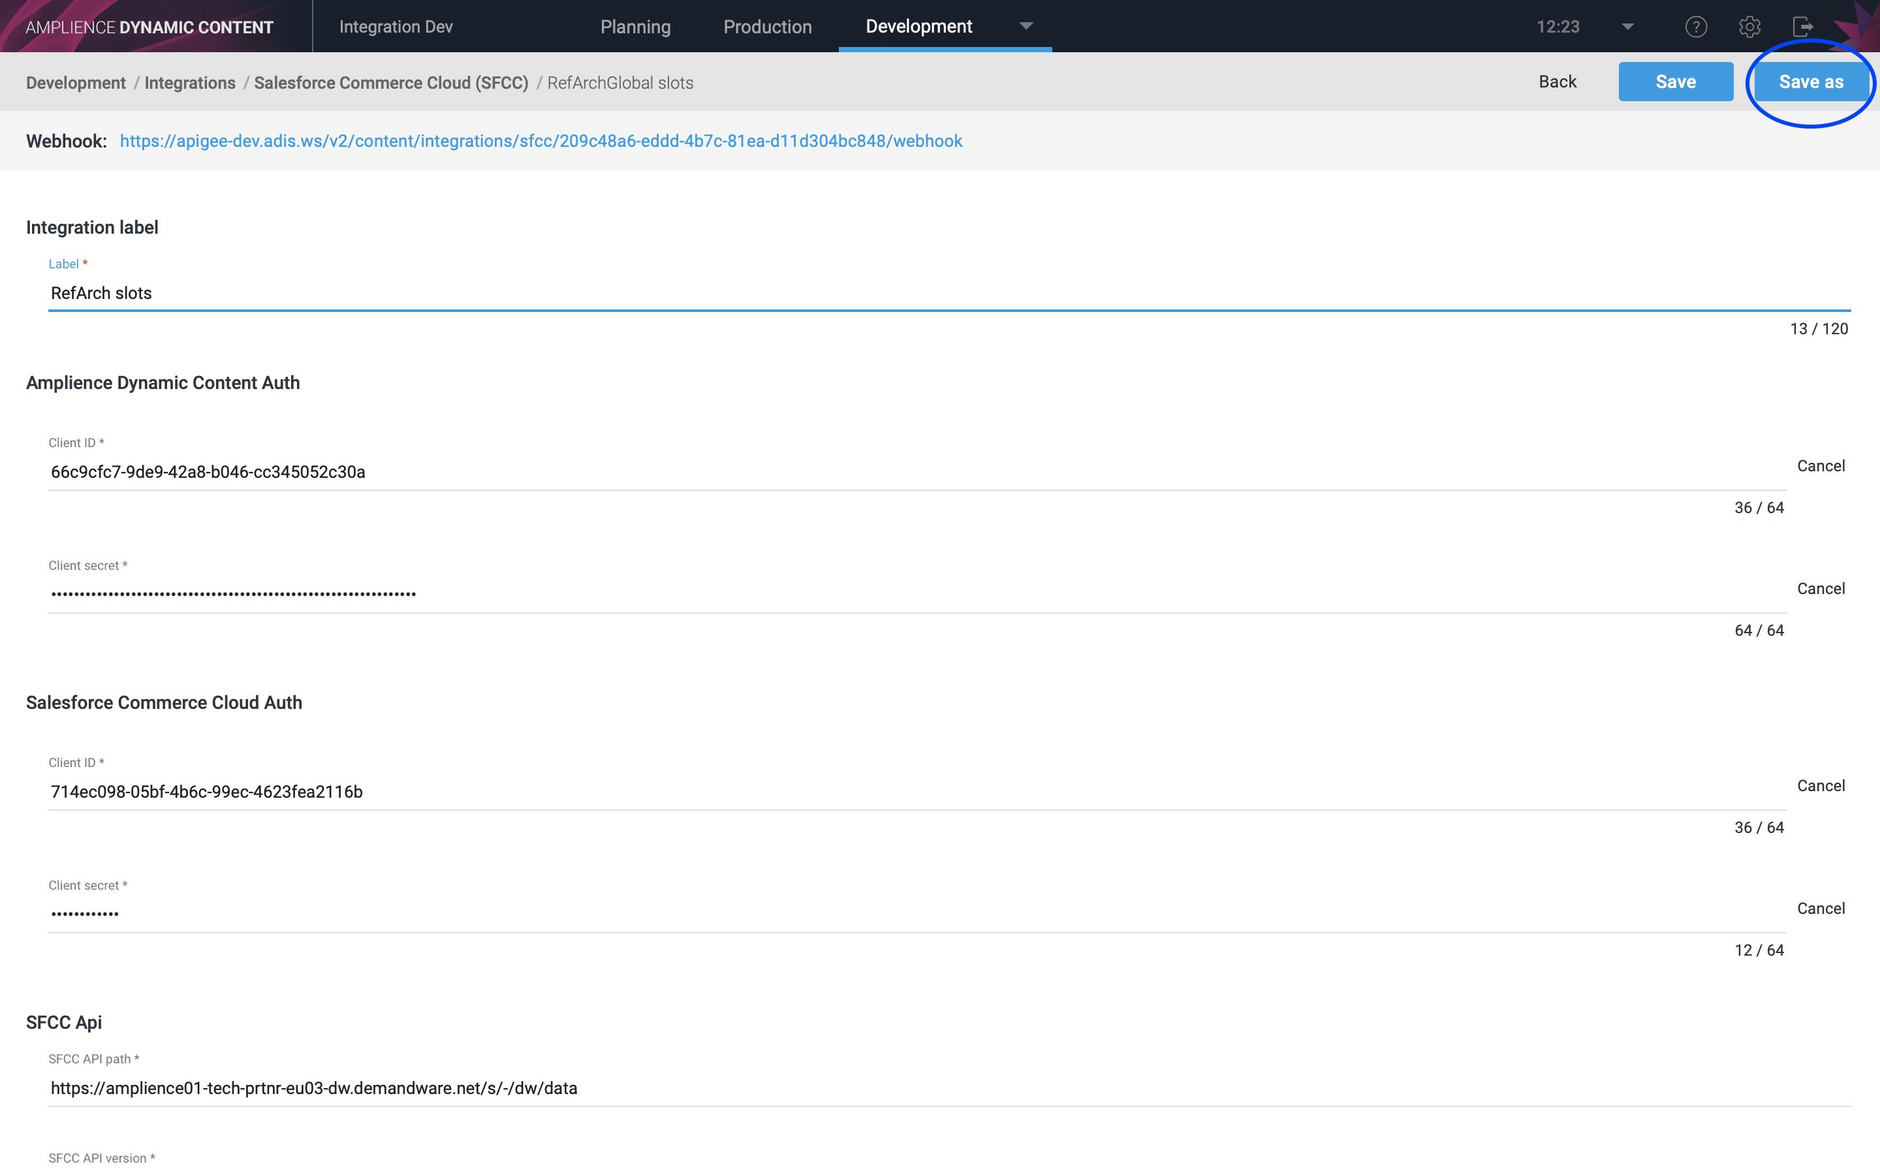
To create a new integration from an existing one you can use the "Save as" feature. See Using Save As to create an integration.
Adding Client IDs and secretsLink copied!
From the Add Integration screen you can add a content slot integration, a content asset integration or both. Some fields are common to both kinds of integration and required fields are marked with a "*".
Give the integration a label. This can be anything you like and is used to identify the integration in the list and used as a label for its webhook.
While you can create one integration to include both content slots and content assets, we recommend creating a separate integration for content assets so that your integrations are easier to maintain.
The fields common to both content slot and content asset integrations are shown below.
| Field | Description |
|---|---|
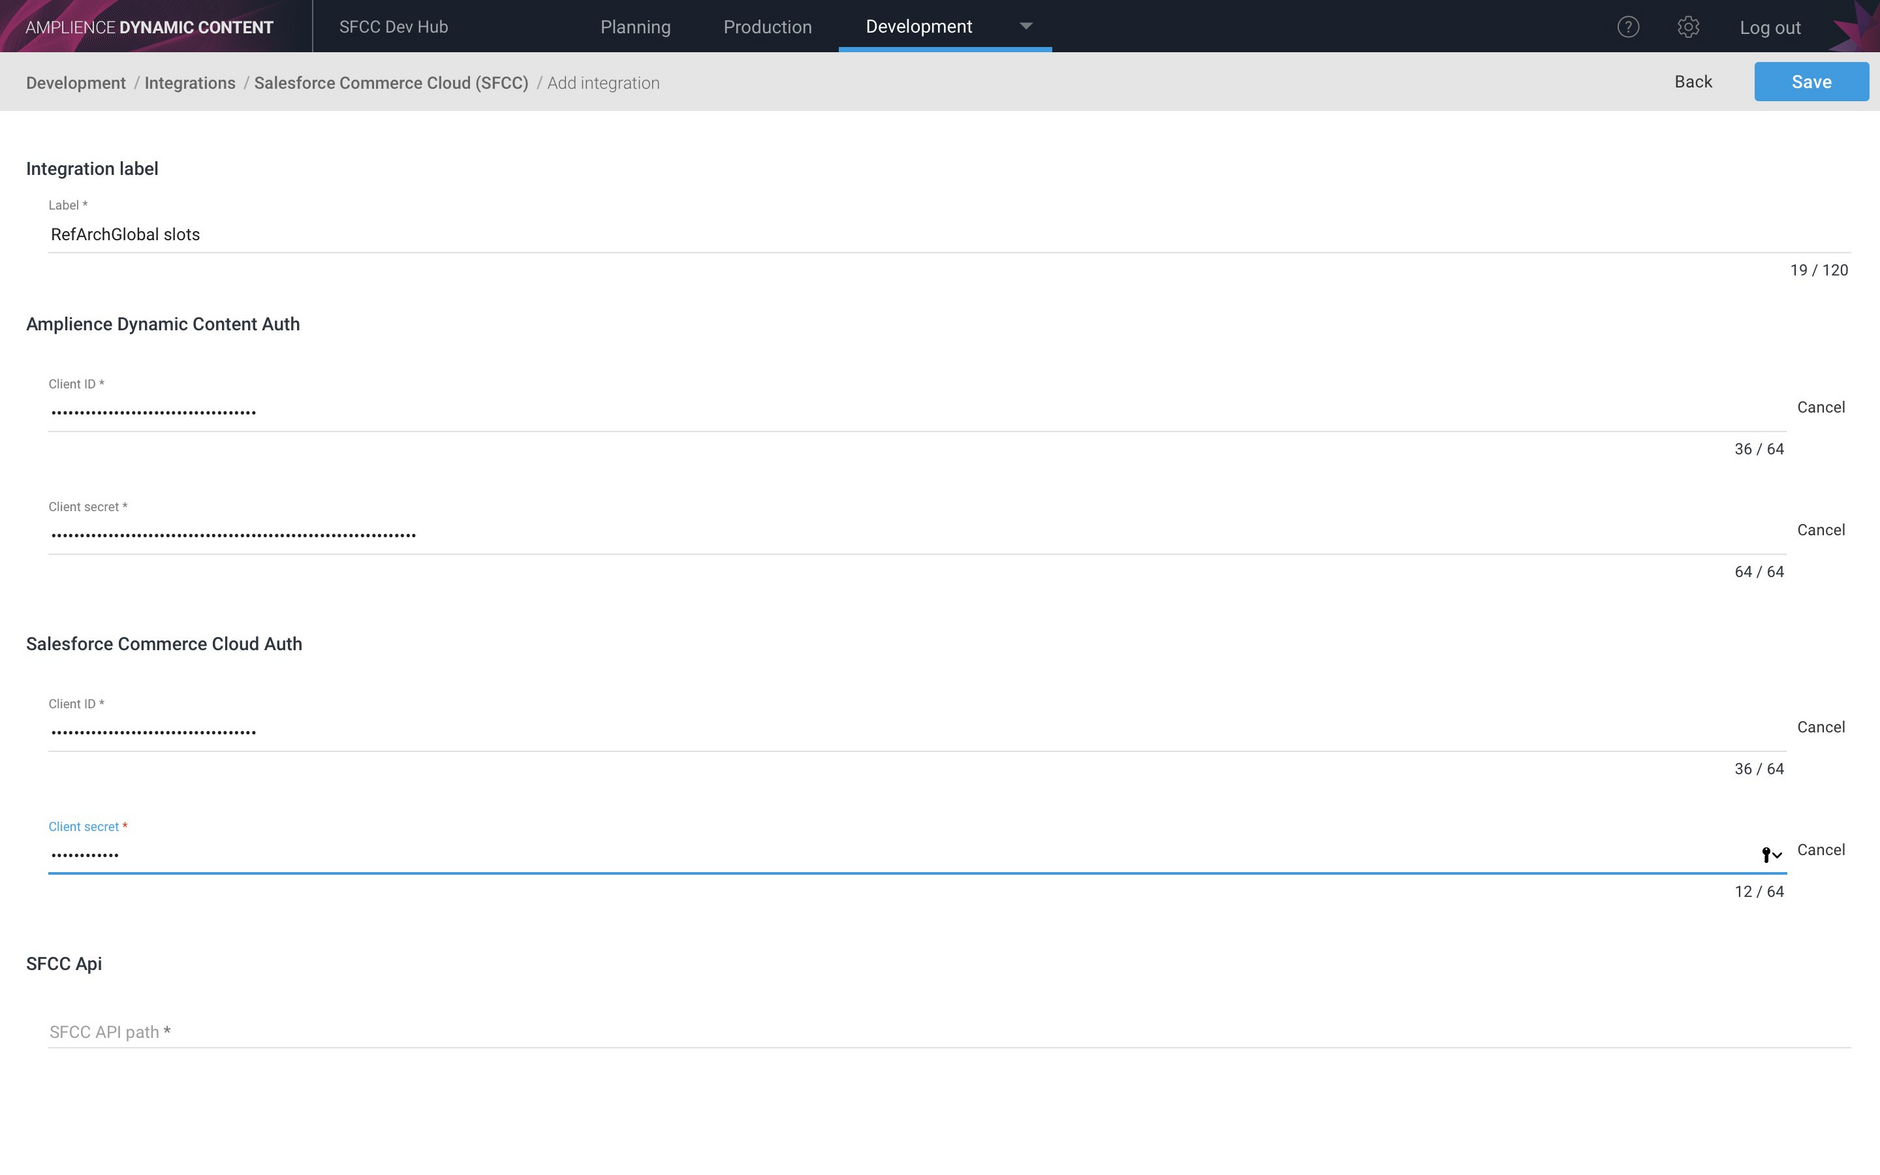
| Dynamic Content Client ID | Dynamic Content authentication. Provided to you by Amplience at the beginning of your project. |
| Dynamic Content Client secret | Provided to you by Amplience at the beginning of your project. |
| SFCC API Client ID | In order to allow the Dynamic Content integration to access the Open Commerce API (OCAPI) on your Salesforce instance, create a new API client and add the client ID to this field. You can add a new API Client from the SFCC Account Manager. |
| SFCC API Secret | When you create an API Client in the SFCC Account Manager, you will also specify an API Secret. See the Setting up a Client ID in SFCC section for more details. |
Enter these fields in the Add Integration screen, as shown in the image below.
API path and versionLink copied!
You will also need to specify the API path and OCAPI version:
| Field | Description |
|---|---|
| SFCC API path | This is the path to your the Salesforce Open Commerce API (OCAPI) data API on your SFCC instance. For example: https://yoursandbox.demandware.net/s/-/dw/data Note that there must be a valid SSL certificate attached to this domain. For all sandboxes the SSL certificate is *.demandware.net so if your sandbox URL uses dot notation, for example: mydomain.cust-eu03.dw.demandware.net, it must be converted to dash notation: mydomain-cust-eu03-dw.demandware.net |
| SFCC API version | This is the version of OCAPI on your SFCC instance that you wish to use. See the SFCC FAQs for more details. |
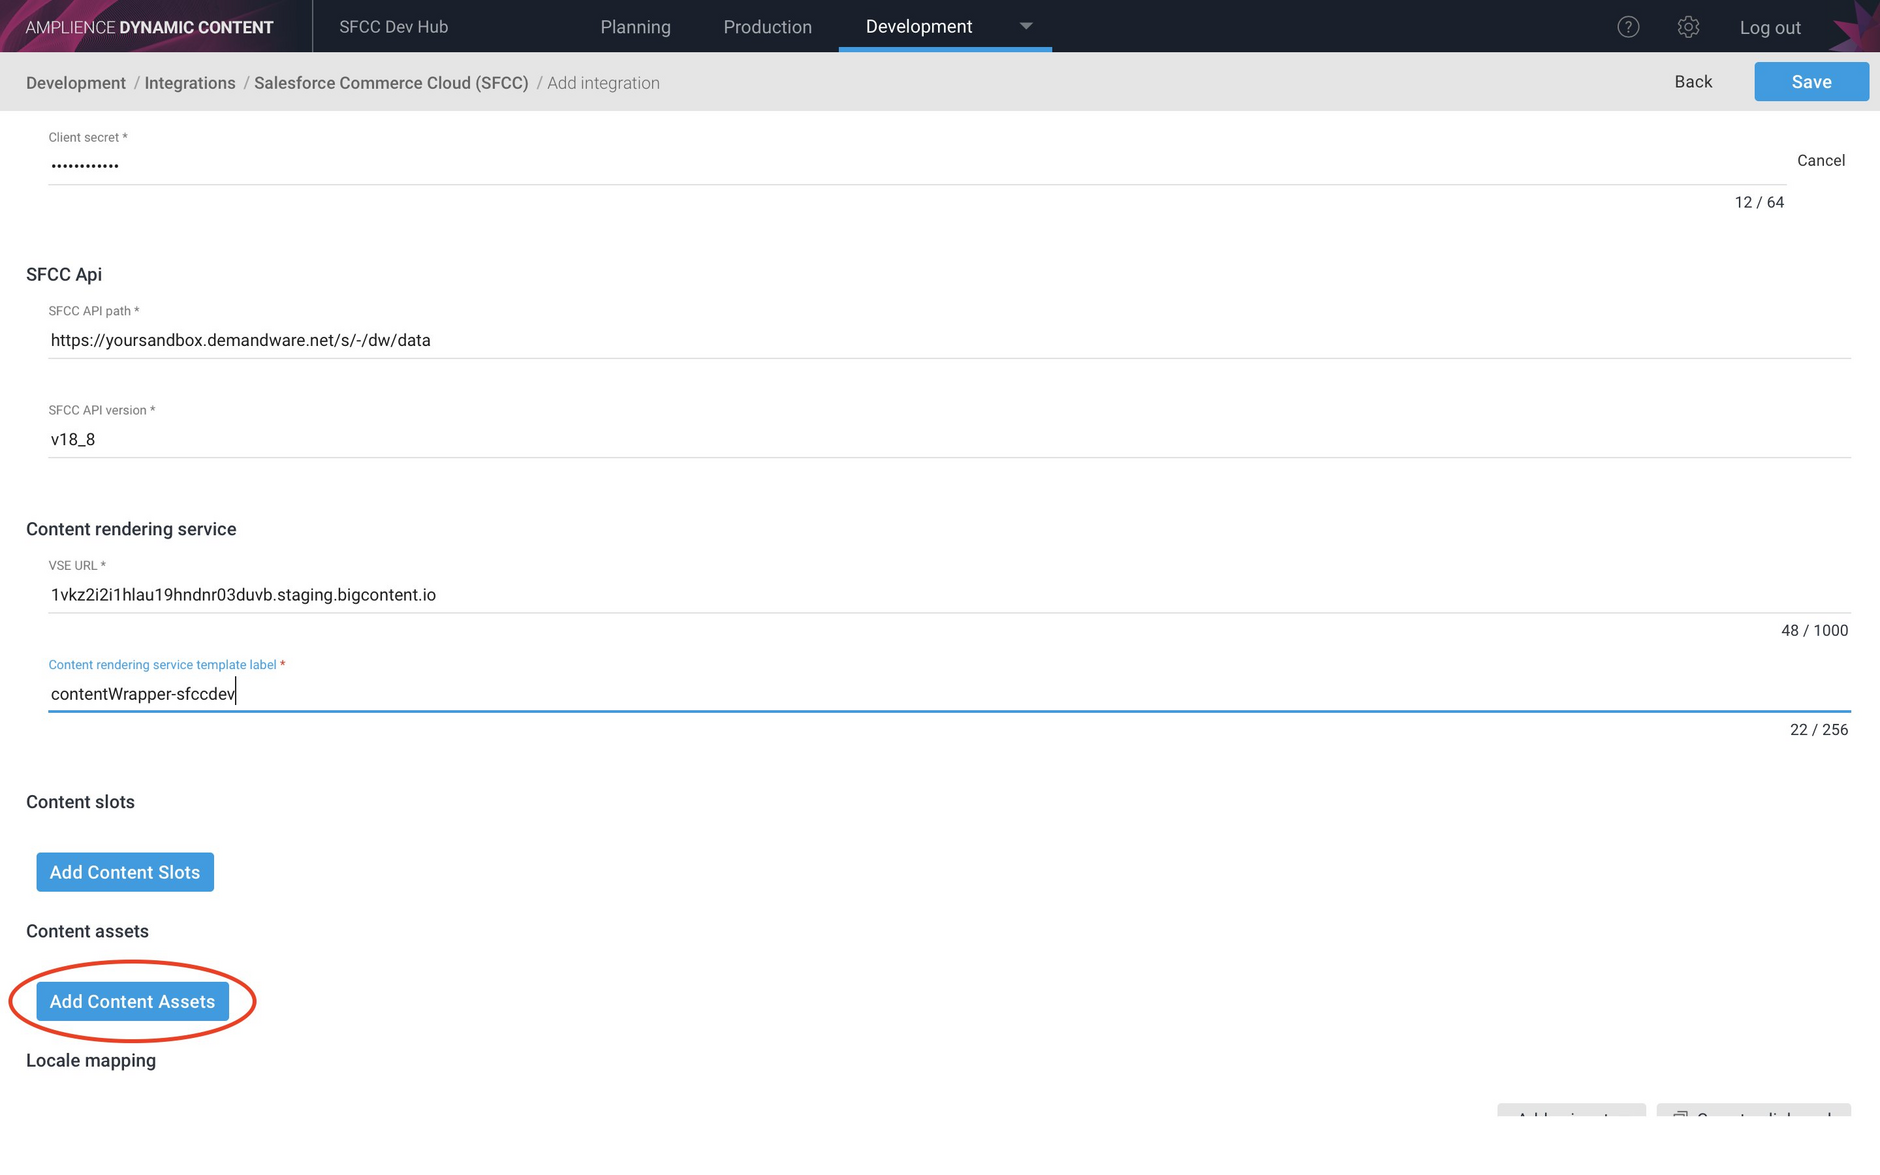
You should enter the API path for your SFCC instance and the version you wish to use as shown in the image below.
Content rendering service fieldsLink copied!
The final required section contains the fields to configure the integration's use of the Content Rendering service: the virtual staging environment (VSE) URL and the handlebars wrapper template.
| Field | Description |
|---|---|
| VSE URL | The virtual staging domain that the integration will use to deliver content. The URL will be provided to you at the start of your project and will generally be the same URL as set up in your Preview settings in the Dynamic Content app. |
| Content rendering service wrapper template | For a slot based integration, the wrapper template will be called by the integration to convert slot content into HTML and should include your supported slot types. For an example of a handlebars template for use with a content slot integration see the slot mapping page. For a content asset integration the template should include each content type you support. Rather than include all the logic in this top level template, we recommend using the handlebars partials feature to load in templates specific to a particular content type. |
An example of a wrapper template for a content asset integration is shown below. For each content type, the wrapper will then load the corresponding partial. The use of partials is explained in more detail on the handlebars page.
Note that all handlebars templates, including the wrapper template, must be stored in Content Hub. When you specify the name of the wrapper template it should not be suffixed with ".html", although it will appear as an HTML file in Content Hub.
Adding a content slot integrationLink copied!
When the standard fields have been added, you will need to setup content slots or content assets for this integration and then add the fields that are specific to your chosen type of integration.
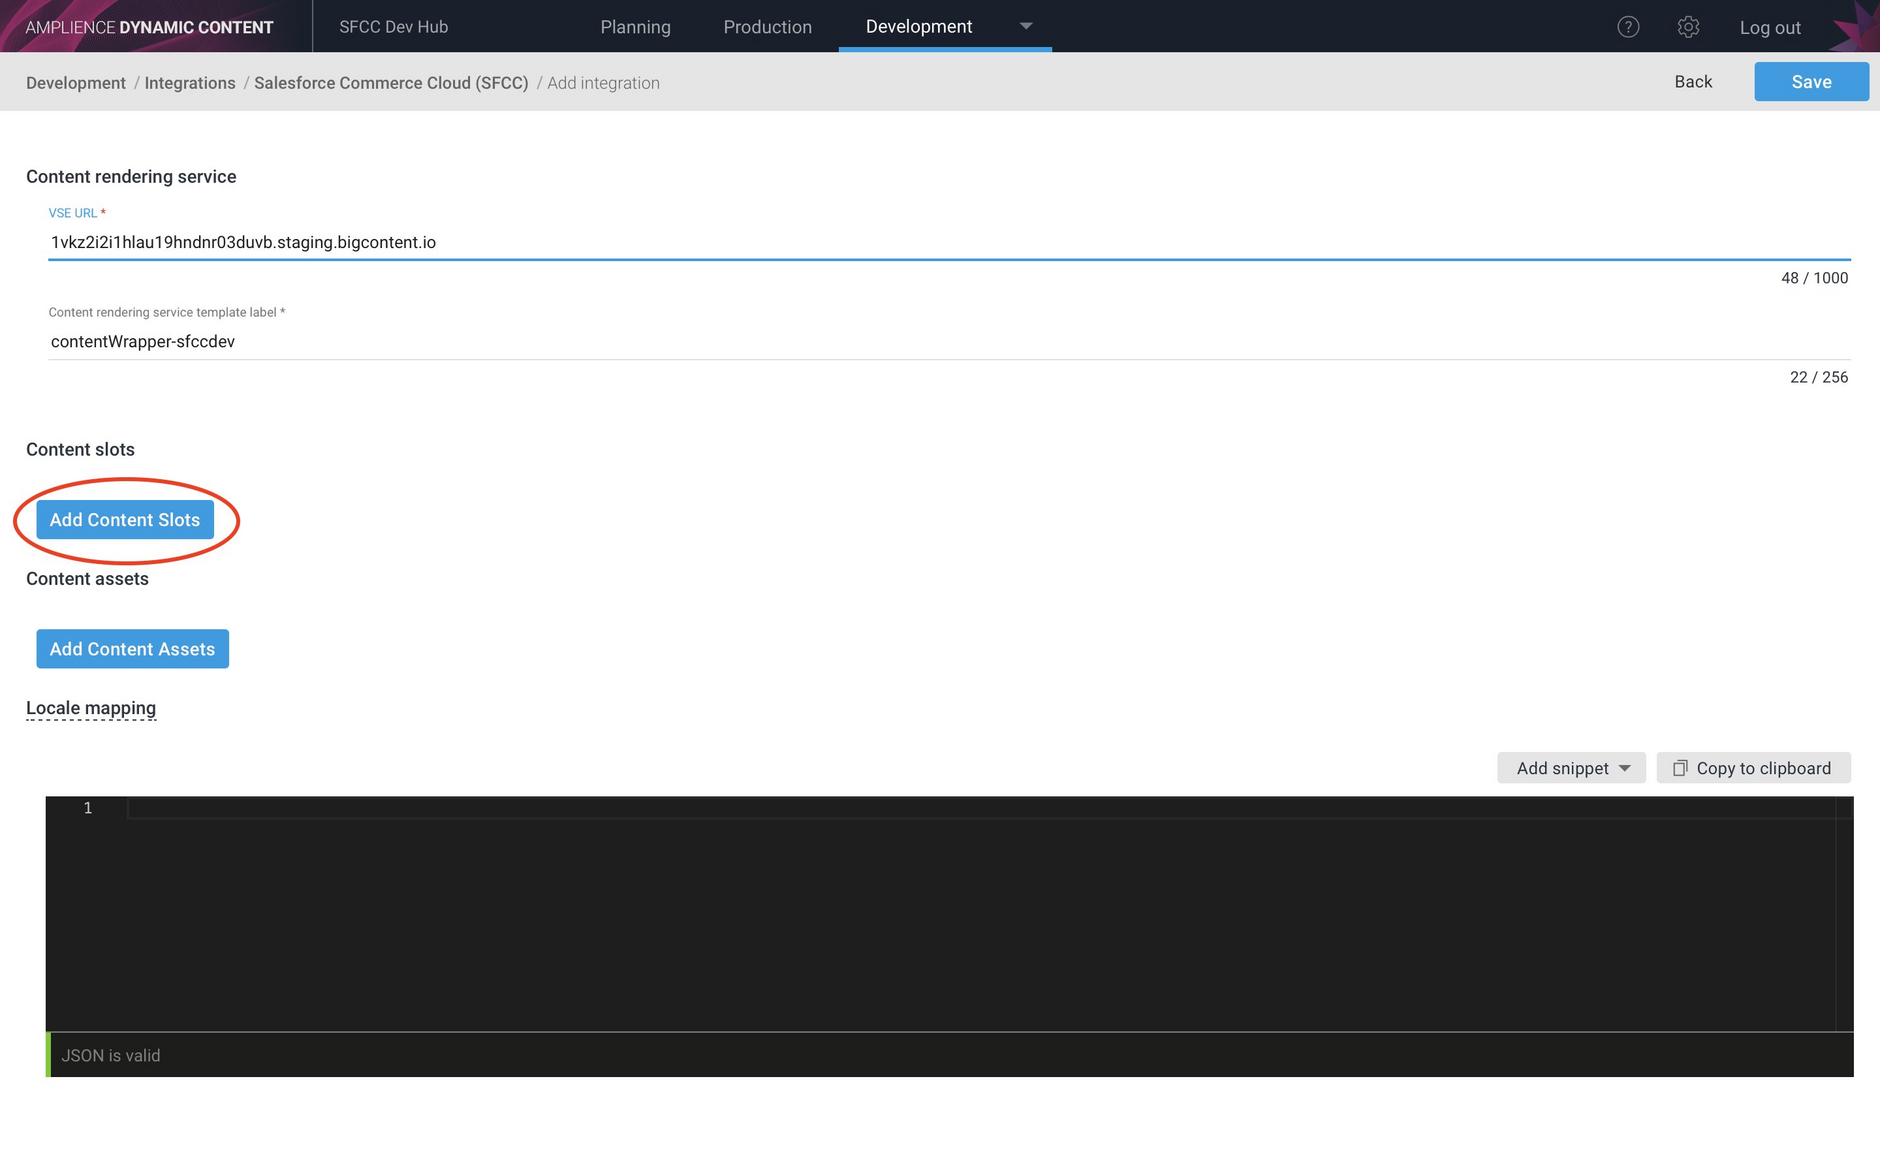
To add a content slot integration click the "Add Content Slots" button as shown:
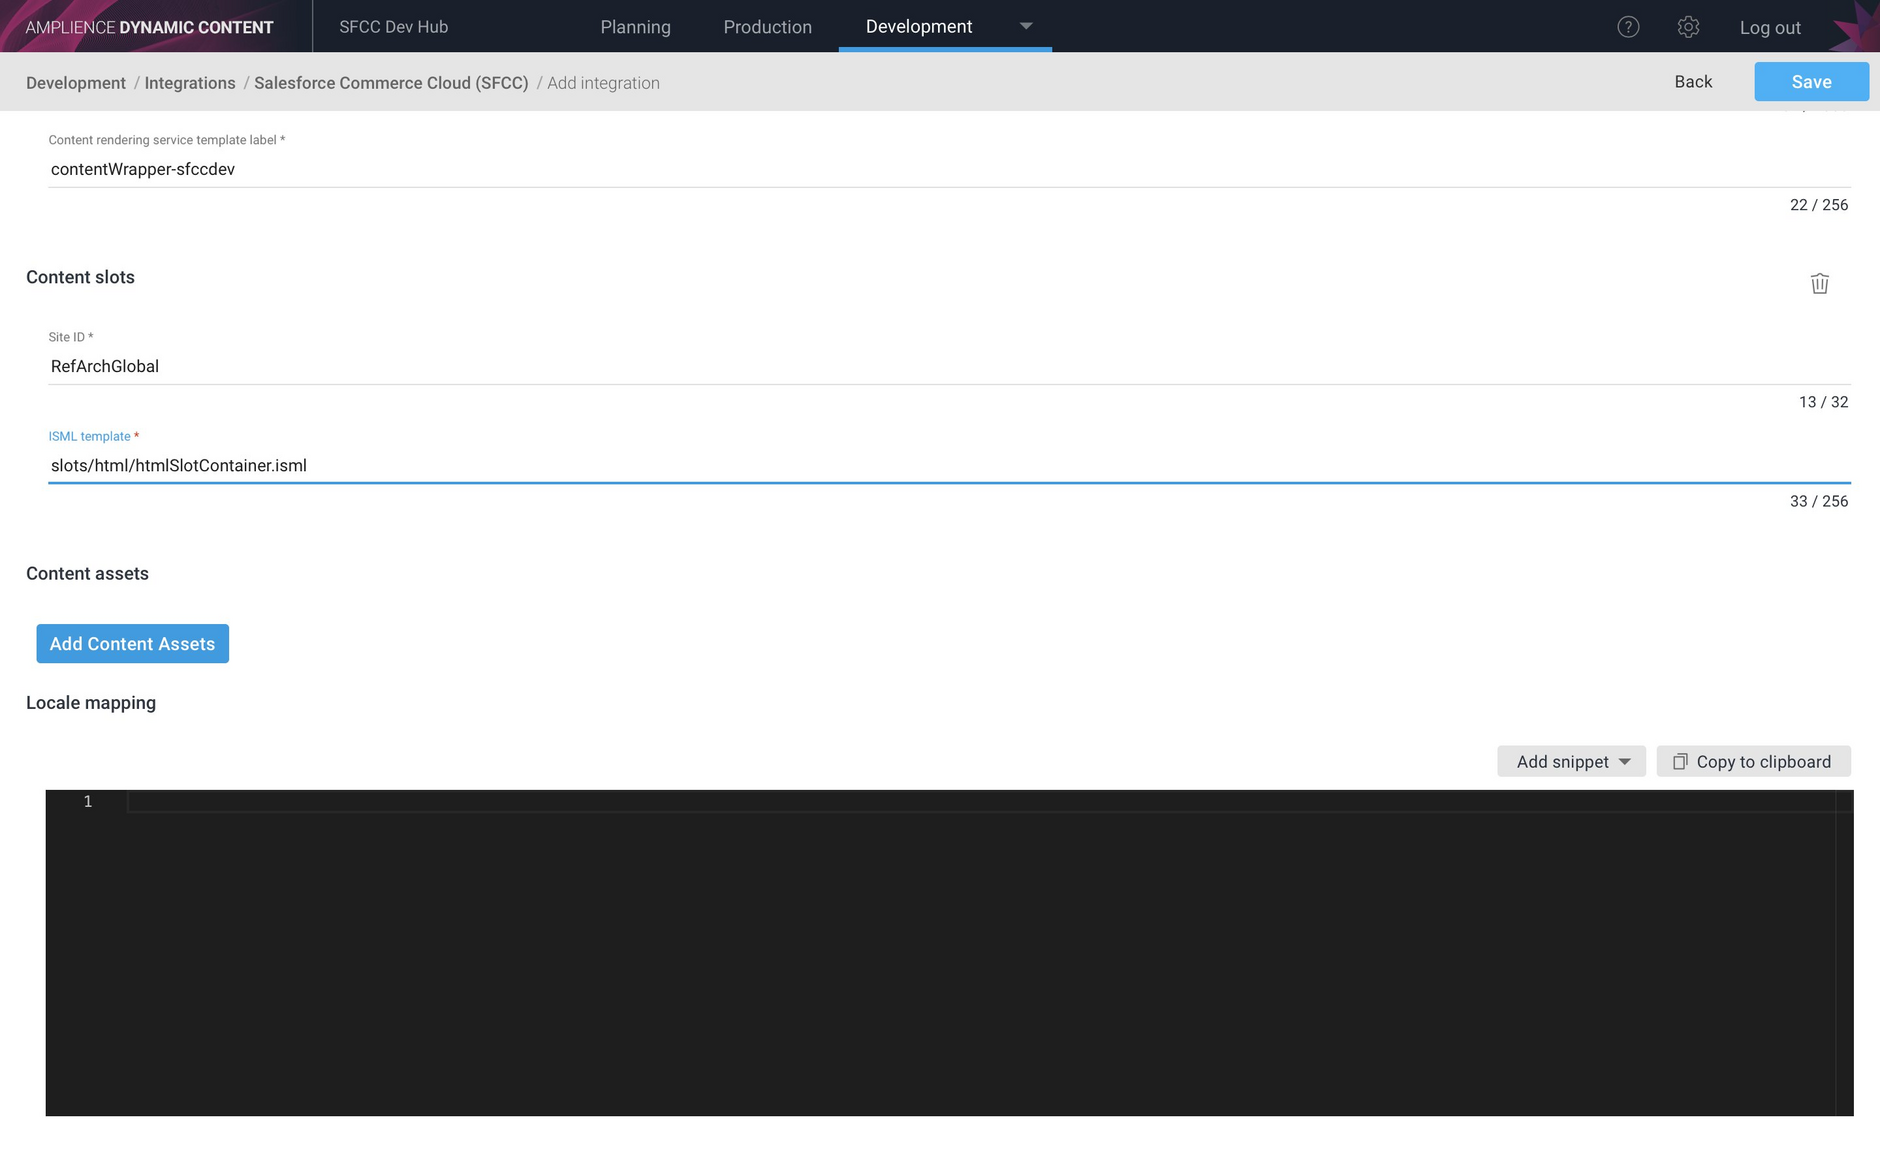
To finish configuring the integration you'll need to provide the site id and the ismlTemplate you want to use.
| Field | Description |
|---|---|
| site | This is the site id that you wish to publish content to. Slots in SFCC are site specific. |
| ismlTemplate | This is a template in your storefront cartridge that is used for slots of type HTML. The standard path for SiteGenesis is: slots/html/htmlslotcontainer.isml and the standard path for Storefront Reference Architecture (SFRA) is: slots/html/htmlSlotContainer.isml |
In the example below we're using the site RefArchGlobal. If you want to support multiple SFCC sites, then a separate integration must be created for each site.
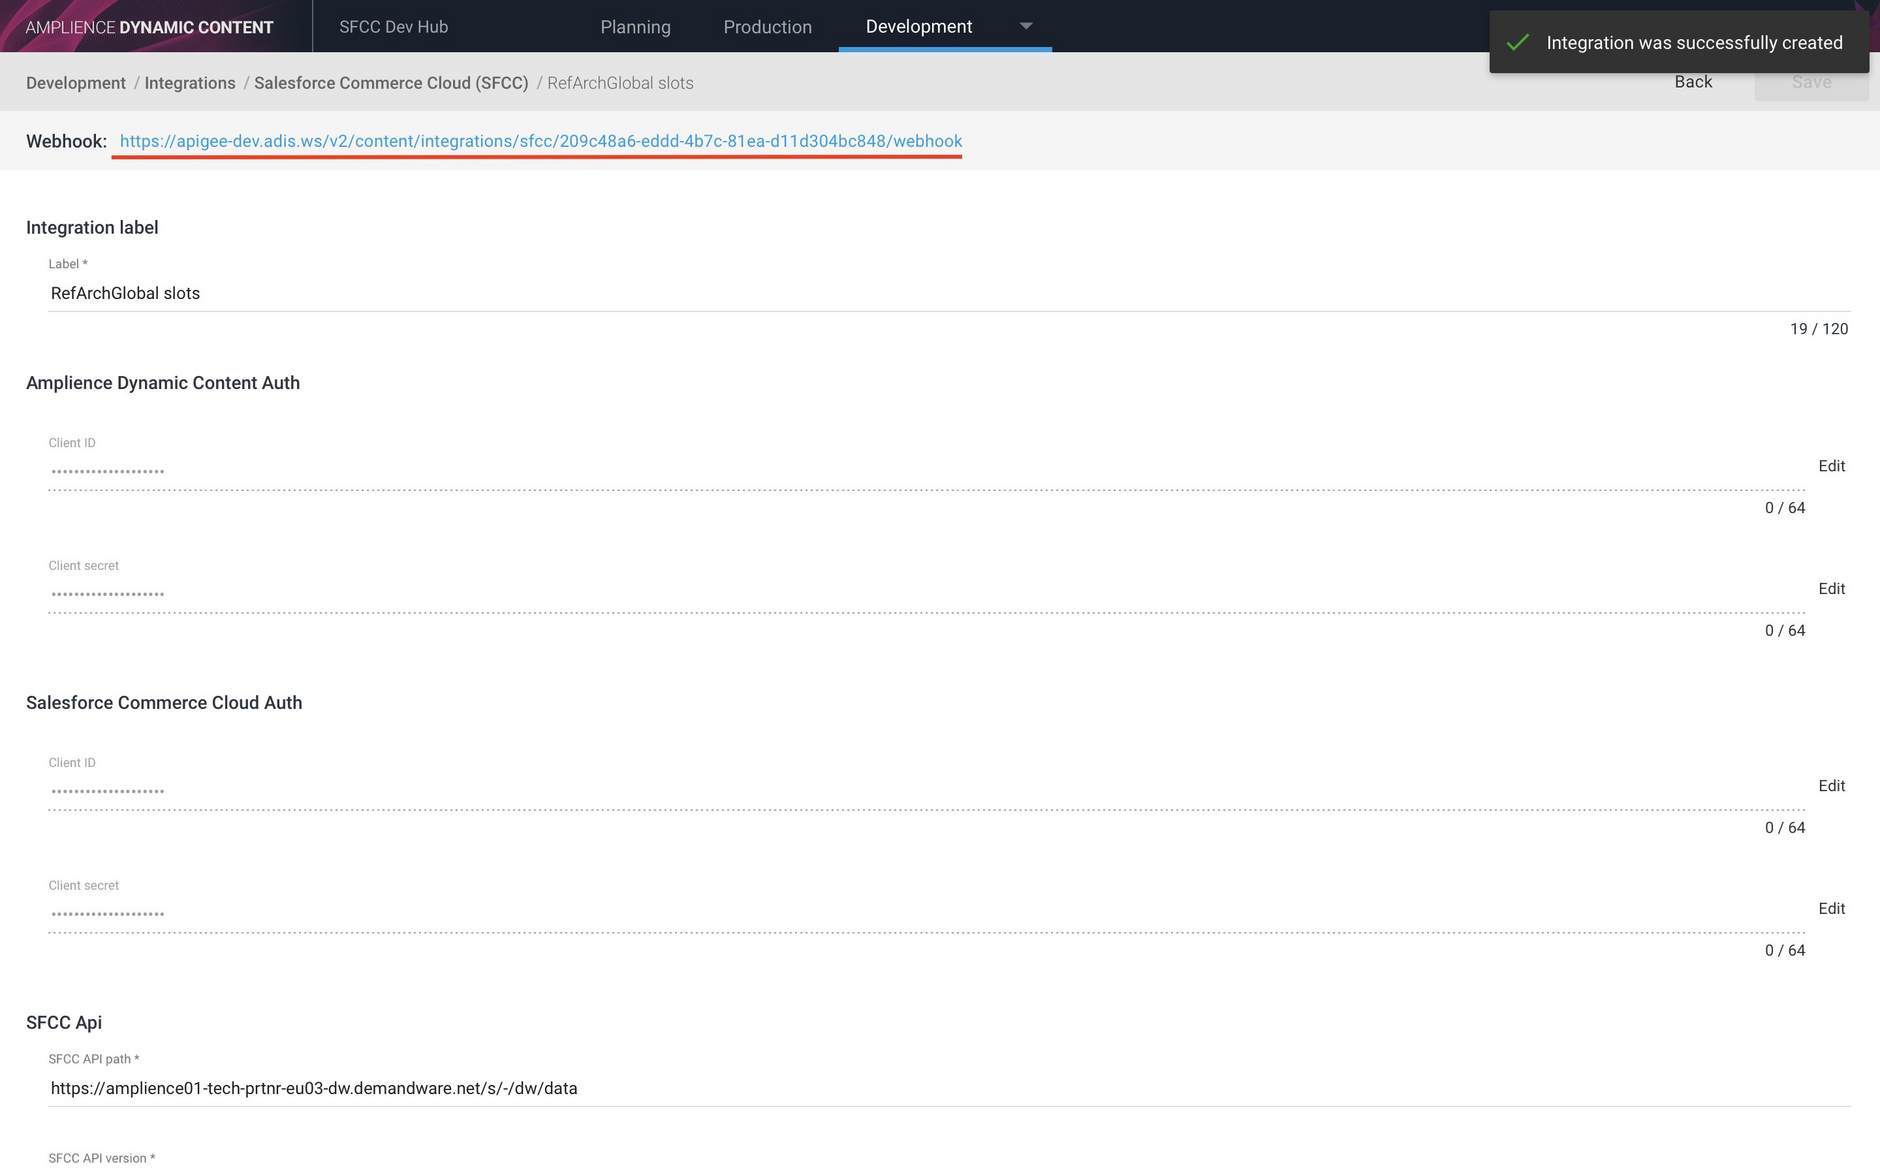
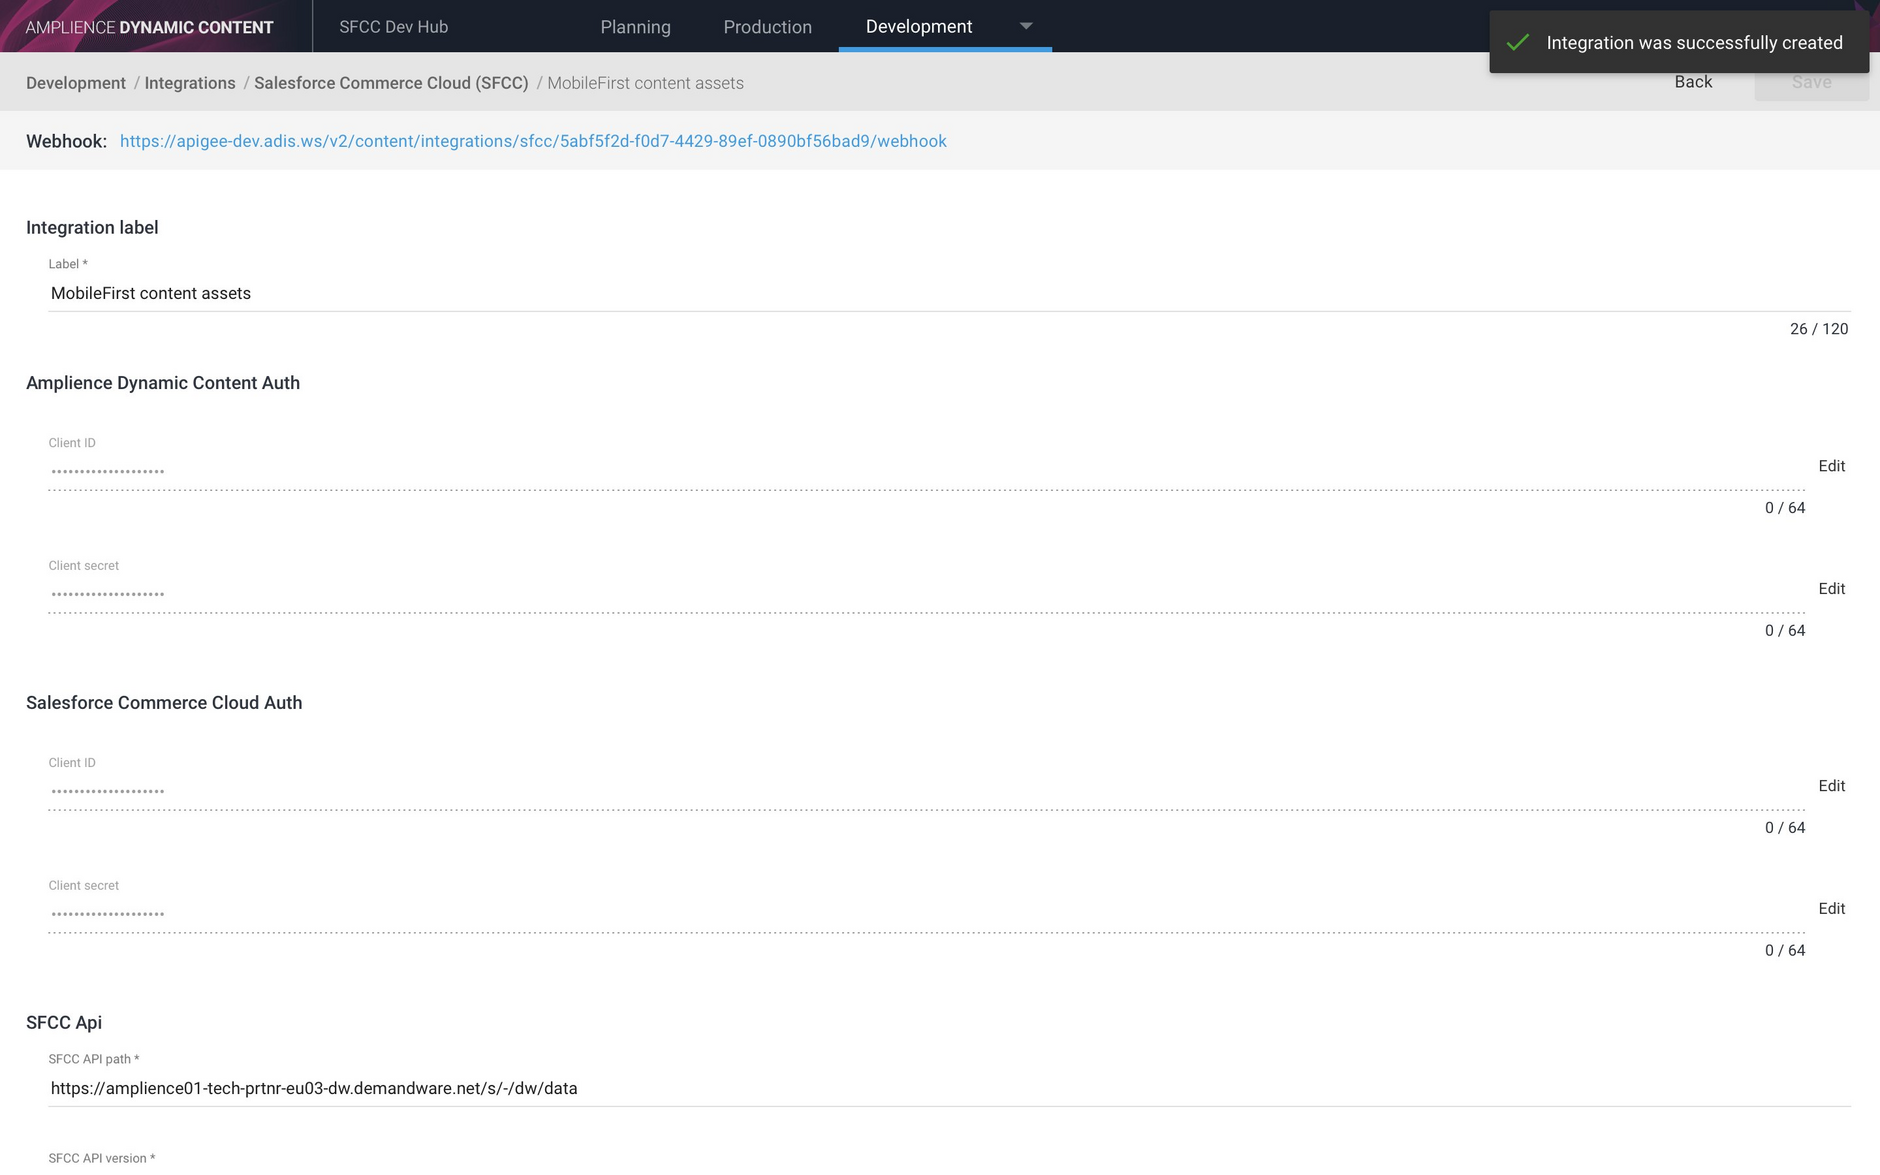
To create the integration click the "Save" button. If all the fields have been entered correctly and the client IDs and secrets are correct, you will get a message to tell you that the integration has been successfully created.
The webhook setup for the integration will be displayed as highlighted in the image below. You can click this link to go to view the webhook history as explained in the viewing error logs section.
The content slot integration is now ready to use. If you are using the integration's localization features then you will need to enter the locale mappings.
Adding a content asset integrationLink copied!
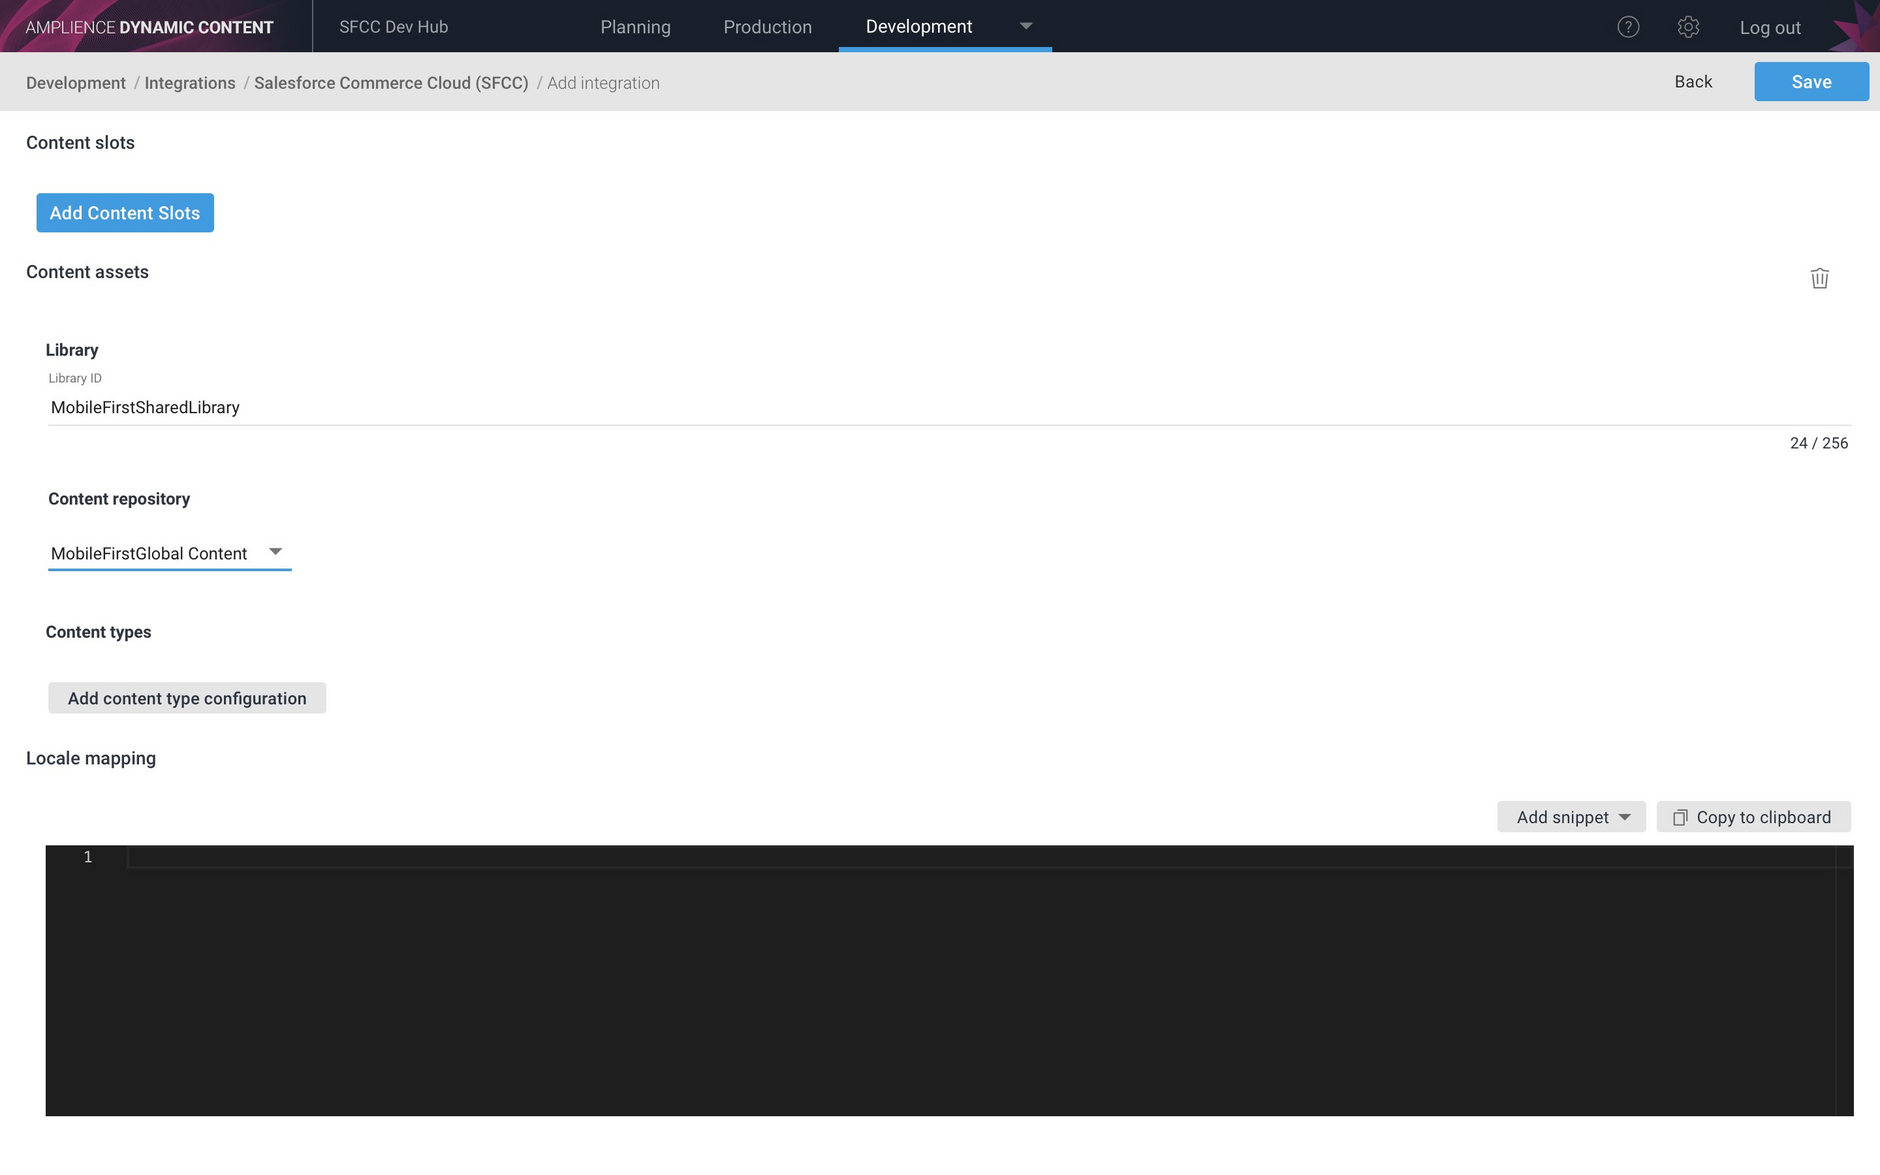
To add a content asset integration click the "Add Content Assets" button. You will then need to enter the required information to configure content assets.
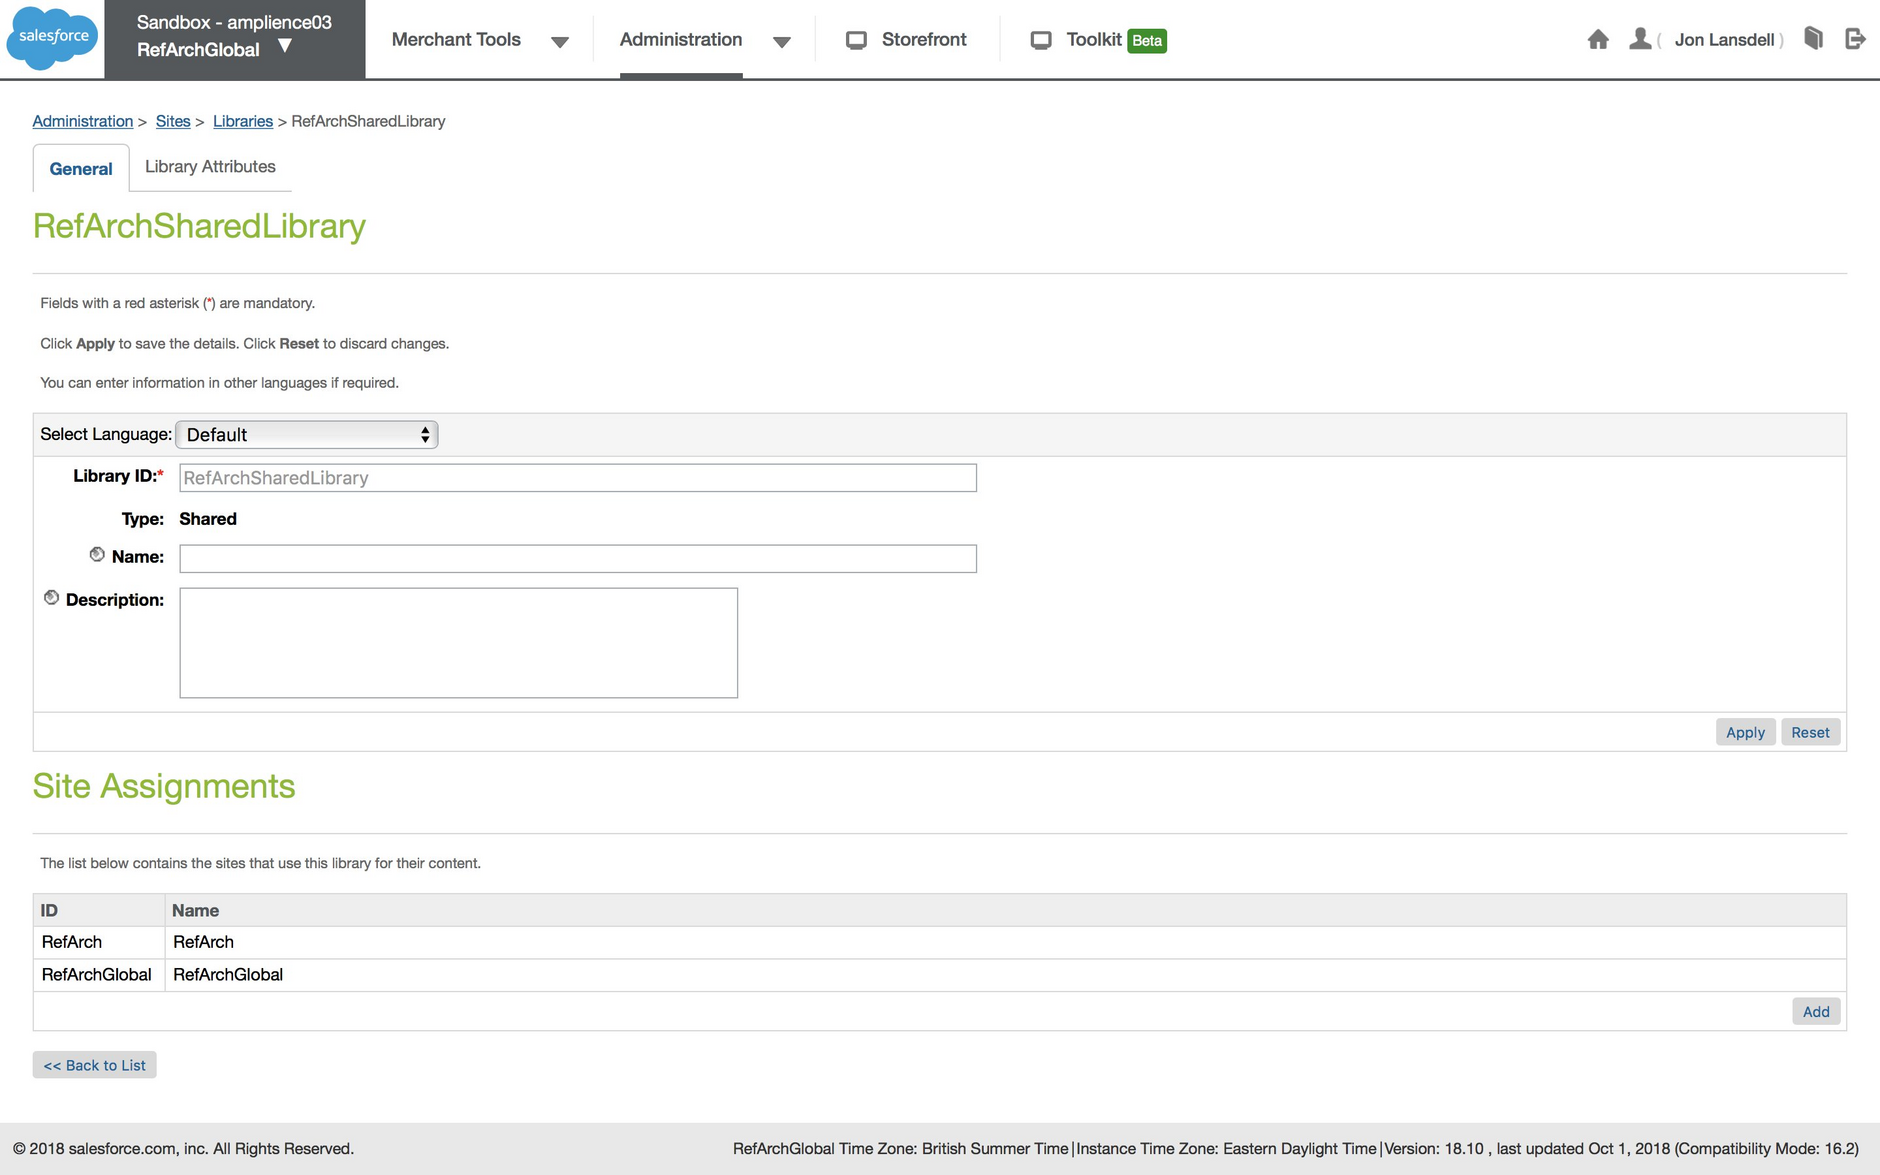
In the Library section, fill in the library ID. This is the ID of the shared library within which the content assets will be created, or the site-id in the case of a private library.
Finding the library IDLink copied!
To find the library ID, go to the Administration section in Salesforce Business Manager, choose Sites -> Libraries and find the library you want to use.
Specifying the update methodLink copied!
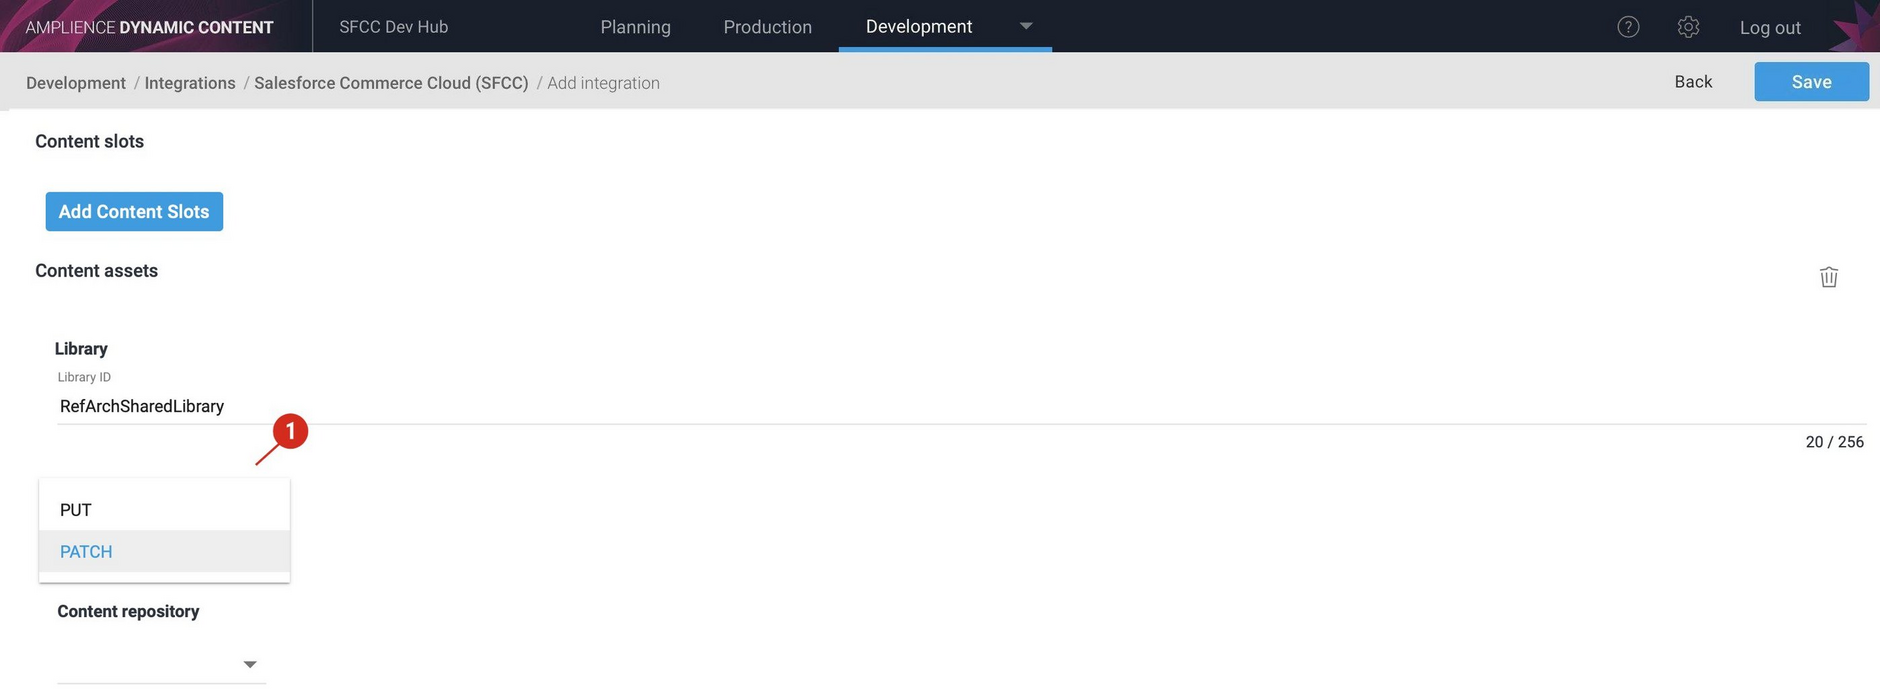
In the update method field you choose how you'd like to manage content assets by choosing either "PUT" or "PATCH".
The update method depends on your chosen workflow and specifies what the integration should do when a content item is published in Dynamic Content.
-
Choose PUT to create or overwrite a content asset in SFCC Business Manager when you publish a content item in Dynamic Content.
-
Choose PATCH to create a content asset if one does not exist, but partially update it if it does exist. If you choose this update method then any fields managed in Dynamic Content must be mapped in your field mappings or localized field mappings.
The examples in this section use the "PUT" update method.
For more information about "PATCH" see the using the PATCH update method page.
Specifying a content repositoryLink copied!
You can also optionally set up the integration to only generate content assets from content in a specific Dynamic Content repository. In the example below the MobileFirstGlobalContent repository is chosen, but you can choose to leave the repository field set to "none" so that content assets will be created from all repositories.
If you want to publish to multiple libraries you will need to configure multiple integrations and you can then use a repository filter on each integration to control which content goes to which library.
To save the content asset integration click the "Save" button. A message will tell you if the integration has been successfully created.
For a content asset integration you'll need to do some additional setup. See Setting up a content asset integration for more details.
Viewing error logs for an integrationLink copied!
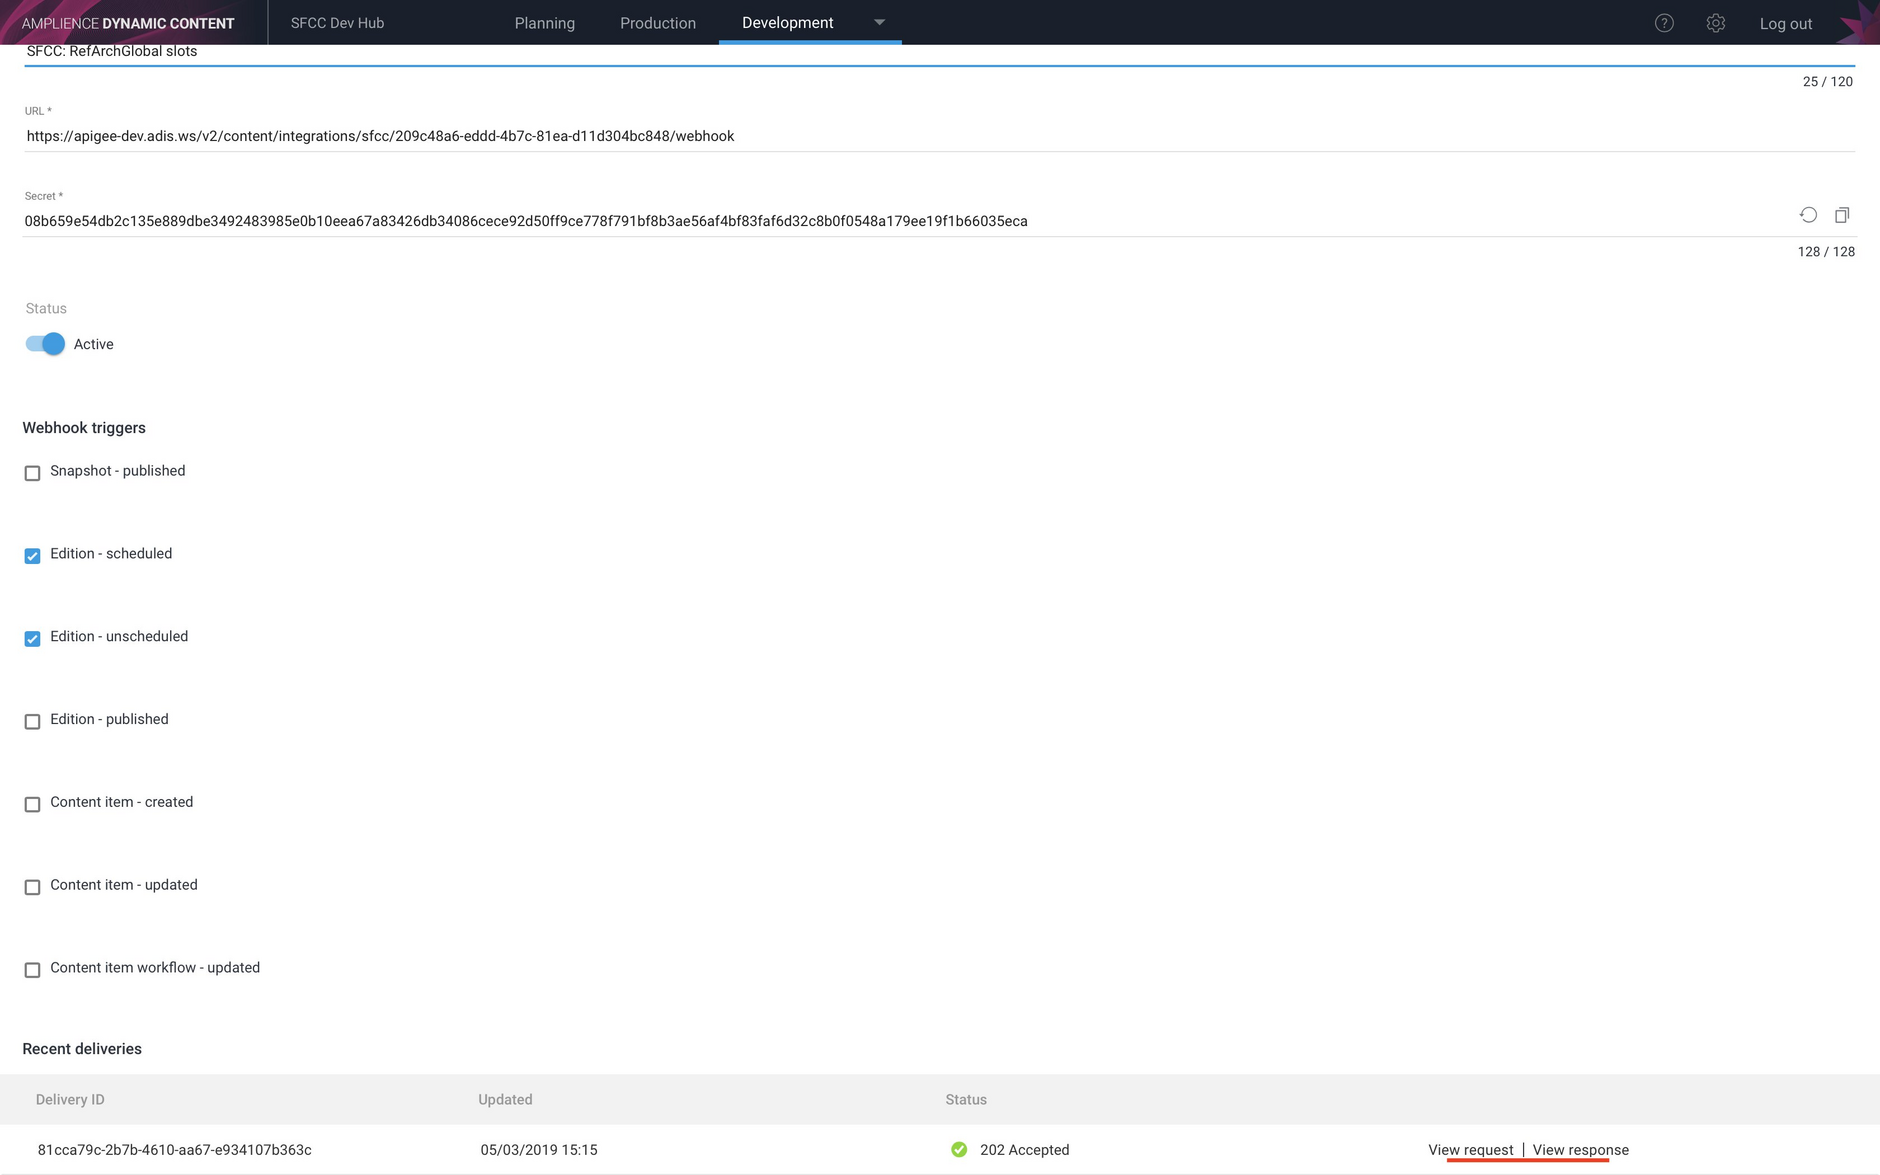
When an integration is saved, a webhook will be created and displayed at the top of the window. Clicking this link opens the webhook logs for this integration, allowing you to view all requests and responses and track down any errors.
Setting localesLink copied!
If you wish to make use of the Dynamic Content SFCC integration's localization features, then you'll need to provide locale mappings. Add the locale mappings to the Locale mapping section.
For more information about locale mapping see the SFCC Localization page.
Using Save As to create an integrationLink copied!
You can quickly create a new integration from an existing one using "Save As". This will set up a new integration using the label that you specify and copy fields from the original integration.
To use the Save As feature you will need to enter Dynamic Content and SFCC client secrets, so to save time find these before you begin.
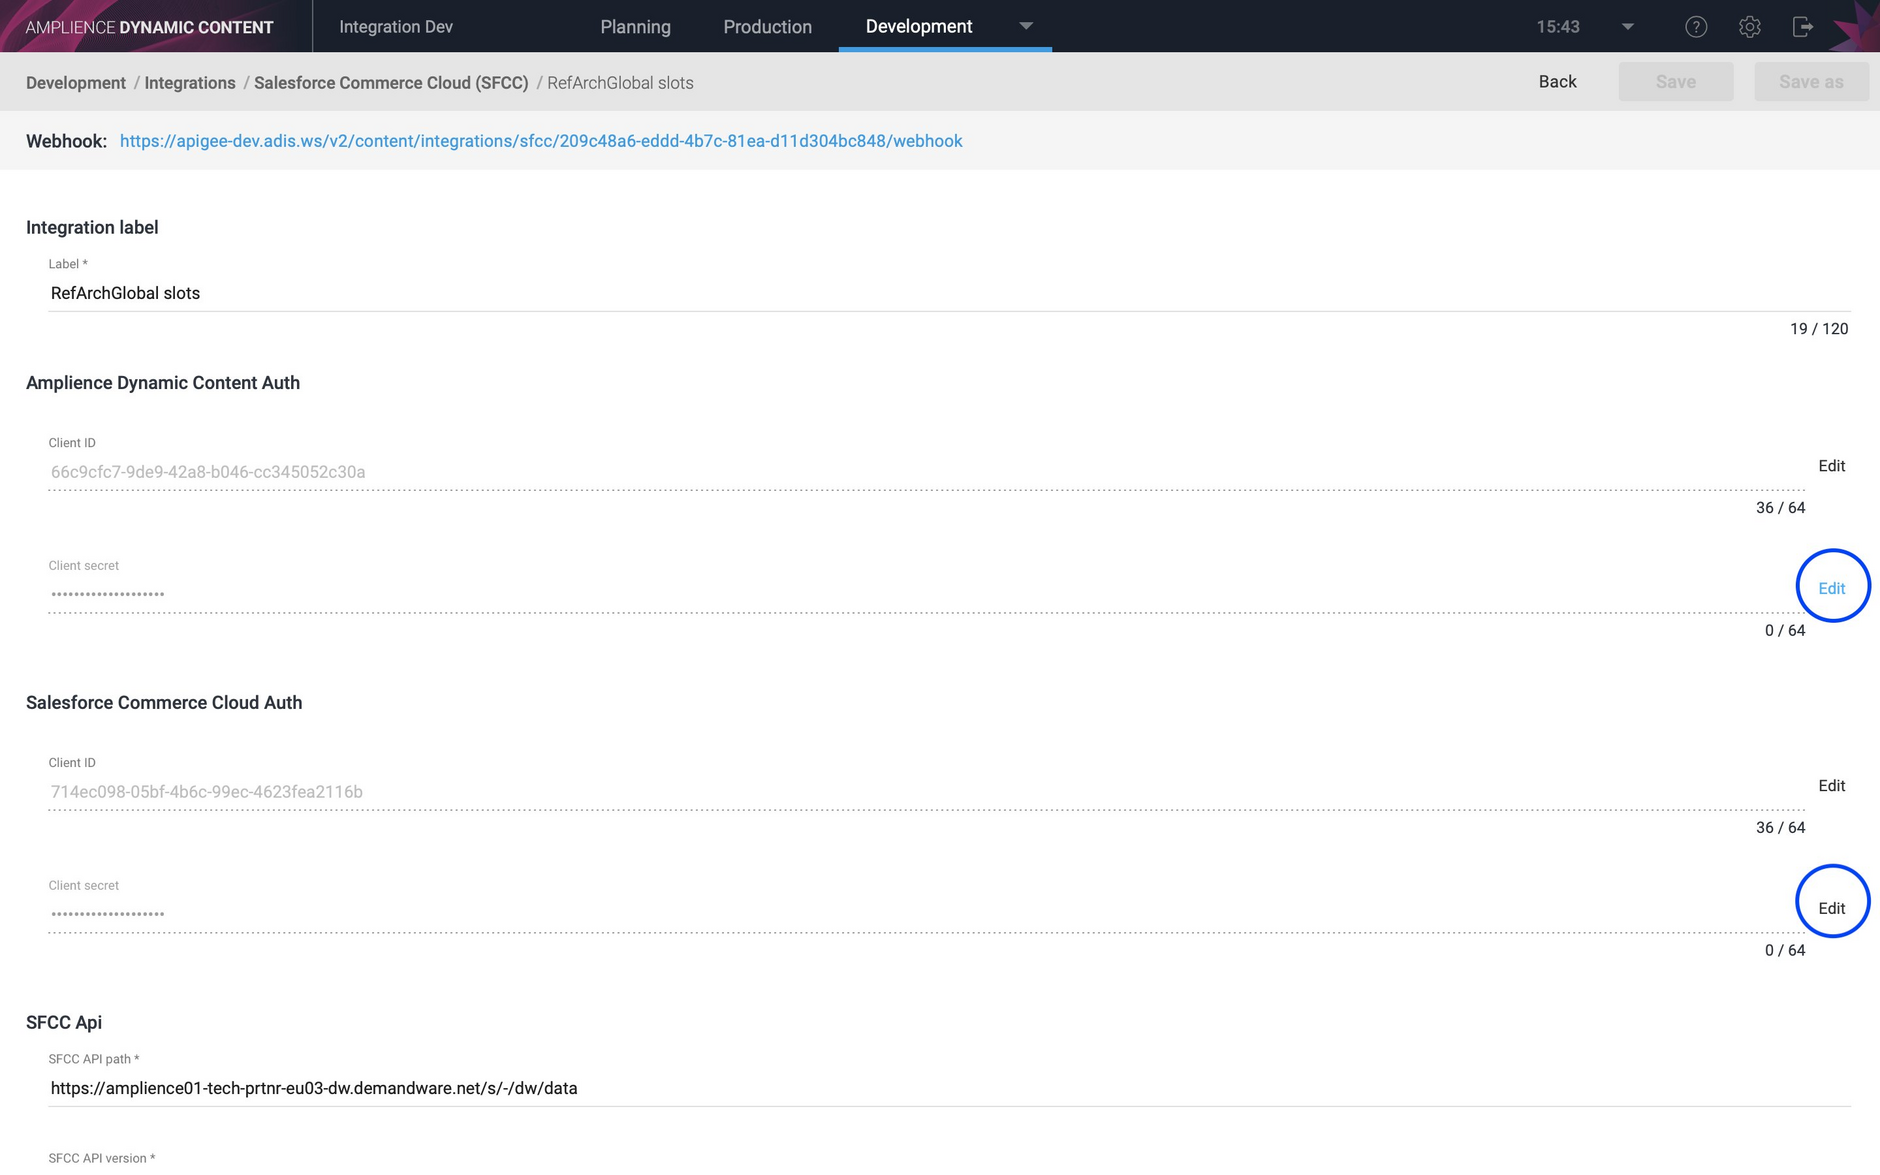
To create a copy of an integration using Save As, open an existing integration. In this example we're using one with the label "RefArchGlobal slots".
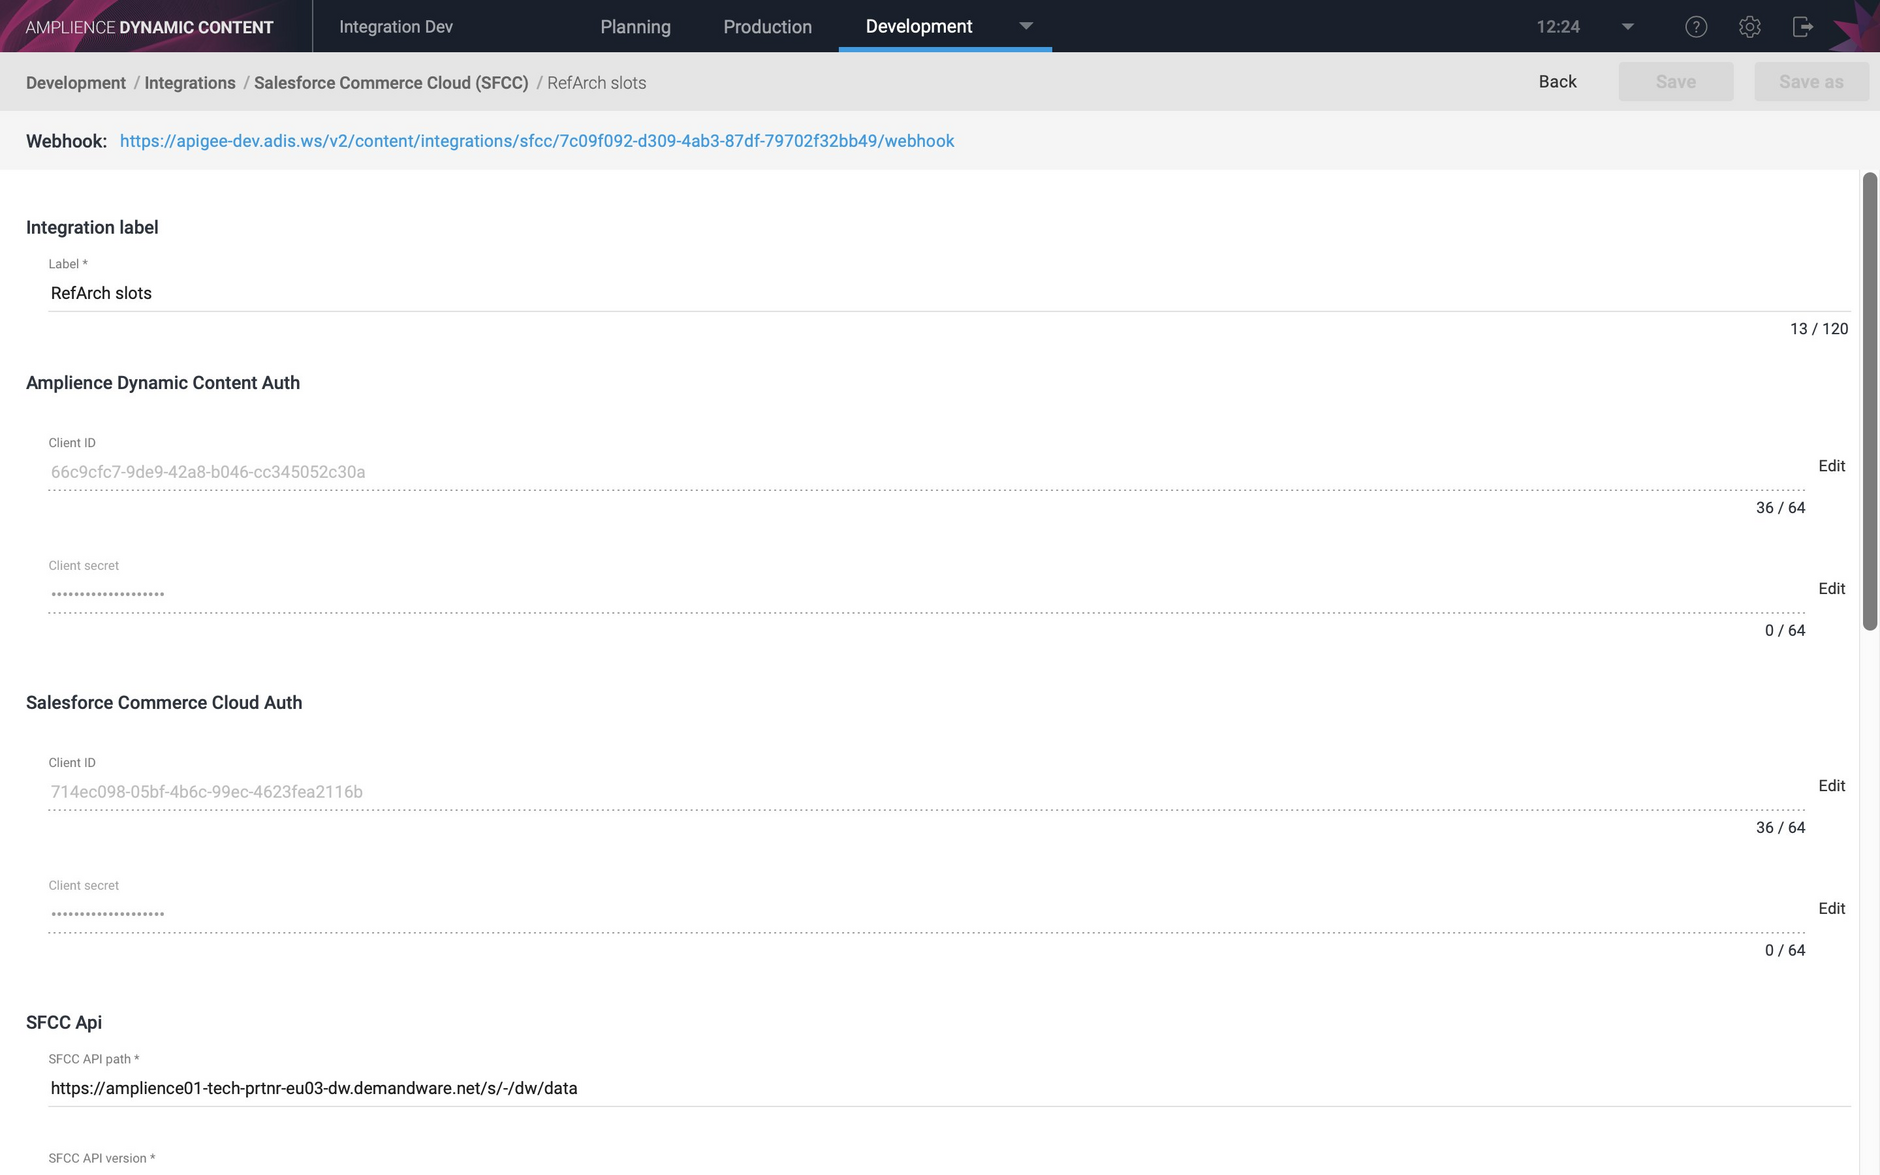
In order to enable the Save As button you must enter values for the Dynamic Content and Salesforce Commerce Cloud client secrets. The secrets are not displayed when you view an integration and so cannot be copied to a new integration. To enter the client secrets, click the "edit" button to the right of the Dynamic Content and SFCC client secret fields and enter a valid secret in each one.
When you have entered the client secrets, the "Save As" button will be enabled.
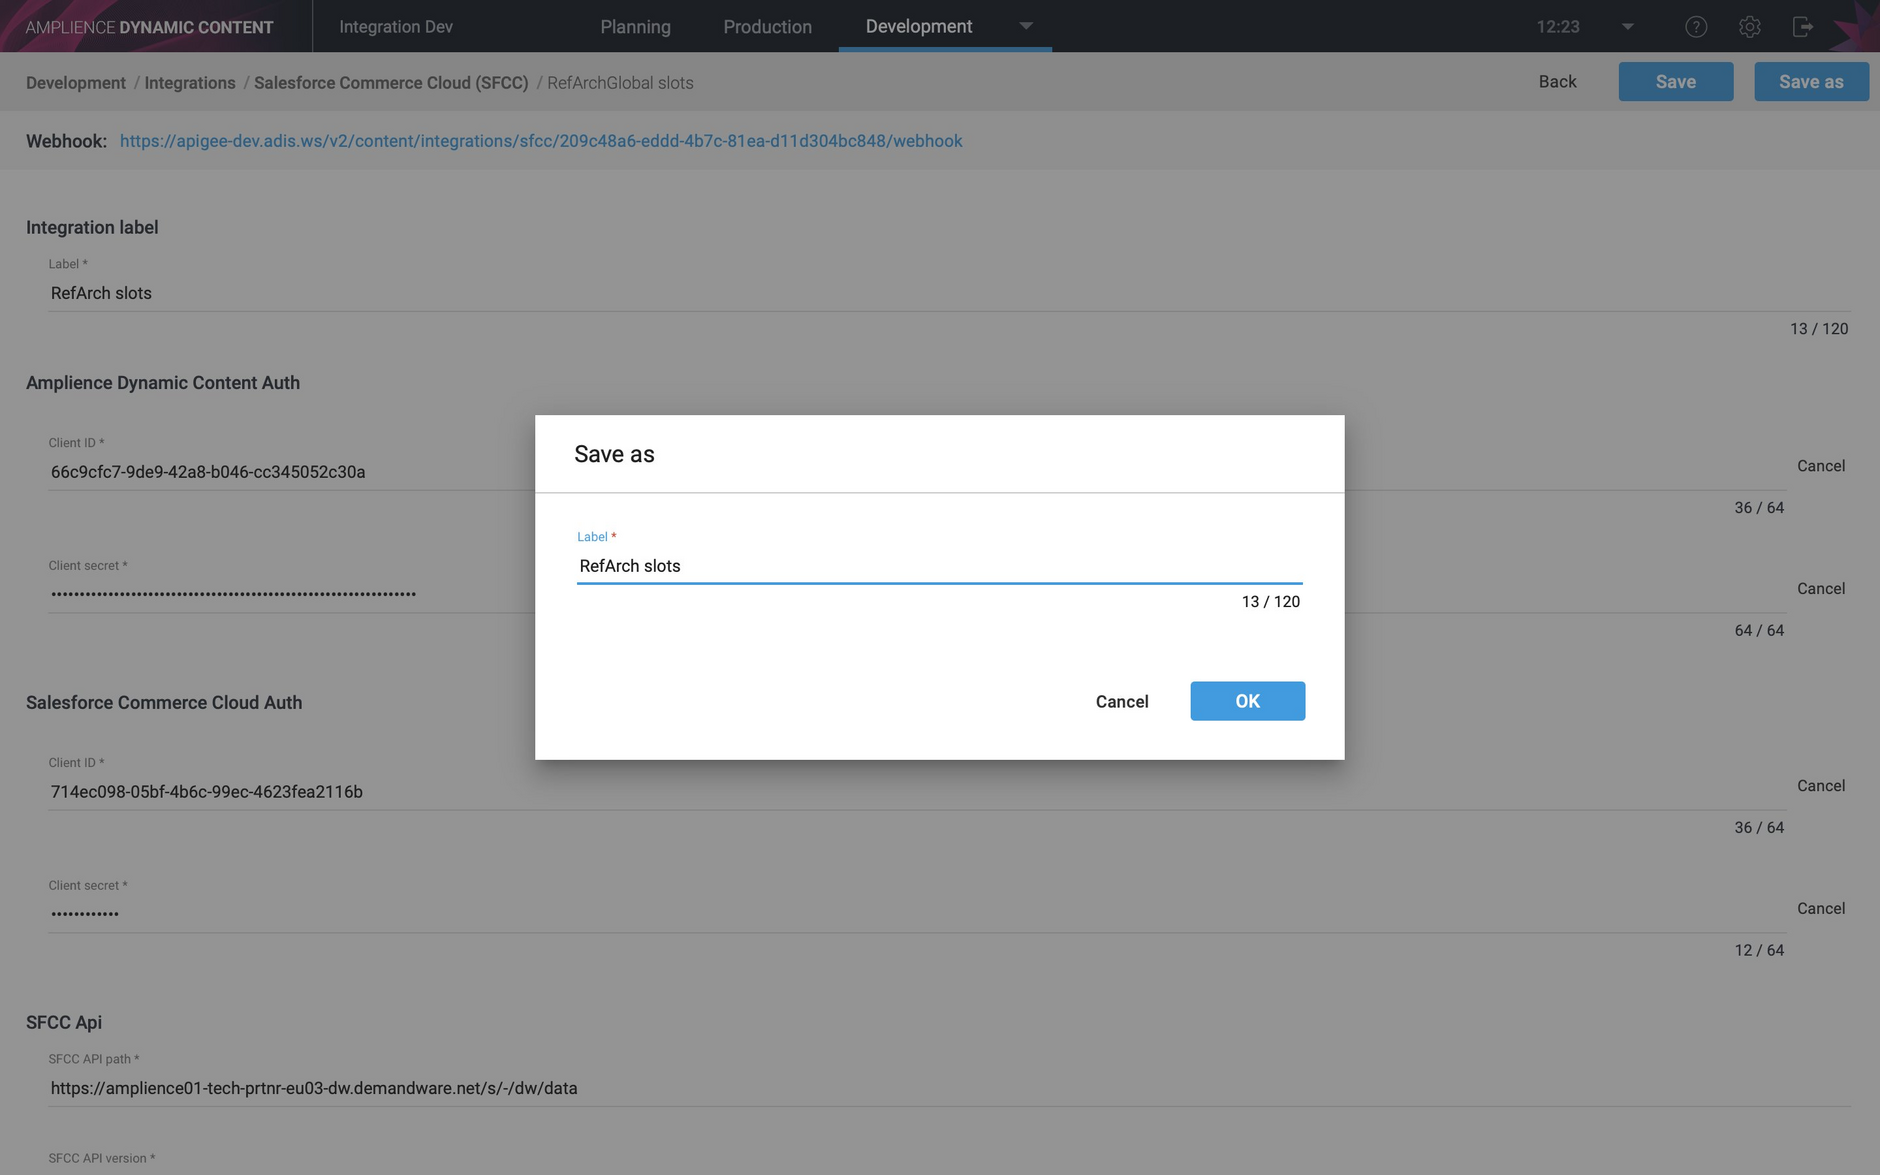
Click the Save As button. The Save As dialog will be displayed. Enter a label for the new integration and click the "Ok" button.
A new integration is set up on the hub and you can edit it as normal.
OCAPI set upLink copied!
In order to set up a Dynamic Content SFCC integration, you will need to do some set up in SFCC.
-
In SFCC account manager create an API client. You'll add the client and secret to the fields in the Add integration screen.
-
In SFCC Business Manager configure your OCAPI settings to provide the integration with access to your SFCC instance. For a content asset integration you will need to include some additional settings.
In order to configure this integration you should be an experienced SFCC developer with knowledge of OCAPI and access to the official SFCC documentation.
Setting up an API client in SFCCLink copied!
In order to allow Dynamic Content to integrate with your SFCC instance, you will need to set up a new API Client in the SFCC account manager. In order to create an API Client, you must log in to the SFCC account manager as an admin user and follow these steps:
-
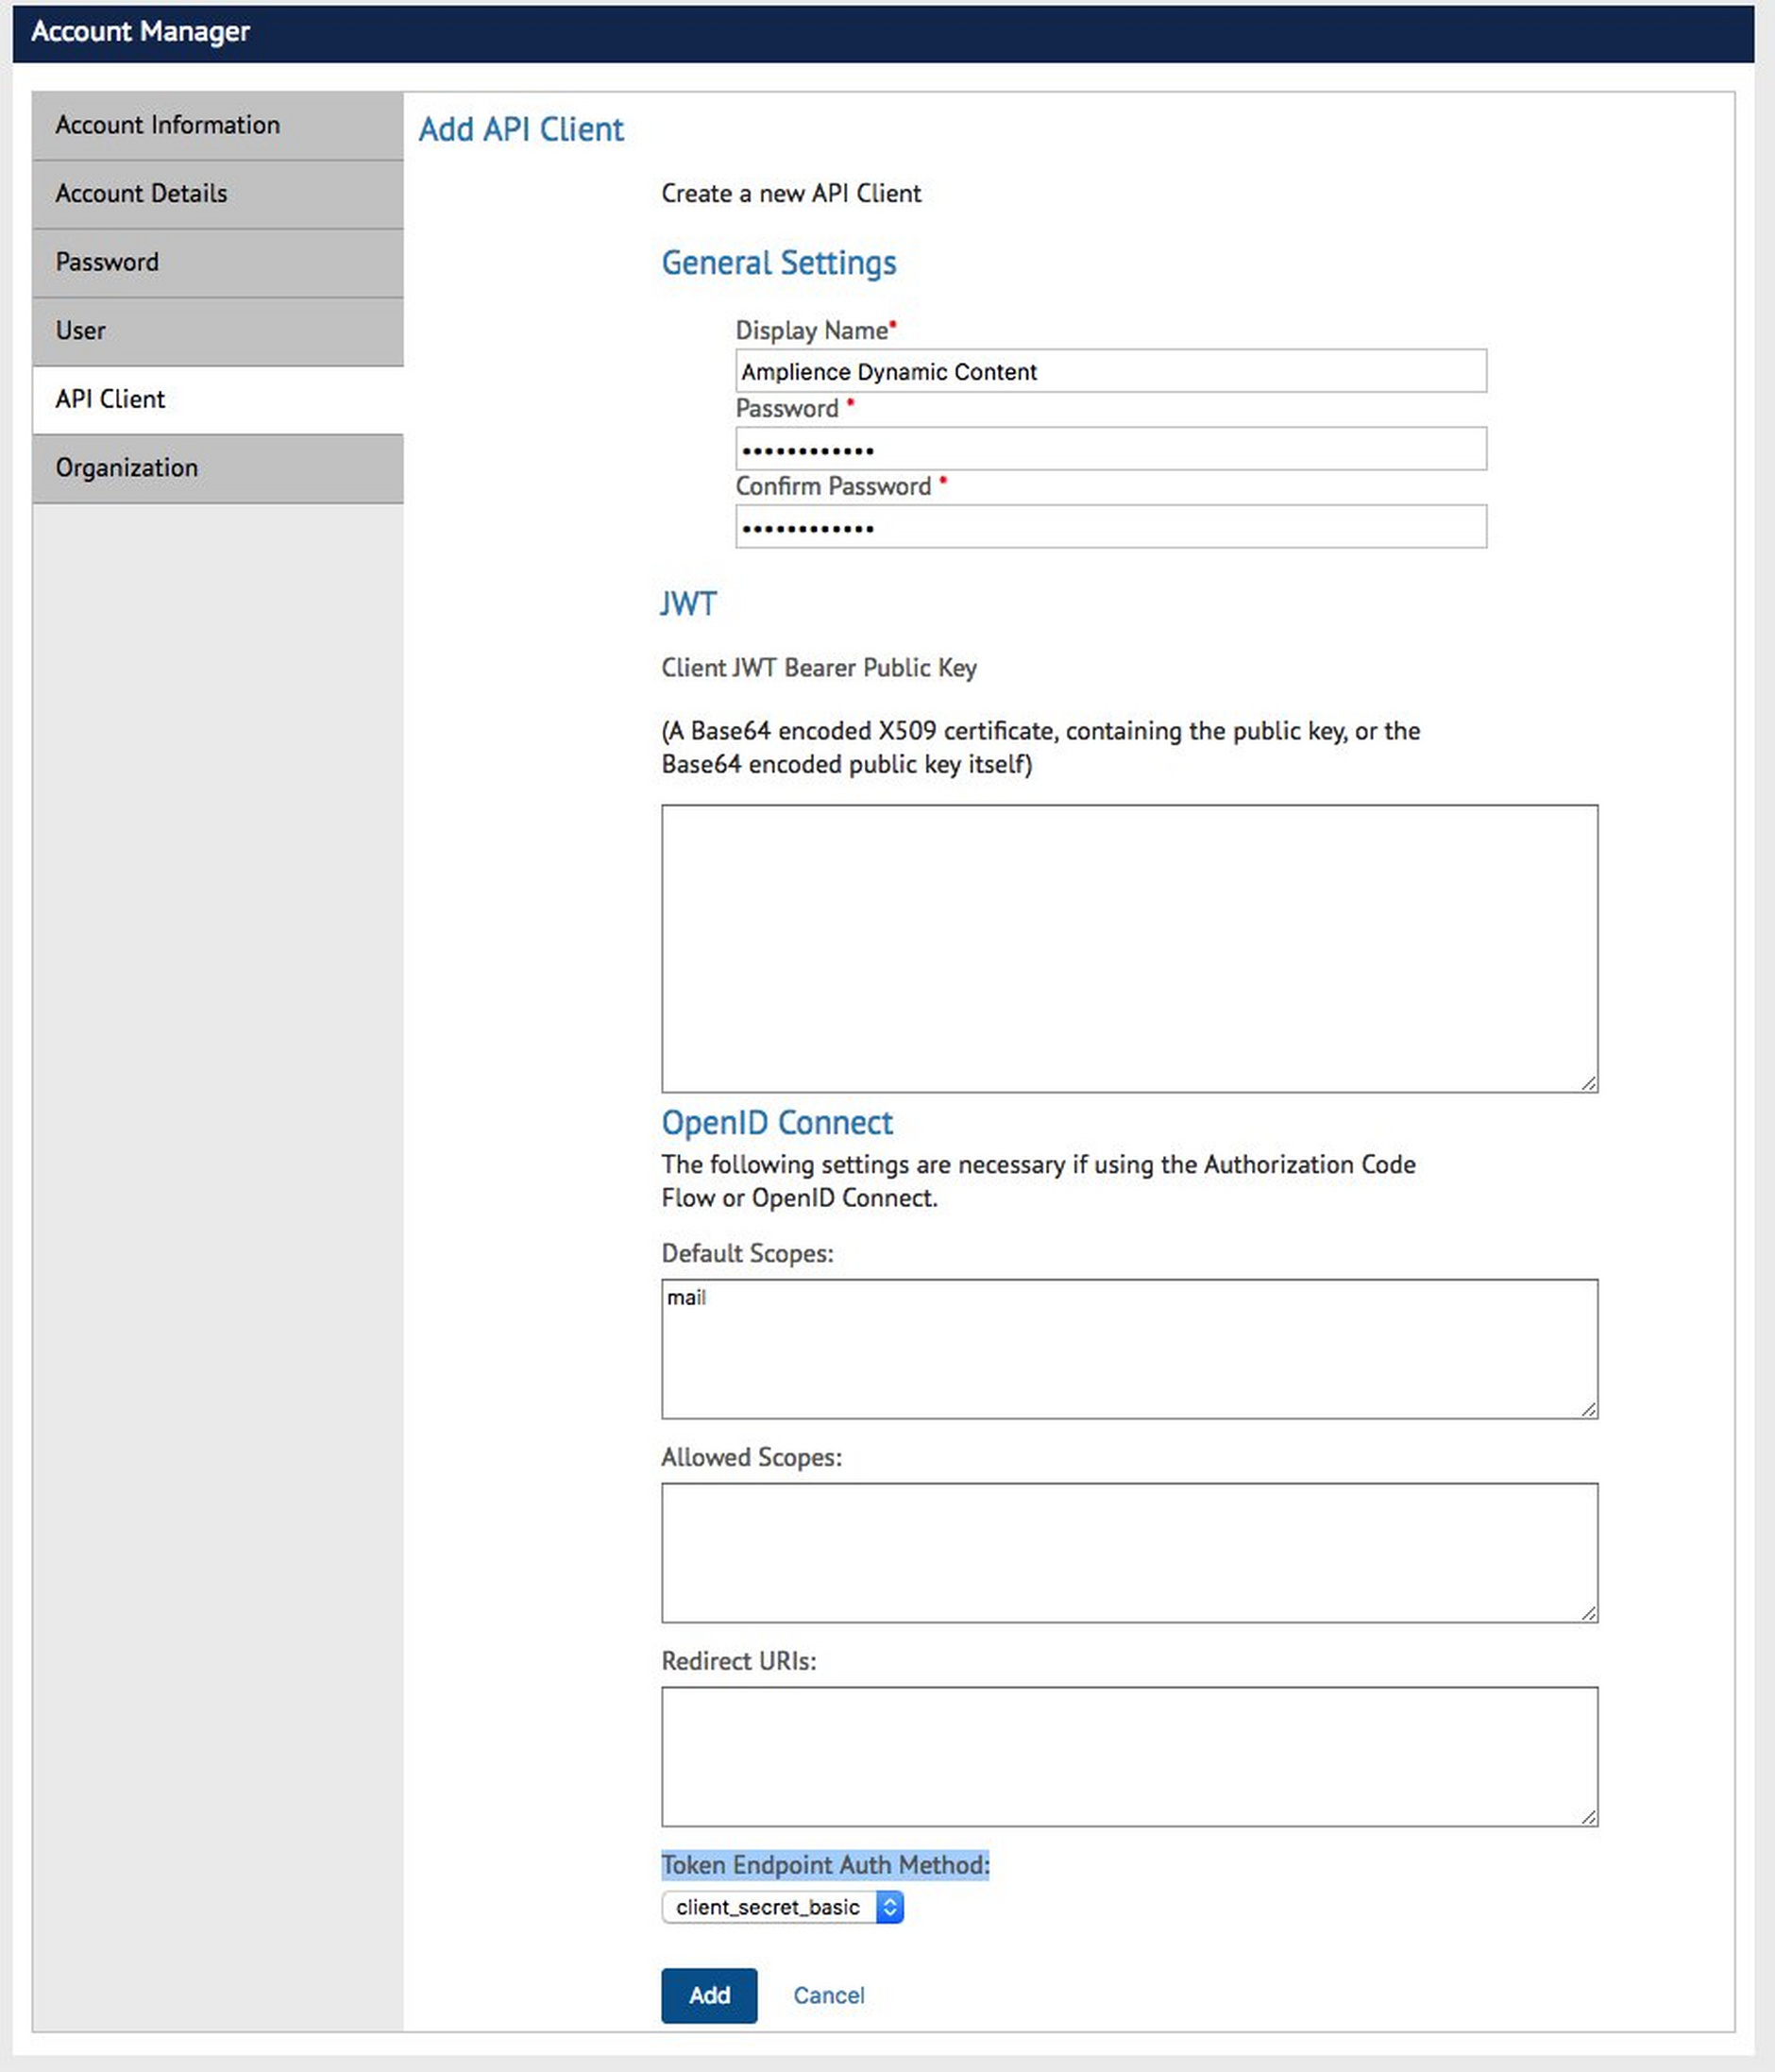
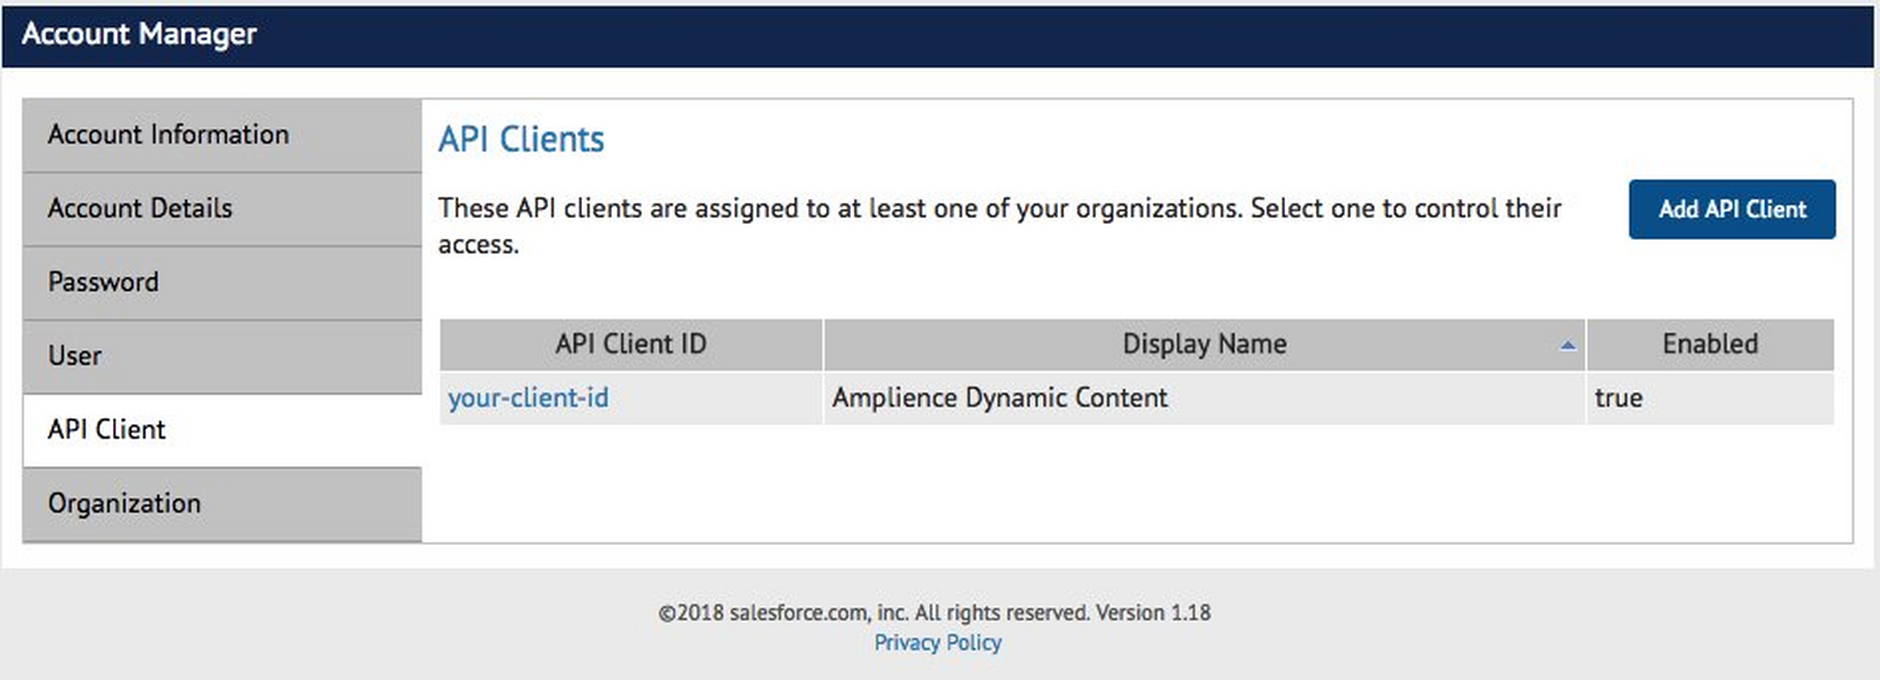
In the SFCC account manager, go to the API Client screen. The "Add API Client" screen is shown in the image below.
-
Click Add API Client
-
Enter a display name to identify the API Client, for example, "Amplience Dynamic Content"
-
Enter a password. This will be your client secret.
Note: leave the sections JWT and OpenID as their defaults
-
From the "Token Endpoint Auth Method" menu choose "client_secret_basic"
-
Click 'Add'
-
Make a note of the API Client ID that is generated.
-
Provide the API Client ID and the Password that you entered in step 4 to Amplience.
The newly created API Client will be shown in the list.
Open Commerce API settingsLink copied!
To enable the Dynamic Content integration to access OCAPI on your SFCC instance you will also need to configure your OCAPI settings.
- In SFCC Business Manager, go to Administration > Site Development > Open Commerce API Settings
- From the Select Type field, select ‘Data’
- From the Select Context field, select ‘Global’ Note: Most Data API resources are organization-specific, so they support only global client permissions.
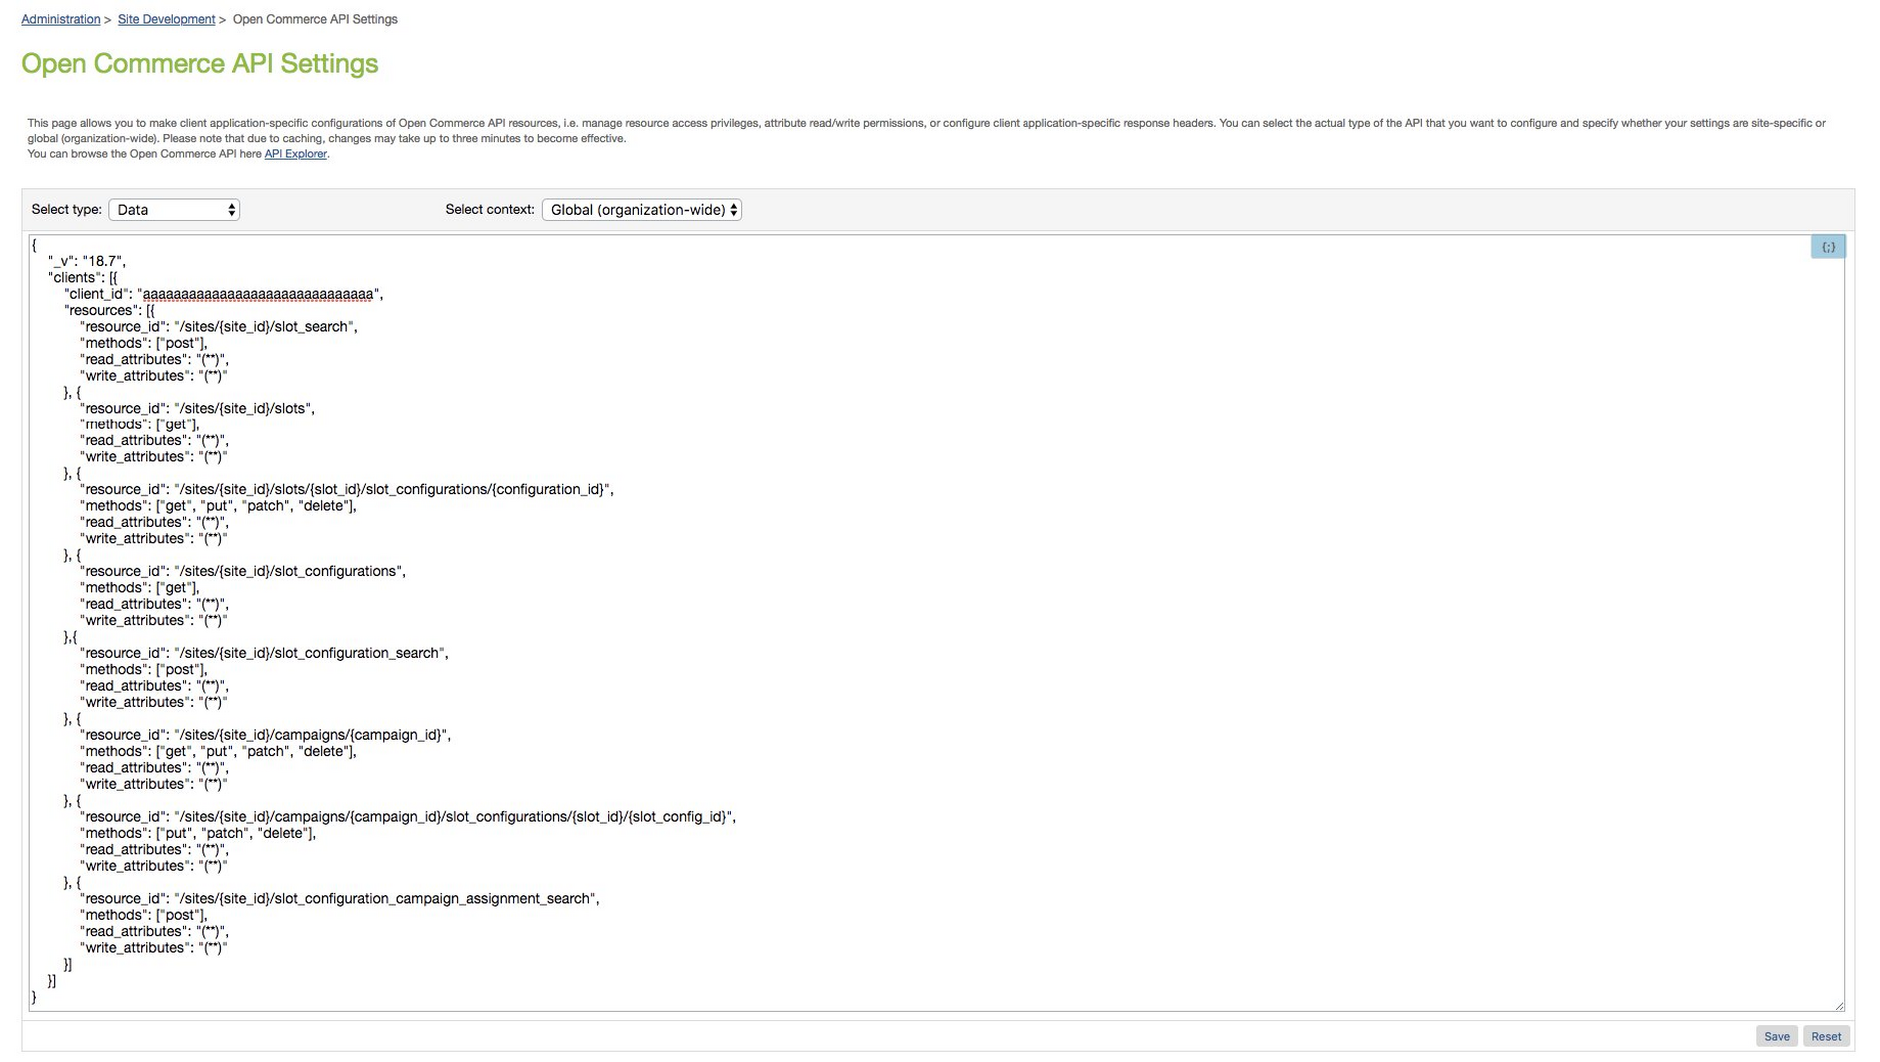
- In the text field, paste in the following JSON:
Once you've added the JSON shown above, you must set the client_id property to the API Client ID you created for use with the integration. See Updating your OCAPI settings.
If you have other OCAPI settings that you need to keep, you will need to merge the data
Your OCAPI settings screen should look something like the following image:
If you're using content asset integration, you will need some additional OCAPI settings. See SFCC Content Assets for more details.
Updating your OCAPI settingsLink copied!
Once you've added the JSON, you will need to modify the values of the following properties.
| Property � | Value |
|---|---|
| _v | It is recommended to modify this to match the latest version of the configuration file structure. Please refer to the SFCC Documentation and search for "OCAPI Settings" for more details. This property is independent of the OCAPI version itself and allows the configuration of resources in any OCAPI version. |
| client_id | Change this to match your API Client ID. This is required for staging, development and production instances. All sandboxes can use the default client id "aaaaaaaaaaaaaaaaaaaaaaaaaaaaaa" |
When you've finished updating these values click "Save".
Additional OCAPI settings for a content asset integrationLink copied!
For the content asset integration, you will need to add the following to your Open Commerce API (OCAPI) settings. These settings are in addition to the OCAPI setup shown on the SFCC setup page.
Video: setting up an integration: end to end exampleLink copied!
In this video we show you how easy it is to set up a Dynamic Content SFCC integration. We'll walk you through the end to end process of setting up a content slot integration, from creating and registering the slot schema to adding the slot to an edition, scheduling content and previewing in the SFCC storefront.
