Figma Sync plugin- mapping guide
Before you sync your designs to Amplience CMS (Dynamic Content), you first need to map the Figma components in your design system to content types in the CMS.
Why do I need to set up mapping?Link copied!
In Amplience CMS, a content type is the blueprint for content, such as a banner, card or split block, while a content type schema defines the data model for a content type. Content items are created from content types. To create a mapping for a Figma component, you need to transform its JSON definition into the structure of a schema in the CMS. This allows the Figma sync plugin to create a content item from an instance of a Figma component.
To create the mapping, the Figma Sync plugin uses the JSONata transformation language. We've created a prompt and skills to use with AI tools to help you create the JSONata.
Pre-requisitesLink copied!
Before you begin you need to:
- Install the Figma Sync plugin
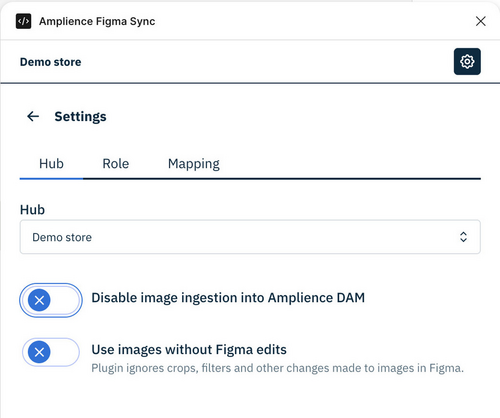
- Open the plugin and ensure your role is set to Figma Admin. (Users with the Designer role can't create mappings)
- Log in to the Amplience CMS hub that contains the content types that you'll be mapping to. You must be logged in with developer permissions. In the example below we're using the "Demo store" hub.
- Content type schemas for each of the components that you want to map should already exist on your CMS hub.
- Content types should already be registered from each of the schemas you want to use.
Note that a full Figma seat is required to access the plugin menu.
Mapping a componentLink copied!
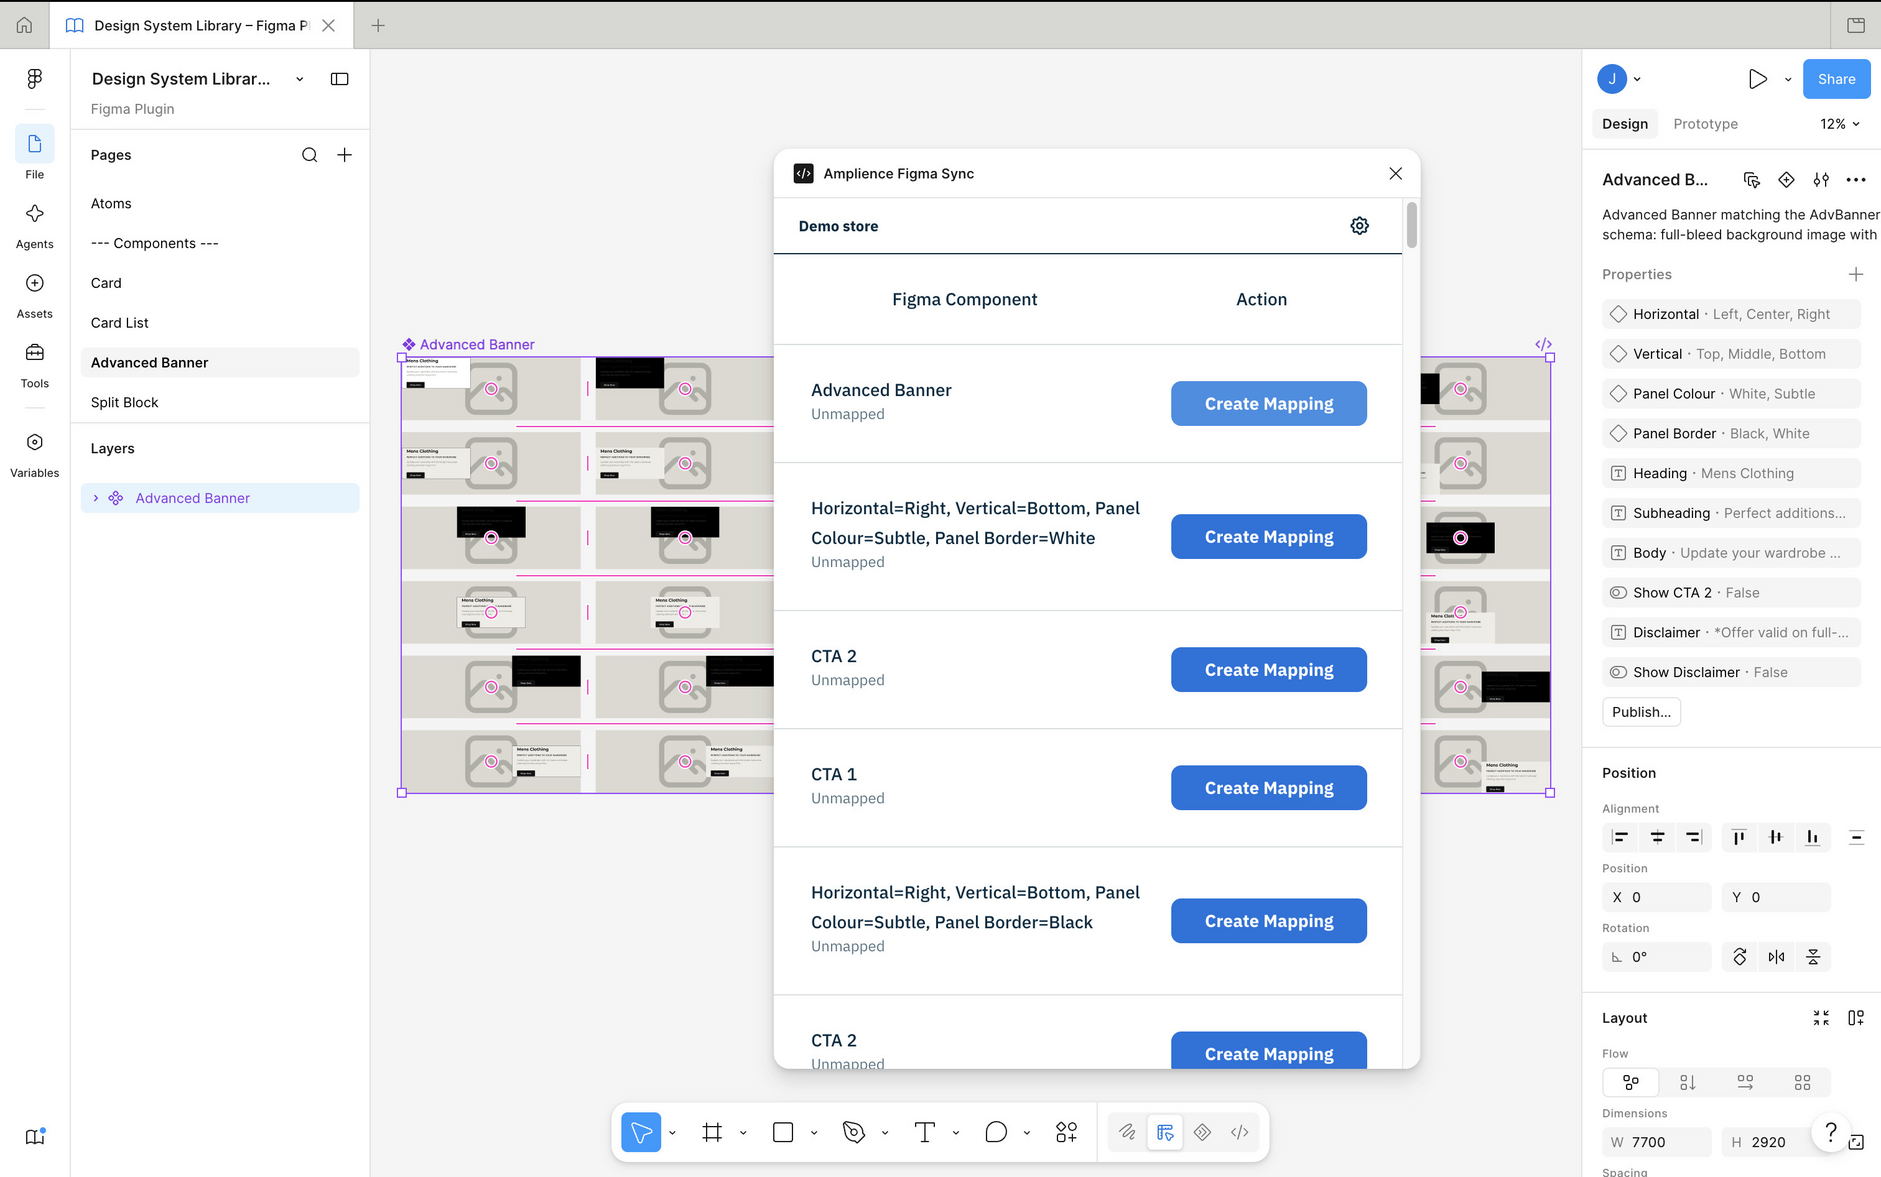
Open the design system containing the components that you want to use to create content from and select a component to map. In this example we're using the Advanced Banner.
-
With the main component selected, open the Figma sync plugin. The banner has several variants, but for this example we just need to create a mapping for the top level Advanced Banner.
-
Click the "Create Mapping" button next to the Advanced Banner.
Finding the content type and schemaLink copied!
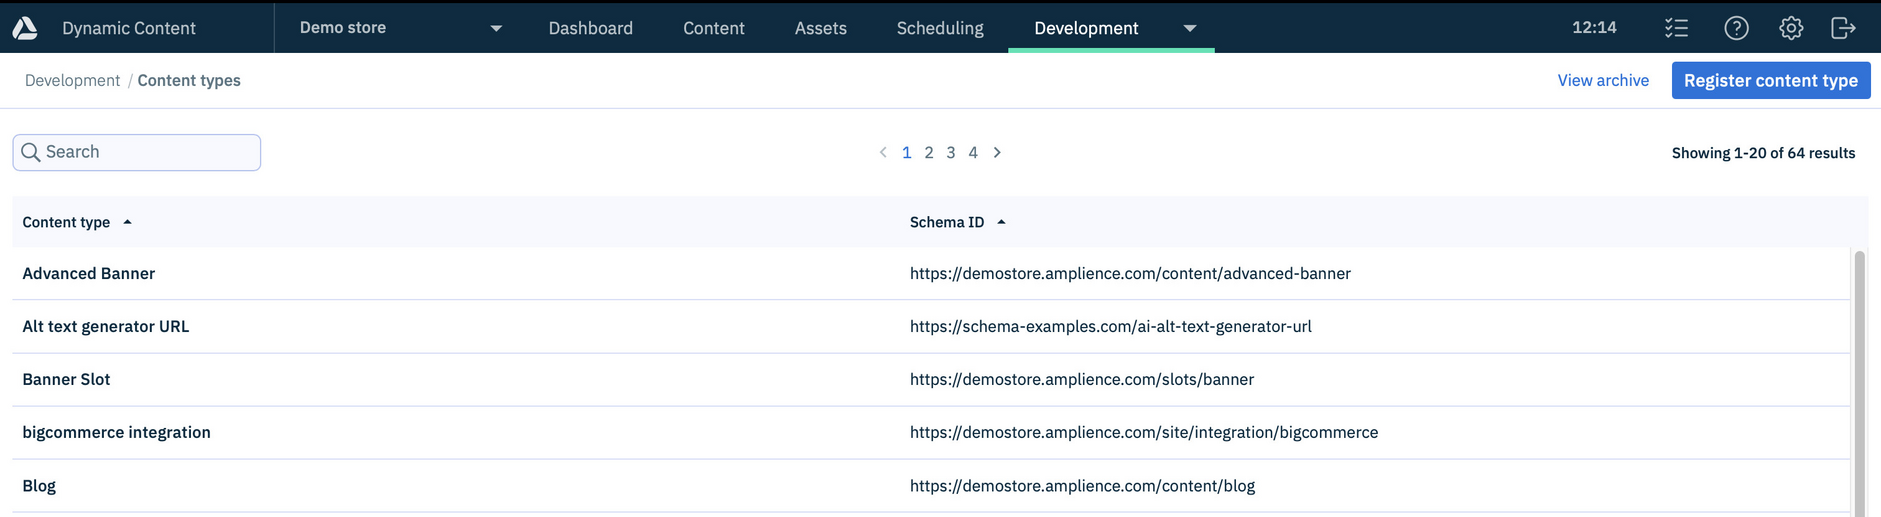
- Open the Amplience CMS, choose "Content types" from the "Development" menu and find the content type that you want to map the component to. For the Advanced Banner component the content type name is "Advanced Banner".
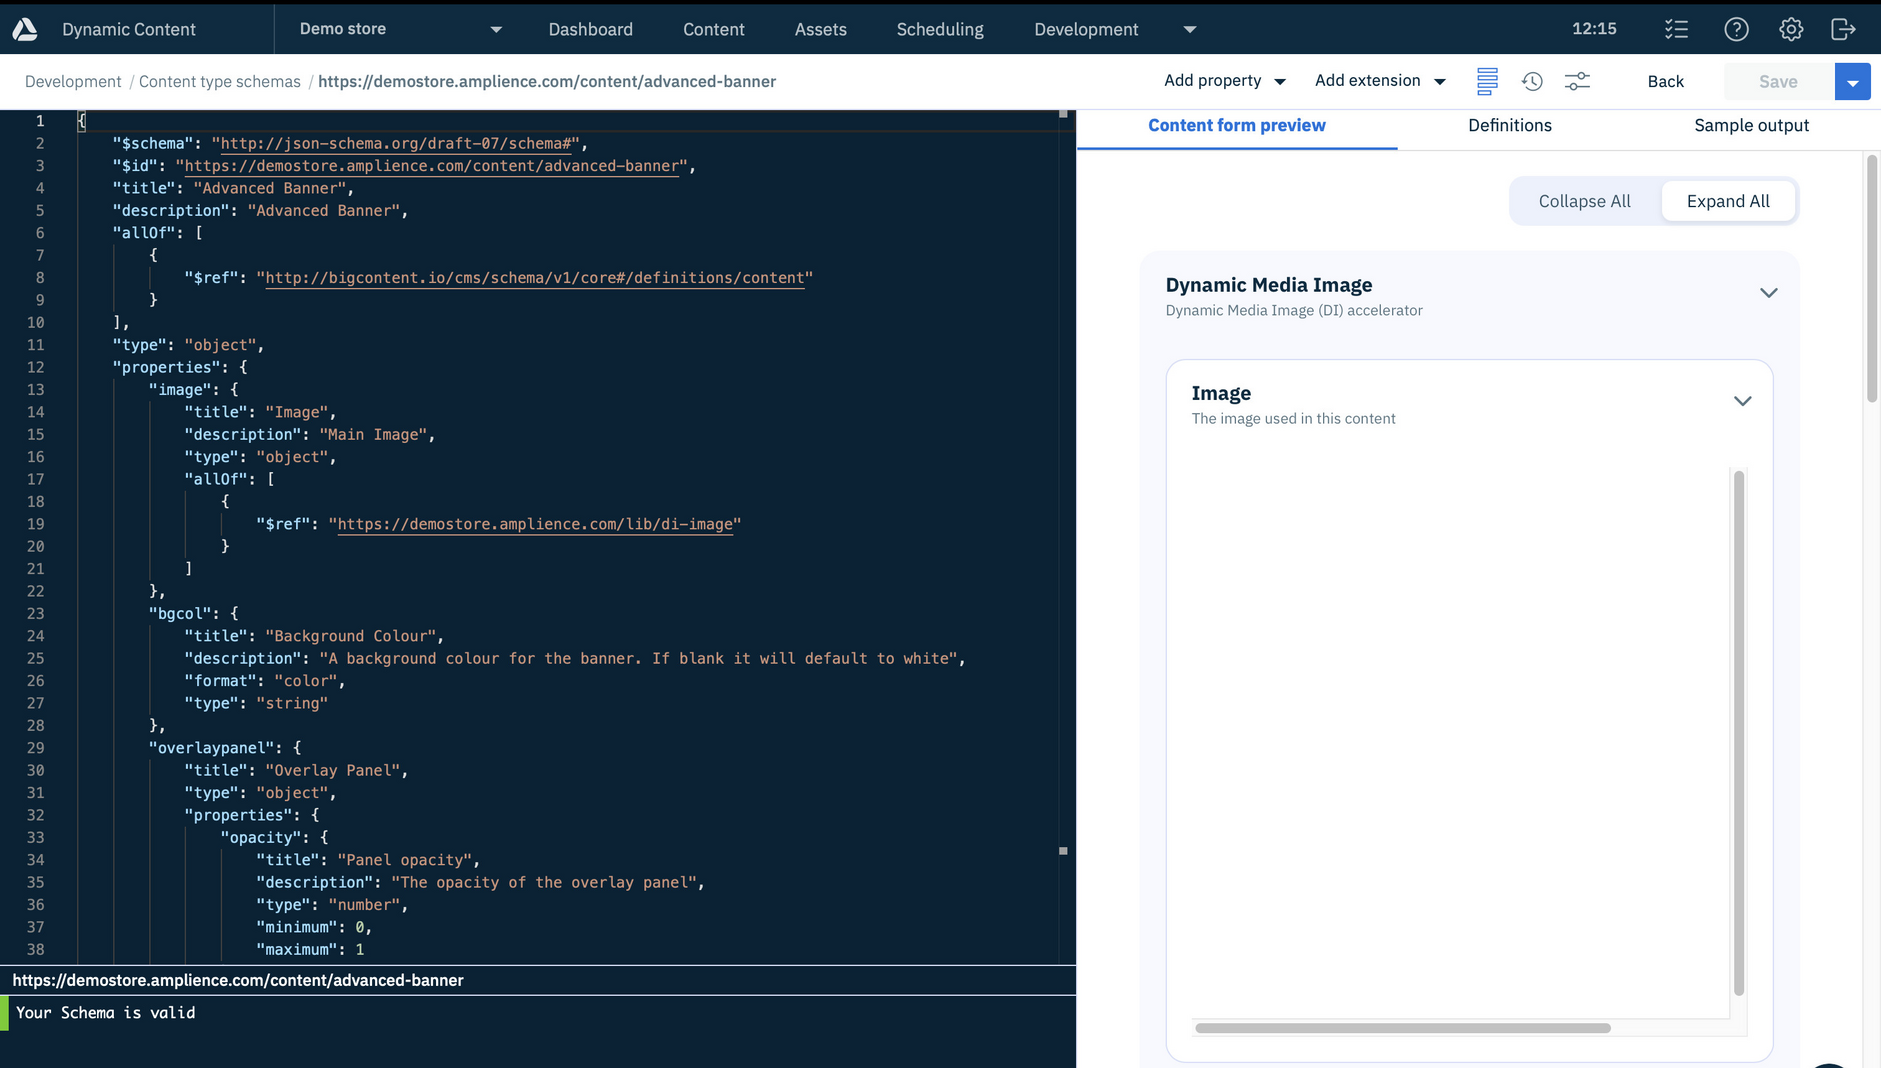
- Next choose "Content type schemas" from the Development menu, find the schema for the content type you want to use and copy its URL. The URL for the Advanced Banner schema is
https://demostore.amplience.com/content/advanced-banner.
Keep the schema window open because you'll need the schema, together with any partials and other schemas it links to or references, to complete the component mapping.
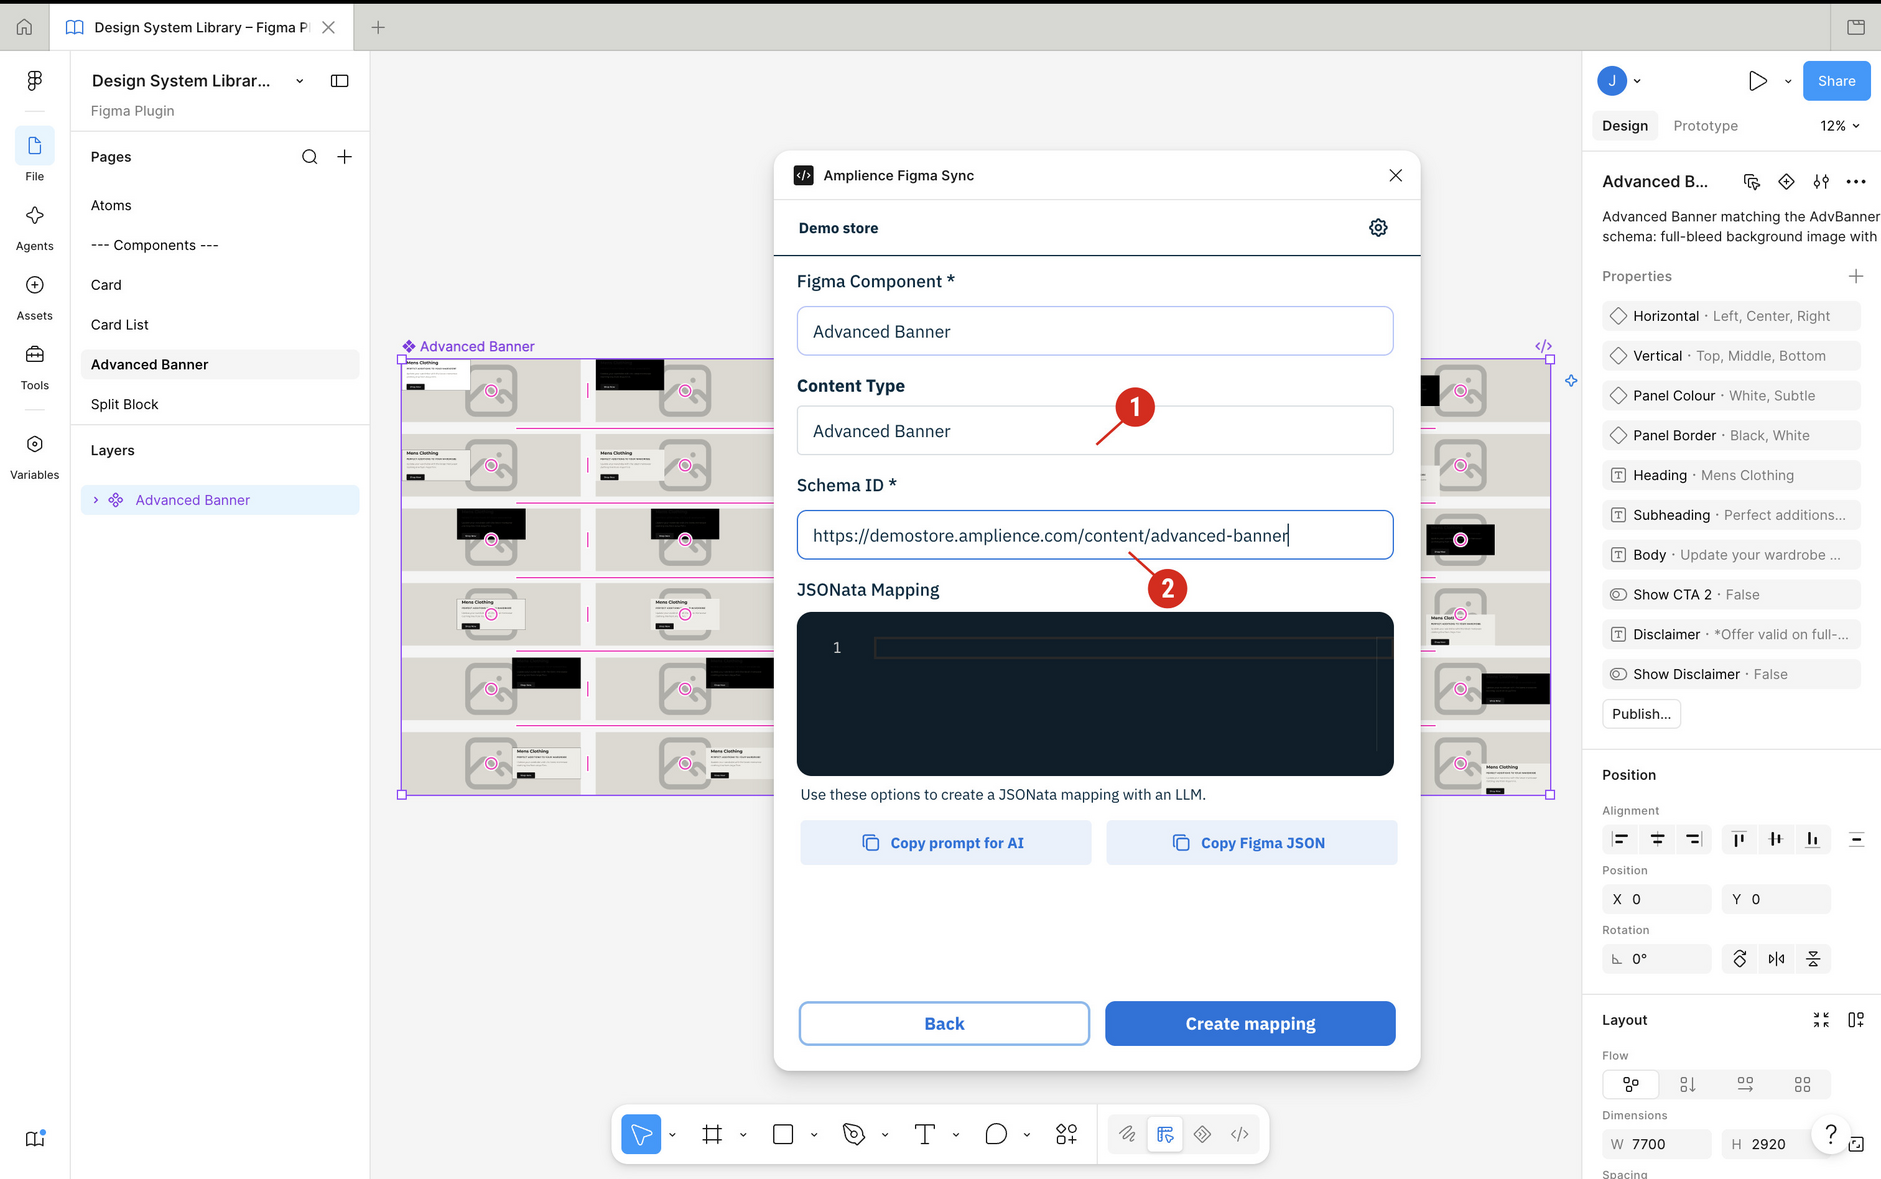
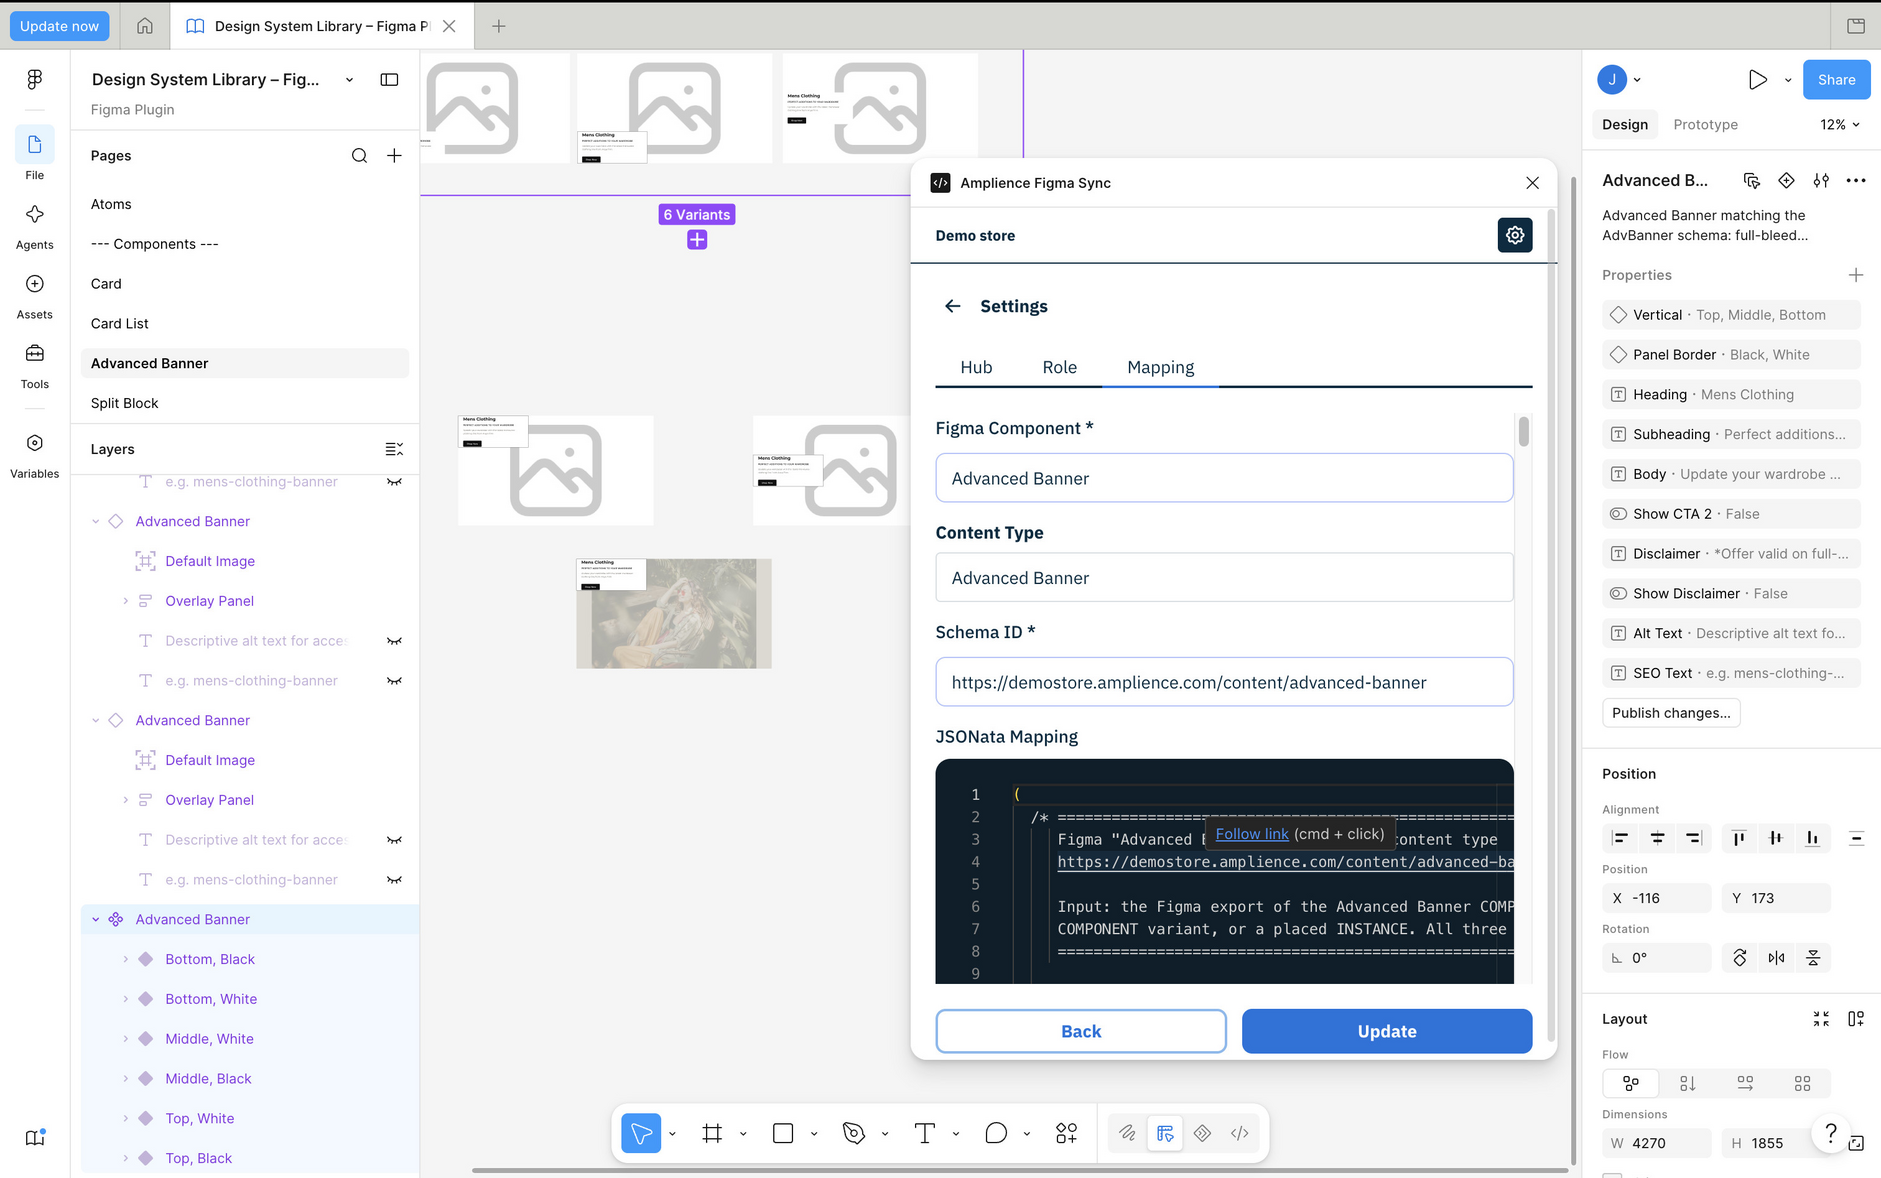
- In the Figma plugin choose the content type from the menu (1). The schema URL (2) should be automatically populated when you select the content type.
Exporting content type schemas from your CMS hub
To save time, you can export all the schemas from your Amplience CMS hub using the CLI tool. This will create a folder of JSON files that you can attach to the conversation in your AI tool.
Creating the mappingLink copied!
To create the JSONata mapping file you can use AI tools such as Claude or Cursor with the prompt and skill that we provide.
- Install the Figma mapping skill in your AI tool.
- Copy and paste the schema into a separate file. In this example we'll create a file called
advanced-banner.jsonand paste the schema into it. - Create additional files for any other referenced schemas. The Advanced Banner references
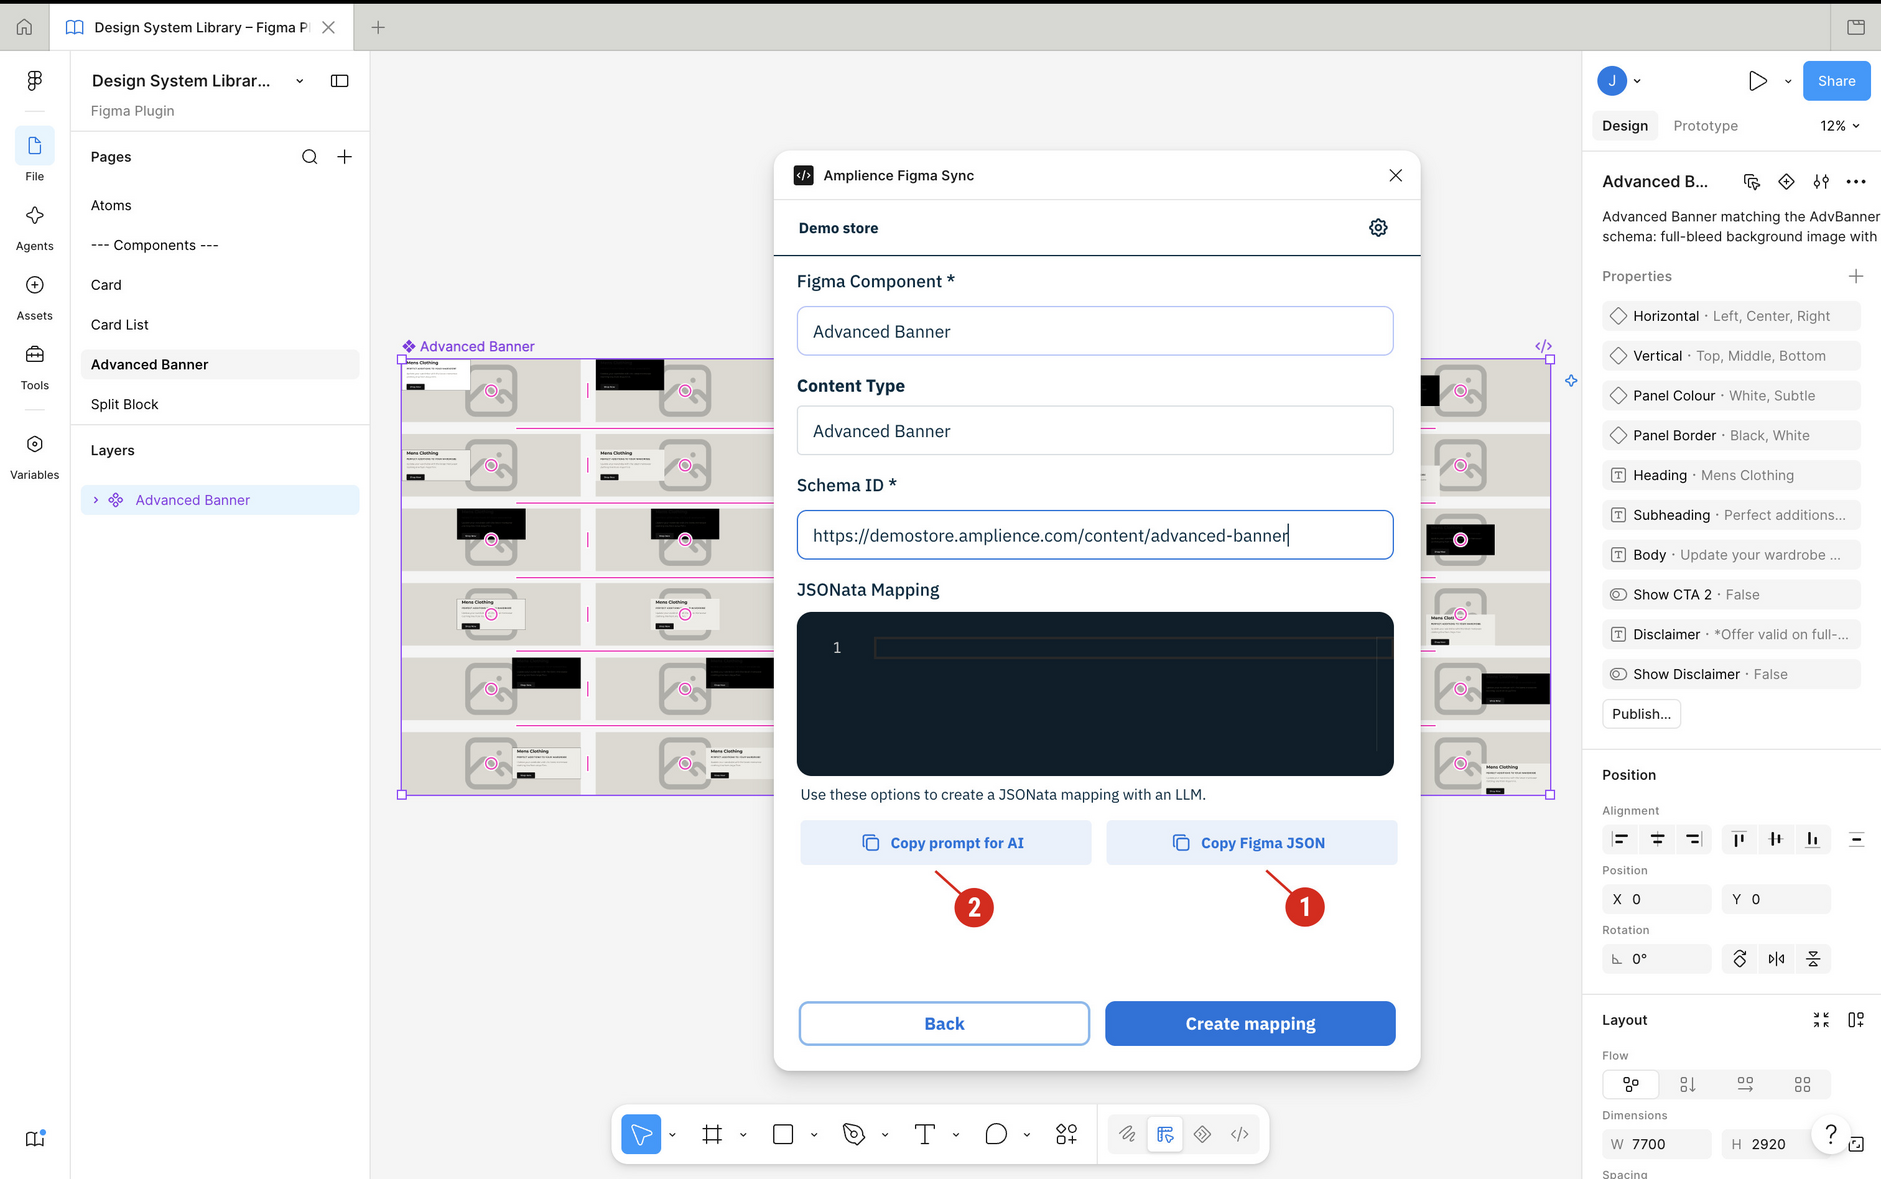
https://demostore.amplience.com/lib/di-imageso we need to copy that schema from Development -> Content type schemas in Amplience CMS. If you don't include any referenced schemas, then you will be prompted to include them. - Click "Copy Figma JSON" (1) to copy the JSON design for the Advanced Banner component. Paste this into a new file.
- Click "Copy prompt for AI" (2) to copy the prompt for your AI tool.
Using AI to create the JSONata mappingLink copied!
- Paste the prompt into your AI tool and attach the schemas, and component JSON file.
- When you run the prompt, you will be prompted to provide any additional schemas that need to be included.
- The JSONata mapping file will be generated.
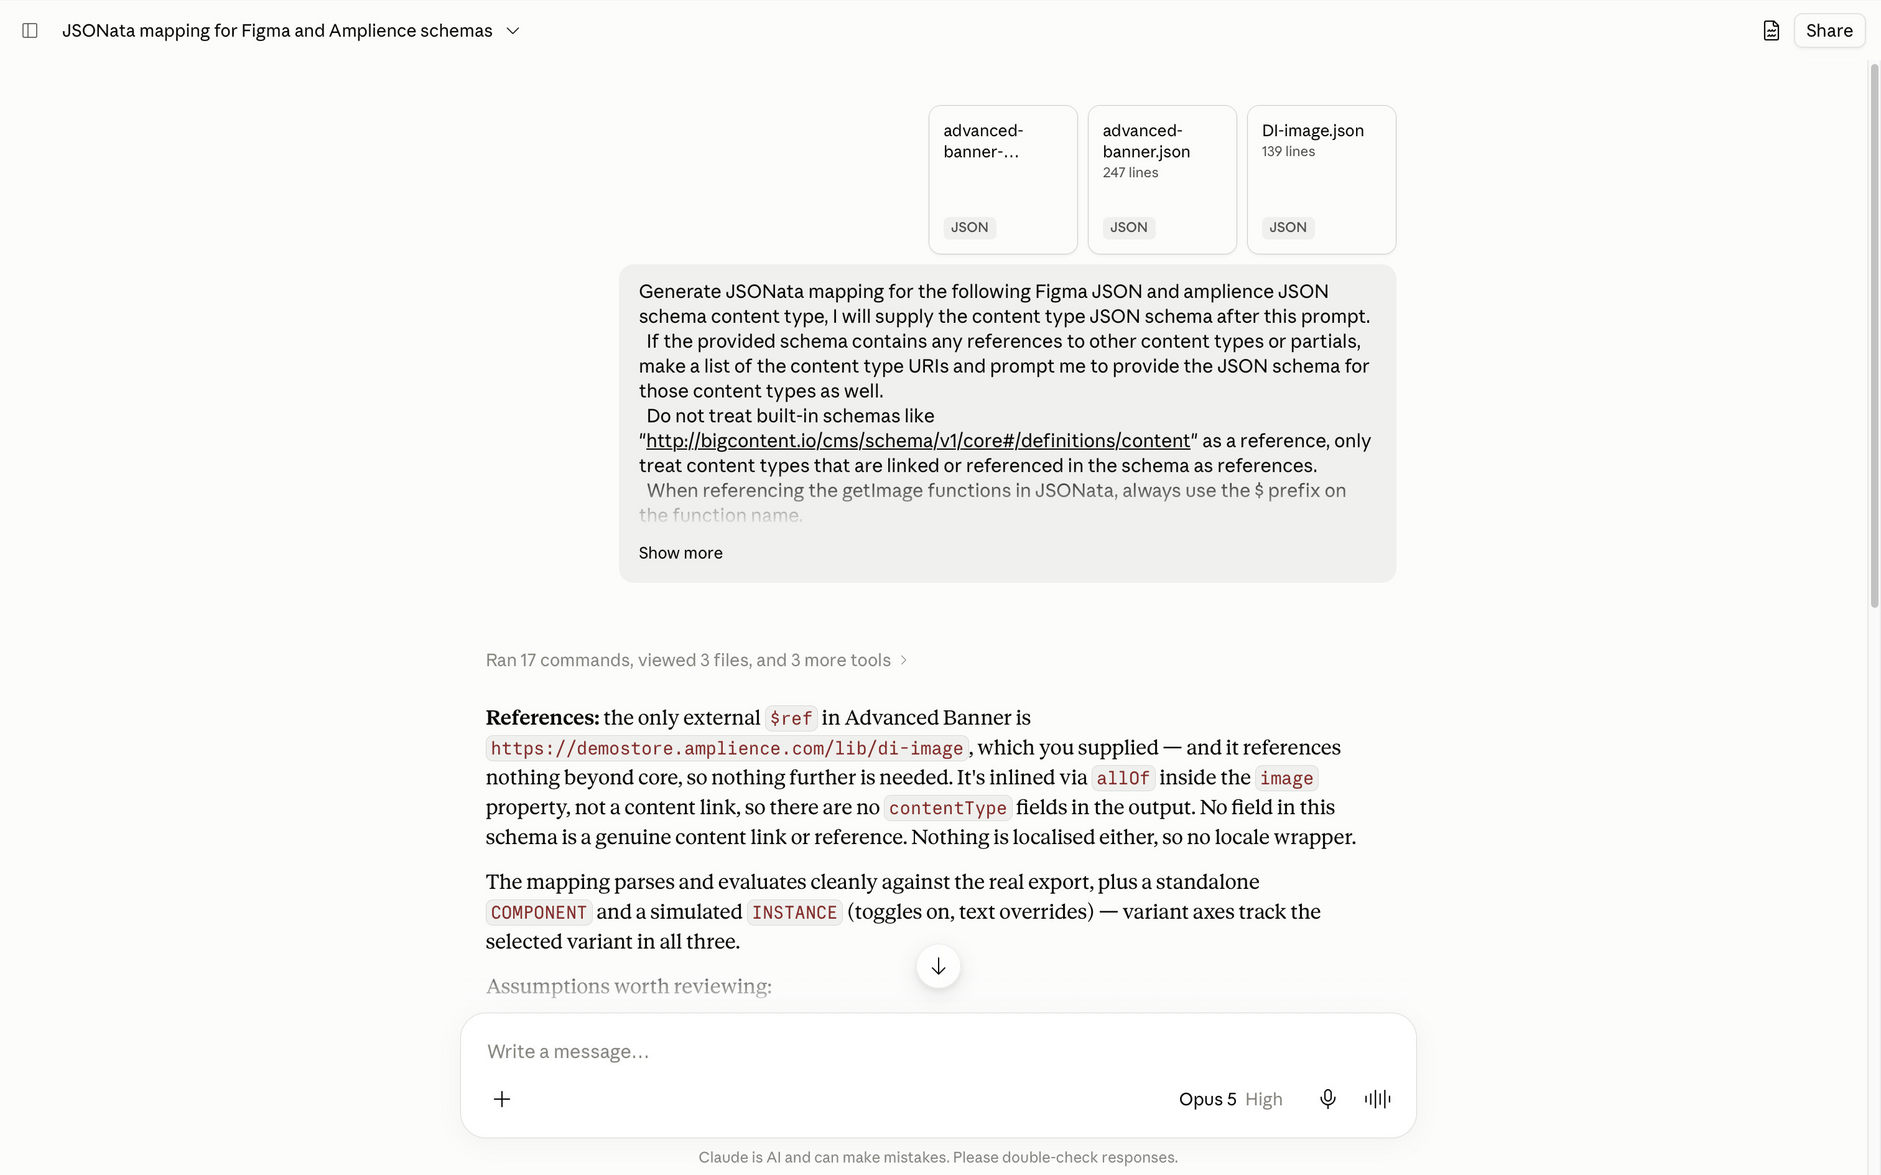
Check the output provided by your AI tool, and not just the JSONata output. Sometimes the AI tool will highlight problems, such as errors in schemas, that may lead to mapping failures later in the process.
Completing the mappingLink copied!
- Paste the JSONata mapping into the the plugin window and click "Create mapping".
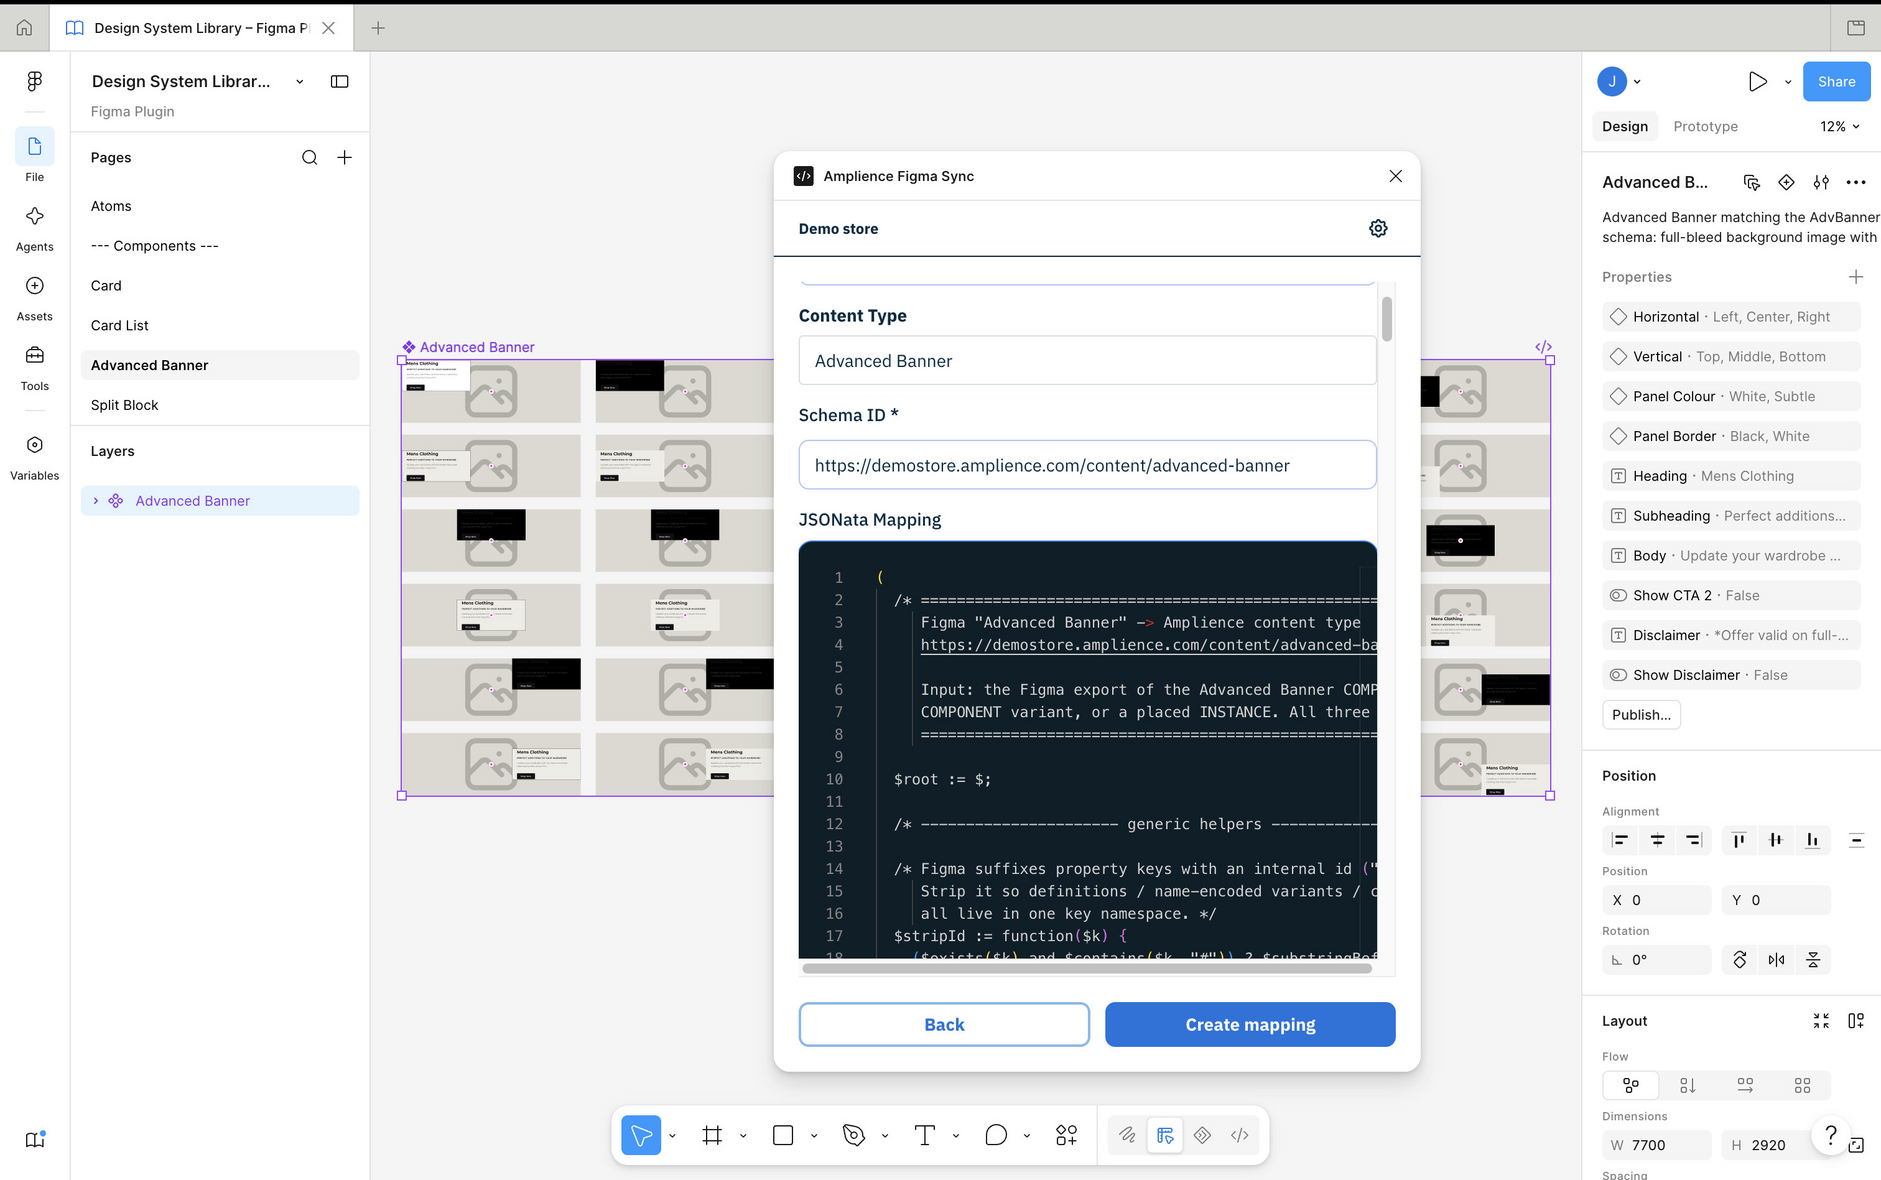
The Advanced Banner will now be shown alongside the other mapped components.
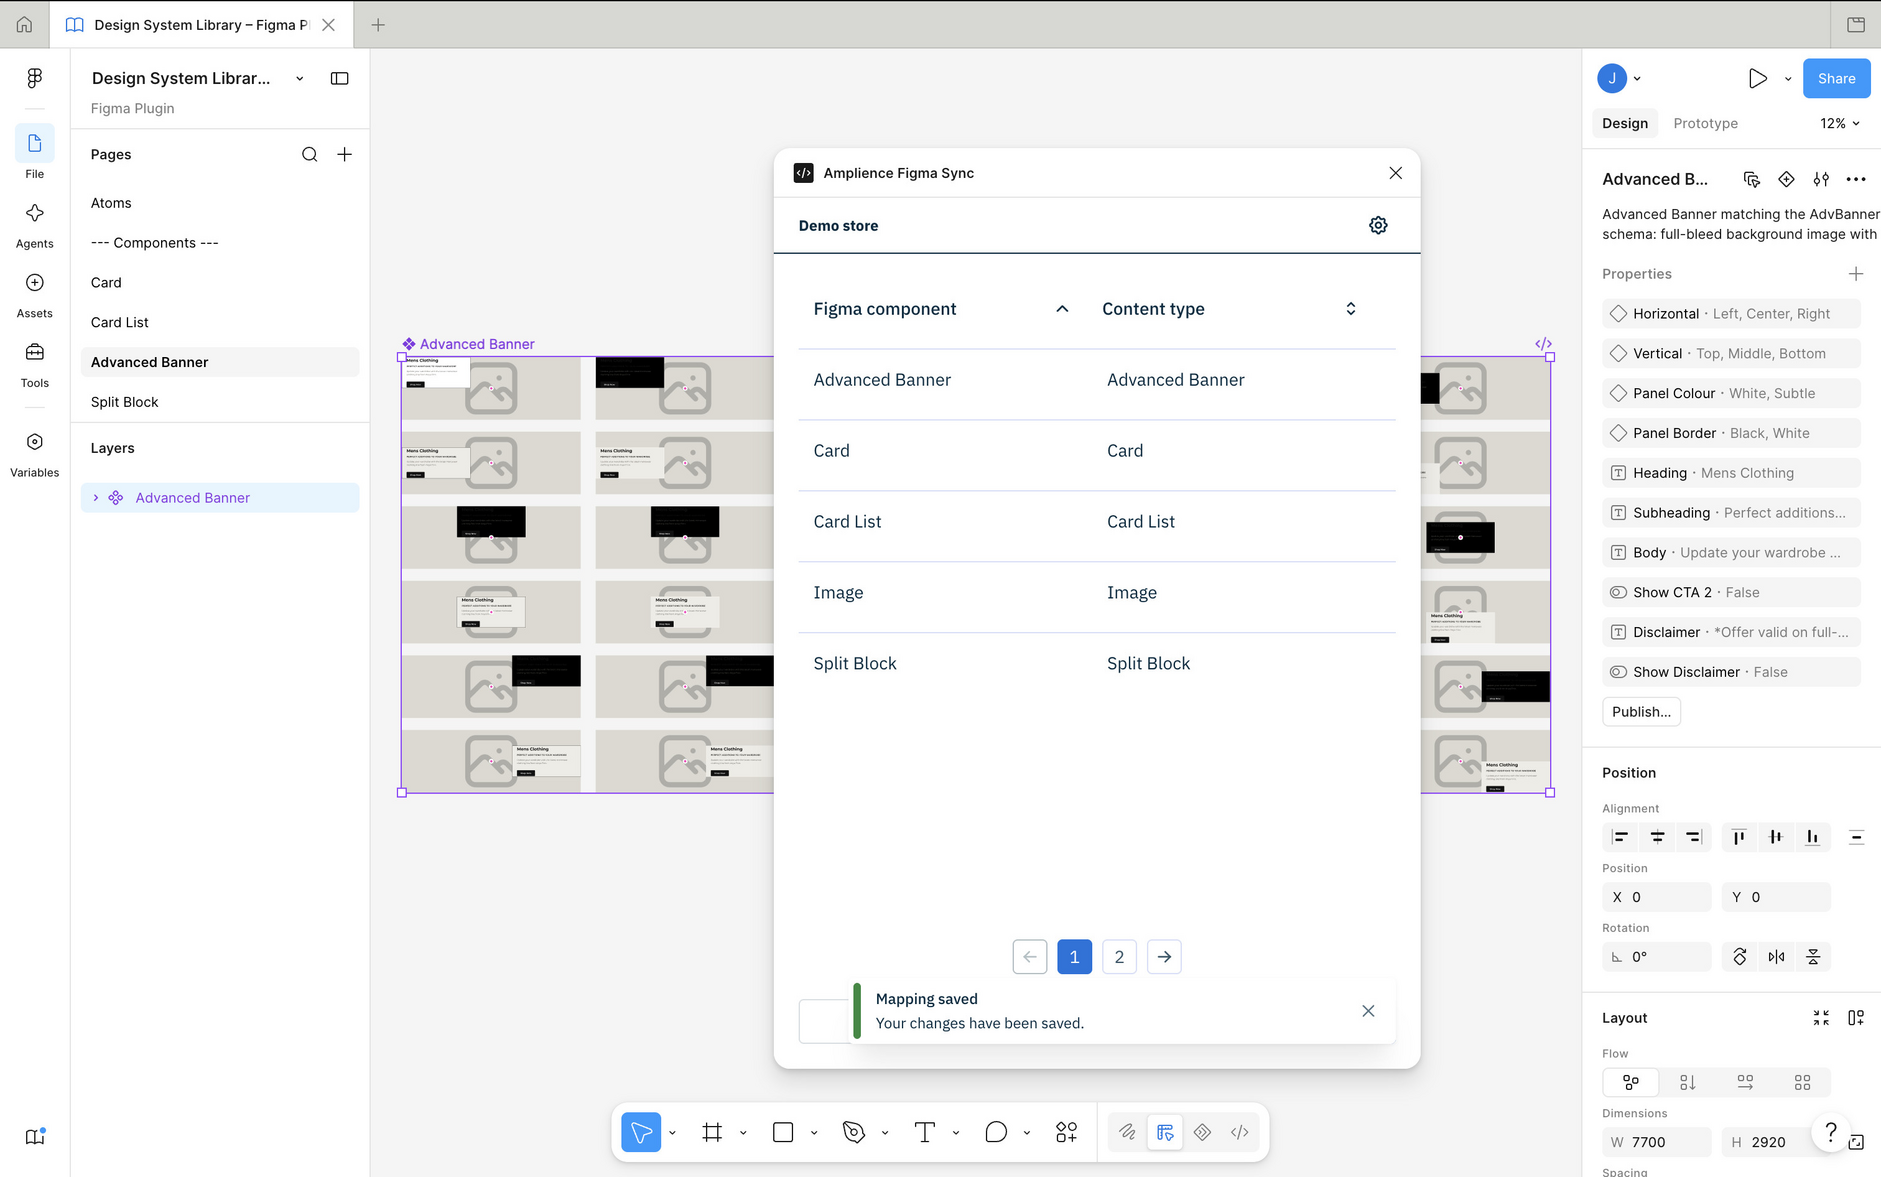
The final step is to test that the mapping you created will allow you to create a content item in the CMS.
Testing and verifying the mapped componentLink copied!
To test the mapping create an instance of the component and copy it to an Amplience CMS hub.
- Create an instance of the component. In this example we're creating an instance of the Advanced Banner.
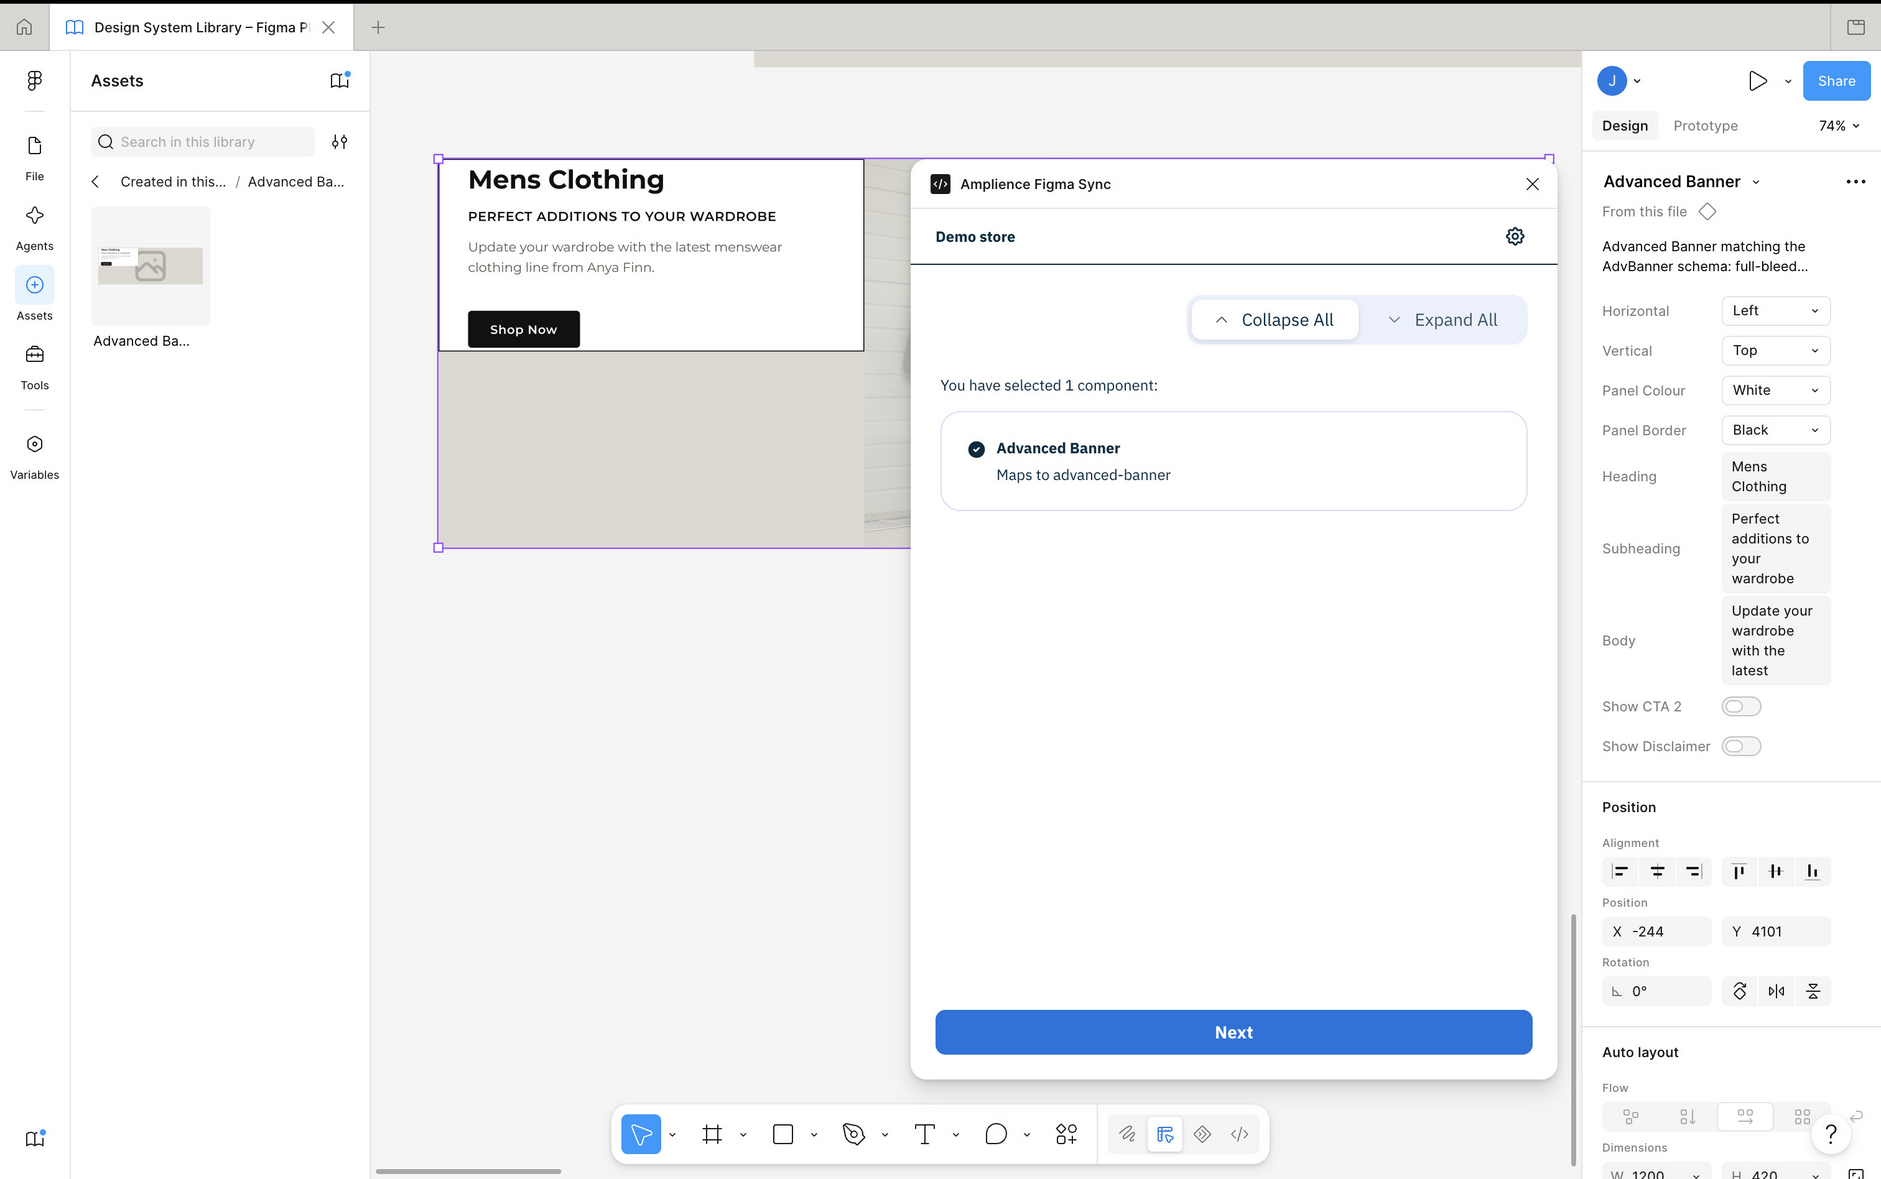
- Select the instance and open the plugin.
The instance should show that it is already mapped. If it doesn't then check you've created an instance of the correct component and check that the mapping is configured.
- Click "Next".
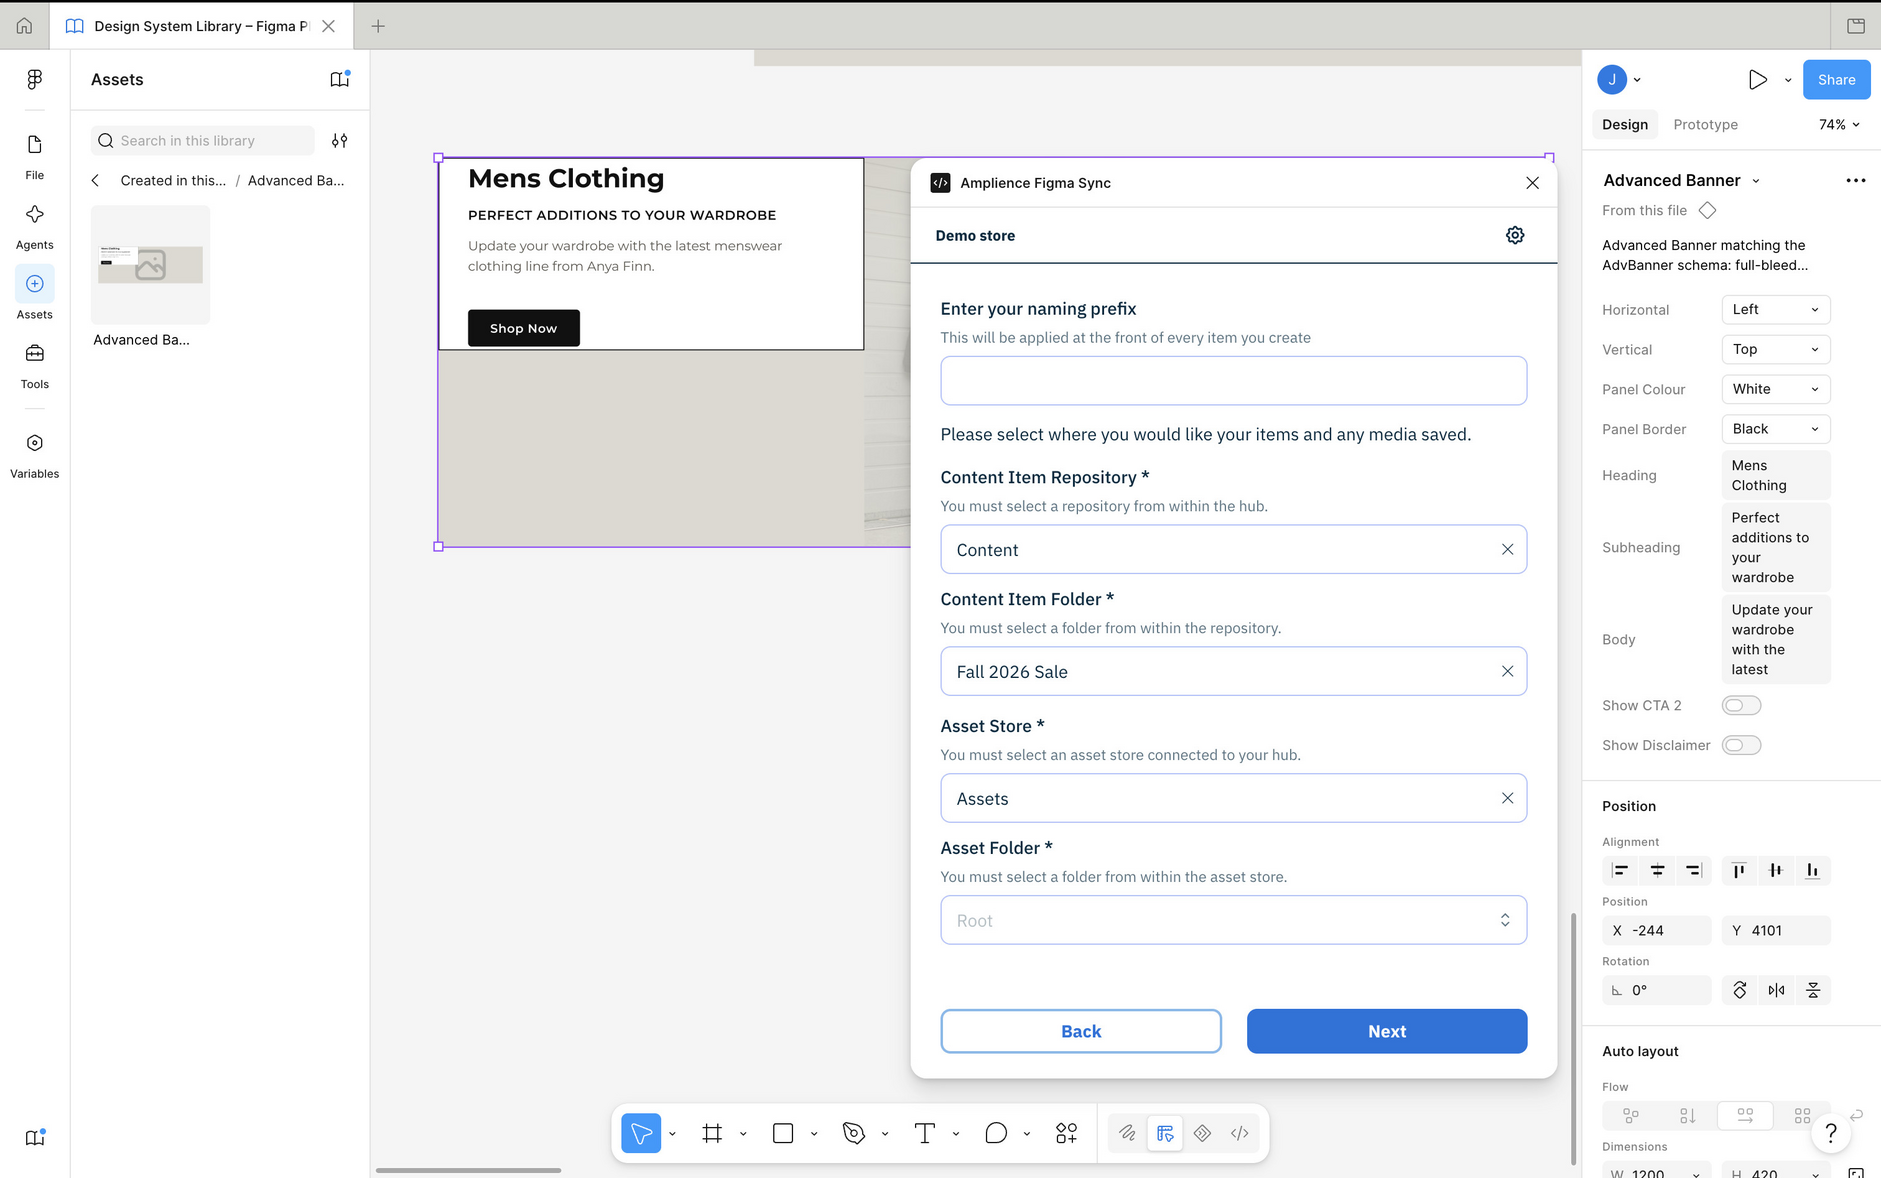
- Choose the Content Item Repository, Folder and Asset Store and click "Next". Add a naming prefix to make the content item easier to find in the CMS.
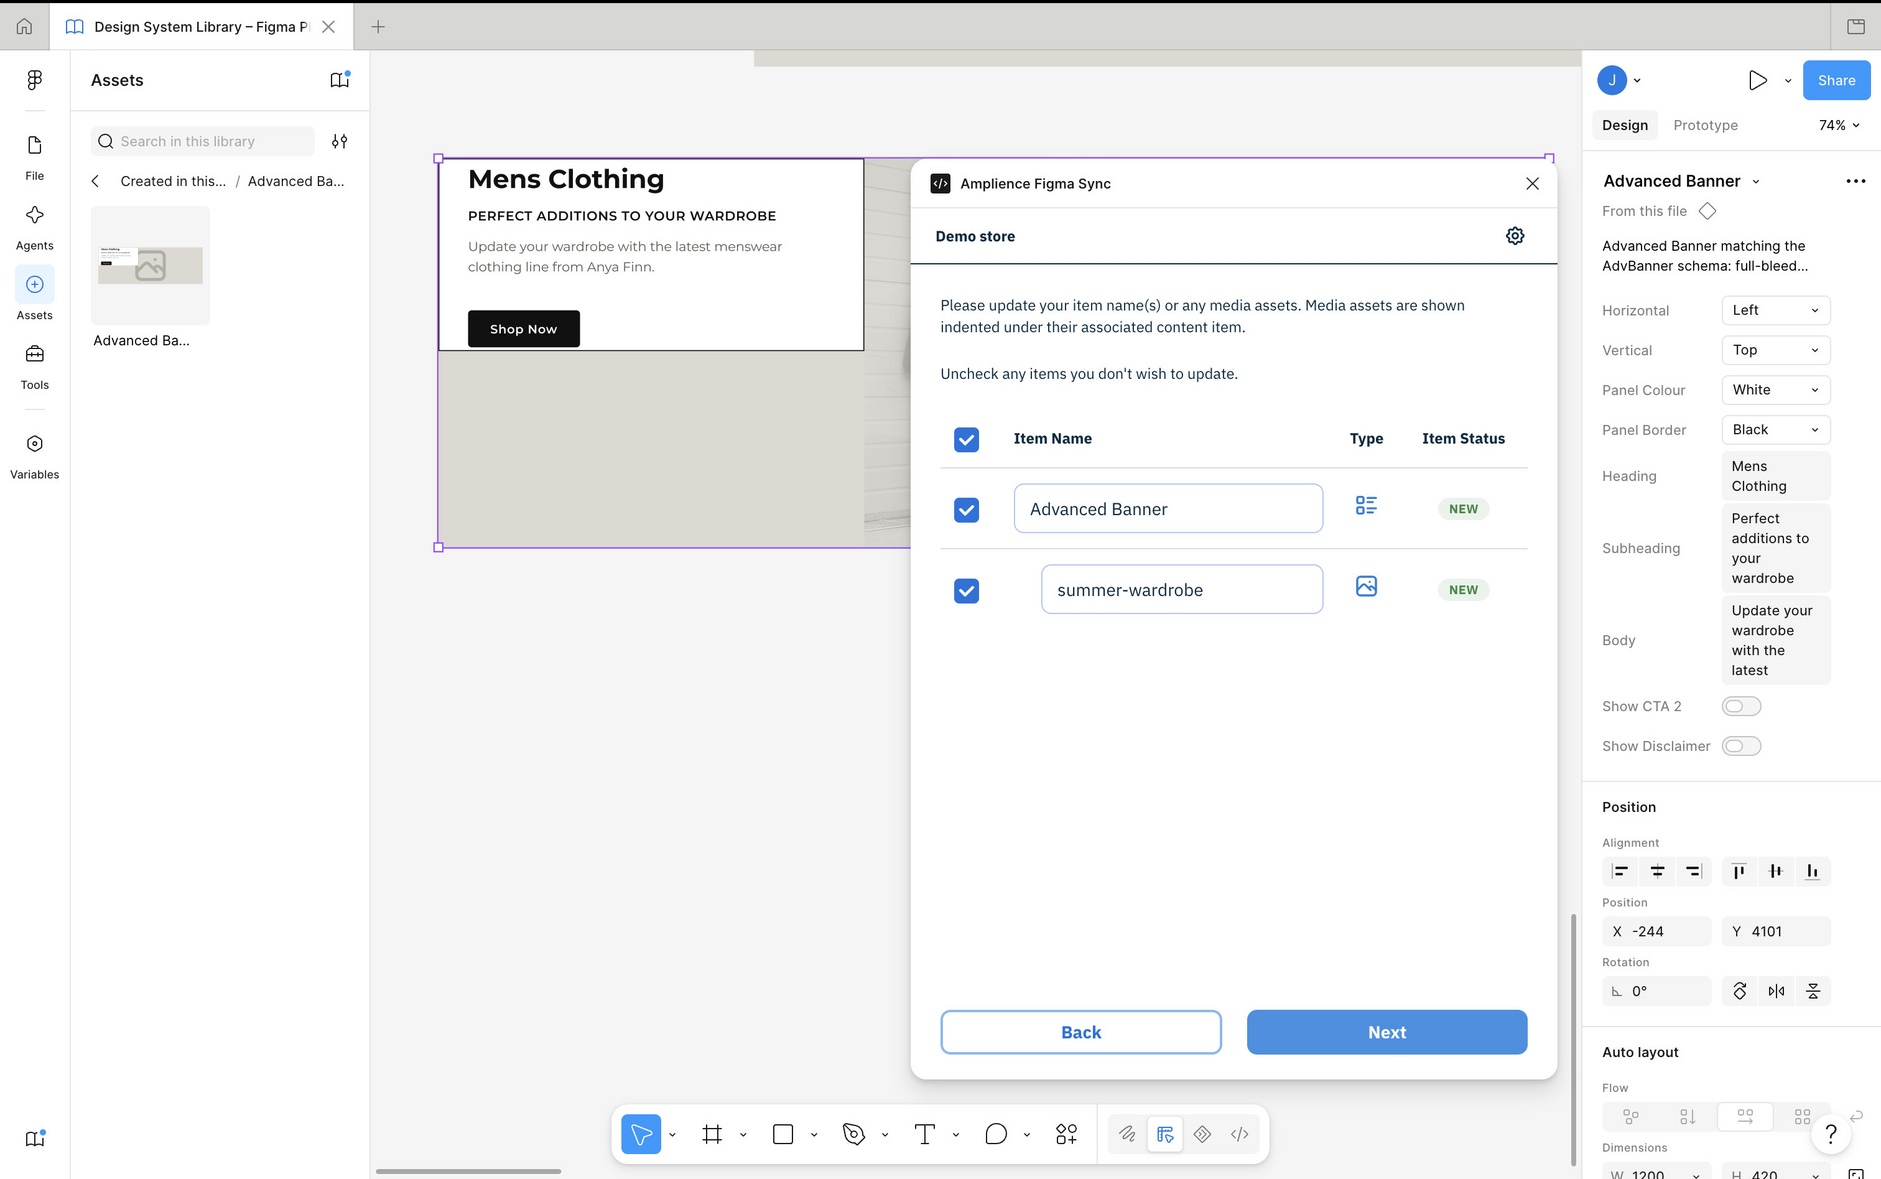
-
You can rename the item and any associated images. In this example we're just creating a content item called "Advanced Banner" containing an image named "summer wardrobe".
-
Click "Next" to copy the content to the CMS.
- If the item has been successfully created then a "Completed" dialog is displayed.
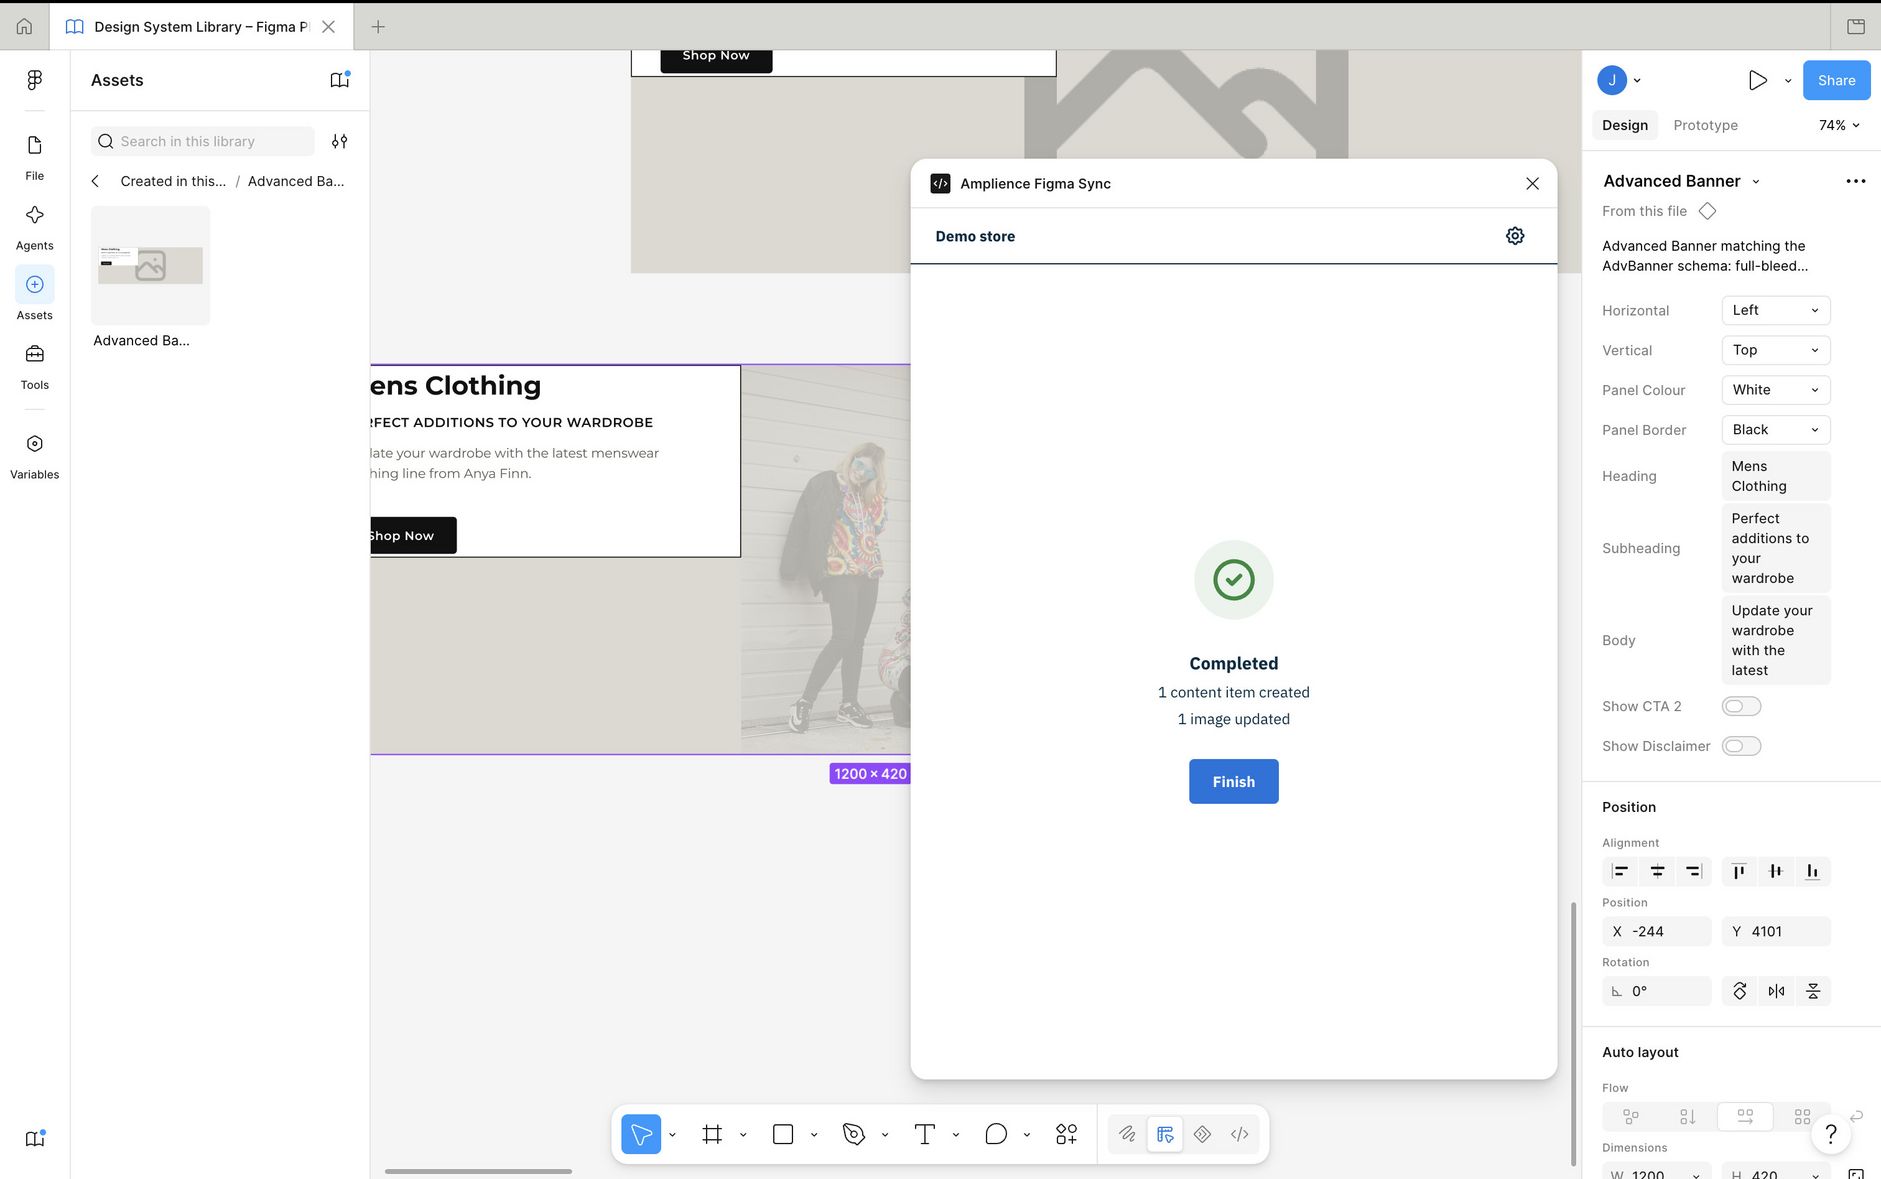
The content has been copied to the CMS.
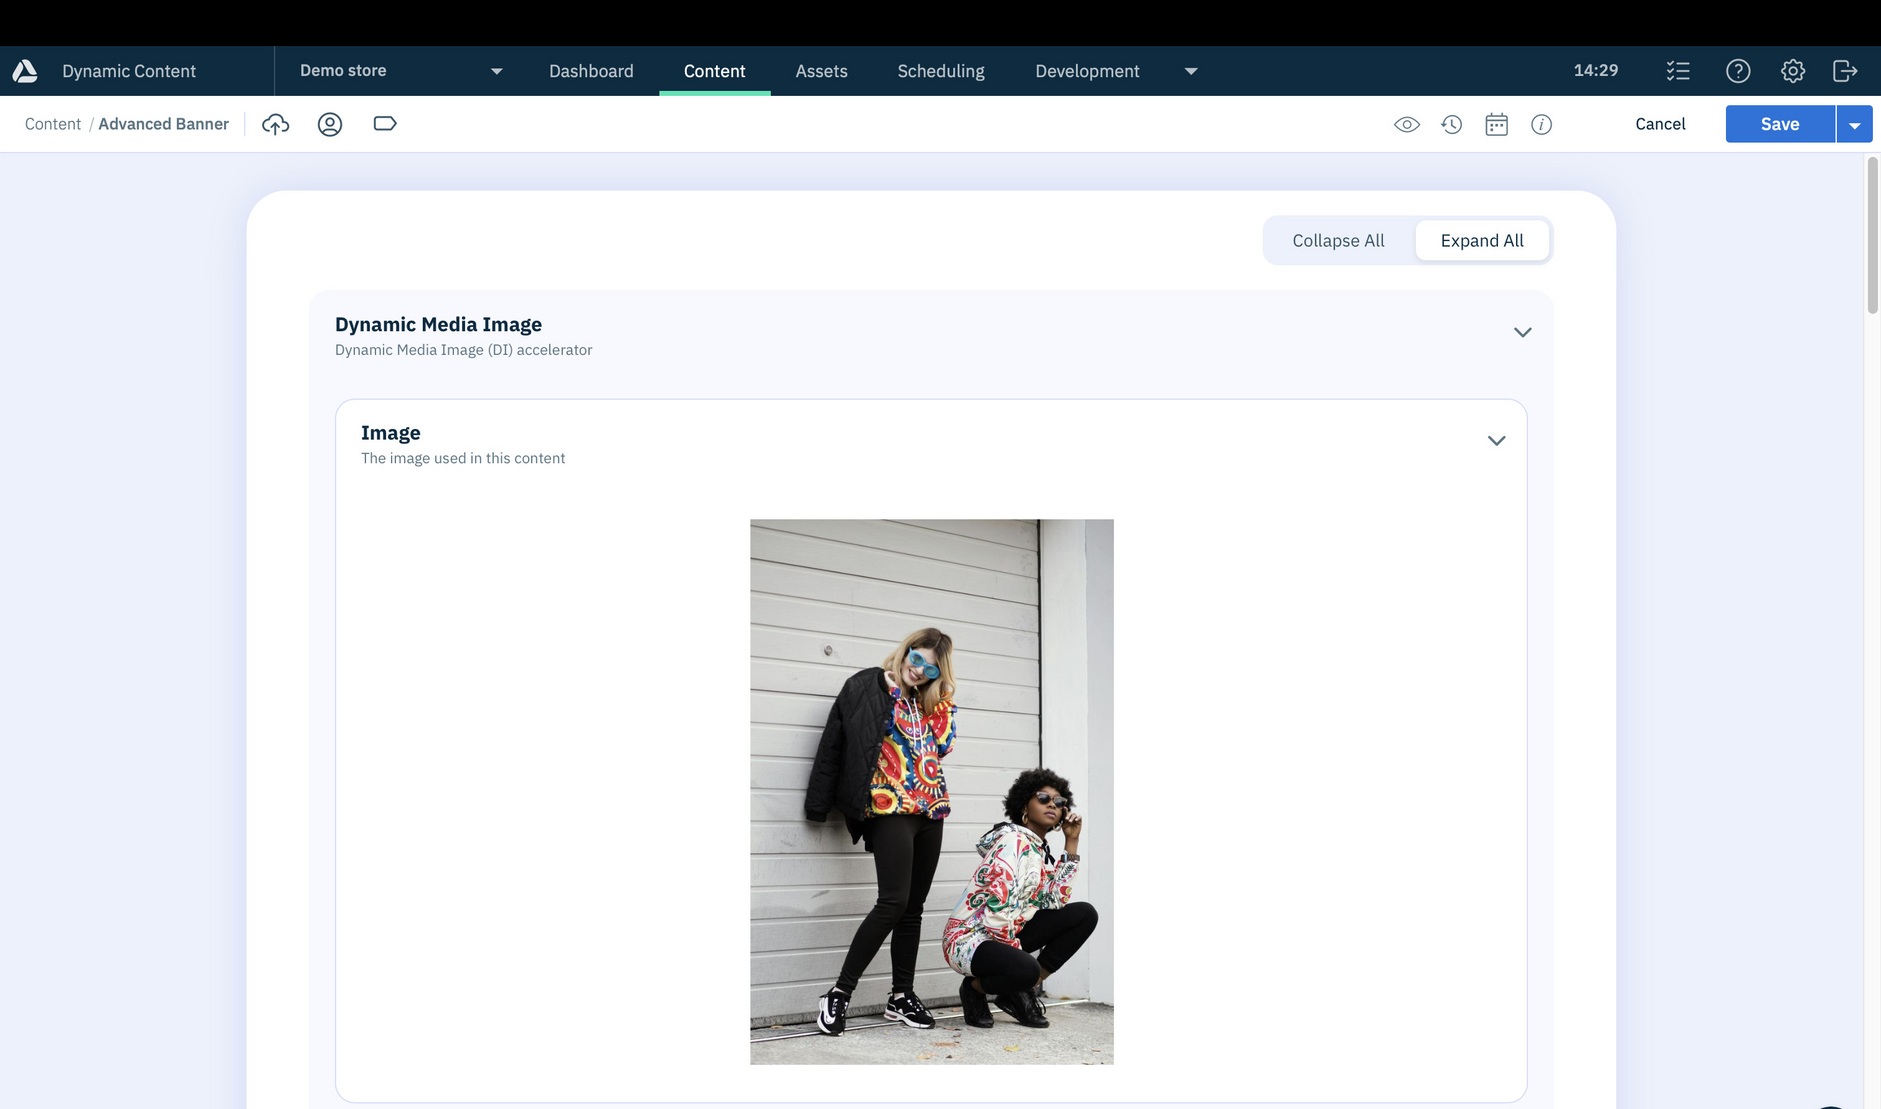
Check that all fields are present in the content item
Check that all the fields are included in the content item copied to the CMS. If any fields are missing, then you'll need to check the mapping.
See Copying Figma designs for more details of how to copy your designs into Amplience CMS.
Verifying variantsLink copied!
If your component has more than one variant, with different alignment settings, for example, then you should verify that instances of these variants can be copied to the CMS. You do not need to verify each simple variant of a component.
If a variant contains fields that aren't in the component you've already mapped, you'll need to create a separate mapping for it. For example, if a mobile variant of the Advanced Banner includes mobile only fields that weren't part of the Advanced Banner mapping, you'd create a dedicated mapping for that variant so every field is mapped correctly. Then create an instance of that variant and ensure that all fields are copied to a content item in the CMS.
Usage and troubleshootingLink copied!
What should I do if I get an error when copying content to the Amplience CMS?Link copied!
If you get an error code during copying and it looks like it's related to the mapping, then paste the error into the AI tool you used to create the mapping and ask it to check the JSONata file it created. There may be an error in the mapping file, or a problem with your Amplience CMS content type schema. Make any changes it specifies and recreate your mapping file again.
How do I handle "id supplied is not a valid UUID" errors?Link copied!
If you get an error containing a message about UUIDs when copying a component instance to a content item in the CMS, then this usually indicates:
- A problem with the destination CMS hub, such as a folder that no longer exists
- A problem with the component mapping
To diagnose a mapping problem, then you should gather as much data as you can and add this to a conversation in your AI tool.
When you encounter an error, do the following:
-
From the Figma plugins menu choose Show/Hide console. This will open the developer console within Figma. From here you can find more data to send to your AI tool.
-
Click the "Retry errors" button in the plugin window.
-
Click the network tab in the console.
In the network tab find the request that led to the error response. Copy the header, payload and response and add this to the conversation in your AI tool. The AI tool may provide a solution, such as diagnosing an issue with a content type schema, or in the JSONata mapping.
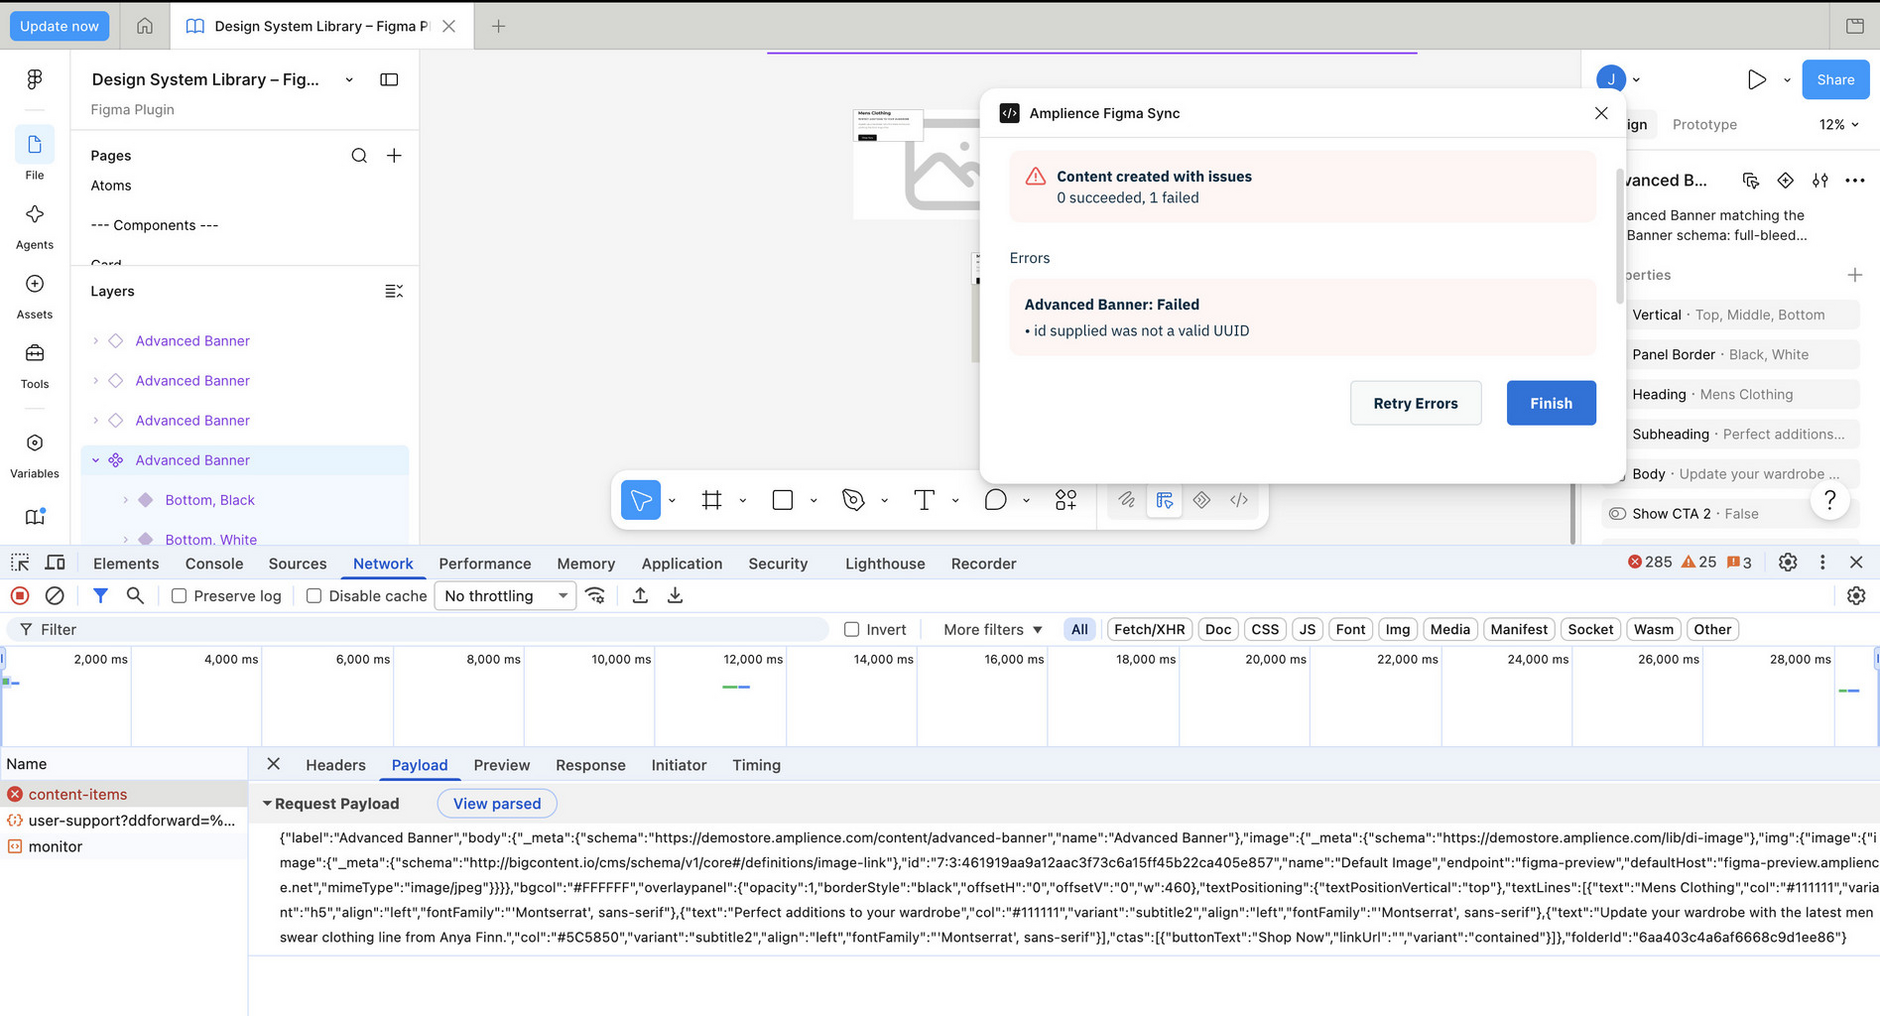
If the request, payload and response are not sufficient to solve the problem, then you can also provide your AI tool with the payload from a content item created from the content type to which you mapped the component. The AI tool can then compare this payload with the one the plugin generated to diagnose the problem.
- Switch to the Amplience CMS and open the hub that you're working with.
- View a content item created from the content type that you mapped the component to.
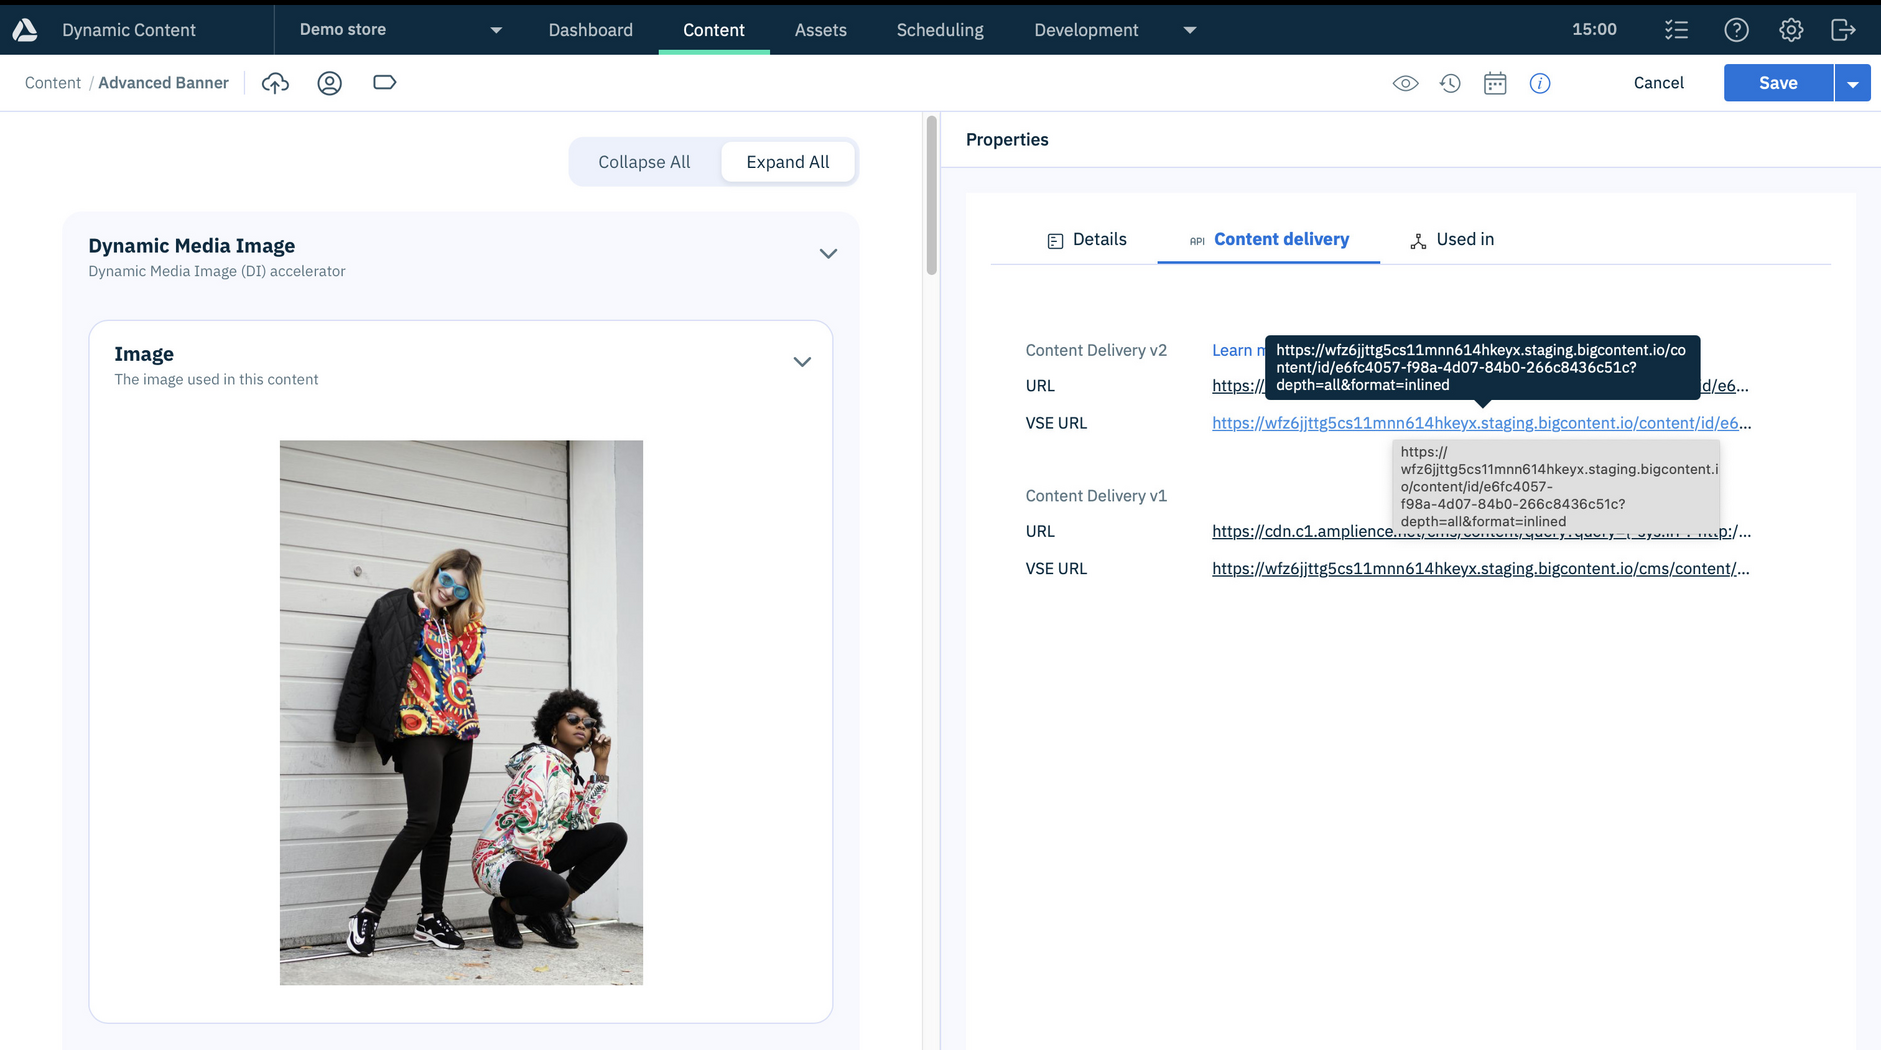
- Go to the Content Delivery tab and click on the VSE URL in the Content Delivery v2 section.
- A new window will open containing the JSON payload for this content item. Copy and paste it into your AI tool. This will help the AI tool diagnose issues such as missing (and possibly unmapped) fields.
I've updated a schema in the Amplience CMS, do I need to update the mapping?Link copied!
If you update a content type schema which you map a Figma component to, then you must update the JSONata mapping. Create the mapping again and paste the updated JSONata into the component settings.
-
In the plugin choose "Mapping" from the settings menu, hover over the component mapping you want to update and click the edit icon (the pencil).
-
Paste the updated JSONata into the JSONata mapping box and click "Update". Test the updated mapping.
For more troubleshooting tips when copying Figma designs see Troubleshooting