Content Hub- Transformation template user interface enhancements
Release date: 16th August 2021
Using transformation templates simplifies your image URLs and allows you to make changes to your image parameters without having to change your website code.
In this release we've improved the user interface for creating and managing transformation templates, making it easier to manage template parameters and the list of templates. On this page we'll give you a quick overview of the new features.
Creating a transformation templateLink copied!
Transformation templates contain a list of Dynamic Media parameters that are added to your account and referenced by name in your image URLs.
To create a transformation template go to Content Hub and choose "Transformation templates" from the Tools section (1). Click the "Create template" (2) button to start creating a new template.
Give the template a name and a label. You'll use the name to refer to the template in the image URL and the label identifies the template in the list. In this example we'll name the template "example-template".
If you've used the previous version of the transformation templates user interface, you'll notice that the template URL box is a lot bigger, allowing you to see more parameters.
Adding parameters from the shortcut menuLink copied!
To add the first parameter to your template click the "Add parameter" button.
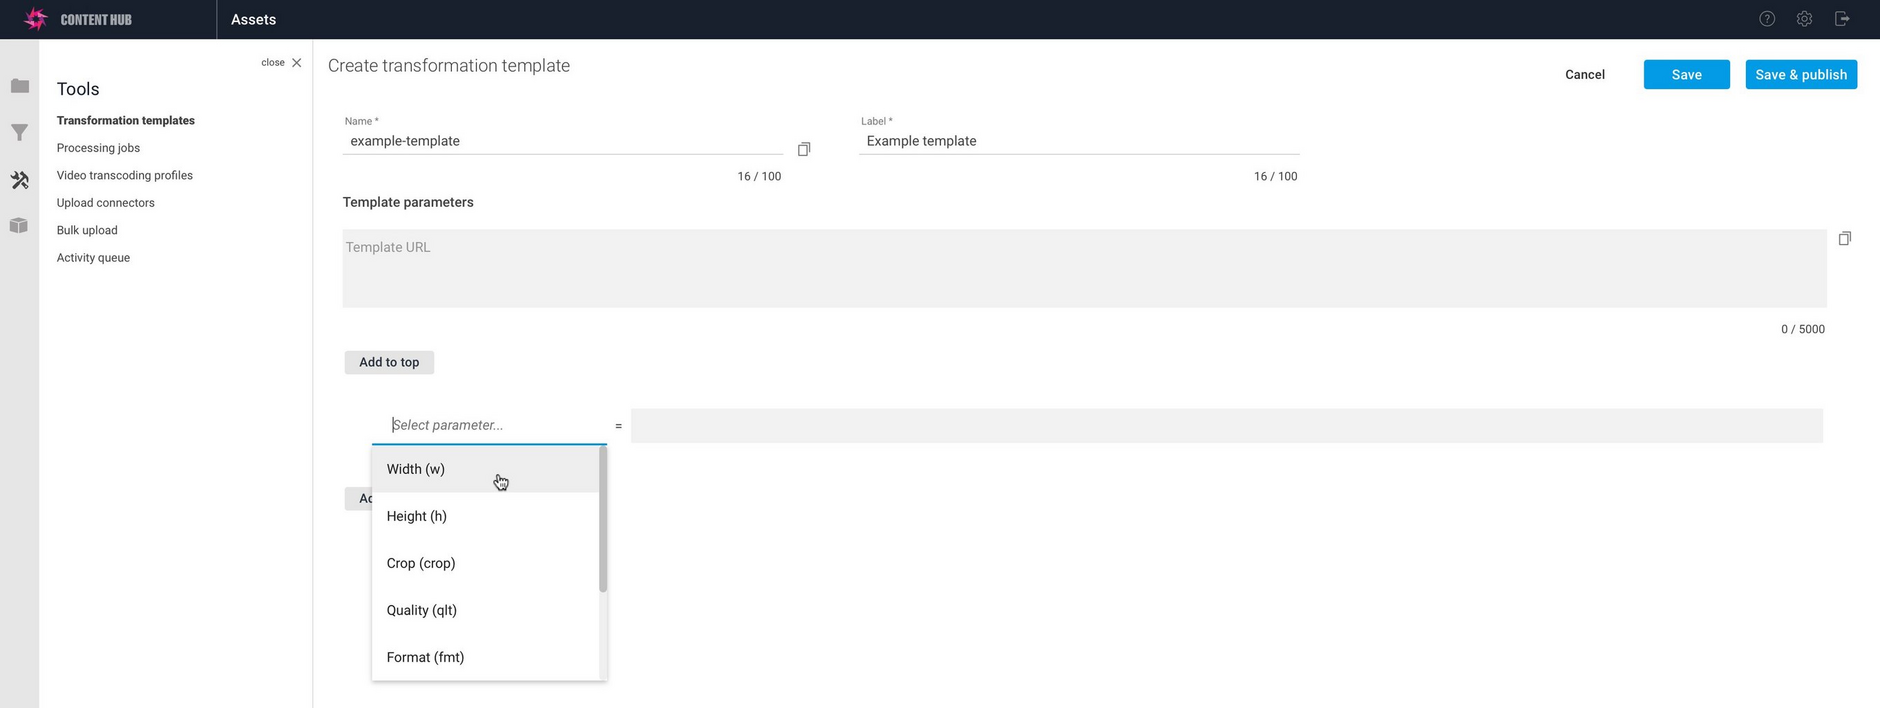
A row is added to the parameter list. You can click "Select parameter" to choose a parameter to add from the menu. We've included the most commonly used parameters such as width, height, format and quality. In this example we'll choose width and set its value to 300.
The parameter is added to the list. As each parameter is added, the template URL is updated.
The "Add to top" and "Add to bottom" buttons allow you to add parameters to the start or end of the URL respectively.
If we add choose another parameter, then it will be added to the template URL. In the example below, the format parameter is added by clicking "Add to bottom" and adding the parameter to the end of the list.
We set the format of the image to PNG.
Adding parameters manuallyLink copied!
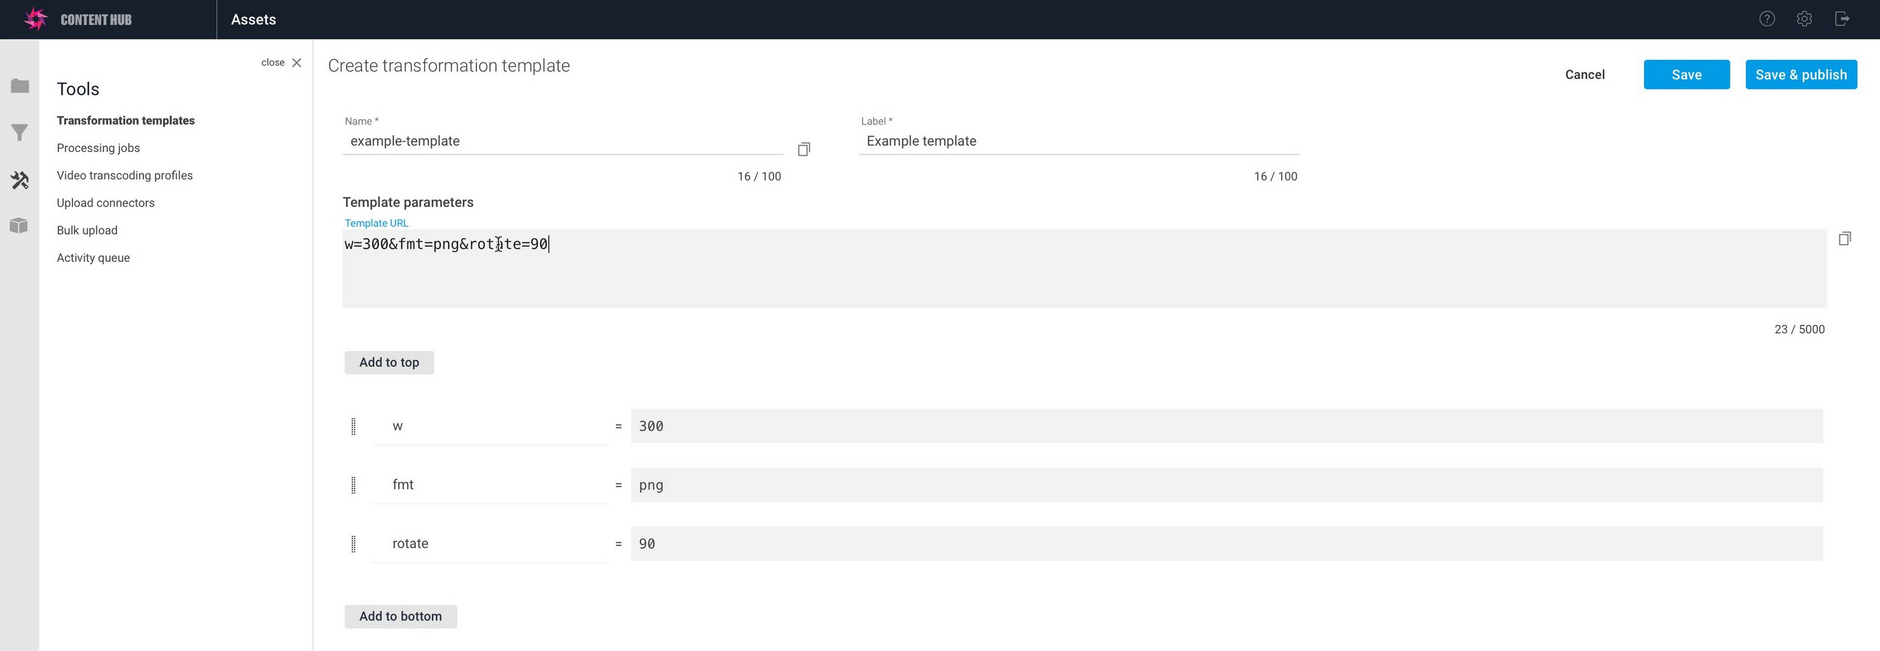
You can add parameters either by choosing them from the shortcut menu, or by typing the parameters directly in the template URL box. In the example below we're rotating the image by 90 degrees. Rotate is not included in the parameters menu so we type it directly into the template URL box.
When a parameter is added to the template URL it's automatically parsed and added to the parameter list underneath. This makes it easier to view each parameter separately.
Changing the order of parametersLink copied!
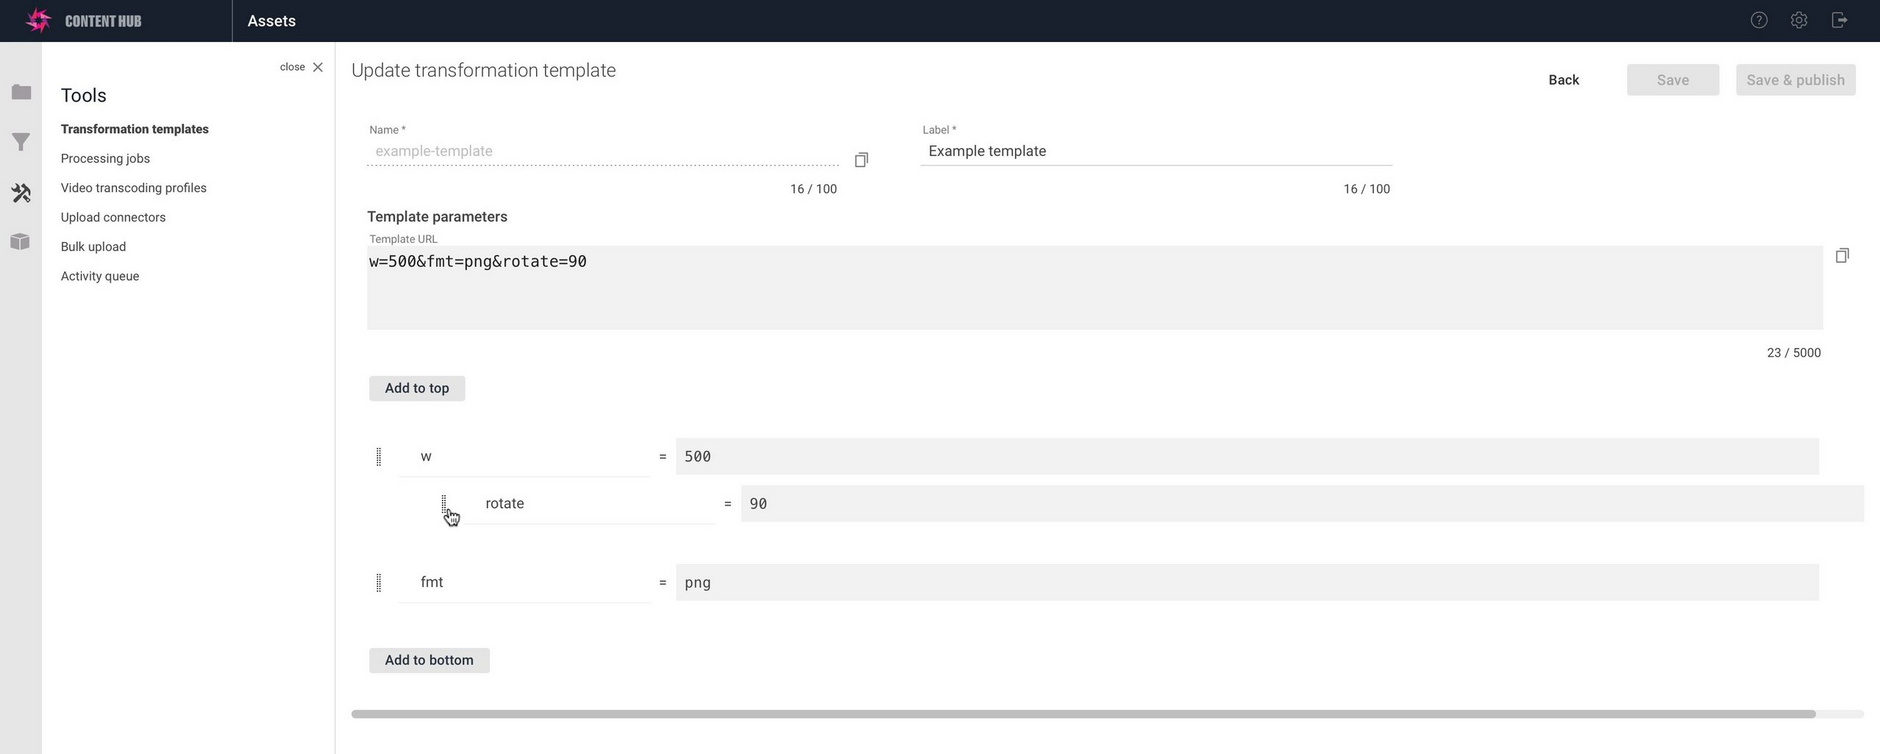
It's easy to change the order of parameters by clicking and dragging the icon to the left of the parameter in the list and dragging it to its new location. In the example shown below, we're changing the order of the rotate parameter in the parameter list.
Viewing and editing transformation templatesLink copied!
From the landing page you can open, publish, copy and delete transformation templates by right-clicking and choosing options from the template's contextual menu. Any transformation templates that you've created previously will be shown in this list.
The template list can be sorted by name, label, creation and modification dates and you can also use search.


