Managing hierarchies
On this page we explain how to remove a node from a hierarchy.
Removing a node from a hierarchyLink copied!
When you remove a node from a hierarchy, the link between the node and its parent is still there in the published version of your content. In order to ensure that the node is not included when you list all children of its parent you need to either:
- Remove the node from the hierarchy and re-publish it. This is the approach to use if you still want to retrieve the published version of the content item.
or
- If you no longer need the content item: unpublish the node and then remove it from the hierarchy.
Removing and republishing the nodeLink copied!
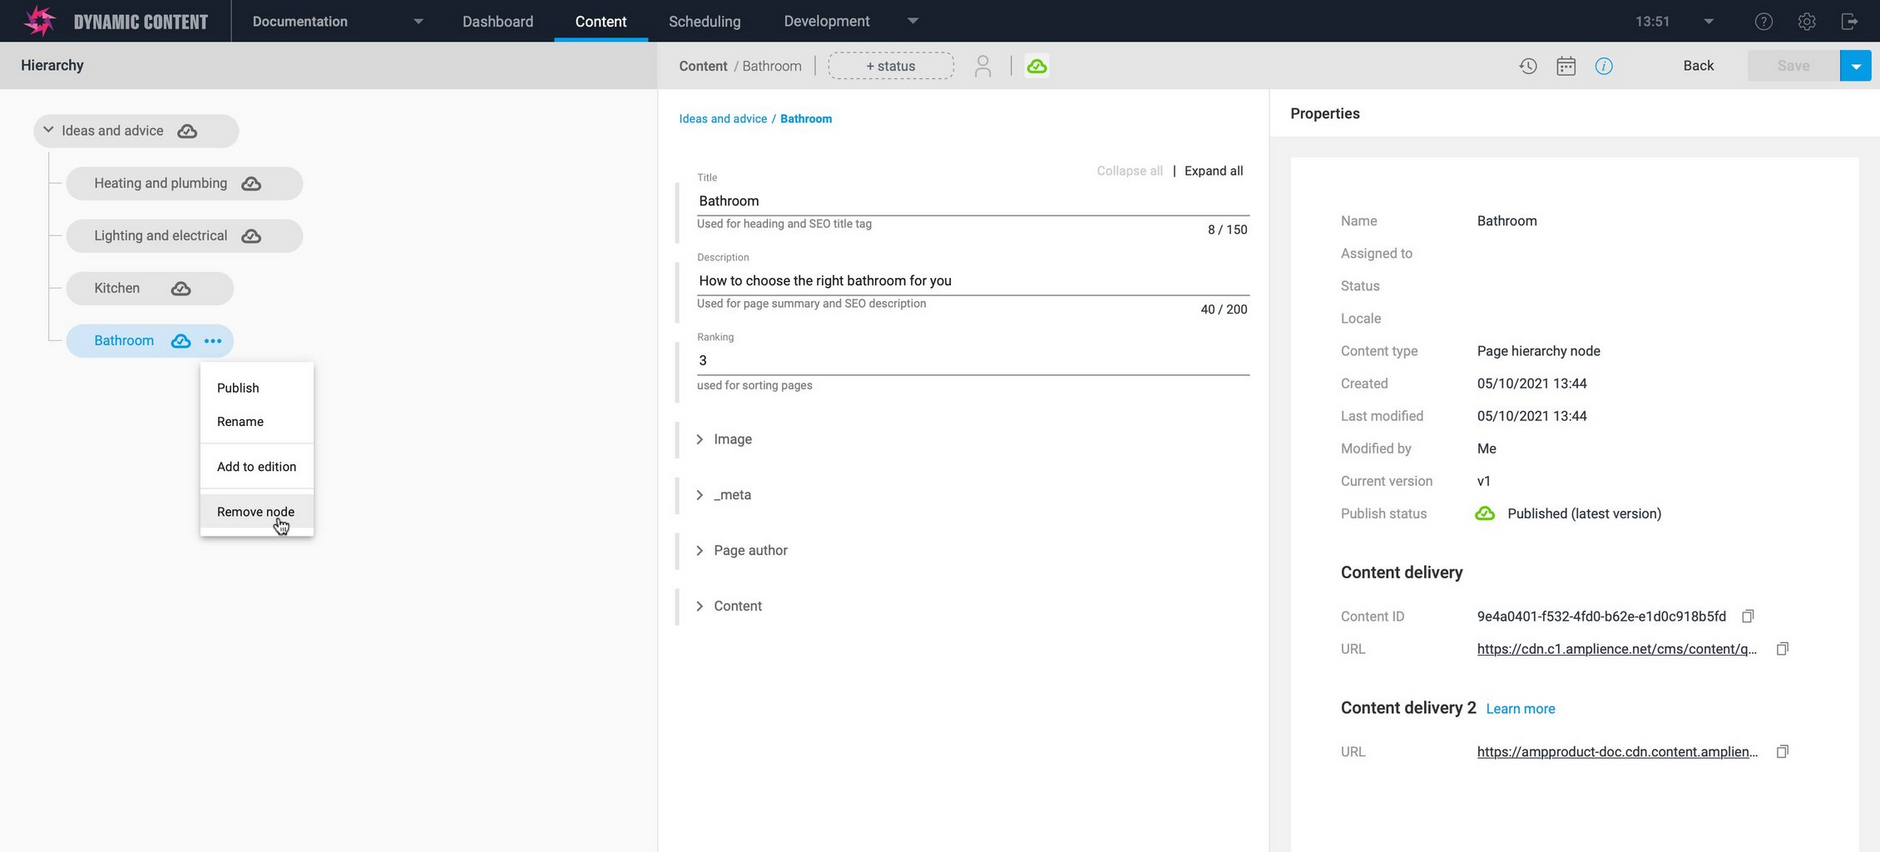
In the example below we're removing the "Bathroom" node from its hierarchy.
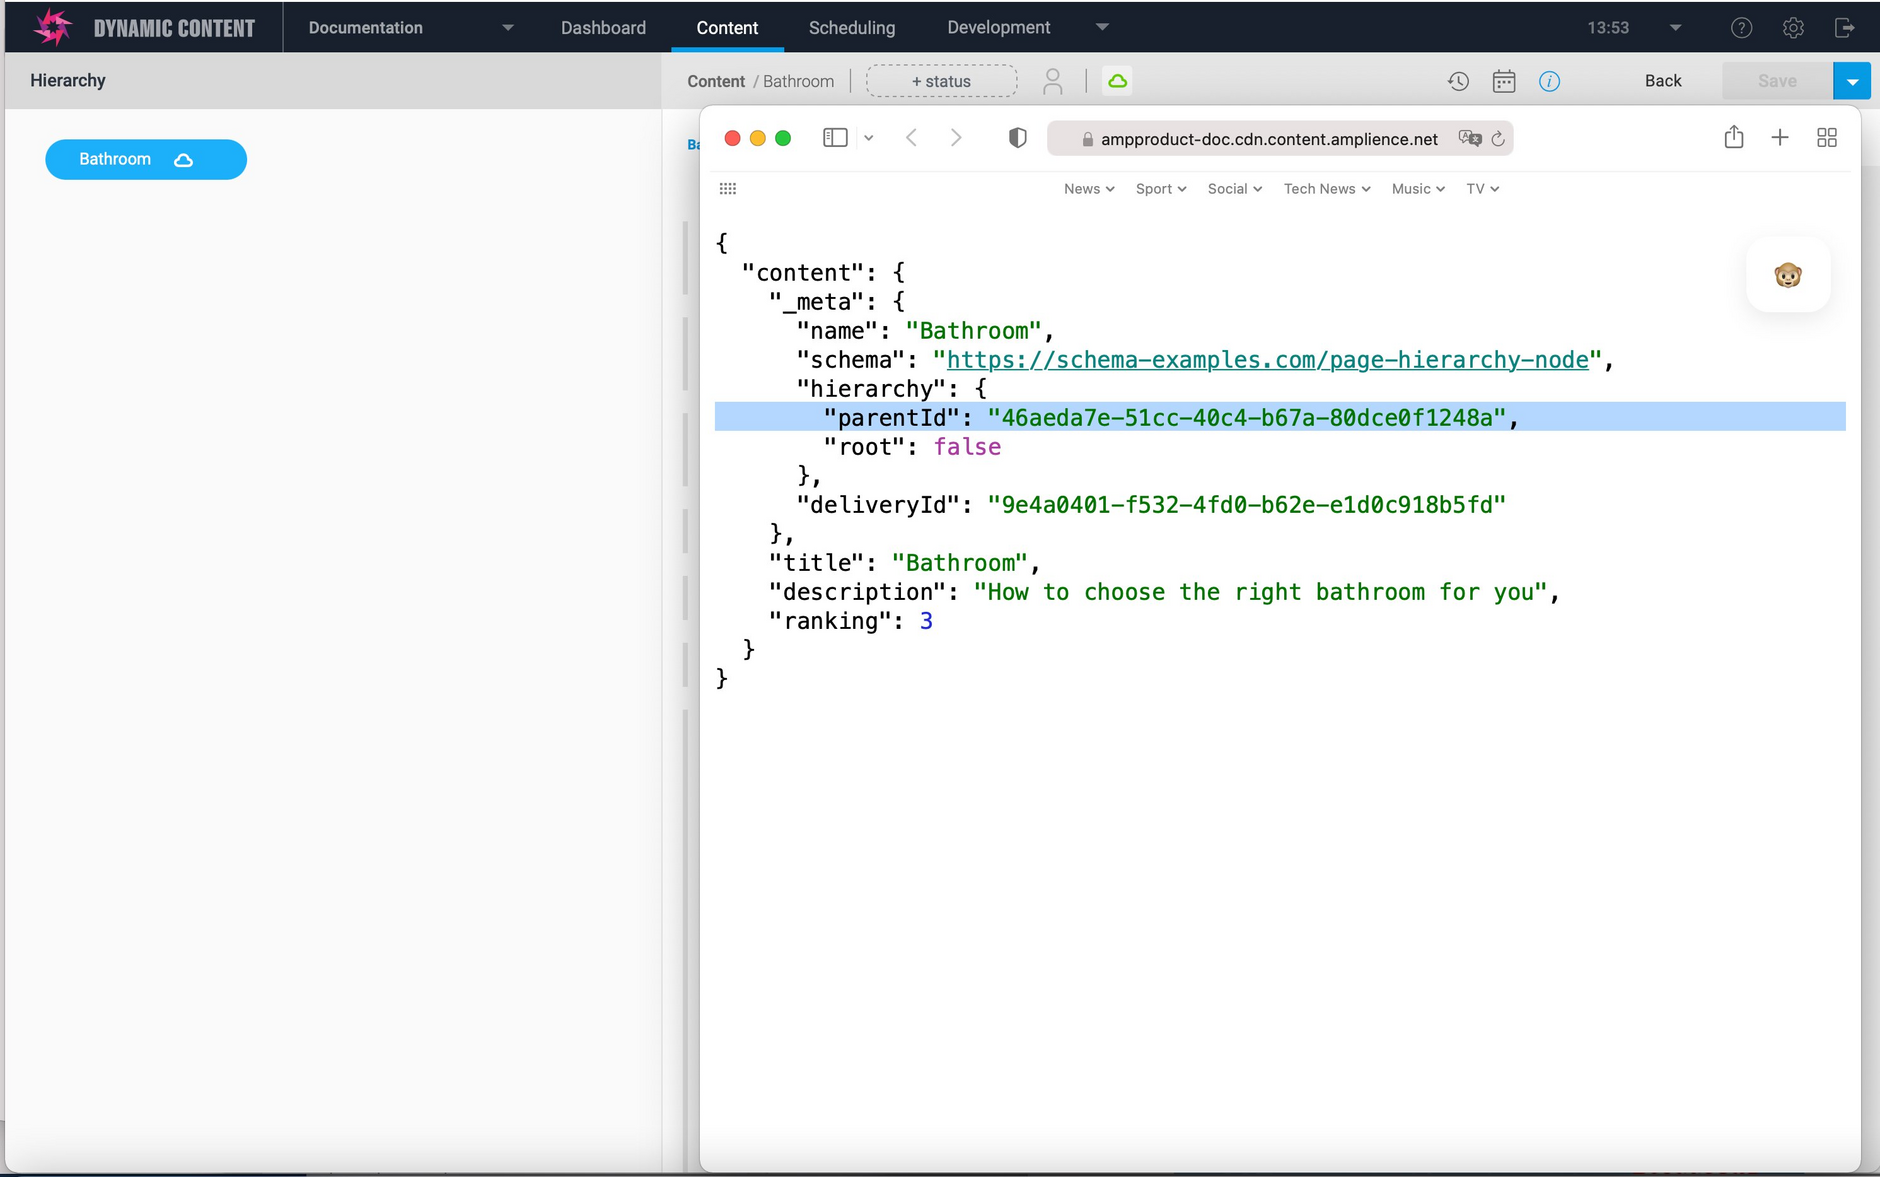
The bathroom node is no longer part of the hierarchy, but as you can see from the JSON returned by the Content Delivery v2 API, the parentId still contains the value of its previous parent node.
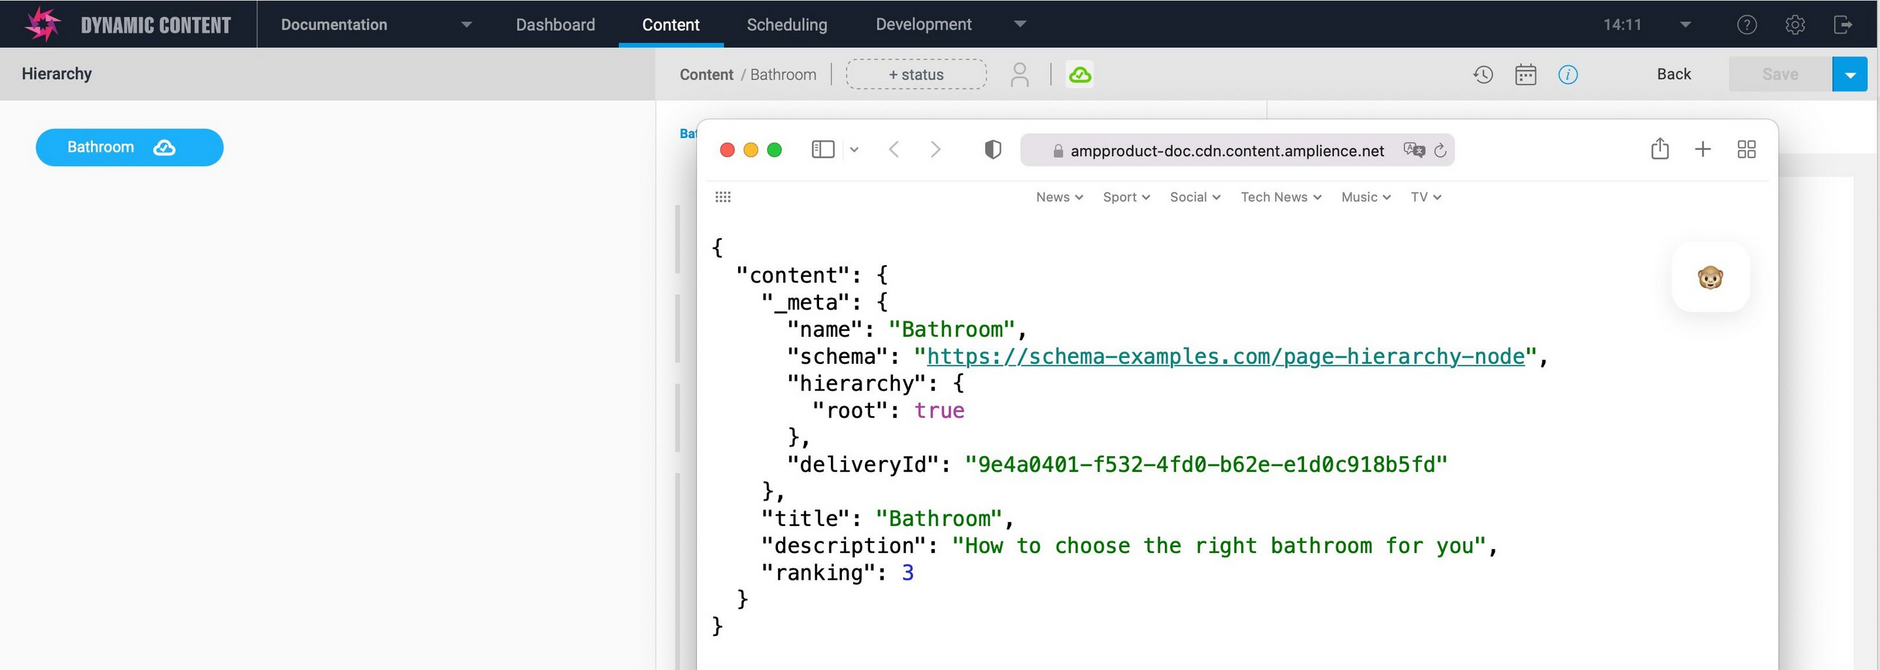
When the item is re-published, the parentId will not longer be included in the JSON response and the item will no longer be returned as part of the hierarchy.
Unpublishing and removing the nodeLink copied!
If you no longer need to retrieve the node using its production Content Delivery URL, you can use the unpublish feature.
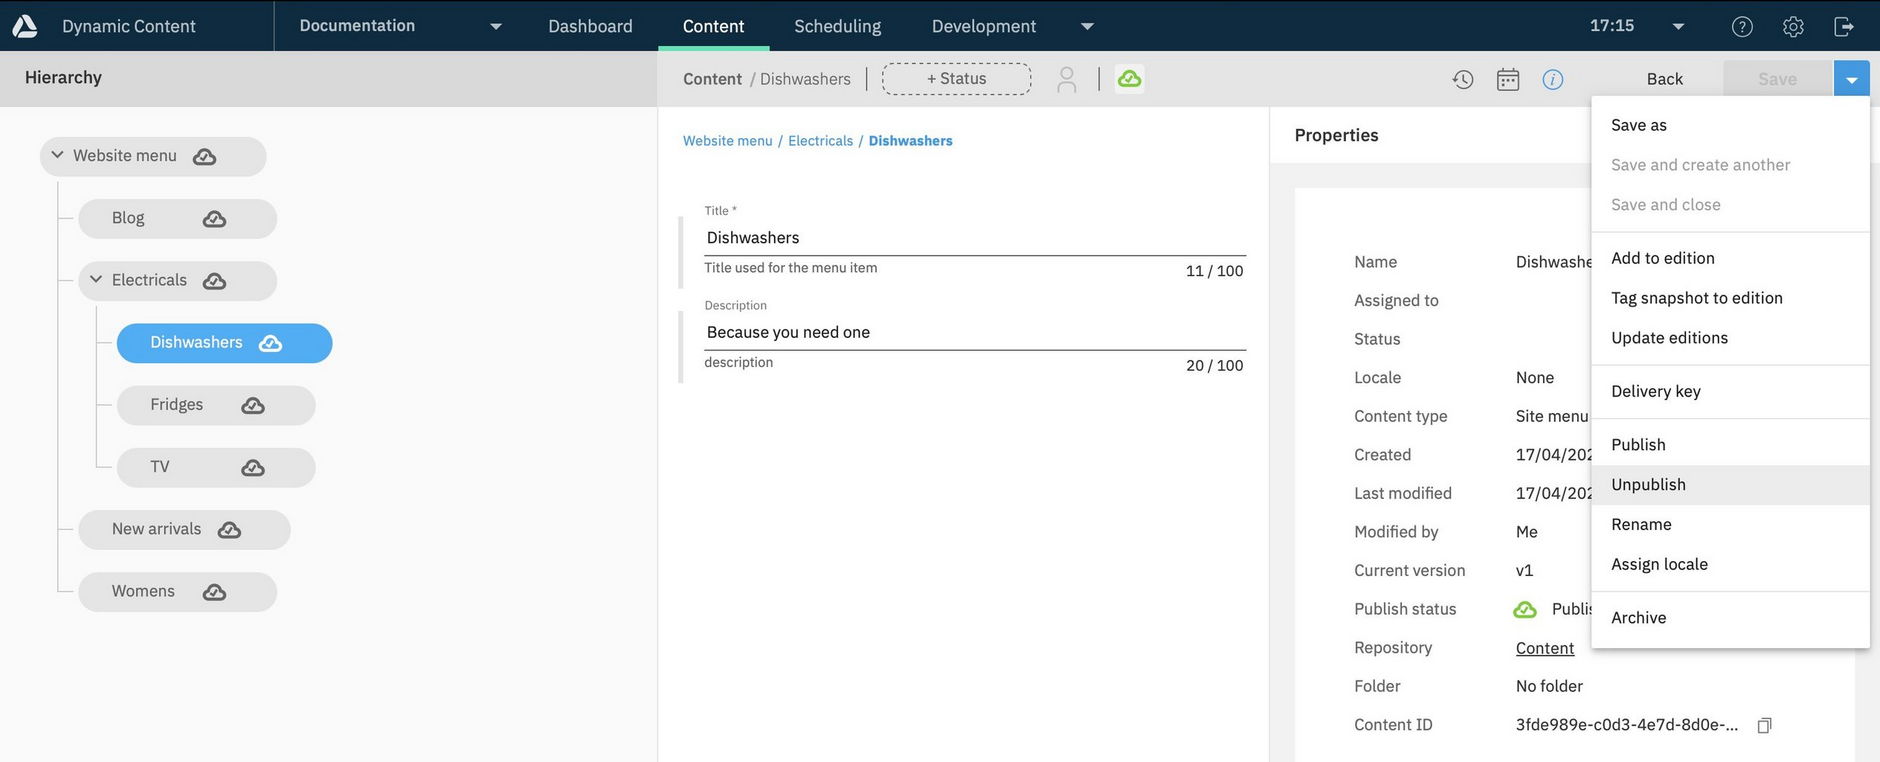
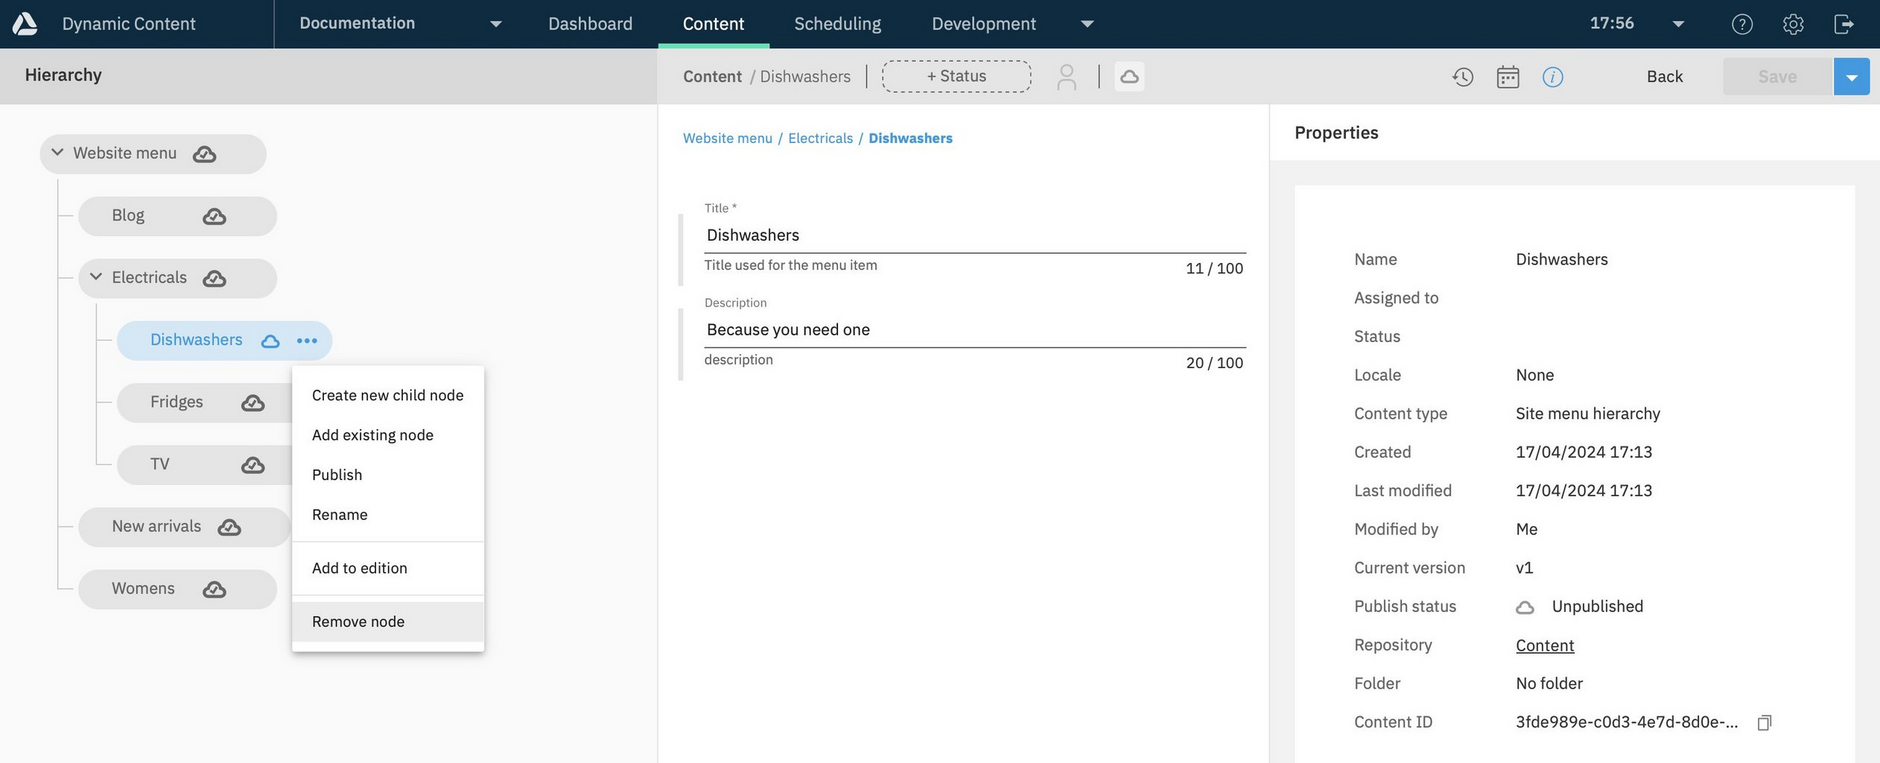
In the example below, we no longer want the Dishwashers node to be part of the hierarchy. To unpublish the node, select it in the hierarchy so the content item the node represents is shown on the content form. Choose "Unpublish" from the "Save" menu to unpublish the item.
If you're no longer using the item, you may want to archive it.
After it is unpublished, the item will no longer be returned if we query all published children of its parent (in this case the Electricals node). However, it will still be returned when you query its parent using the virtual staging URL.
To remove the item from the hierarchy and the link to its parent, click the node in the hierarchy browser and choose "Remove node" from its menu.
Implementing an isActive flagLink copied!
Another approach you can use, if you're implementing something like a page hierarchy, is to include an "isActive" flag in the Content Type schema that you can use with the filter API to return only those nodes that are marked as active. This allows the user to choose which nodes will be returned.
The hierarchy chooser extensionLink copied!
The hierarchy content field extension allows users to browse and add content items from a hierarchy rather than having to find these items in the Content Library. In the example of the recipe hierarchy, by using the hierarchy extension, it's easy to browse and add multiple ingredients.
To use the hierarchy extension you need to include either:
- The content item id of the hierarchy node from which the hierarchy can be browsed in the extension params. You can find the content item id from the properties pane in the content form, as shown in the image below.
- The delivery key of the node from which you wish to browse. You can also find this from the properties pane.
If you specify both the content item id and the delivery key, then the delivery key will take precedence.
The ingredients property shown below uses the extension registered as "hierarchy-extension" and passes the id of the root node of the ingredients hierarchy- the content item named "Ingredients".
Here's the same example referencing the node using its delivery key, in this case the node has a delivery key of ingredients-main-list. In the schema shown below, the hierarchy chooser extension is attached to the ingredients property using its hosted URL: https://hierarchy-chooser.extensions.content.amplience.net.
Registering the hierarchy chooser extensionLink copied!
To register the hierarchy extension, go the development home page and click the extensions icon, or choose "Extensions" from the Development menu. Click the "Register extension" button.
-
In the registration window, choose "Content field" as the category.
-
Add a label and name. The name will be used as the value of the "name" field in the
ui:extensionsection of a property that uses the extension. In theingredientsproperty shown above the extension is named "hierarchy-extension". -
Enter
https://hierarchy-chooser.extensions.content.amplience.net/as the URL. -
Click the "Permissions" tab to set the extension permissions. Set the "Read access" and "Allow same origin" permissions.
You can specify additional parameters from the "Installation parameters" tab or add them directly in your schema. The available parameters are as follows:
| Parameter | Description | Required / Optional |
|---|---|---|
nodeId | The content item id of the item to use as the root of the hierarchy | Required (one of nodeId or deliveryKey must be specified) |
deliveryKey | The delivery key of the item to use as the root of the hierarchy | Required (one of nodeId or deliveryKey must be specified) |
type | The display size of each node: large, small or chip | Optional. The default is "large" |
When you've finished setting up the extension, click "Save" and the extension will be registered and available to include in your schemas.
See the hierarchy chooser extension GitHub repository for more details on the configuration options.
