Registering and using extensions
Content field extensions, content editor extensions and dashboard extensions can all be registered.
-
Registering a content field extension makes it easier to use the same extension in multiple schemas, supply snippets for common parameters and edit the extension's URL.
-
The label used to register content editor extensions is used as the tab name for the extension in the content form. You can also add permissions and installation parameters.
-
Dashboard extensions must be registered, with information including the extension label, URL and any optional installation parameters.
On this page we'll show you how to register each type of extension, configure which permissions it is granted and specify installation parameters. For content field extensions we'll show you how to add snippets and add an extension in the schema editor.
Registering an extensionLink copied!
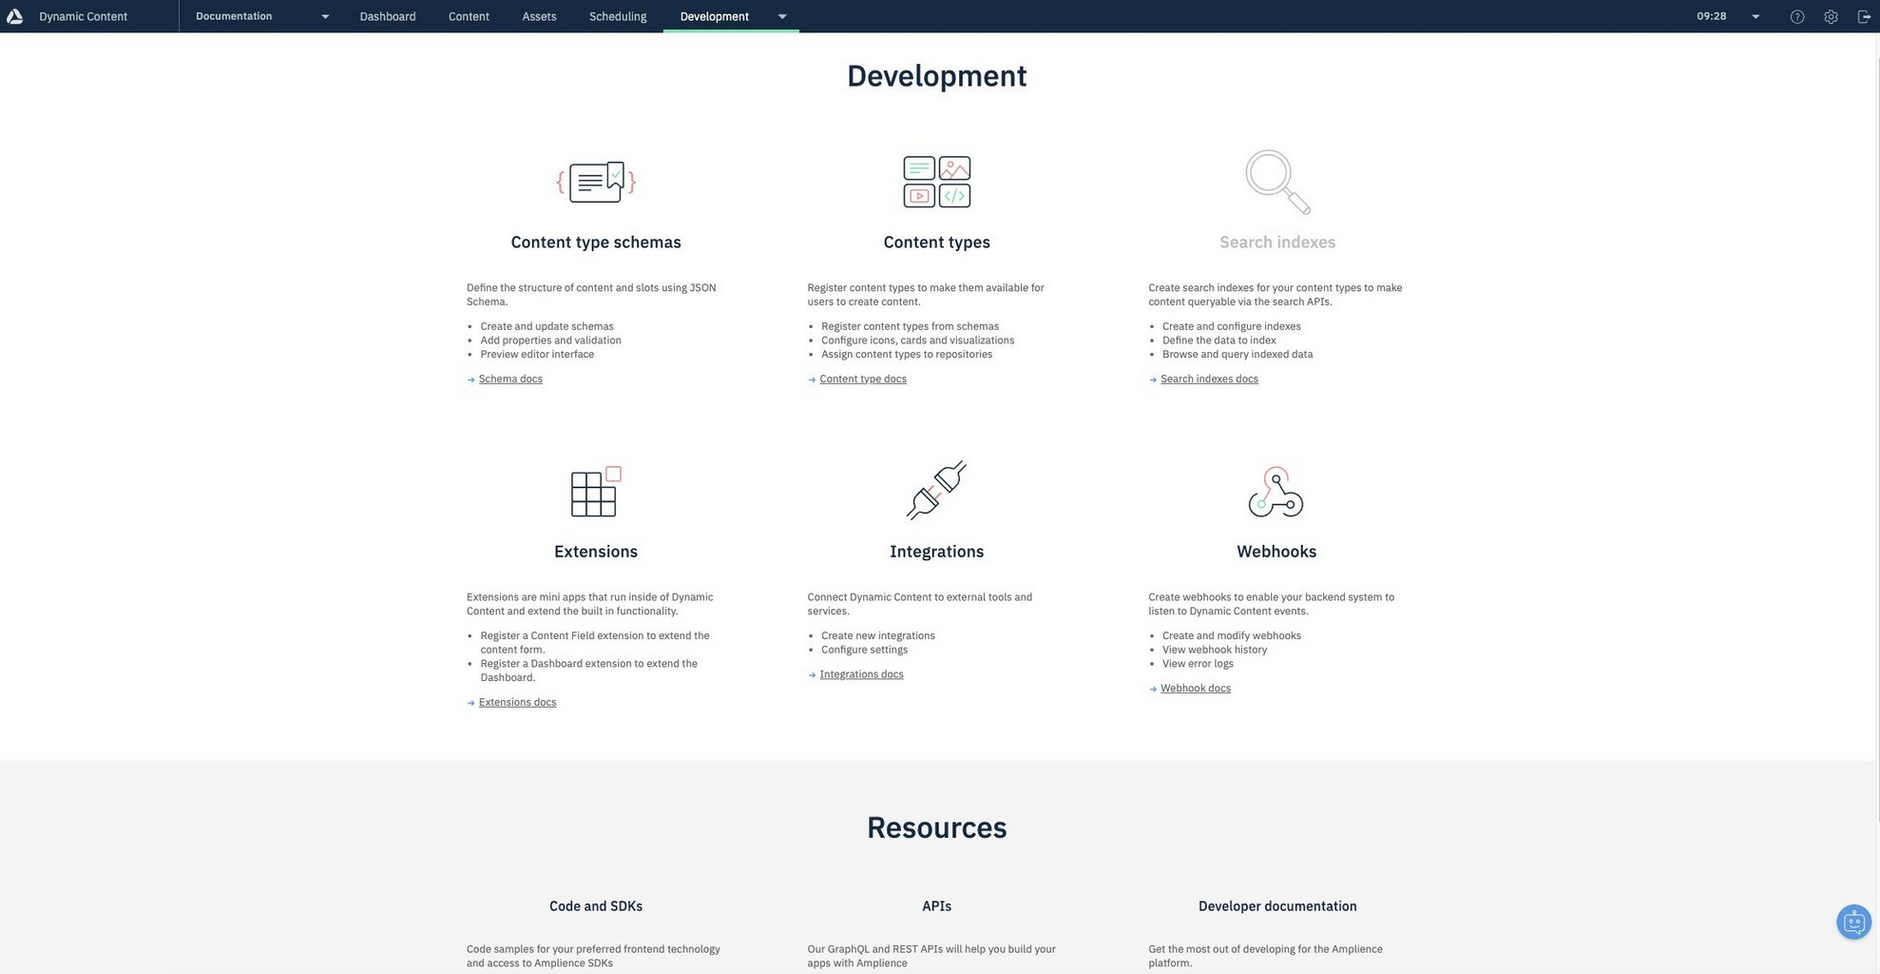
To register an extension, go the development home page and click the extensions icon, or choose "Extensions" from the Development menu.
Note that users must have the developer role in order to have permission to register and manage extensions.
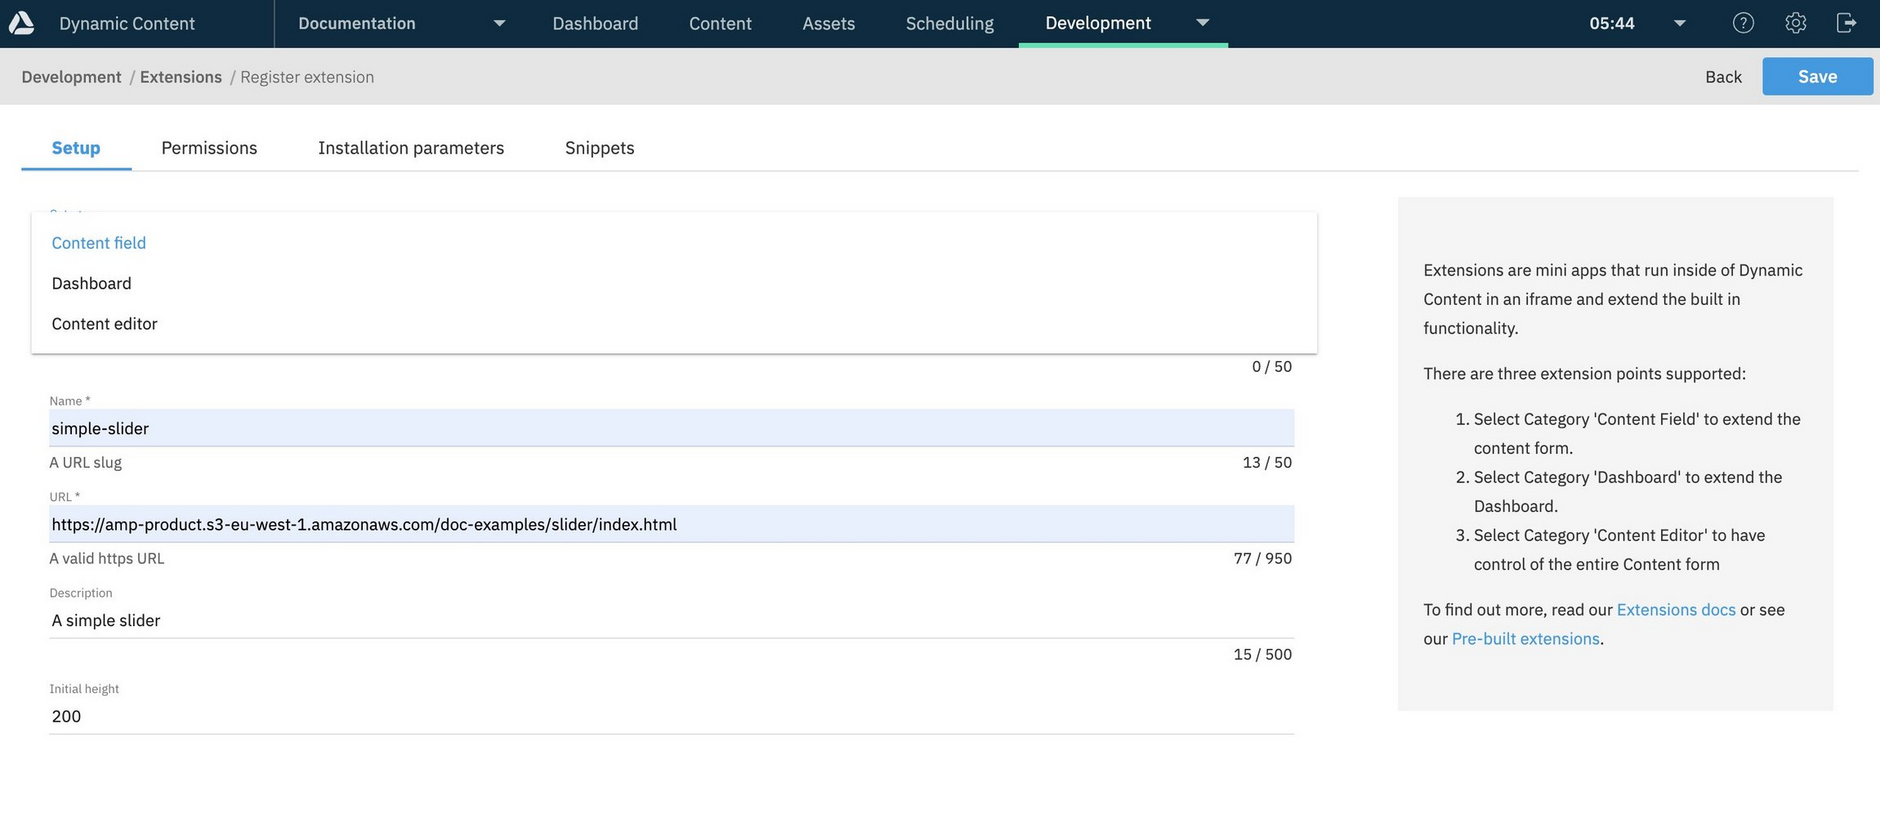
In the registration window, choose the category: content field, content editor or dashboard extension.
Registering a content field extensionLink copied!
Add a label and name. For content field extensions the label is used to identify the extension in the Add extension menu in the schema editor. The name will be used as the value of the "name" field in the ui:extension section of a property that uses the extension.
Next you need to add the extension URL and a short description that will be used to provide information when adding the extension to a content type schema. The initial height of the frame within which the extension is displayed defaults to 200 pixels, but you can change this value if you wish.
When all this information is added, click "Save" and the extension will be registered on the hub and available to use with the schema editor.
Registering a content editor extensionLink copied!
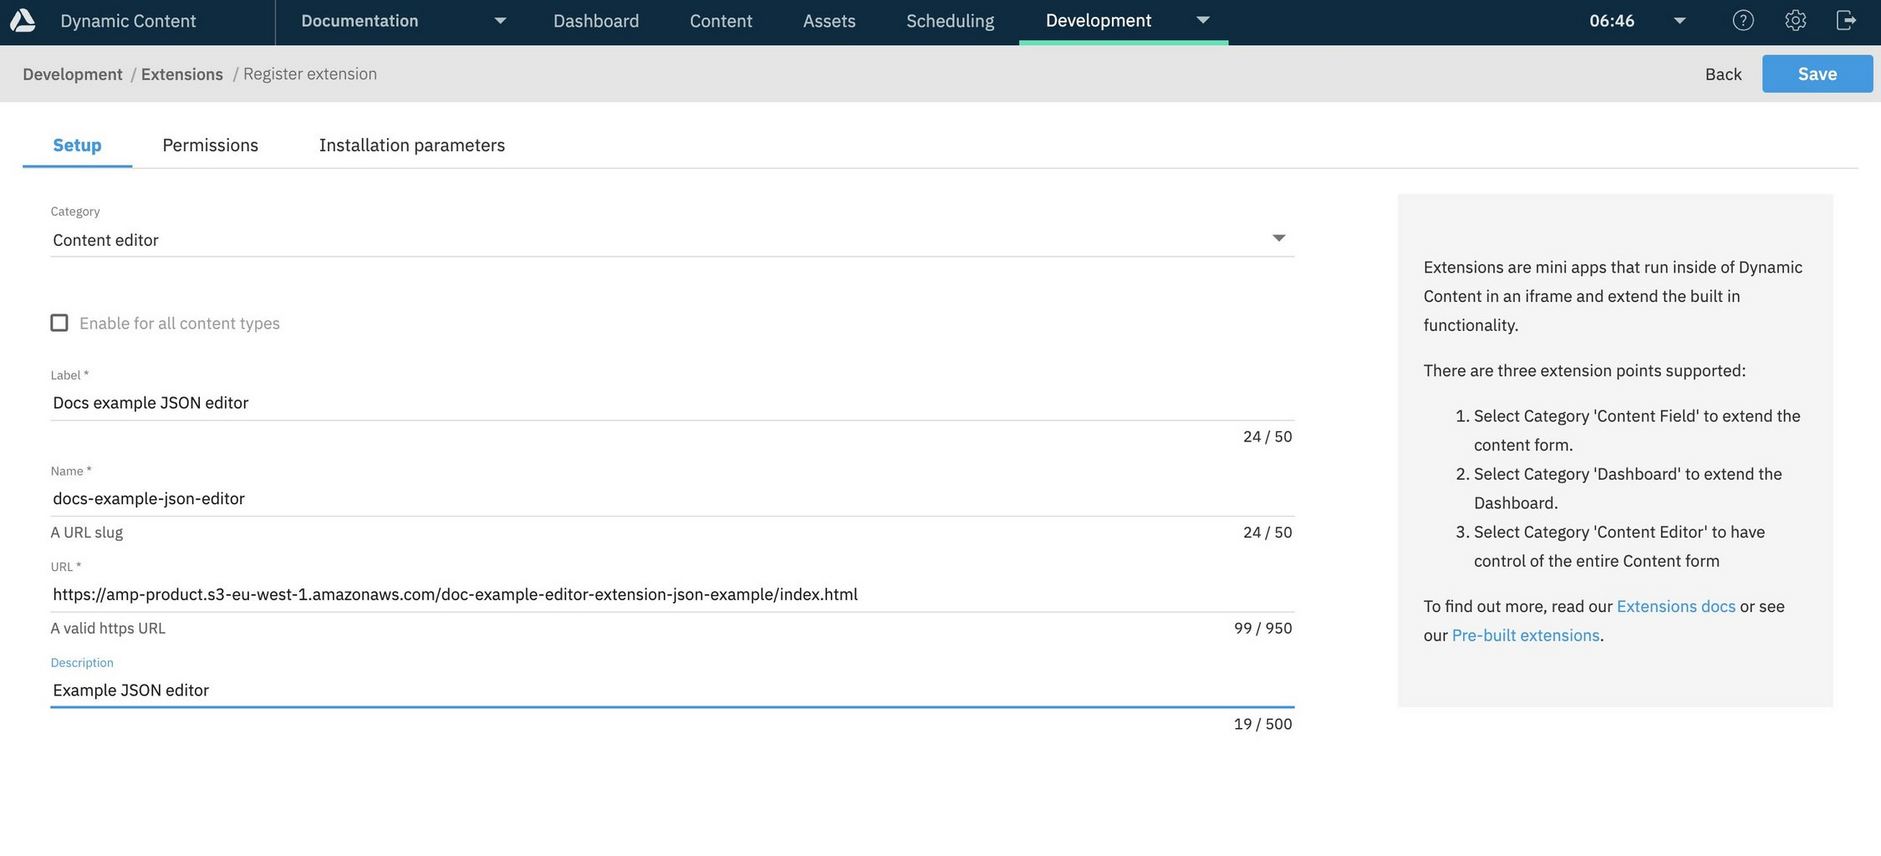
To register a content editor extension, choose "Content editor" from the category menu and enter the extension's label. This will be displayed as a title of the extension's tab in the content form.
Enter the extension's URL and a description. In the example shown below we are registering an extension called "Docs example JSON editor".
The "Enable for all content types" checkbox allows you to specify whether the extension is shown on the content form for all content types, or just those that include a reference to the extension in their schema.
Registering a dashboard extensionLink copied!
To register a dashboard extension, choose "Dashboard" from the category menu and enter the extension's label. This will be displayed as a title of the extension's Dashboard tab.
Enter the extension's URL and a description. In the example shown below we are registering the Kanban example extension.
Extensions can be hosted locally, so you can include "localhost" in the URL. This makes it easier to develop an extension because you do not have to host it externally during testing.
PermissionsLink copied!
Click the "Permissions" tab to display the permissions available to the extension. The same set of permissions is available to both Content Field and Dashboard extensions.
You can specify two sets of permissions: API permissions and Sandbox permissions.
All permissions will initially be set to off by default and are configured per extension and for the current user. The user controls which permissions are set for an extension, the extension cannot modify which permissions it is granted.
You toggle all permissions on or off by clicking "Select all".
API permissionsLink copied!
The API permissions allow you to grant this extension permission to access the Dynamic Content Management API. You can choose to enable "Read access" ("GET" methods) and "Modify access" (all other methods). If you leave these permissions set to off, then the extension will be denied access to the API. Even if the extension is granted access to the API, the user must also have the appropriate API permissions.
Sandbox permissionsLink copied!
Extensions are loaded into an iFrame which has the sandbox attribute set. This attribute enforces restrictions on the iFrame content.
You can choose to remove some sandbox restrictions from the sandbox permissions section. These are standard sandbox attributes supported by Chrome, Safari and Firefox. Note that not all browsers may support all of these sandbox attributes.
The available permissions are shown in the table below.
| Permission | Description |
|---|---|
| allow-same-origin | If this is not enabled, then any requests sent by the extension will be treated as being from a special origin and will fail the same origin policy. |
| allow-modals | Allow the extension to open modal windows. |
| allow-top-navigation | Allow the extension to navigate the top level browsing context. |
| allow-popups | Allow the extension to create pop ups, using window.open(), target="_blank", or showModalDialog(). If this permission is not set, then the popups will fail silently. |
| allow-popups to escape sandbox | Allow popups to open new windows without inheriting the sandboxing. |
| allow-downloads | Allow downloads triggered by a user action. |
| allow-forms | Allow the extension to submit forms. If this permission is not set, then form submission will be blocked. |
Including the extension URL in your content type schema Permissions are only available to registered extensions. For a content field extension, if you are including the extension URL in your schema instead of registering it, then your extension will not be granted any permissions.
Installation parametersLink copied!
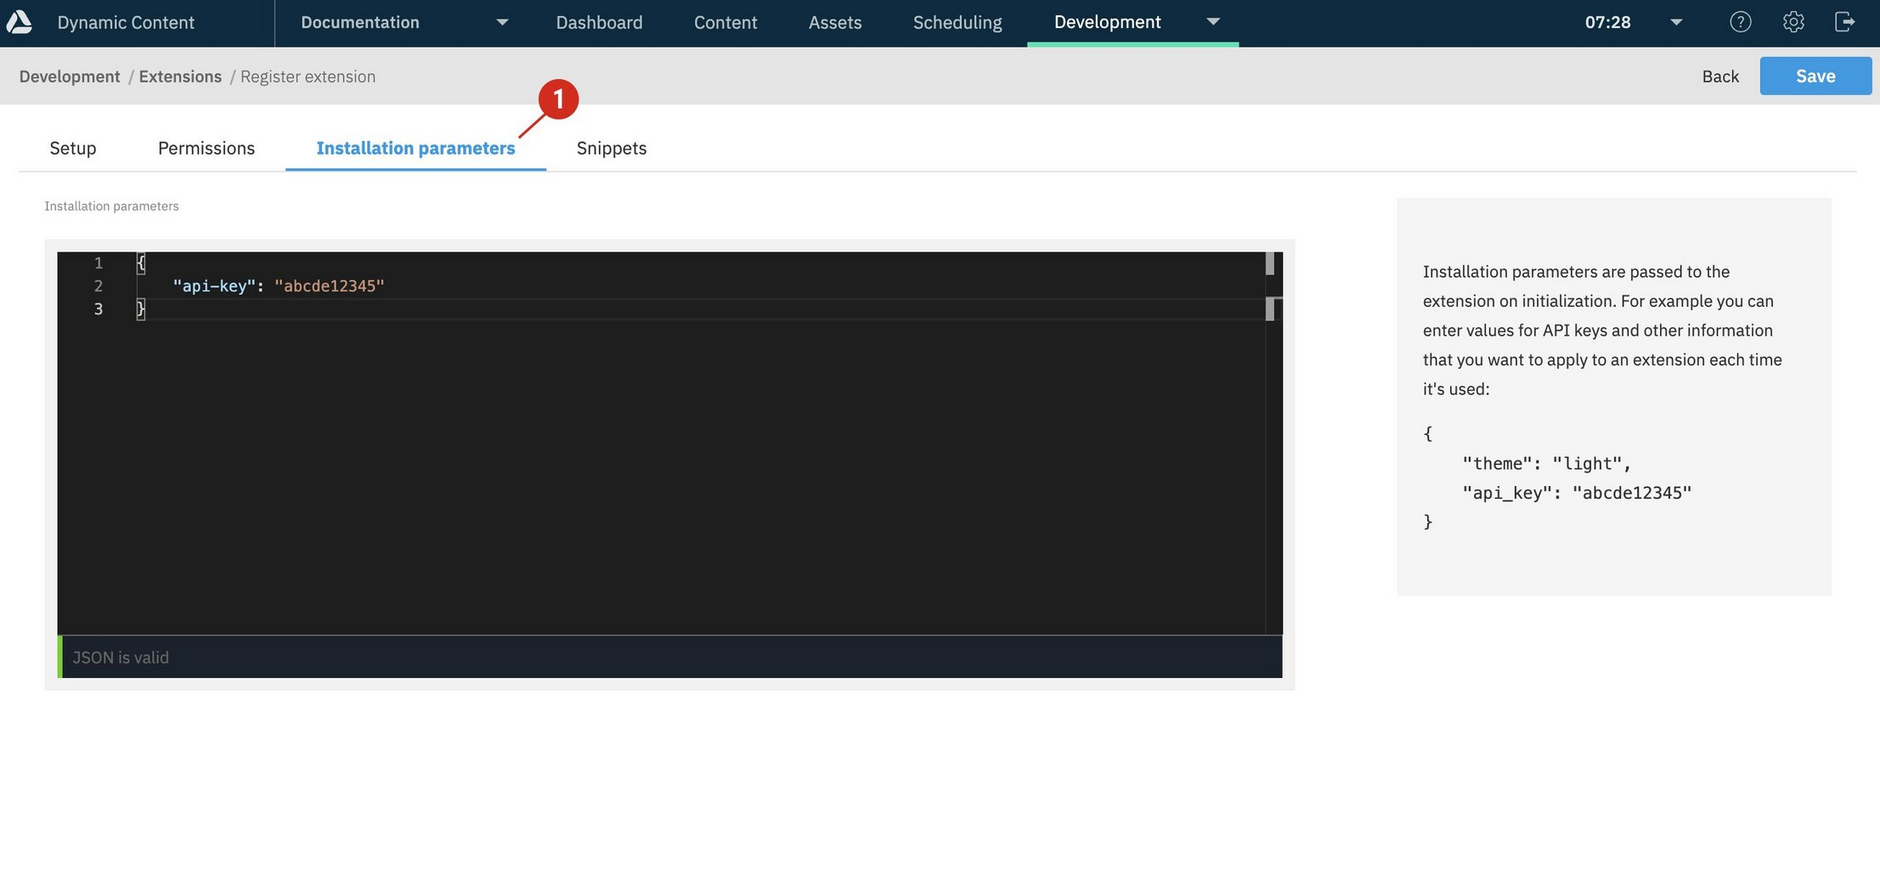
In the installation parameters section (1 in the image below) you can enter values for API keys and other information that you want to apply to an extension each time it's used and don't want to specify in the schema. This is particularly useful if your extension accesses a 3rd party service that requires authorisation.
Installation params are different to the params that are specified for a content field extension in a schema (and that you usually include in snippets). In the example of a code editor you might want installation params to include display settings that are applied each time the extension is used, while schema params could include settings that vary according to the language.
Saving an extensionLink copied!
If you're registering a Dashboard extension, you just need to configure the settings in the Setup, Permissions and Installation parameters section and you can then save the extension. For a Content Field extension you can add some snippets to make it easier to use the extension in the schema editor.
When you've finished setting up your extension, save your changes and click the Back button at the top of the window to return to the Extensions window. The extension you just added will be shown in the list. The category for each extension is displayed (1), together with its URL and last modification date. You can click on the header for each of these fields to sort the list.
To edit an existing extension, double-click its name in the list or choose "View" from its contextual menu.
When you save a Dashboard extension, the extension is added to the Dashboard, with a tab name the same as its label. In the example below, the Kanban extension has been registered and is now shown in the Dashboard.
Deleting a registered extensionLink copied!
To remove an extension from your list of registered extensions, select "Delete":
Once a registered extension is deleted, it is completely removed from the list and the name can be reused for registering other extensions.
If you deleted registered extensions before name reuse was introduced, those names cannot be reused.
You should update any schemas that include the registered extension, removing the reference to the extension and re-syncing the schema.
Configuring a Content Field extensionLink copied!
Adding snippets for Content Field extensionsLink copied!
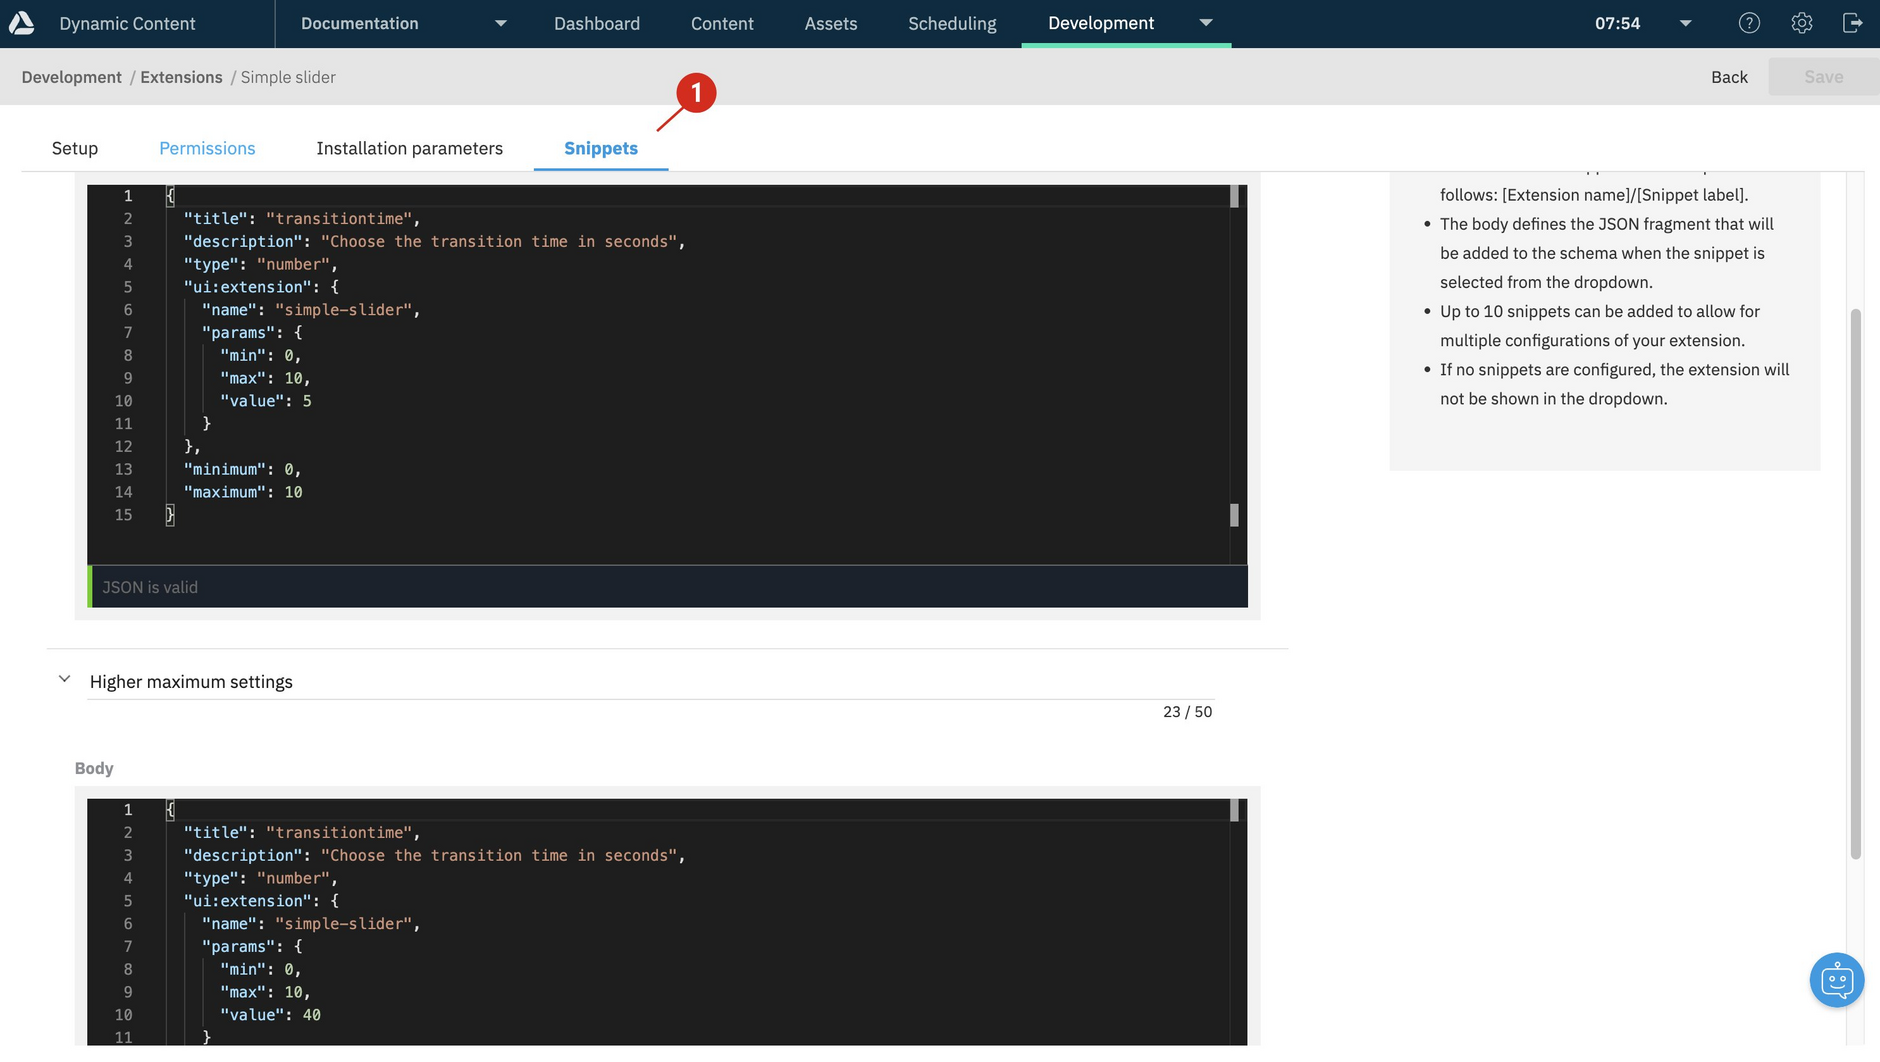
The snippets tab (1 in the image below) will be shown when are adding a Content Field extension. Adding one or more snippets makes it easier to add your extension to a property in the schema editor, as well as specifying common initial values for parameters. To add a snippet, click "Add Snippet", add a label and paste the JSON for the snippet into the window.
When you choose a snippet in the schema editor, it is used to add a property that uses the extension to the schema.
For the slider extension we've added two snippets with different values for the params.
An example snippet is shown below. Note that the extension name should match the name that the extension was registered with.
Adding a Content Field extension in the schema editorLink copied!
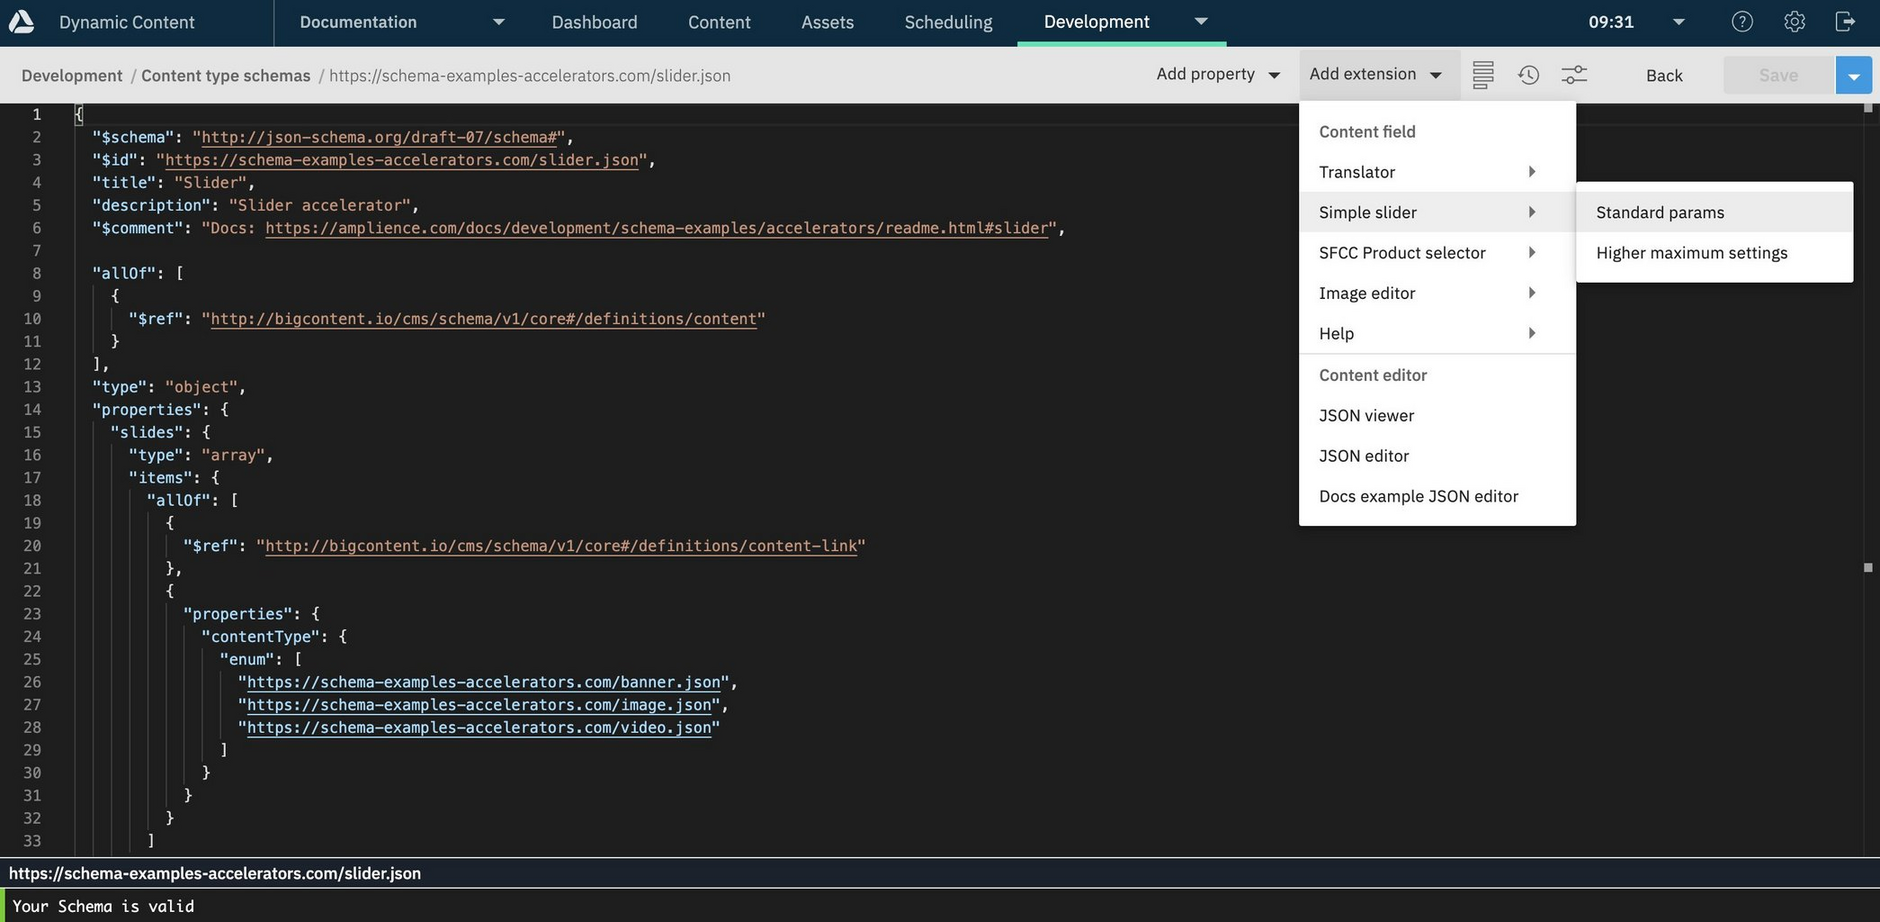
There are two ways of adding a registered extension to a schema property using the schema editor. The first and easiest approach is to use one of the snippets we set up when we registered the schema.
If you have any extensions with snippets registered on your hub, then an "Add extension" menu is shown in the schema editor. In here you'll find all the snippets for all the extensions you've registered.
For this example we'll choose "Standard params" which will add the snippet shown above.
A new property is added to the schema editor, including your chosen snippet. This includes a default property name and the title, description, property type and params from the snippet.
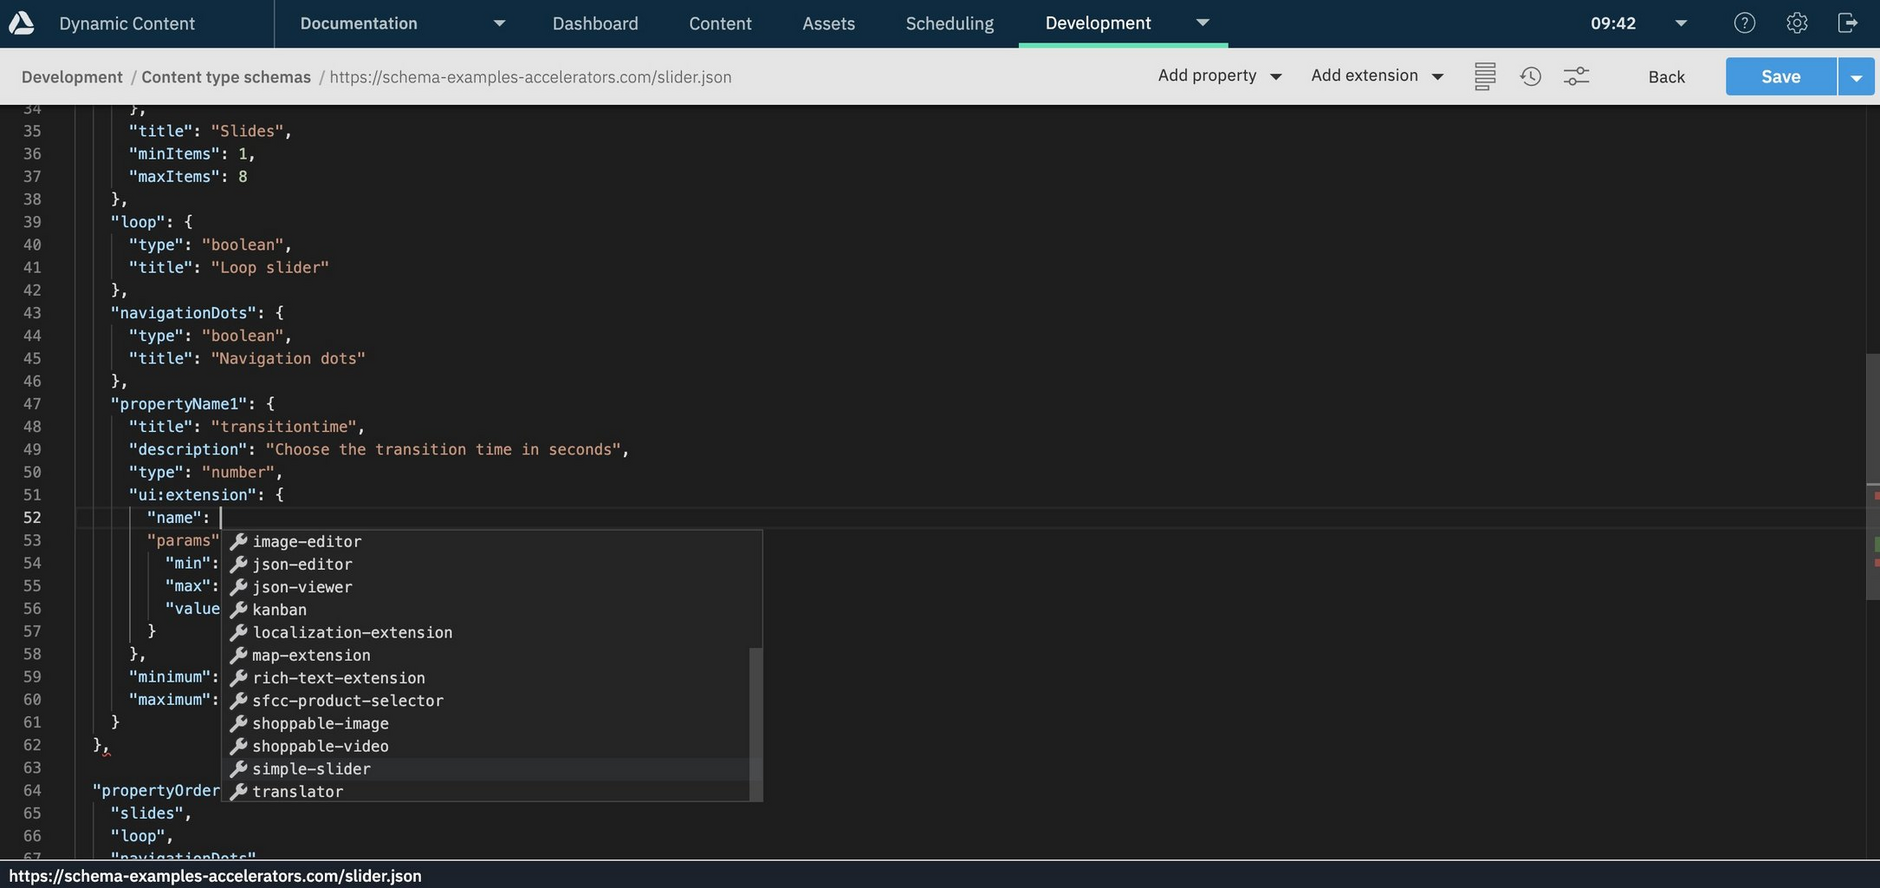
Another way of adding an extension to a property is to use the schema editor's auto complete suggestions. If you add the "ui:extension" keyword and then add "name" within this, pressing control-space will bring up a list of registered extensions from which to choose. In the example shown below we're adding the slider.
Enabling a content editor extension for a content typeLink copied!
In order to enable a content editor extension so that it is shown in the content form for a content type, it must first be included in the content type schema. The reference to the content editor extension must be included at the root level of the schema and not within any properties.
To enable a content editor extension that has been registered with the name "json-editor", include it in the schema using the ui:extension keyword as shown below:
As with content field extensions, you can also include a content editor extension using its URL.
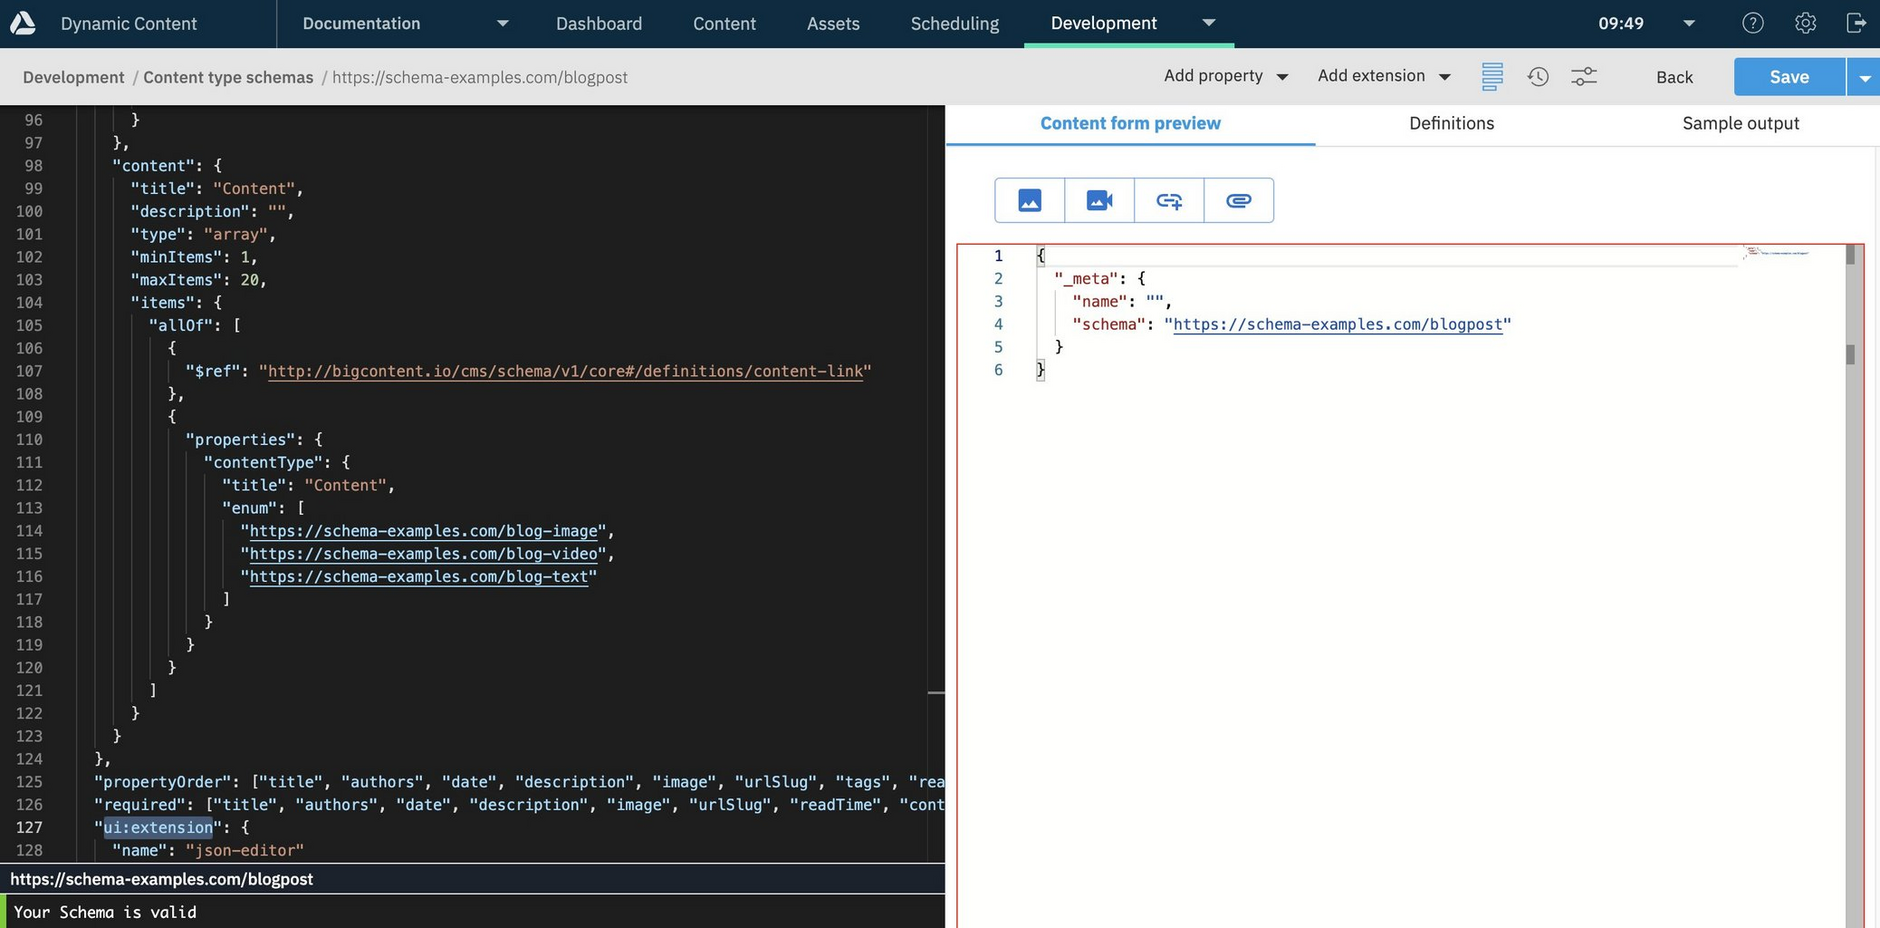
When a content editor extension is enabled for a content type, it will replace the entire content editing form.
Using the schema editor add extension menuLink copied!
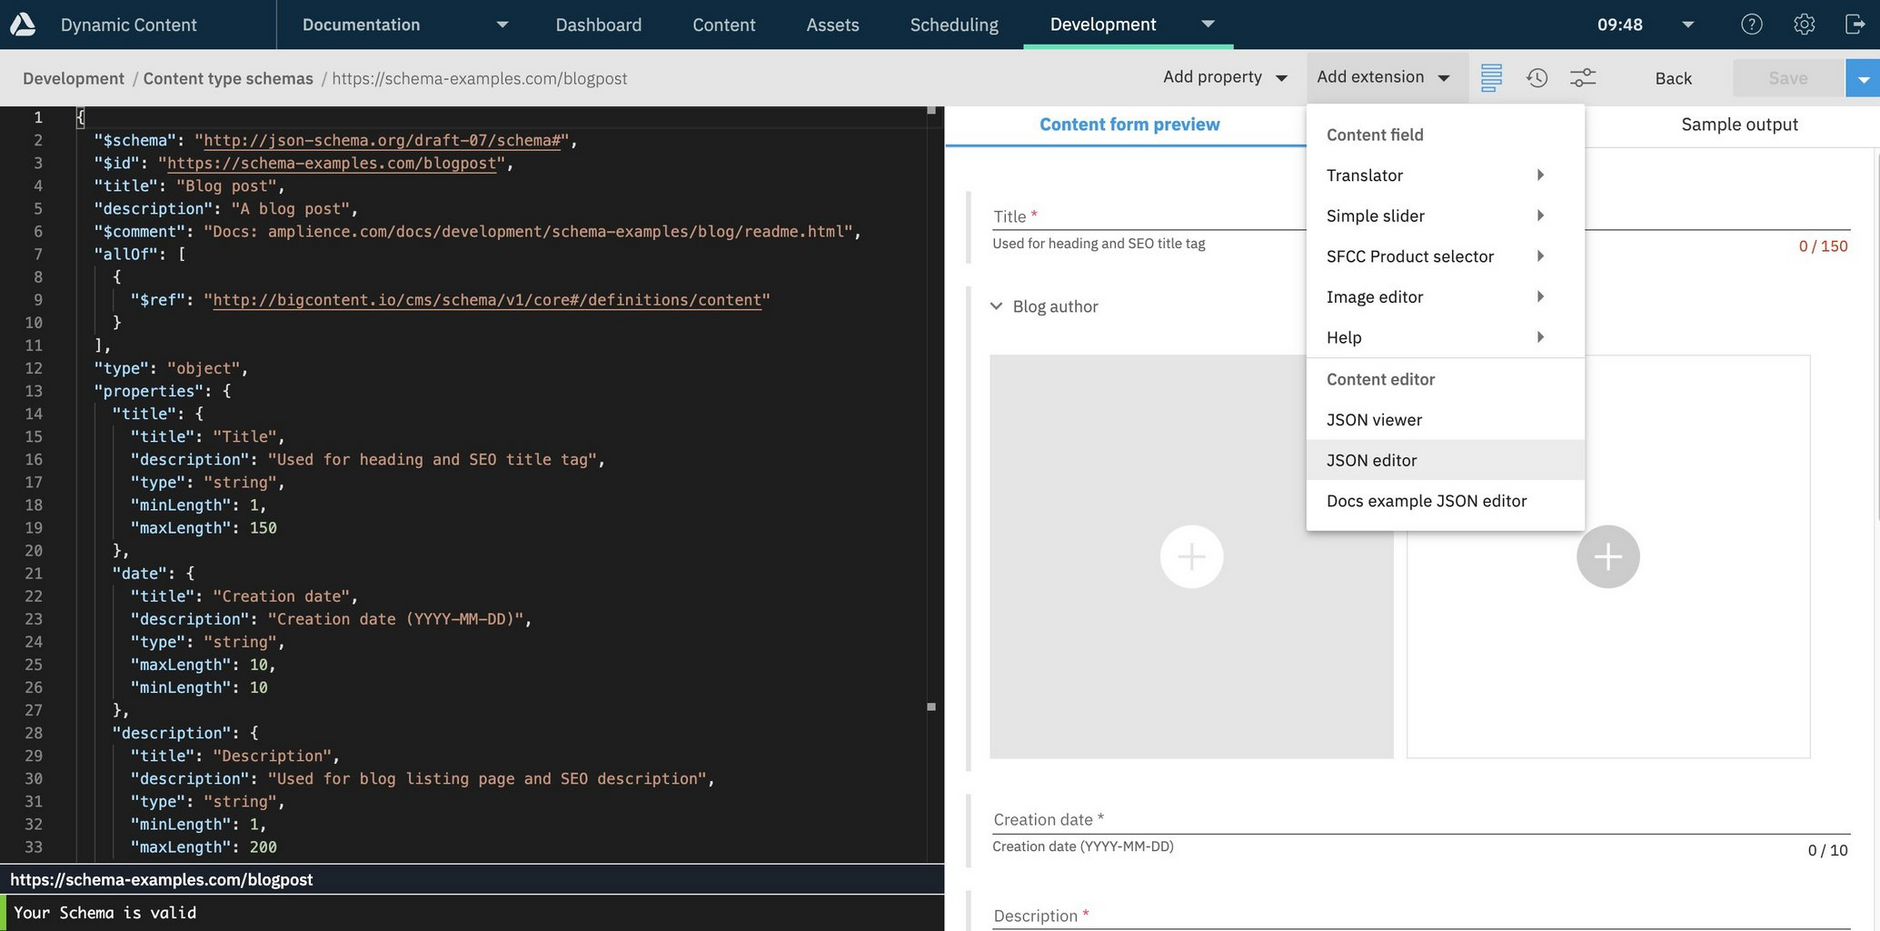
You can add a content editor extension to a schema using the "Add extension" menu in the Schema Editor. When there are any non-global content editor extensions registered on a hub (those registered without the "Enable for all content types" checkbox enabled), then these content editor extensions will appear in the "Add extension" menu. Choose the extension that you want and it will be added to the schema.
In the example below, the "JSON editor" extension is added to the schema.
Previewing a content editor extensionLink copied!
You can use the schema editor to preview how the content editor extension will appear in the content form.
The image below shows a preview of how the content form will be displayed for a content type with the "JSON editor" extension enabled. The extension UI replaces the content editing interface.
Related pagesLink copied!
Sample content field extension- slider
Sample content editor extension- JSON viewer

