Creating a colorized product image
This guide explains how to create multiple colored product images from a single source image.
There are three parts to the process:
- The creation of assets from your source product image.
- The creation of an SVG file containing these assets with a combination of SVG filters applied.
- Making the SVG dynamic
In this tutorial we have used Adobe Photoshop to create assets and Inkscape to create the SVG. You could use any similar graphic design tool that supports the creation of an SVG, for example Adobe Illustrator.
If this is your first colorization, you should allow 45-60 minutes to complete the process. More experienced users should be able to produce a colorized product in considerably less time (by re-using existing pre-configured SVGs, and swapping out the product images as needed).
Part 1 - Creating colorization assets in PhotoshopLink copied!
For best results, start with a noise-free, high-resolution, uncompressed product image (TIF, PNG format). JPG image files can be used but may require additional post-production to remove compression artefacts that will become visible during the colorization process.
We need to create two assets from the source file; a grayscale version of the product image, and a full-colour mask that excludes any areas of the product image that you do not wish to colorize.
Step 1: Creating the grayscale assetLink copied!
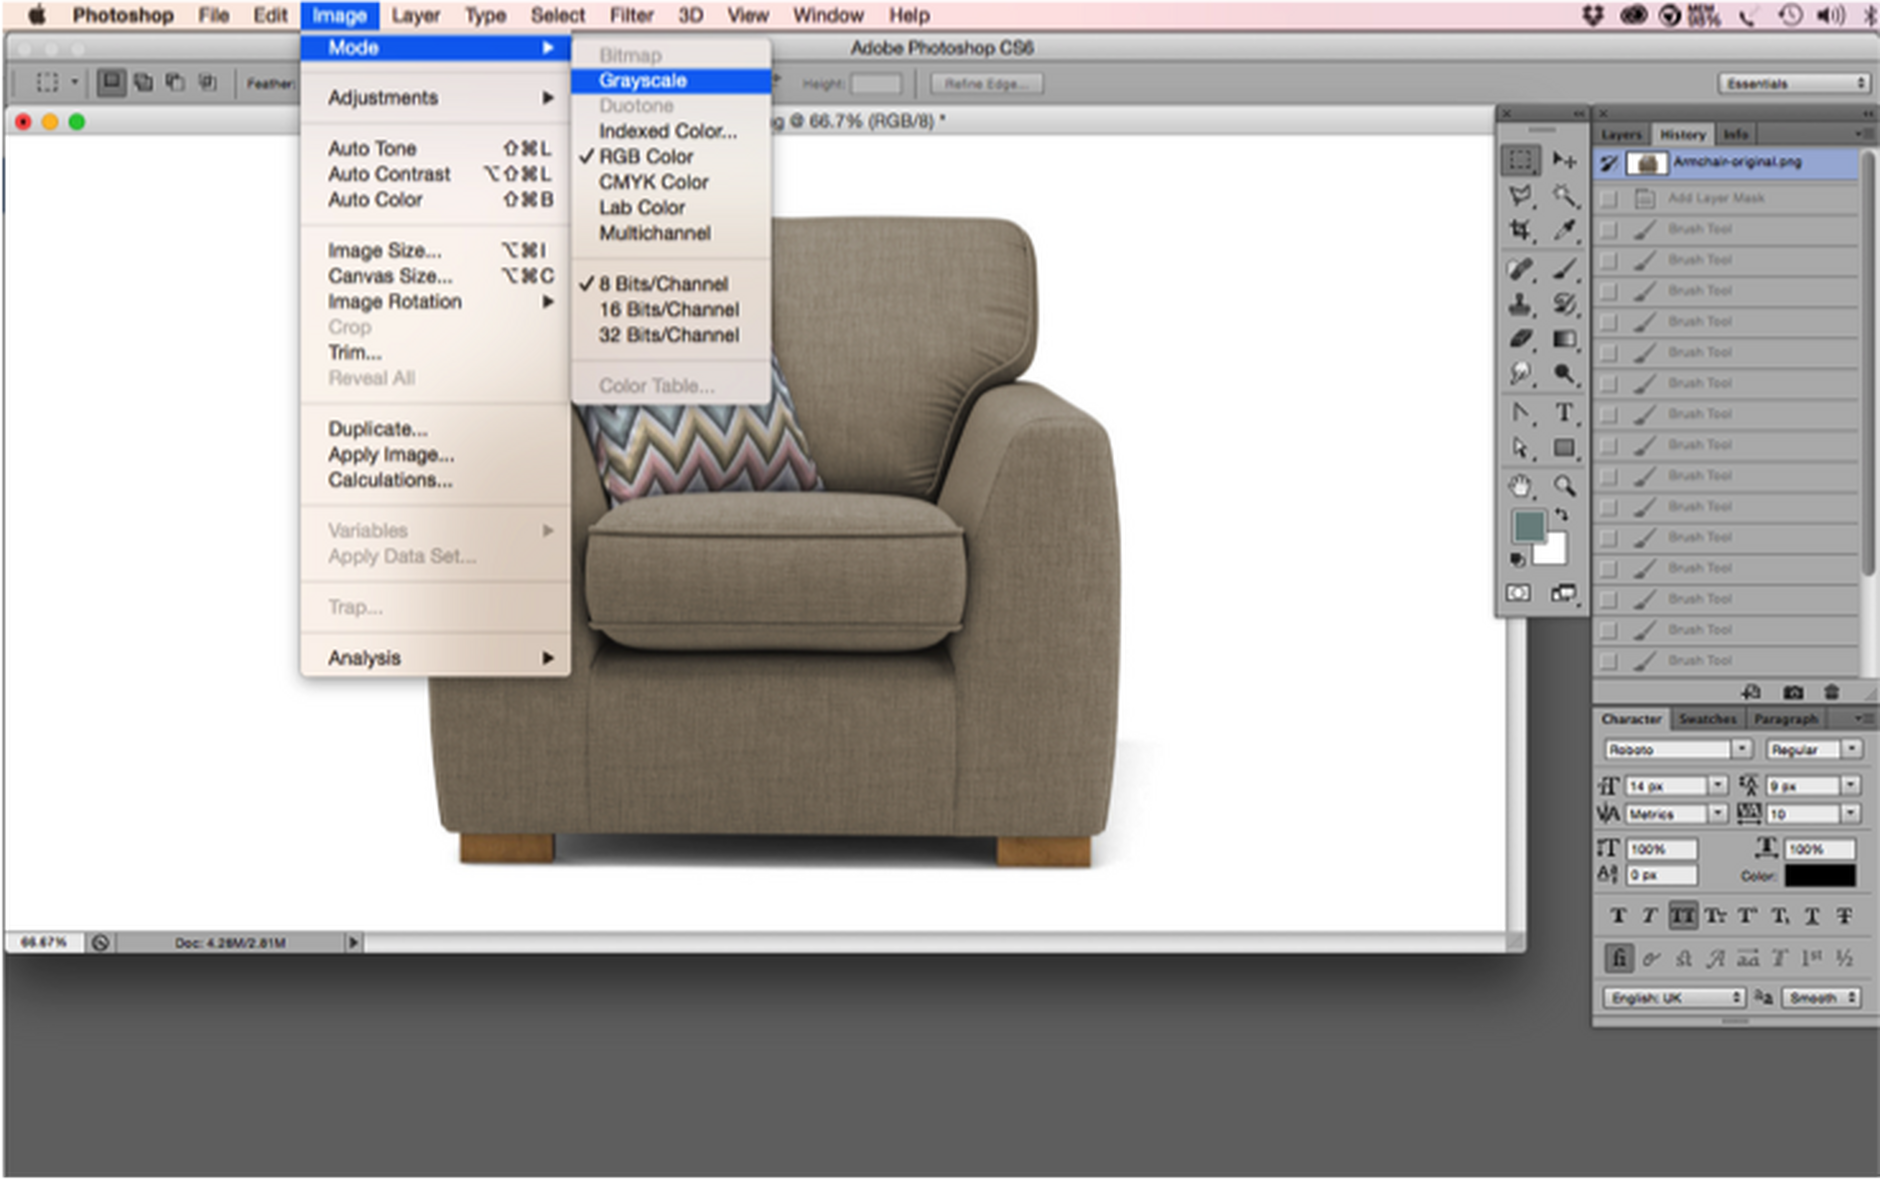
Open source image in Photoshop
Go to Image > Mode > Grayscale
Your image will lose all color information
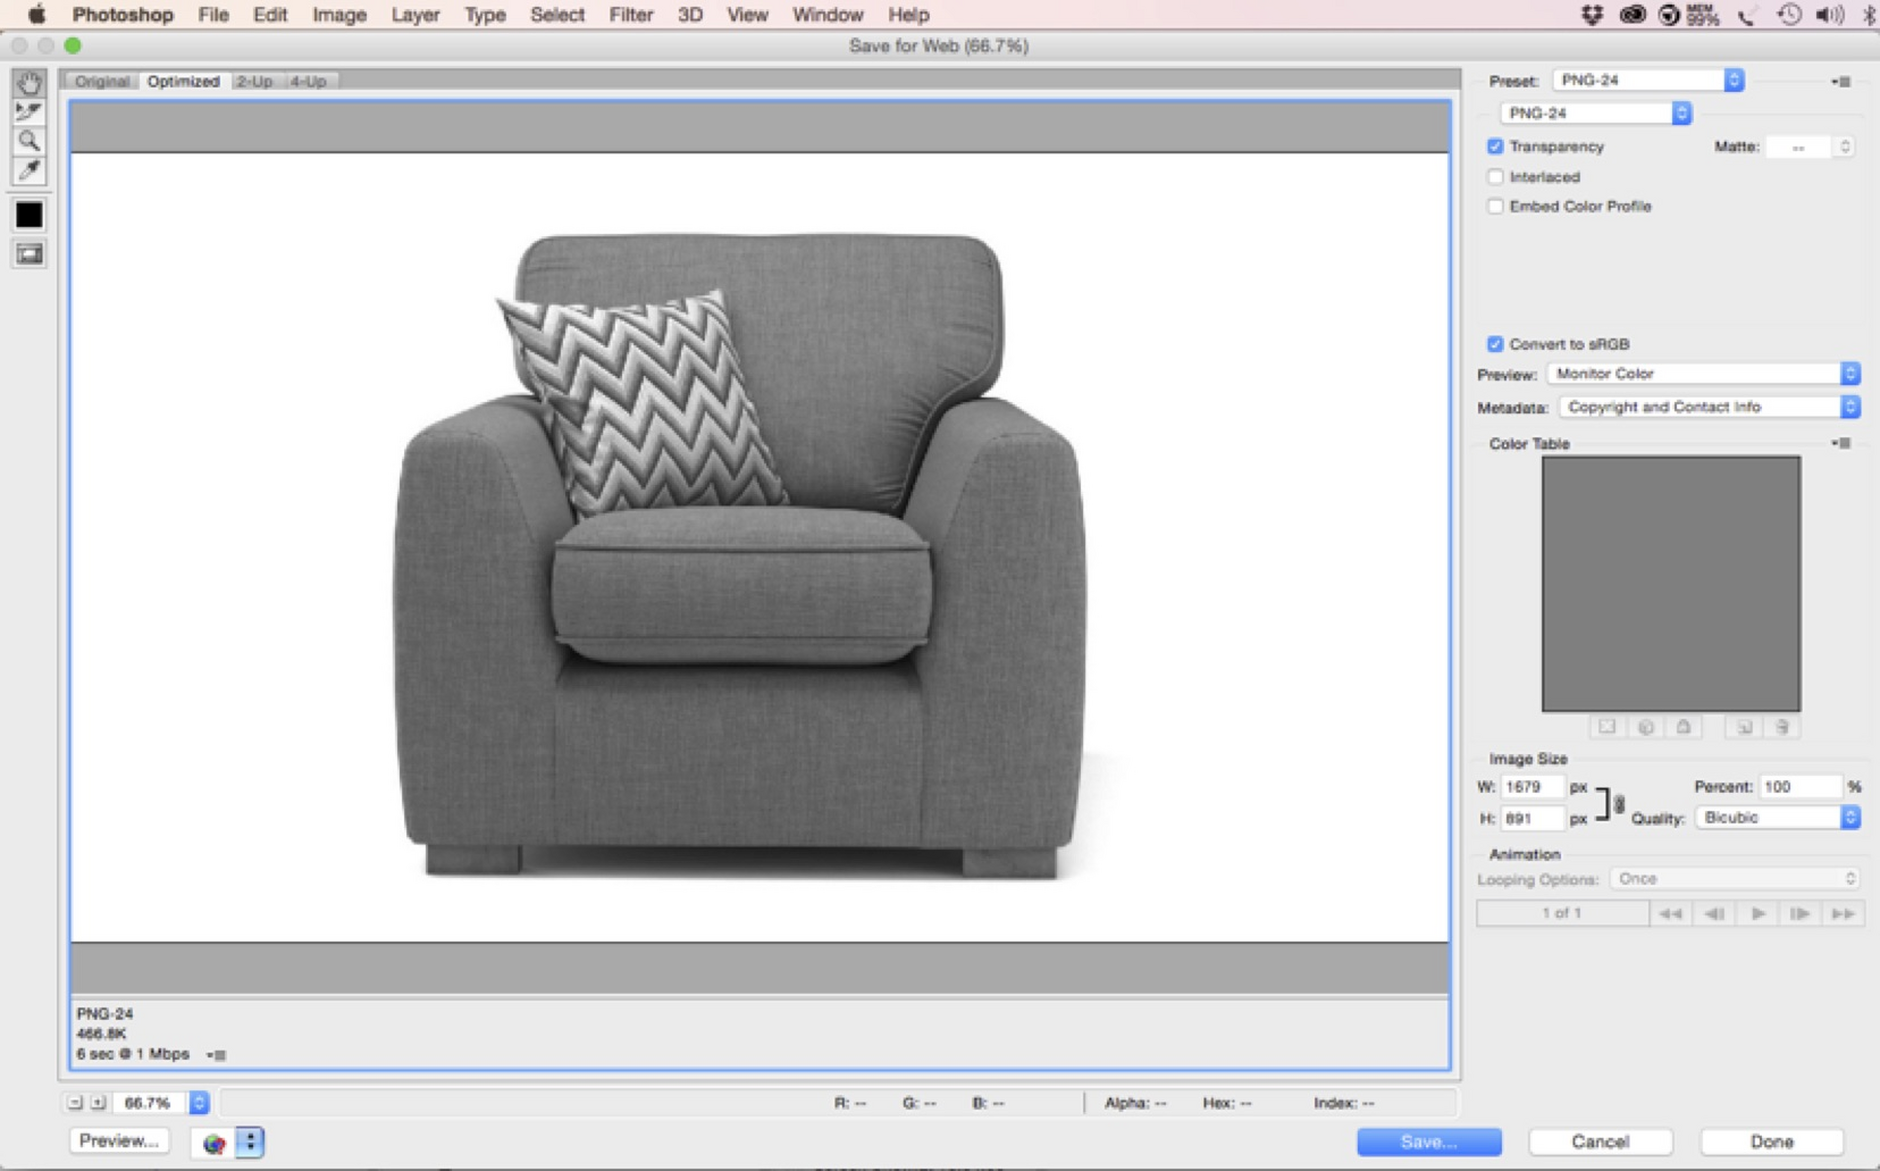
- Go to Save for Web and save the asset in 24-bit PNG format
Step 2: Creating the product maskLink copied!
Open source image in Photoshop
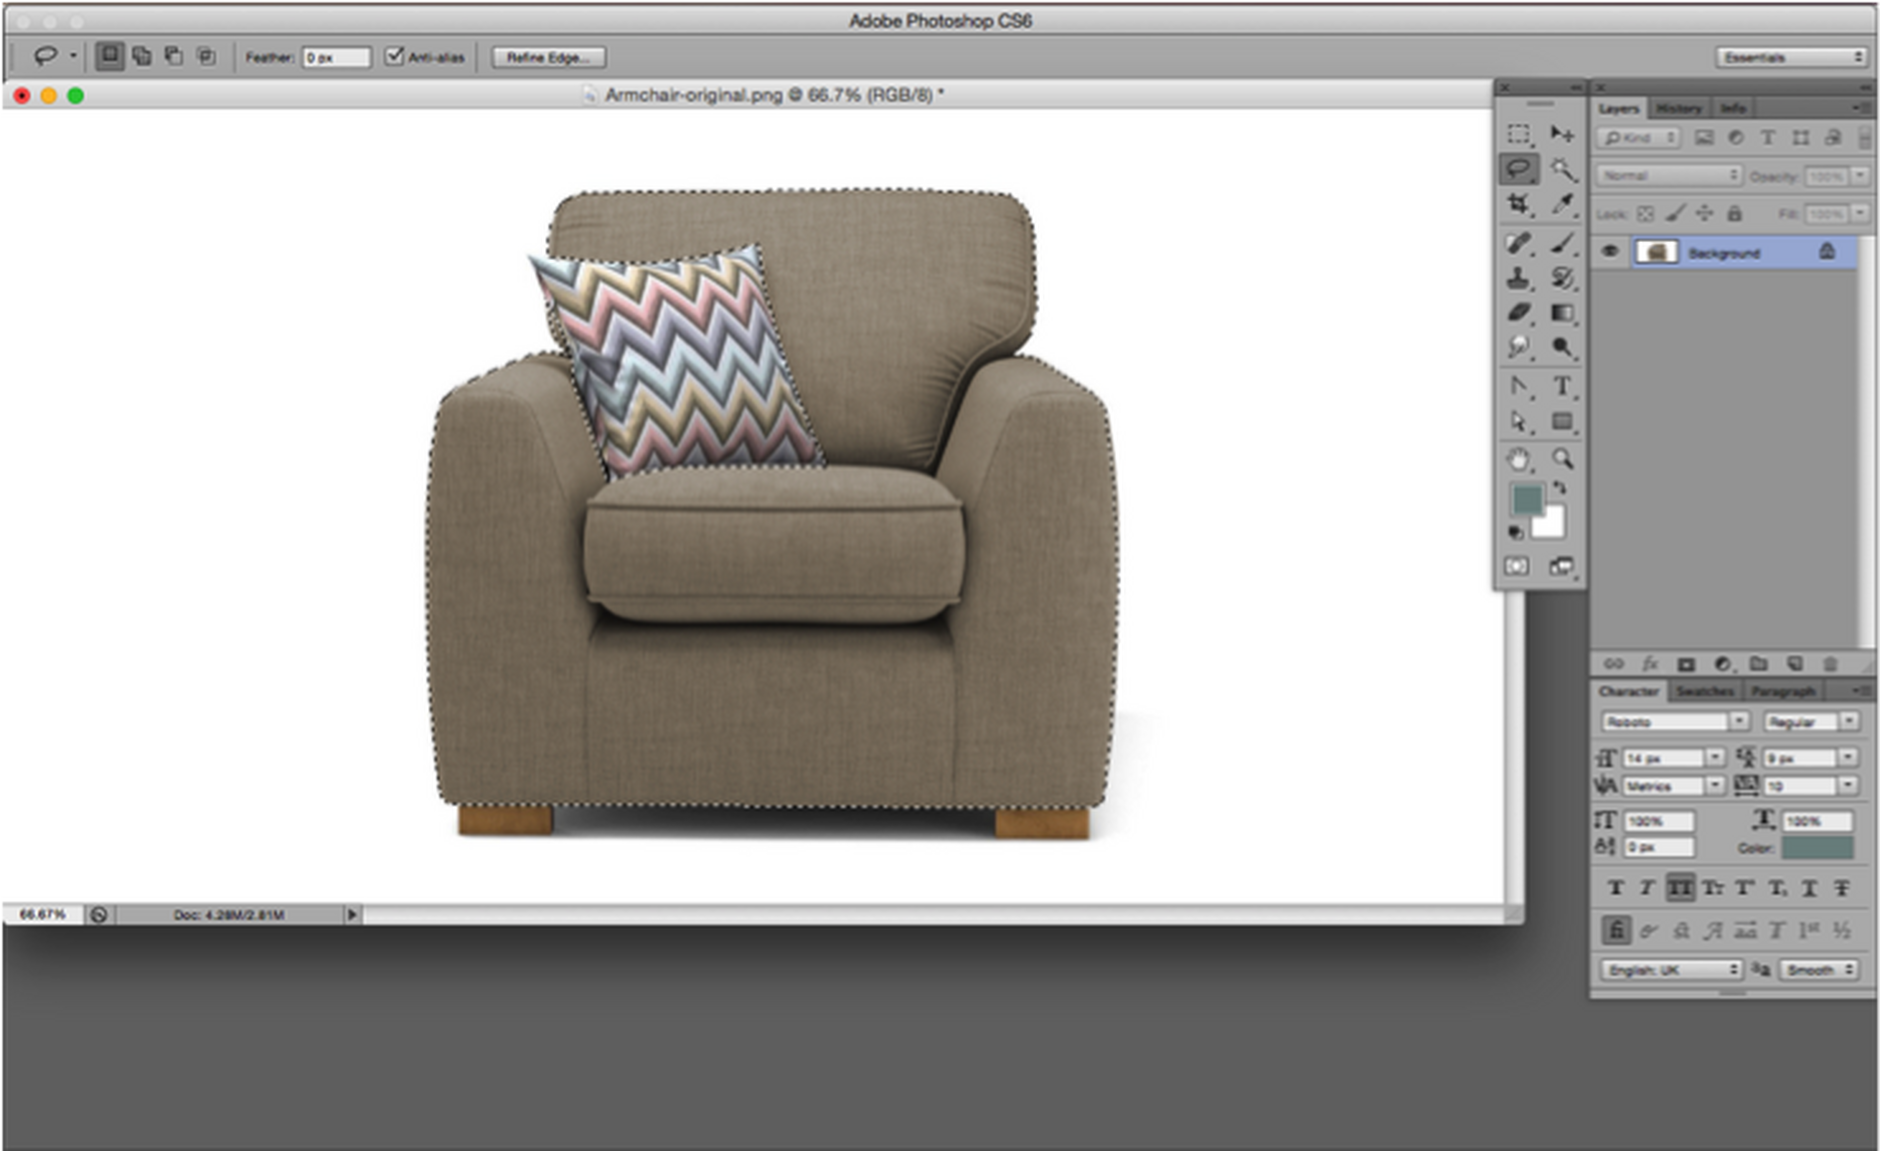
Using 'magic wand' or 'polygonal lasso tool', create and area of selection around the area to be masked
- Go to 'Select > Invert' to reverse the selection
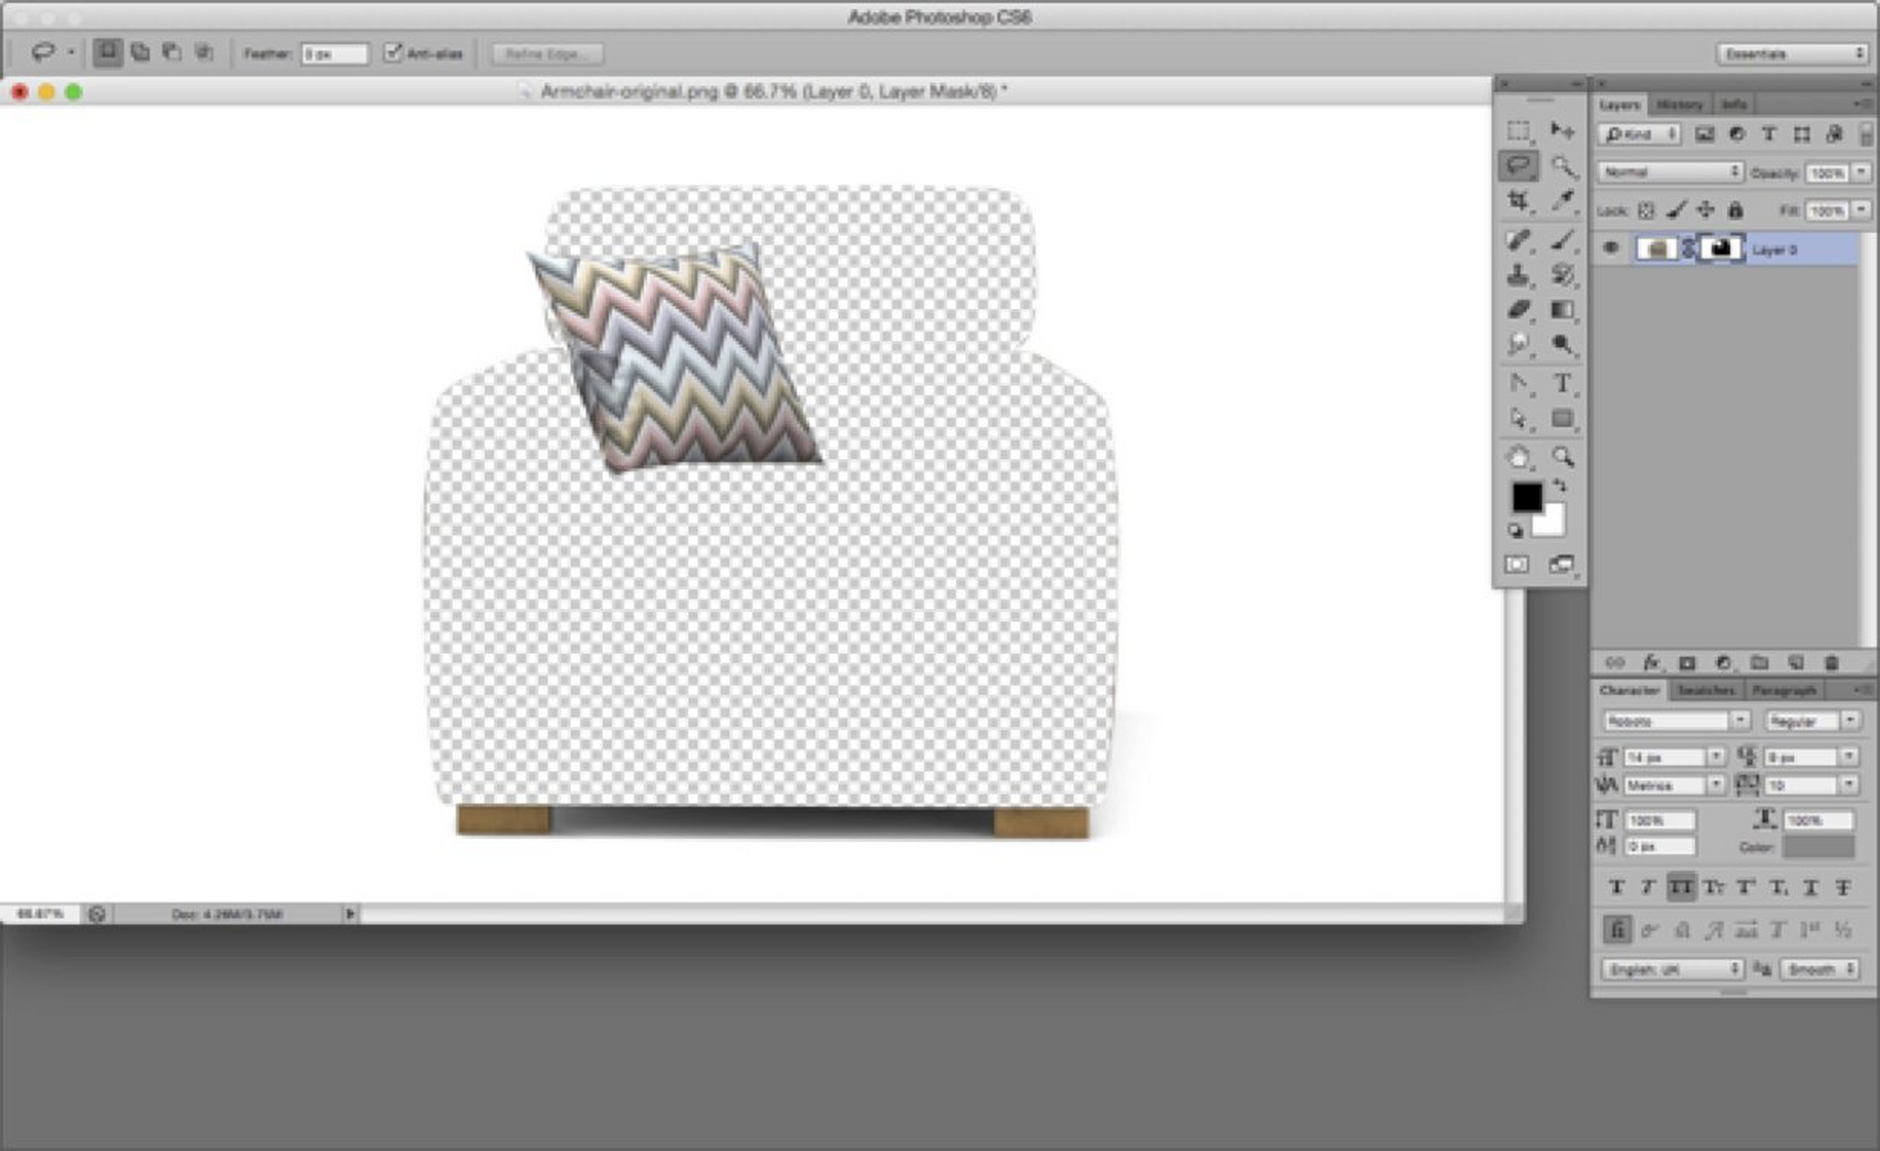
- On your Layers panel, 'Add vector mask' to the selected layer (all areas to be colourised will become transparent).
- Inspect the results of your masking to ensure all the required areas of the product image are covered -- adjust the mask if necessary.
- Go to Save for Web and save asset in 24-bit PNG format with transparency ON
You now have the assets ready for a basic colorization. You can proceed to Part 2 - constructing the SVG file.
Part 2 - Using Inkscape to construct the SVG fileLink copied!
When opening Inkscape for the first time, you'll see a screen similar to this:
- Go to 'File > Import' and navigate to your saved assets.
- Select the grayscale version of your product image and click 'Open'
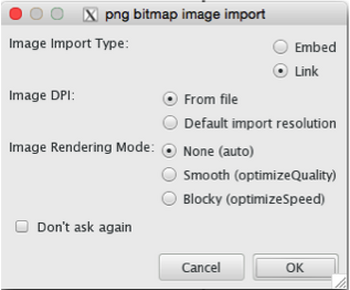
- In the subsequent dialog you need to choose between embedding and linking your assets. Linking them reduces SVG file size significantly (as the image data is not included in the SVG XML). If you link the files, you need to ensure the assets are provided to your developer along with the SVG file otherwise the linkage is broken. Embedding will make the SVG file large (multiple MBs) but the plus side is you have only one file to deal with. Talk with your developer and decide the preferred option
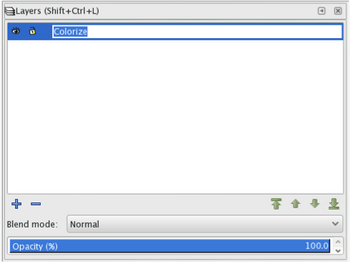
- Either way, after clicking 'OK', your grayscale product image will appear on the canvas are in Inkscape and will be associated with 'Layer 1' in your Layers palette.
- Rename 'Layer 1' to 'Colorize' (or something meaningful as this label will appear in the SVG XML)
Step 1 - Creating the Colorize filterLink copied!
Next we're going to create an SVG filter. Filters are effects that you can apply to objects within the SVG such as images, shapes and text. The colorization process requires that we combine two different filters, one that does the job of colorizing the product and one that restores black information to the image that is lost during colorization.
Creating your first filterLink copied!
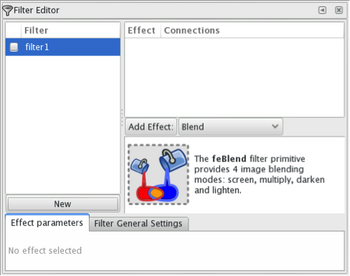
- In the Filter Editor palette, click the 'New' button.
- 'Filter1' appears in the Filter list.
- Double-click 'filter1' and rename the filter to something meaningful like 'Colorize'
Creating your first filter effectLink copied!
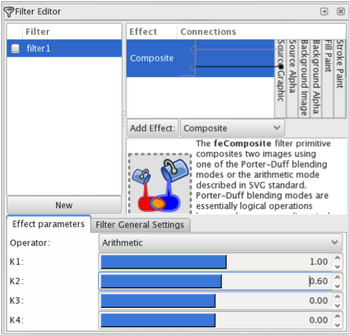
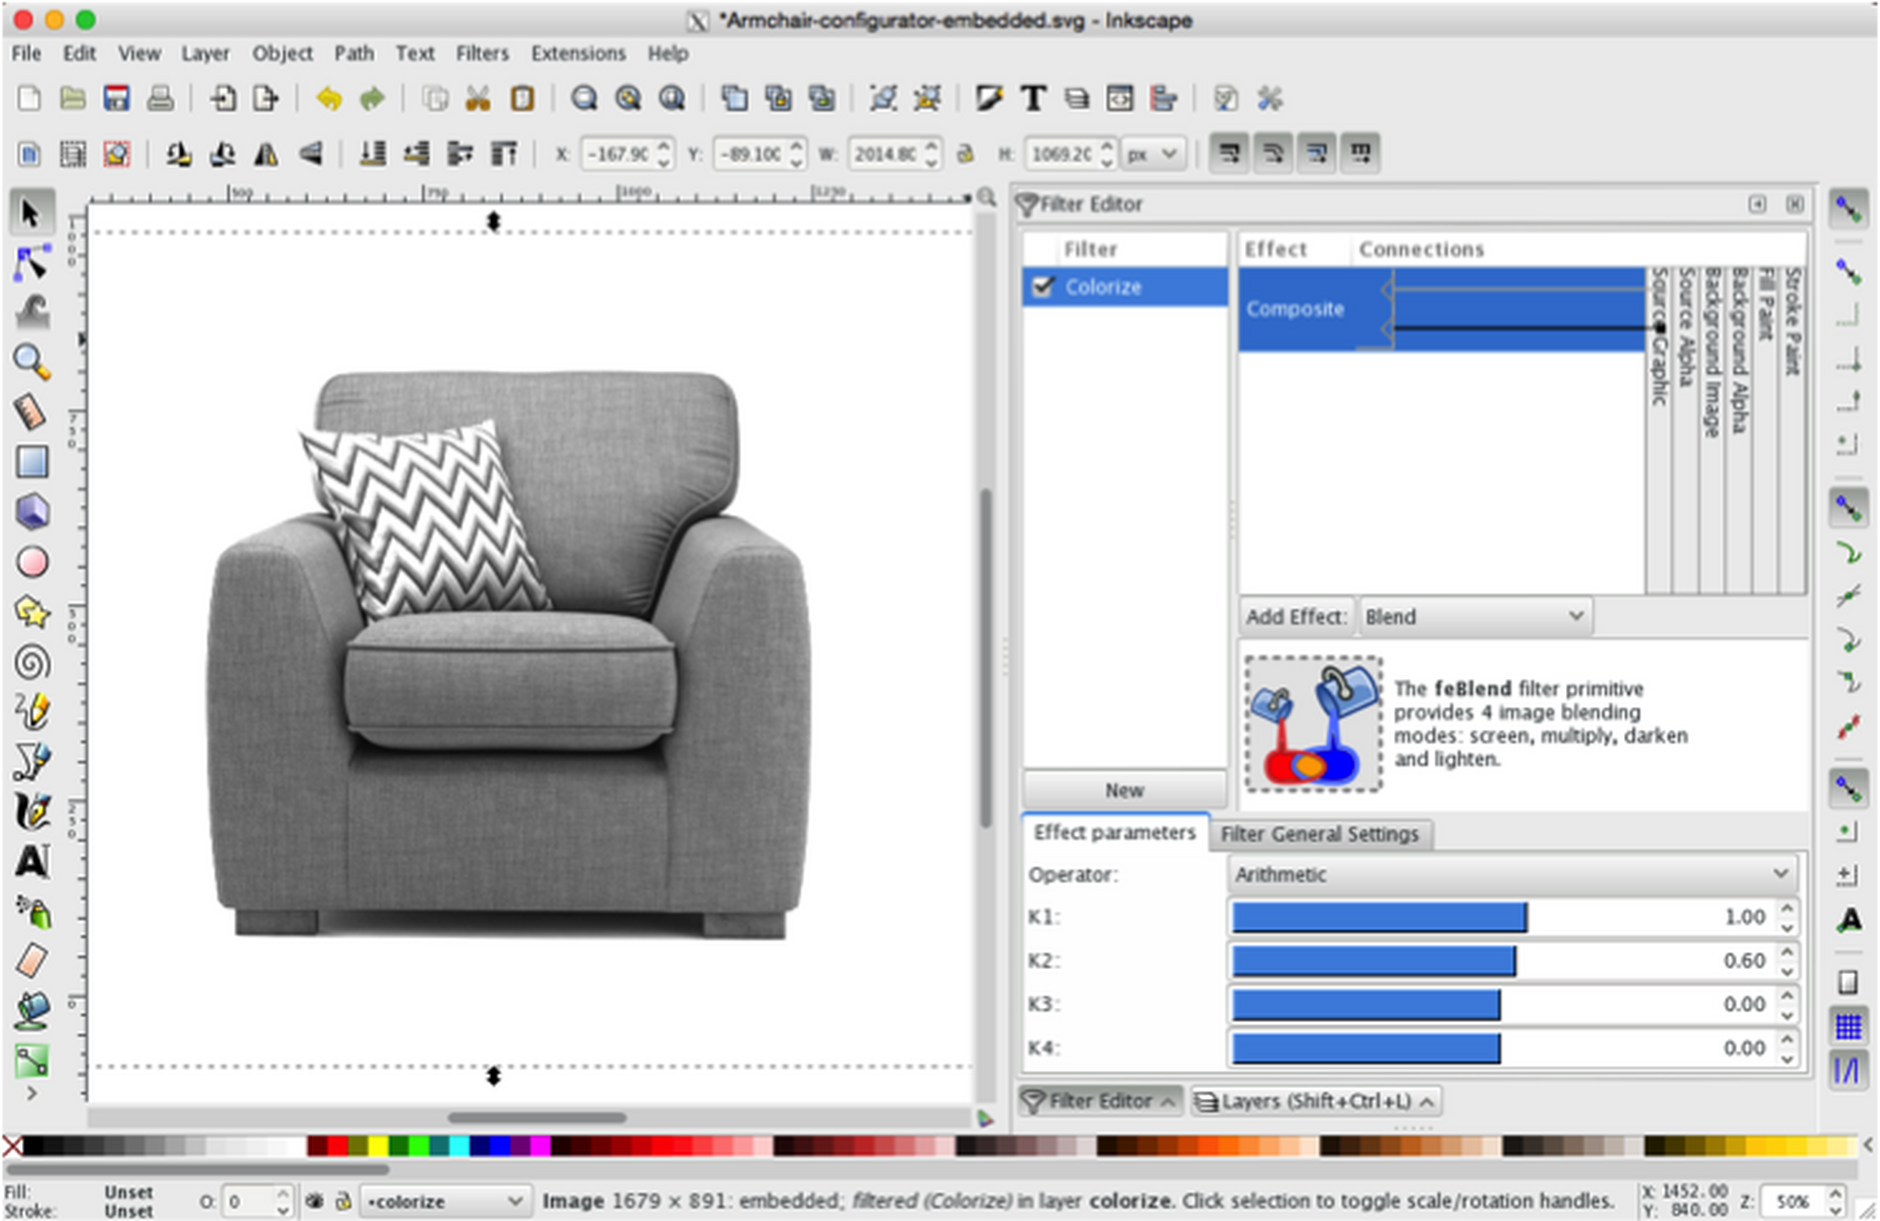
- Go to the droplist to the right of 'Add effect' button and select 'Composite'
- Click the 'Add effect' button, and you've just added your first filter effect. You'll see it represented by a blue panel labelled 'Composite' the Filter editor.
- Now we need to configure it. In the Effect Parameters tab, you'll see the Composite filter is set to 'Over' operator by default. This needs to be changed to 'Arithmetic' and the K1 and K2 levels should be changed to +1.00 and +0.60 respectively.
It now will look like nothing's happened...
Don't panic! That's because the filter has to be applied to the image in order for it to have any affect.
- Click on your grayscale product image visible in the canvas window to the left.
- A dotted line and transformation handles will indicate the image is selected.
- Check the box to the left of the filter that you just created - this will apply the filter to this image, and you should see the image change appearance.
Flood -- second filter effectLink copied!
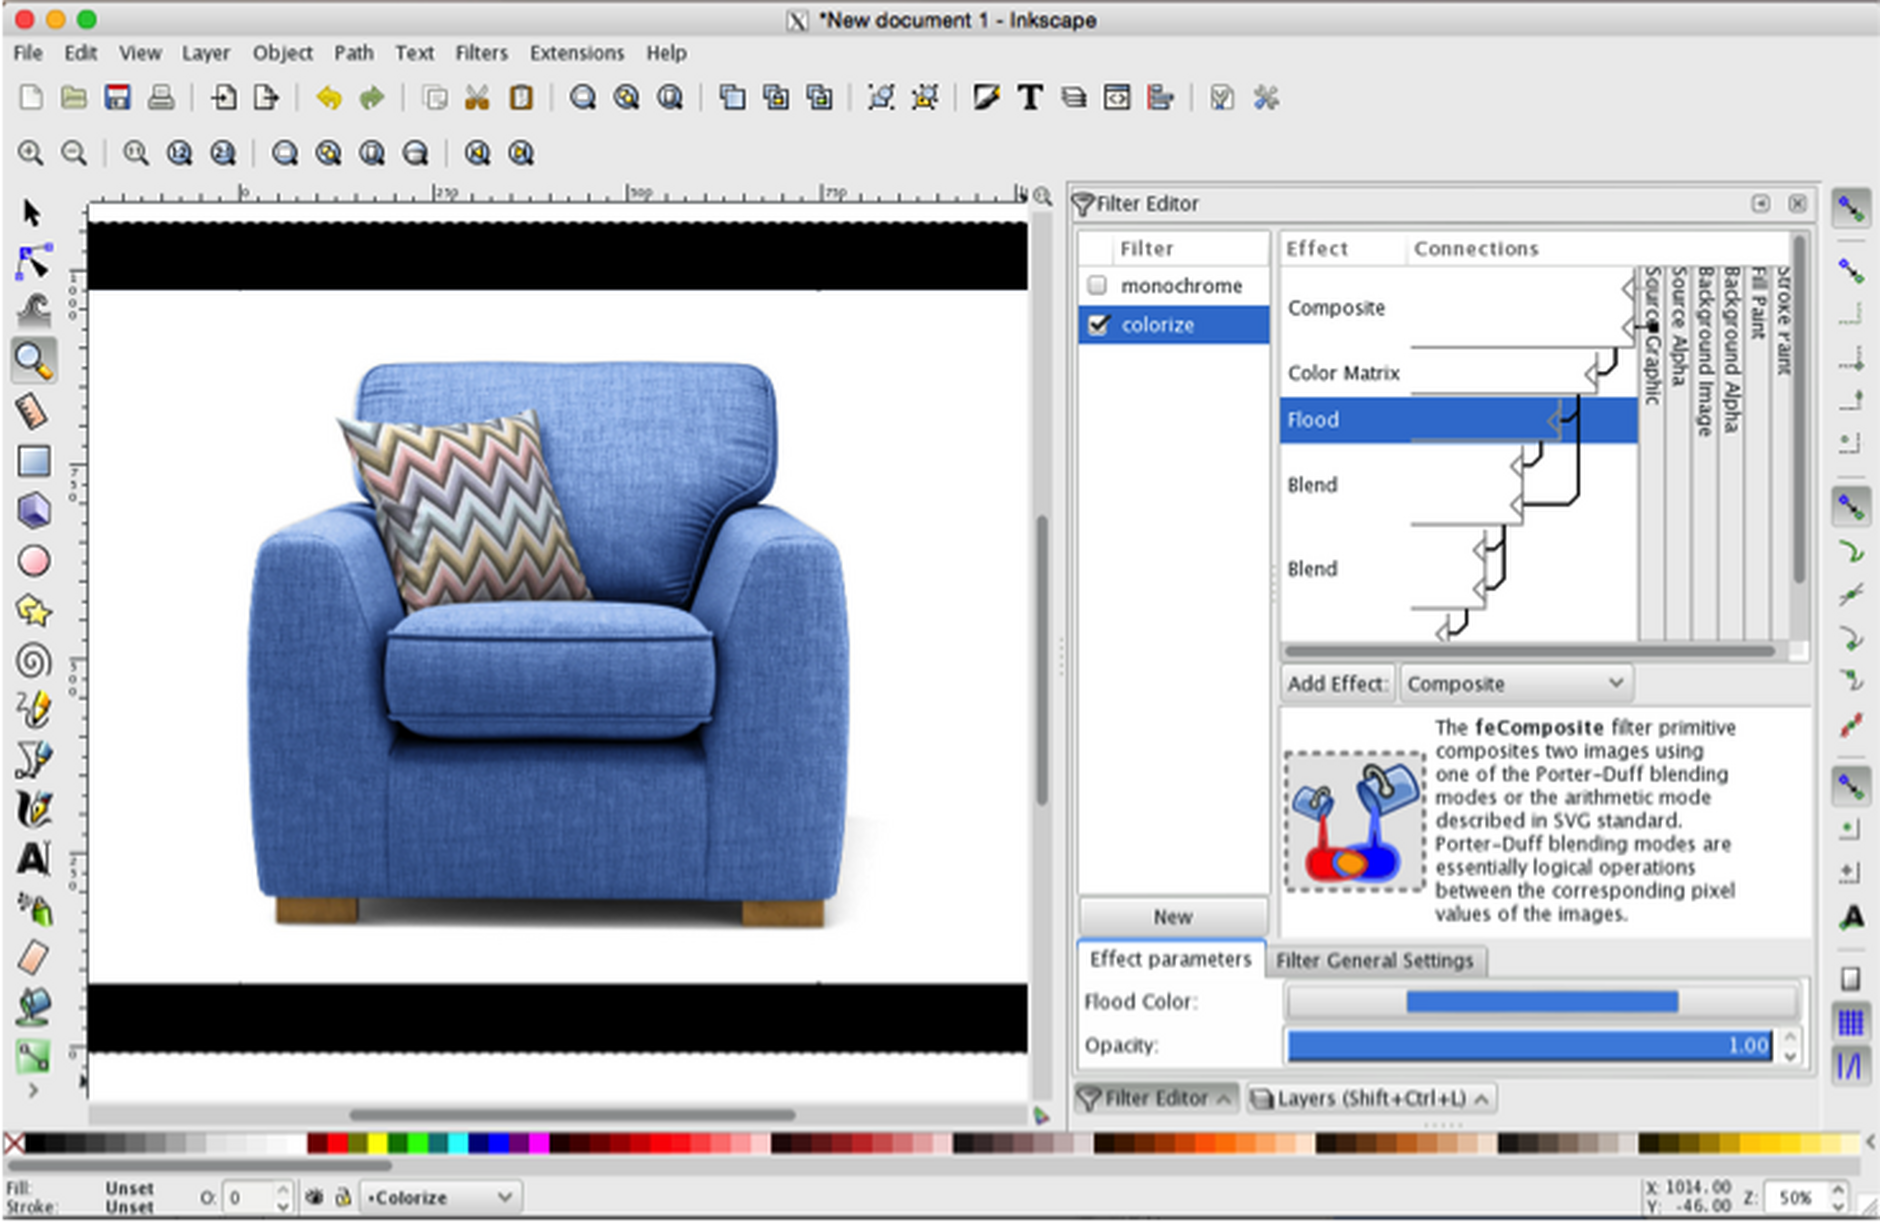
This is the key filter in the colorization process. The Hex/RGB value we assign to the Flood filter defines the color of the product. This value is parameterized by your developer so you can dynamically generate any color of product.
The process of creating the Flood filter effect is similar to before:
- Go to the droplist to the right of the 'Add effect' button and select 'Flood'
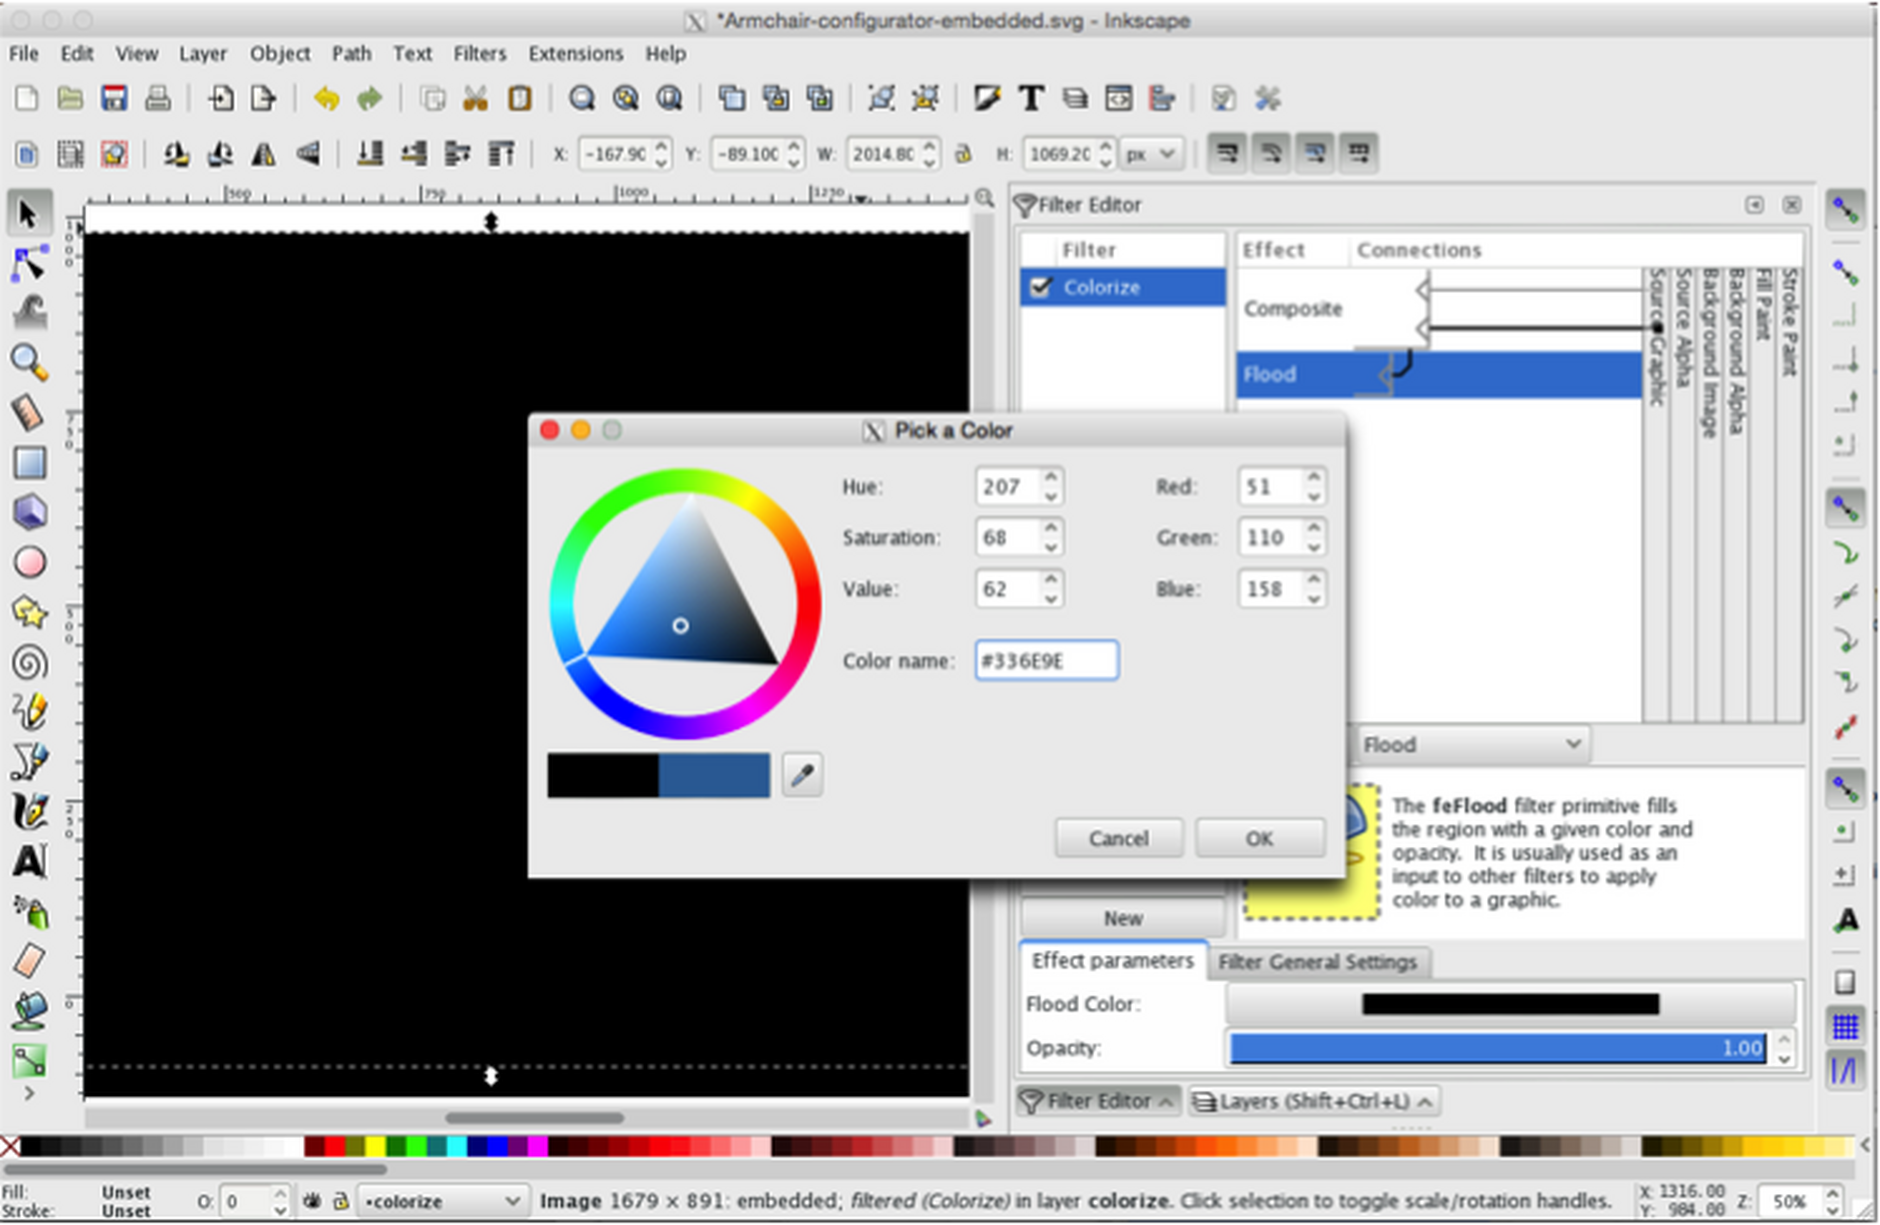
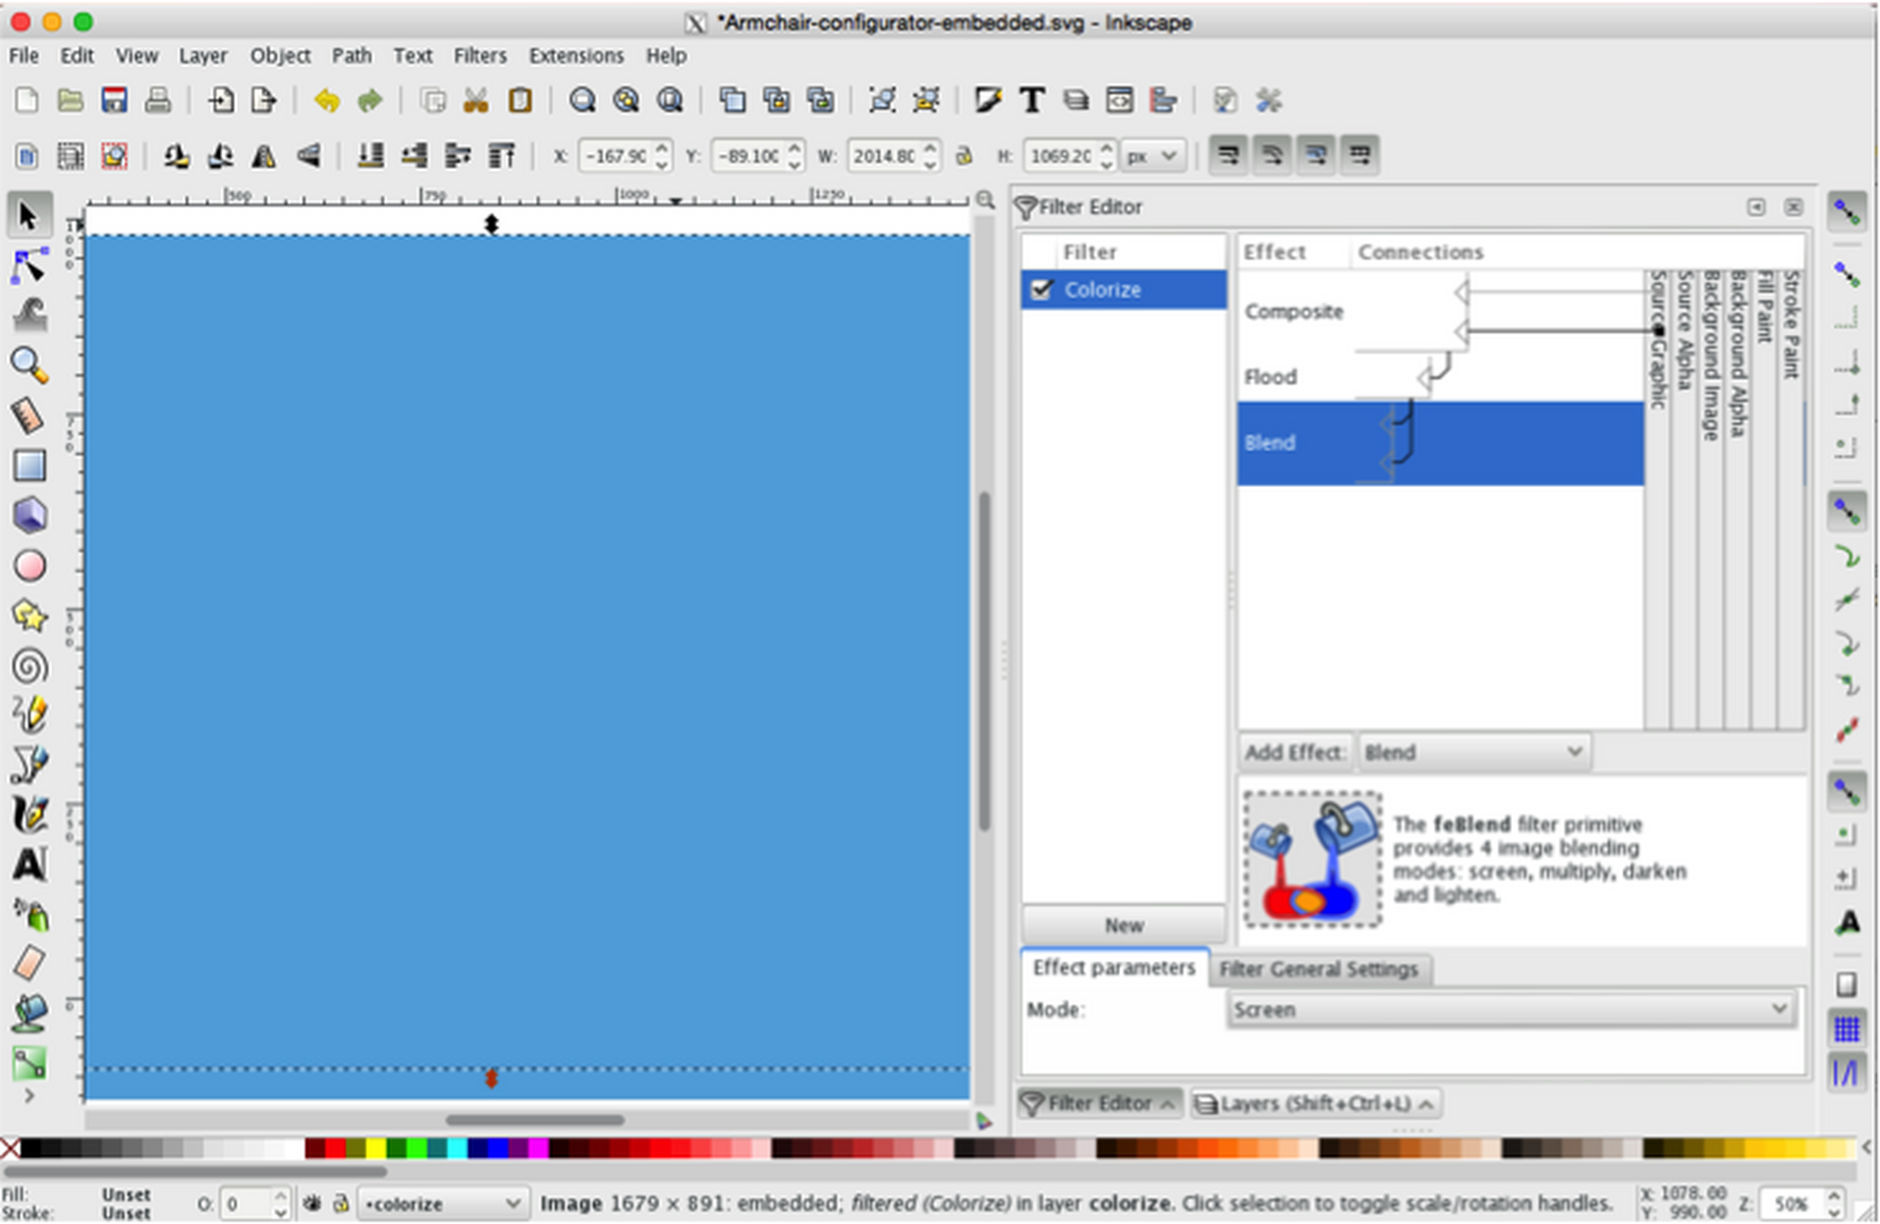
- Click the 'Add effect' button (your product image will most likely go black at this point but don't worry - this is just temporary until we create the next filter effect).
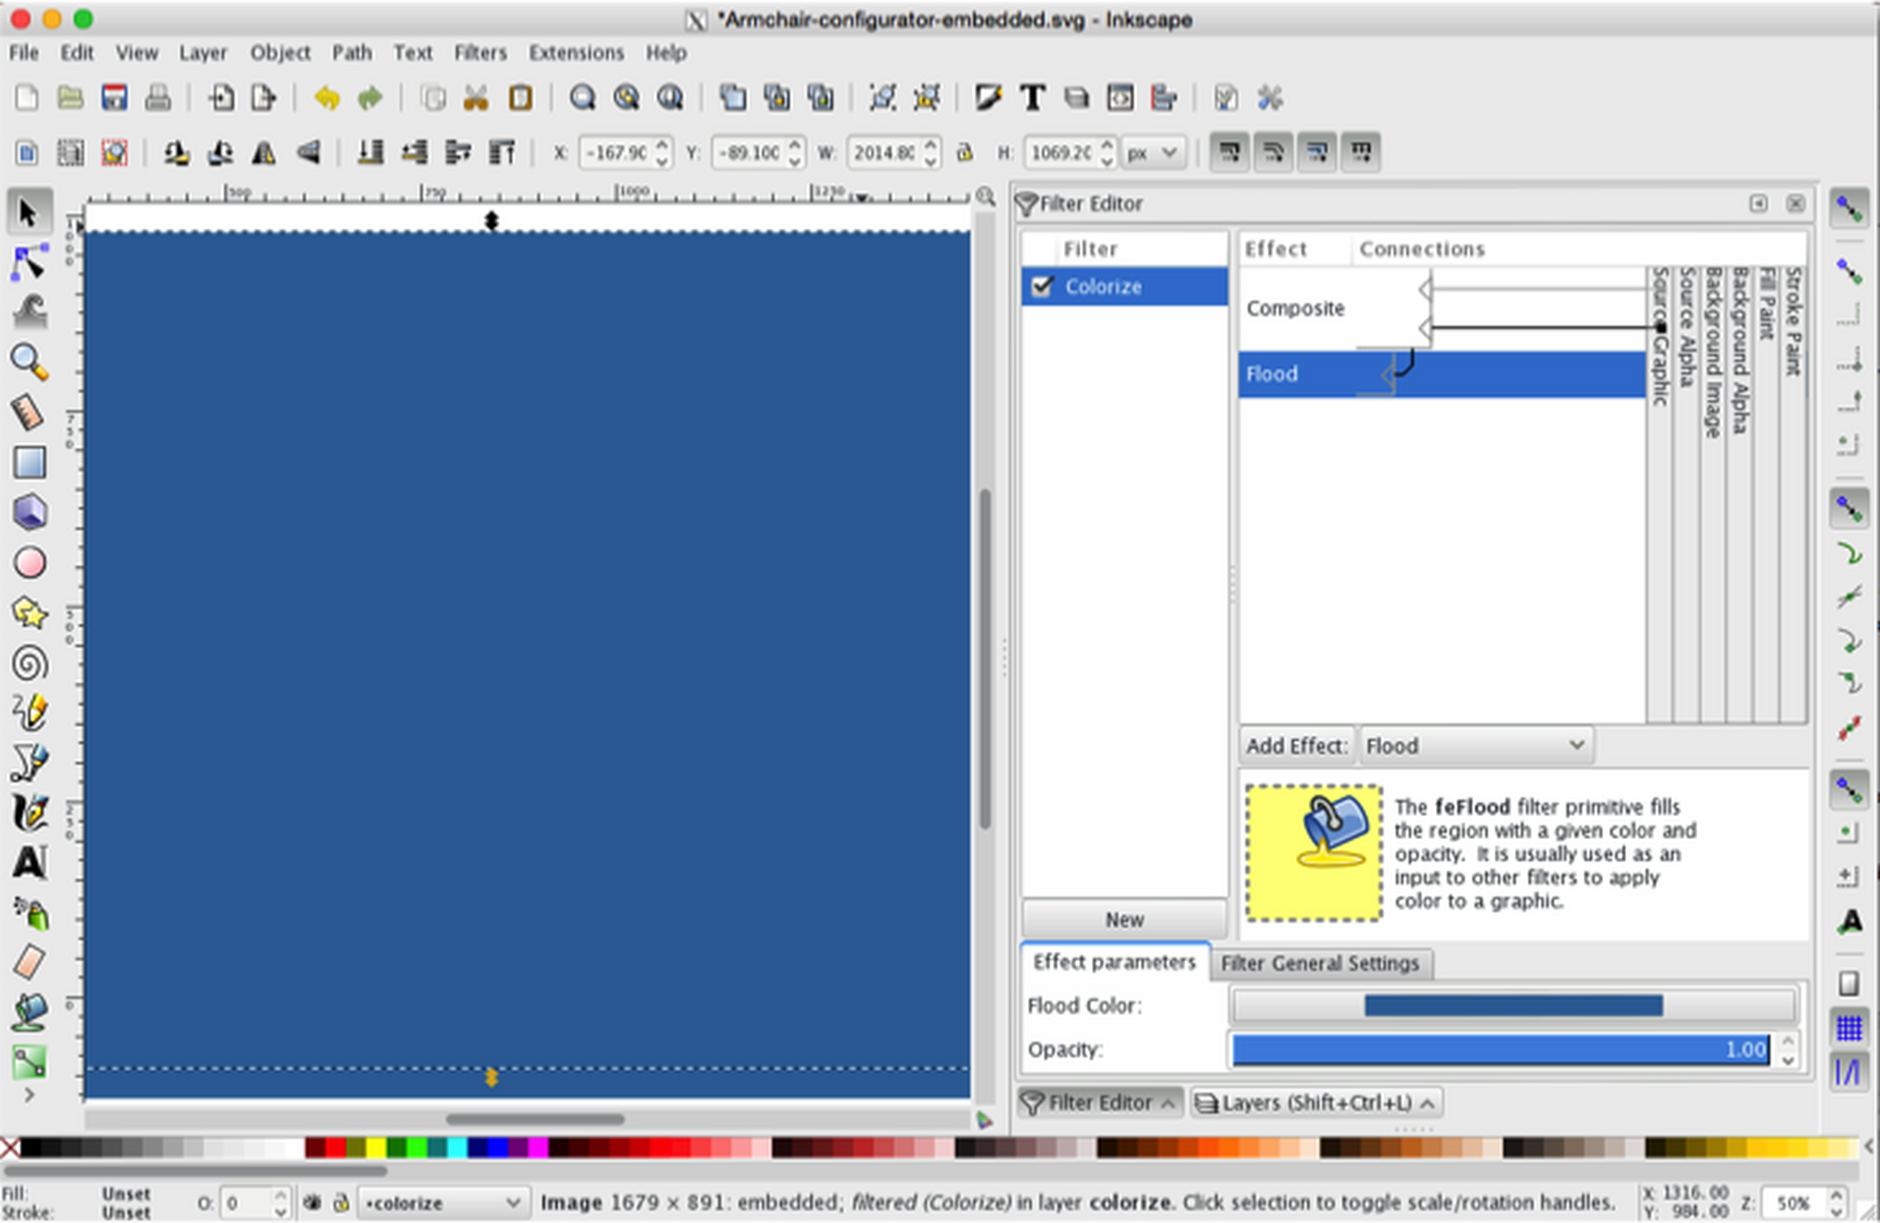
In 'Effect parameters' change the Flood colour to something appropriate that you wish to test (we chose blue in the example below)
leave 'opacity' setting at '1.00'
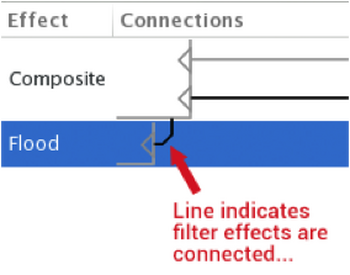
You'll notice a Flood filter effect appears beneath Composite, and importantly, a right-angled black line connects the two filters together (this connection was automatically created by Inkscape, but can be manually adjusted as you'll see later in this process). For now it's enough to just be aware of this feature of the filter palette
Blend -- third filter effectLink copied!
The process of creating the Blend filter effect is similar to before:
- Go to the droplist to the right of 'Add effect' button and select 'Blend'
- Click the 'Add effect' button
- In 'Effect parameters', change Mode from 'Normal' to 'Screen'
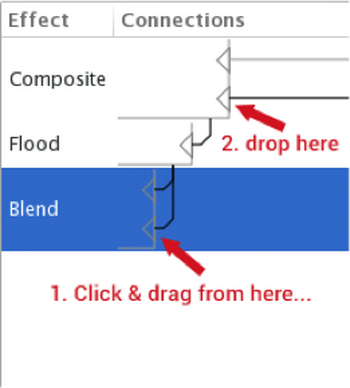
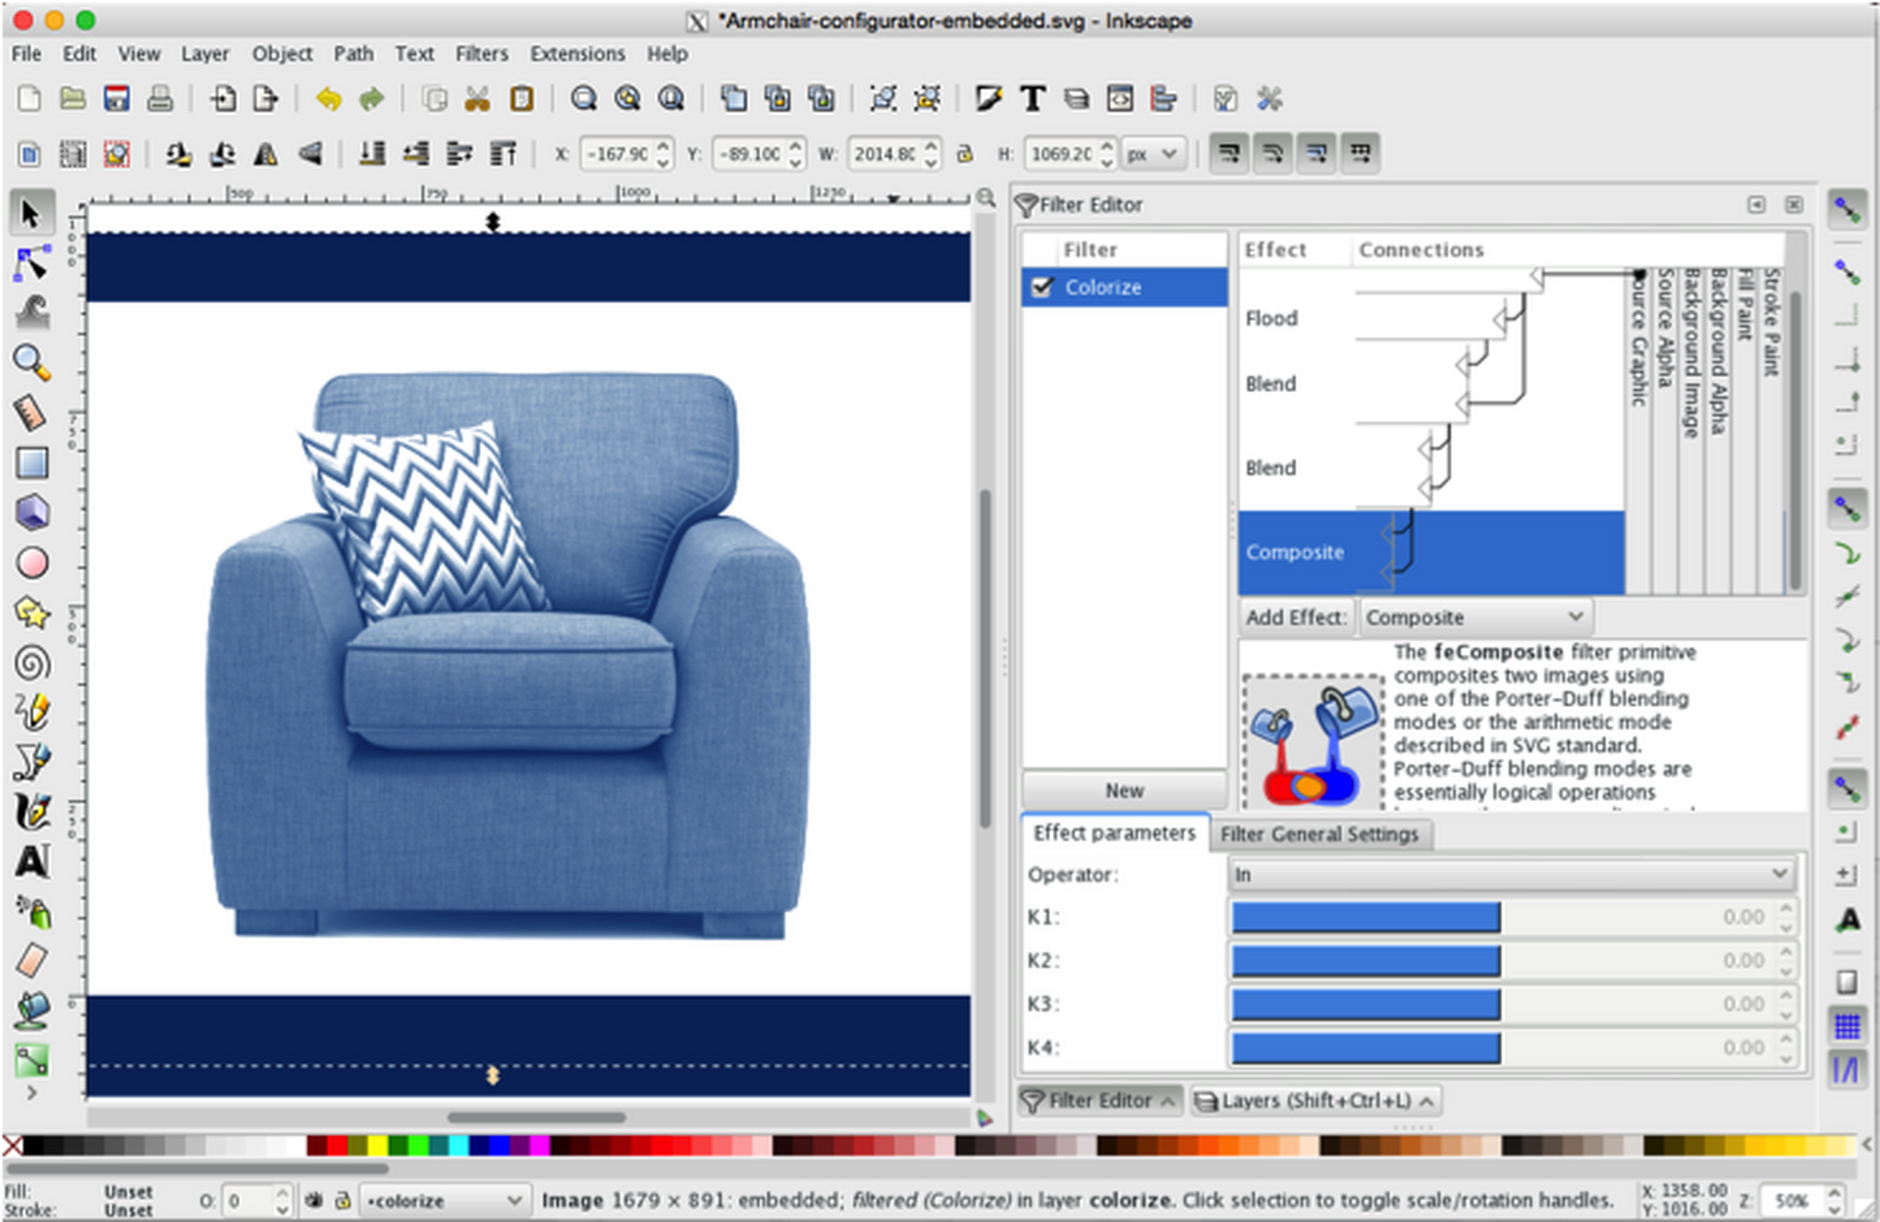
- Now we have to adjust Inkscape's preset connection between this Blend filter effect and Flood. You'll see both right-hand connectors are linked to Flood by default. We want to take the bottom of the two and connect it to the Composite filter effect. To do this, click on the arrow head to the right of the filter effect name, drag it and drop it onto the bottom of the two arrow heads to the right of the Composite. The filter effects are then connected as shown here.
That's the tricky part done! Hopefully it's beginning to make sense now, so don't give up!
Blend -- fourth filter effectLink copied!
We use a second blend filter to create a richer colorization effect.
The process of creating the Blend filter effect is the similar to before:
- Go to the droplist to the right of 'Add effect' button and select 'Blend'
- Click the 'Add effect' button
- In 'Effect parameters', change Mode from 'Normal' to 'Multiply'
- There's no need to adjust any of Inkscape's connectors -- this time the Blend is simply linked to the one above.
Composite -- fifth filter effect
The final filter effect.
- Go to the droplist to the right of 'Add effect' button and select 'Composite'
- Click the 'Add effect' button
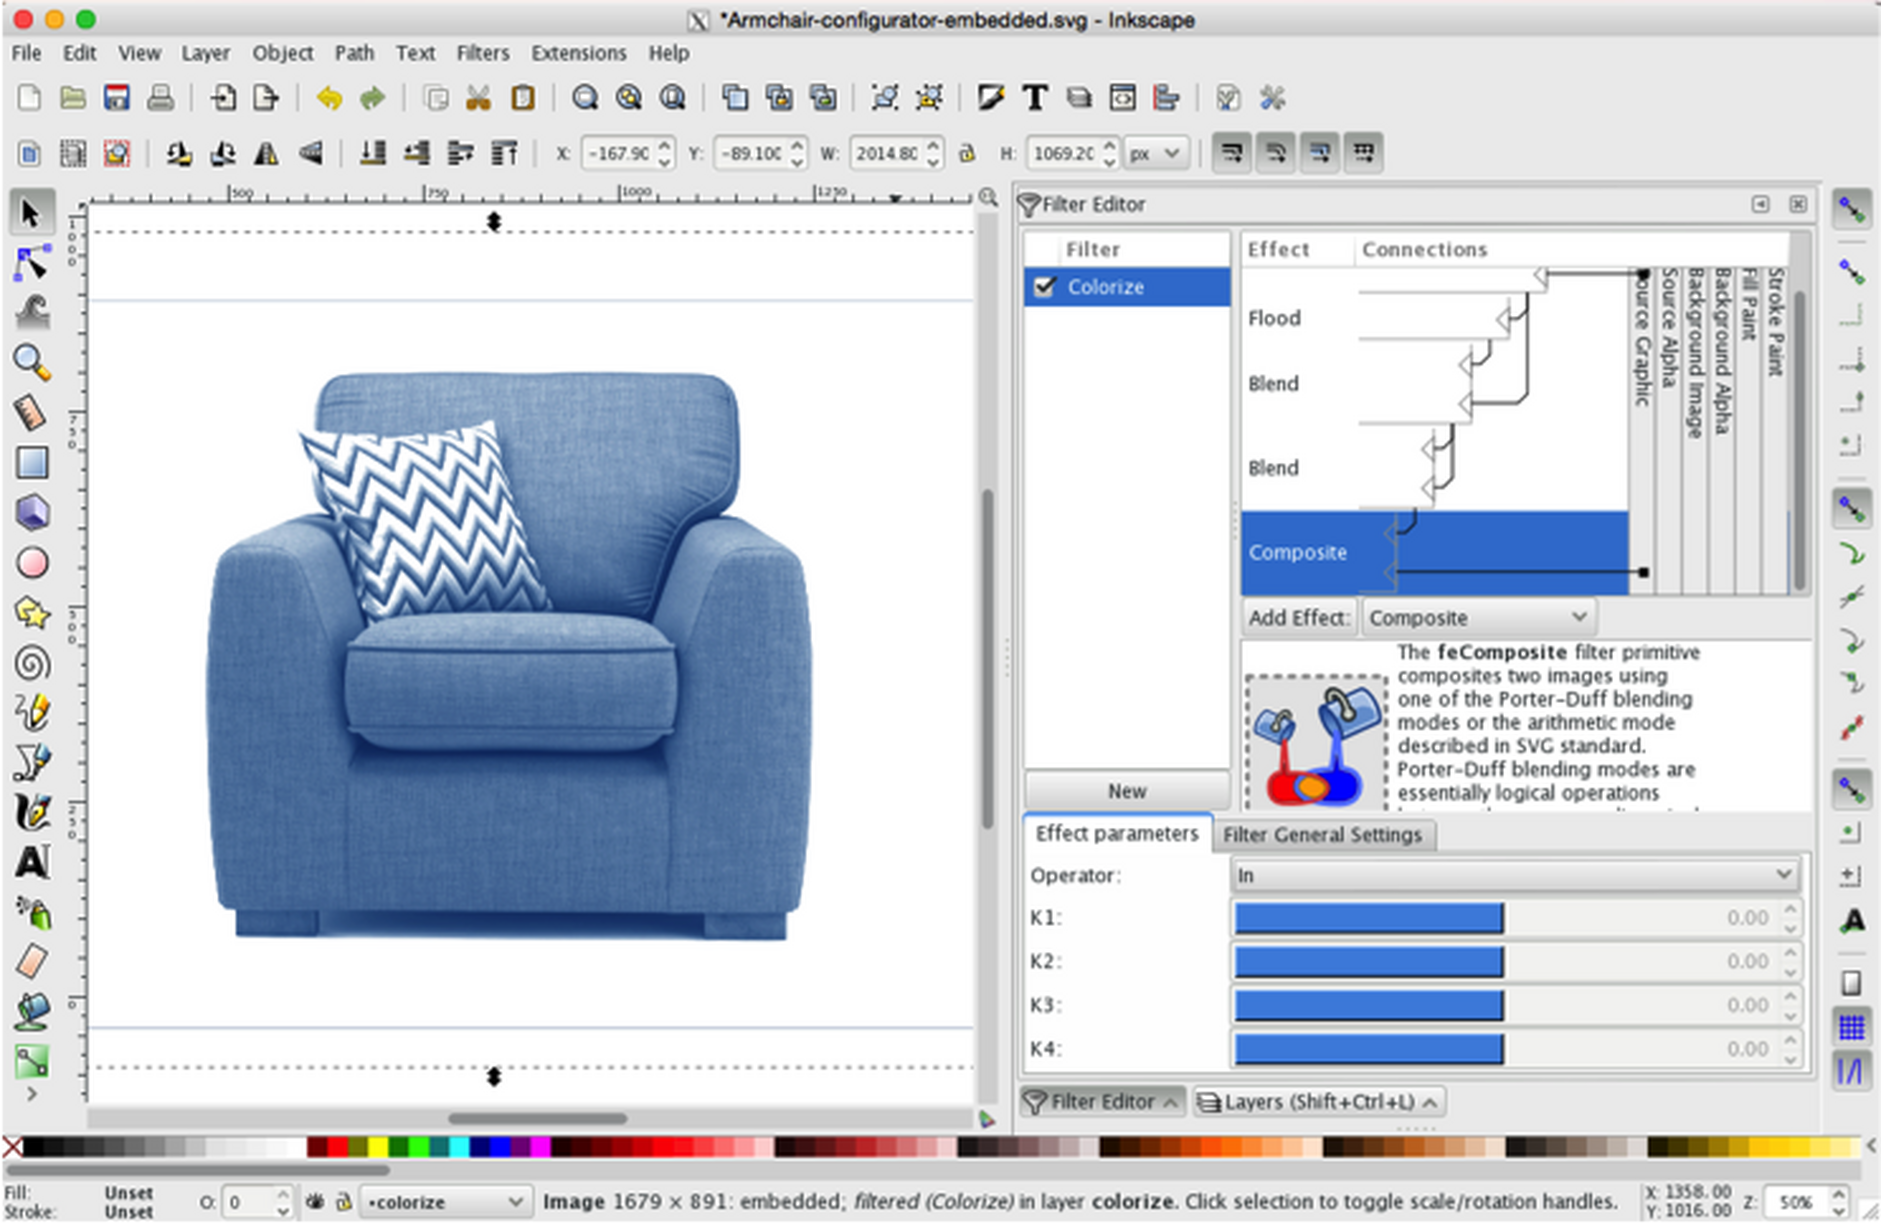
- In 'Effect parameters', change Operator from 'Over' to 'In'
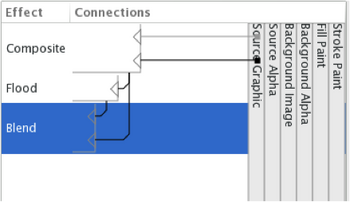
- Drag the second connector from 'Composite' to 'Source Graphic' - as a result the coloured border surrounding your product will disappear
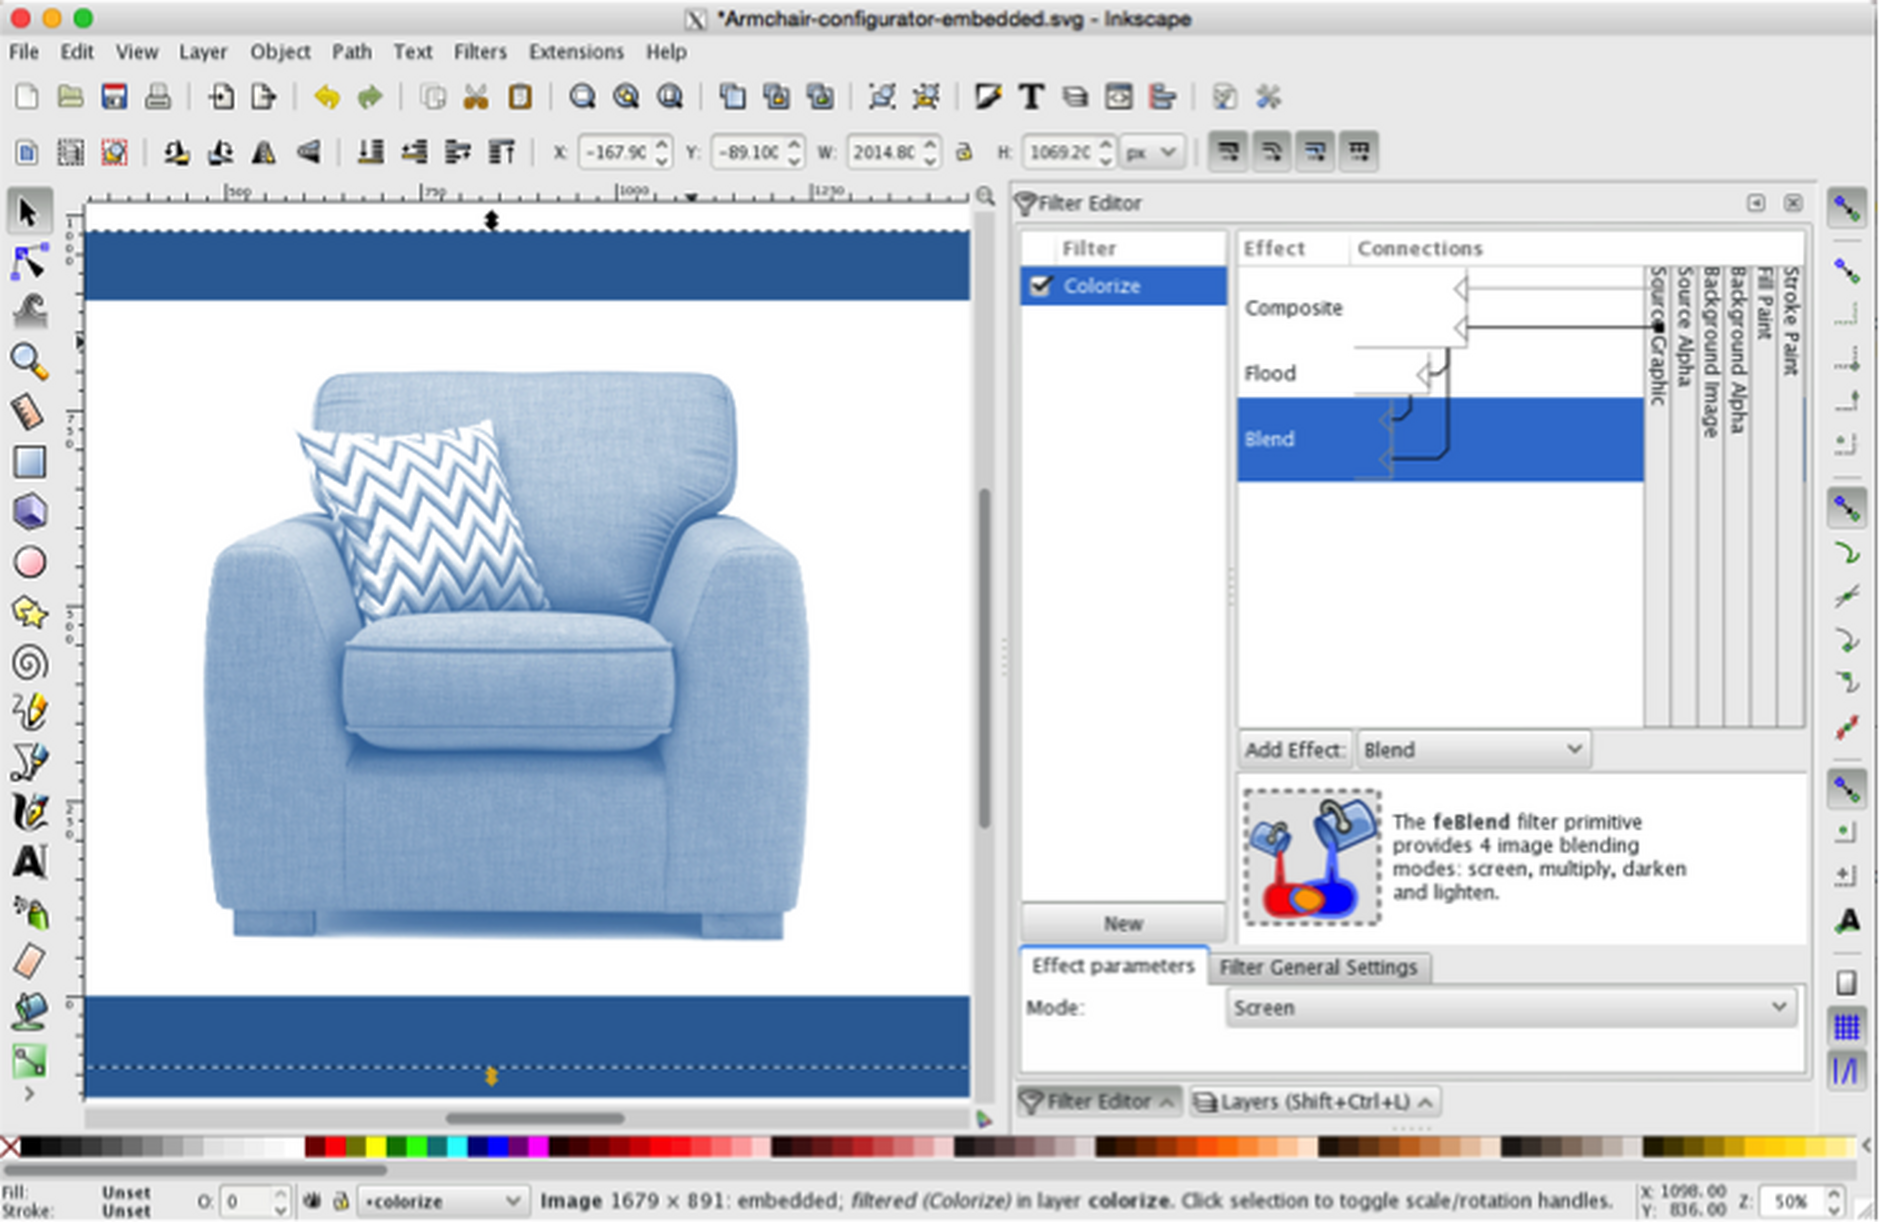
That's it -- you've created your colorized product image!
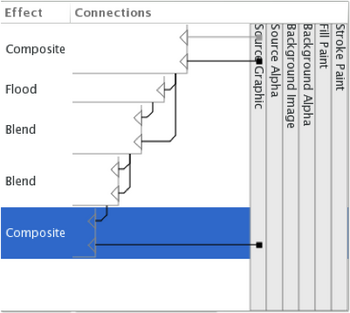
At this point your filters should look like this:
We still need to add the product mask layer, and another filter to bring shadowing back into the image, back you're well underway now.
Step 2 - Creating the Monochrome filterLink copied!
This filter is required because the during the colorization process, black information in our product image was replaced by colour. We now need to restore some of this black (in the form of shading and shadows) to make the final colorised image more realistic. We call this filter the Monochrome filter.
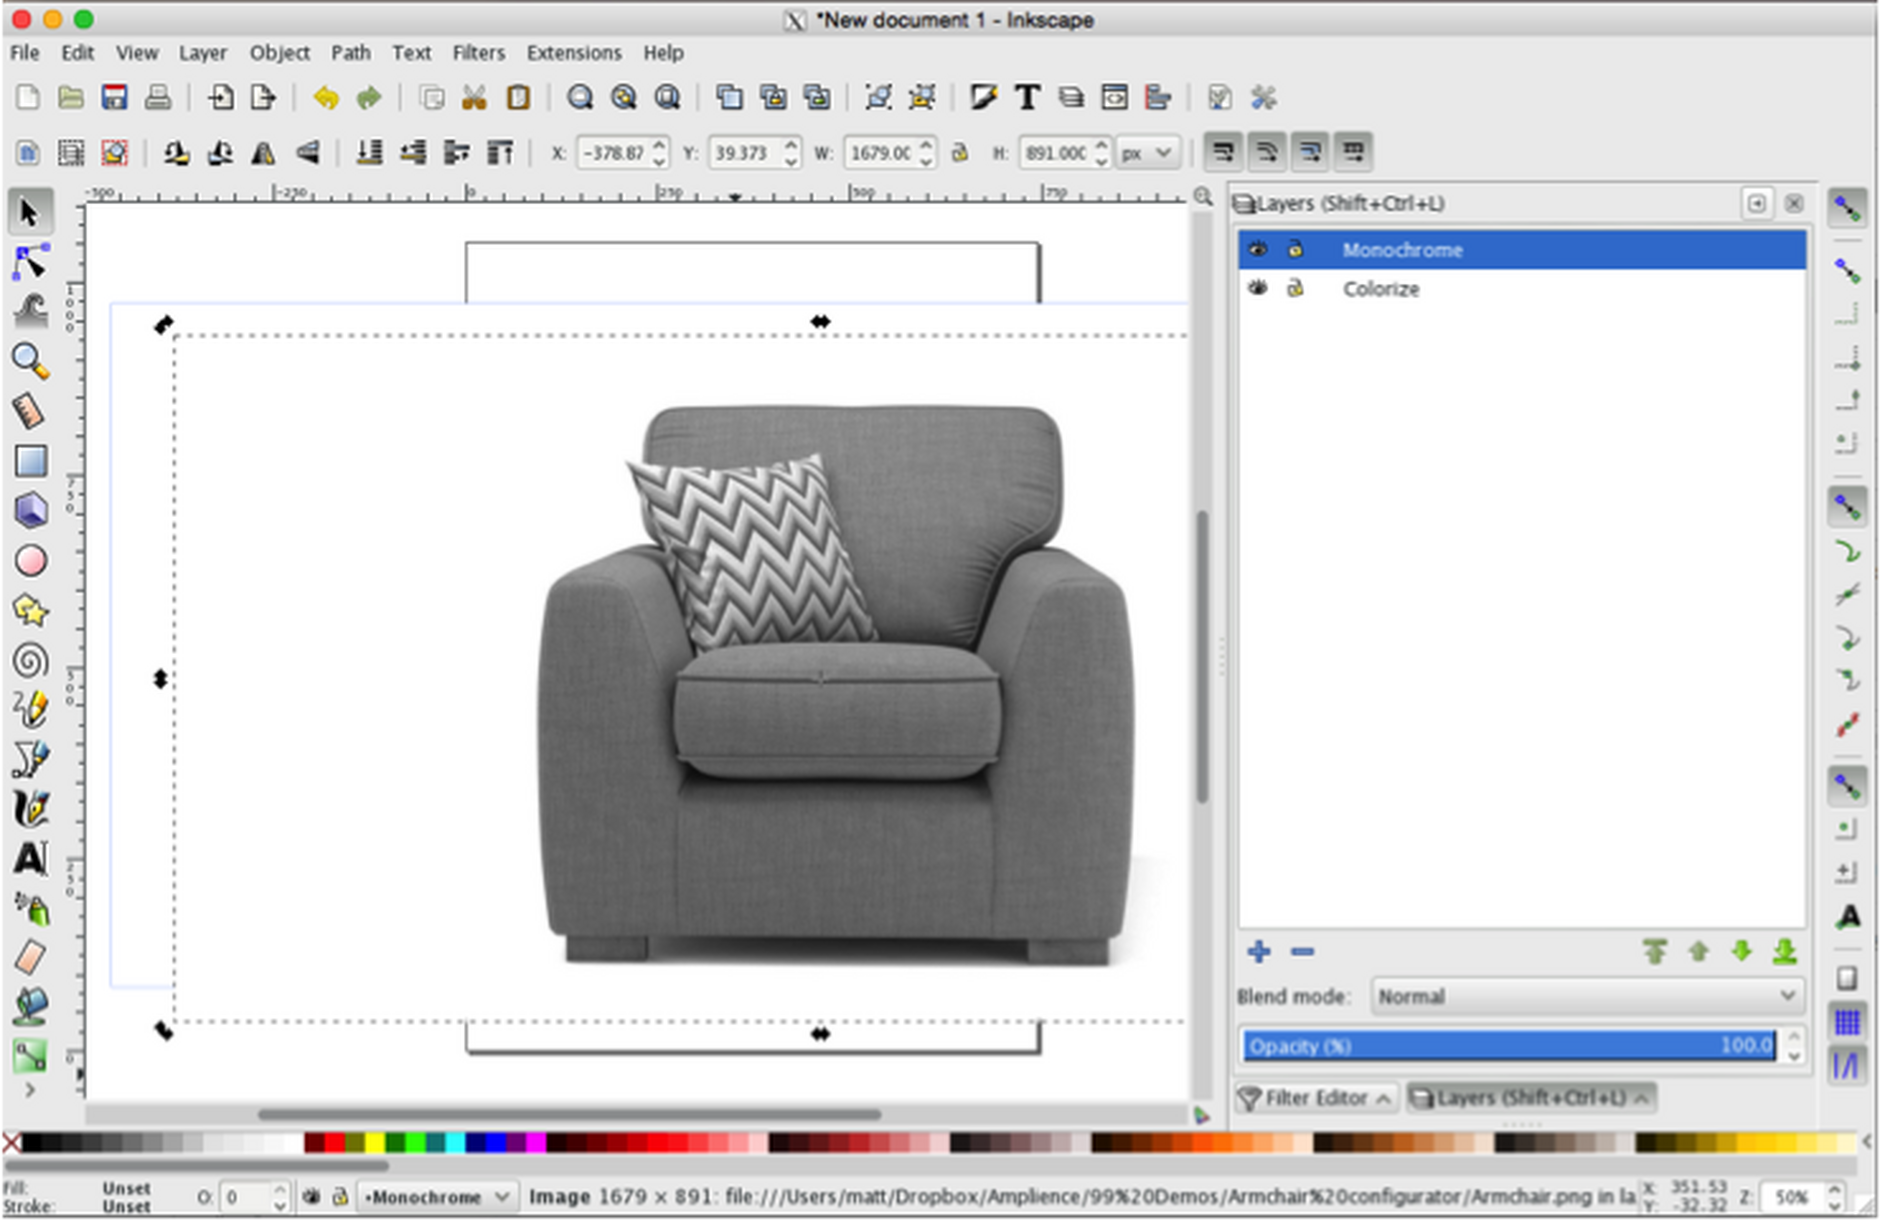
This filter has to be applied to a different layer that sits above the colorization layer. Our first job is to create a new layer in the SVG document and import the grayscale asset generated earlier into this new layer.
Creating the Monochrome LayerLink copied!
- On the Layers palette, click the '+' button to create a new layer.
- In the Add layer modal, name your layer 'Monochrome' (or something else meaningful)
- Add this layer 'Above current'
- Blend mode should be 'Normal' and leave opacity at '100.0'
- Go to 'File > Import' and navigate to your saved assets.
- Select the greyscale version of your product image and click 'Open'
- Choose between Embed and Link
- Your greyscale product image will appear on your canvas
- Ensure the image is aligned correctly with the colorized version beneath (You can switch layers on/off by clicking on the eye icon to the left of the layer name in the Layers palette - this can be helpful to check the alignment. Inkscape's also snaps objects together that are positioned in close proximity - a feature that should help you here).
Now to create the filter itself...
Creating the Monochrome filterLink copied!
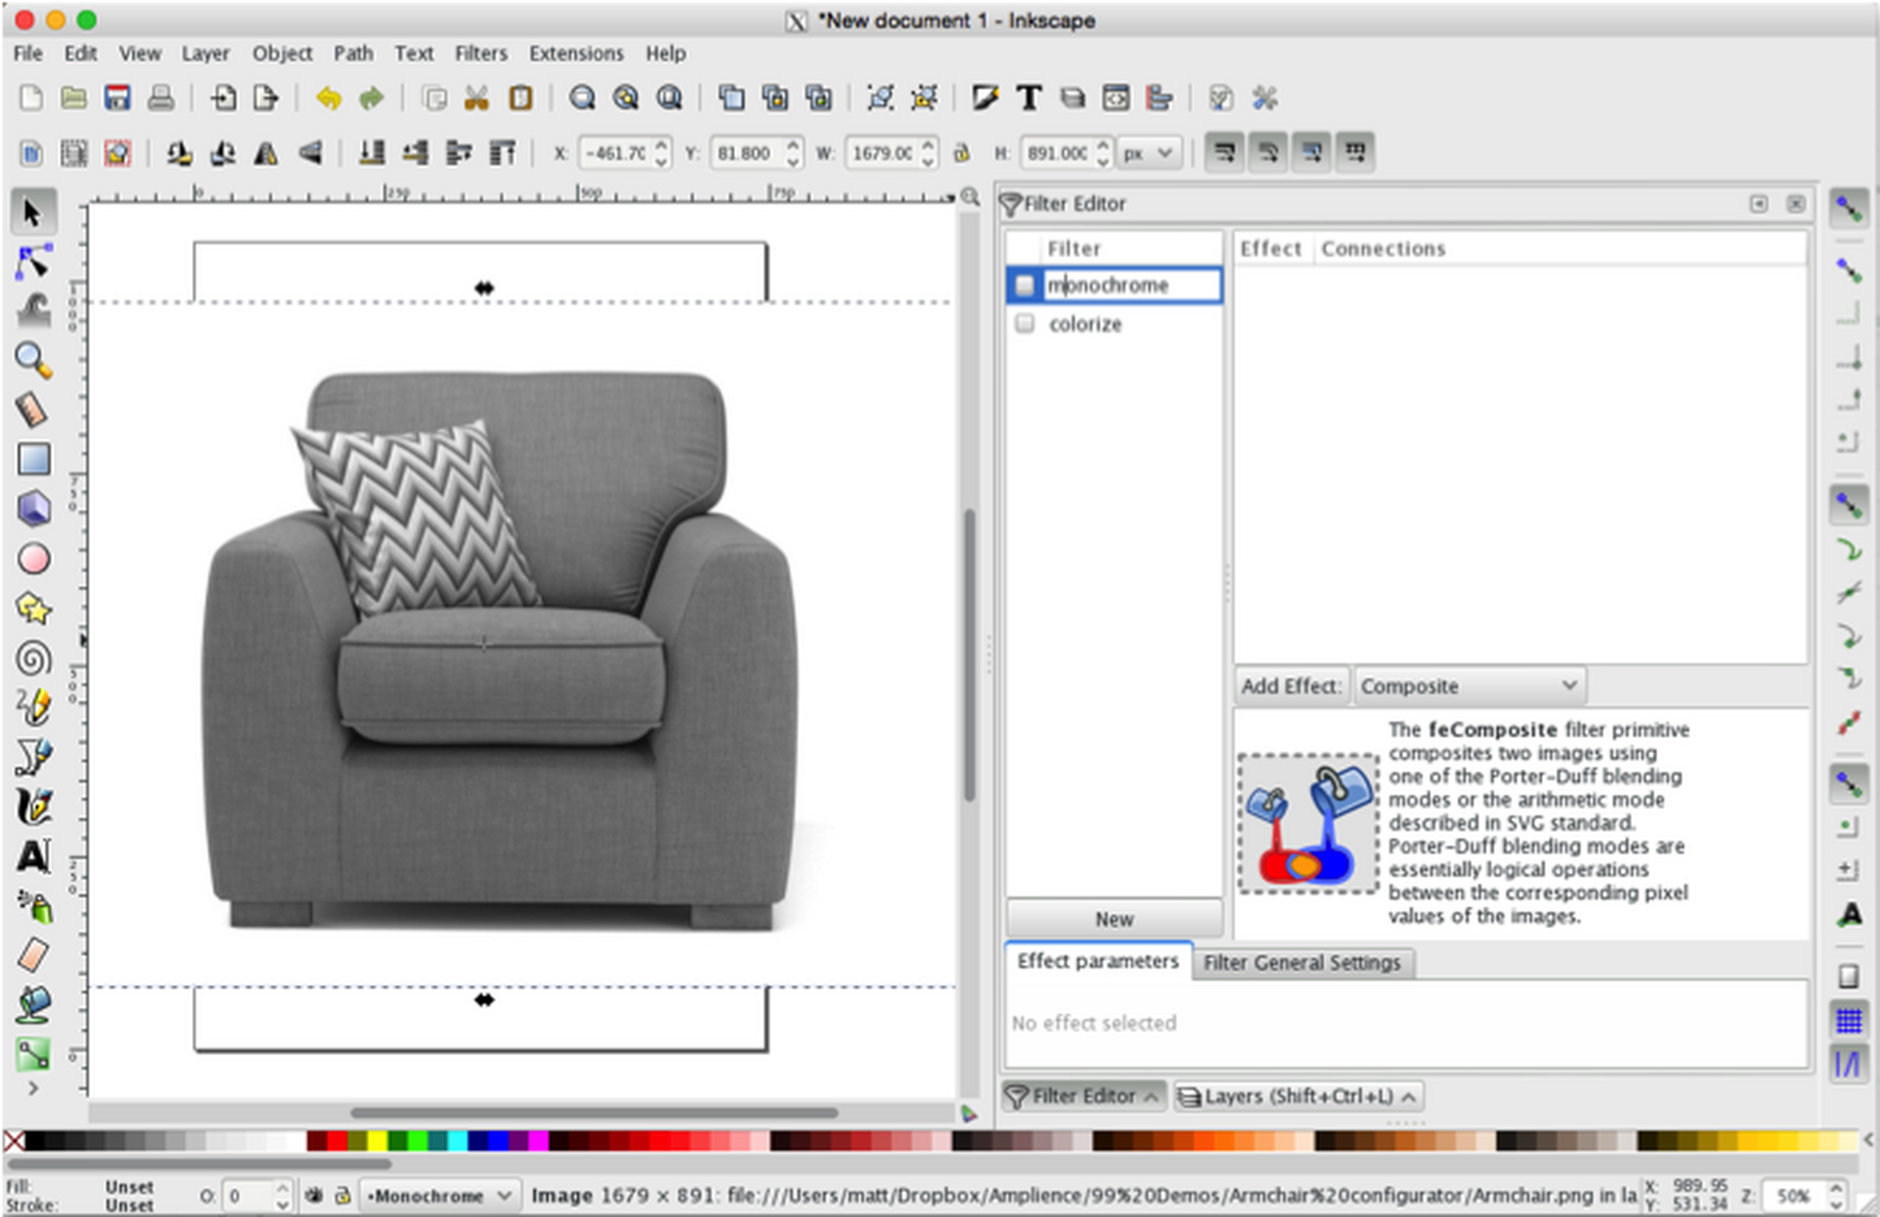
- In the Filter Editor palette, click the 'New' button.
- You'll see 'filter2' appear in the Filter list.
- Double-click 'filter2' and rename the filter 'Monochrome'
At this point you might want to apply the filter to the layer (although nothing will happen at this point because the filter has no effects). To do this:
- Click on your greyscale product image visible in the left-hand window.
- A dotted line and transformation handles will indicate the image is selected.
- In the Filter Editor, check the Monochrome filter box - and we're ready to proceed to the next step
Creating the Monochrome filter effectsLink copied!
This filter has fewer filter effects than Colorize - four to be precise. We will use the same techniques that we learnt earlier to create each effect in turn. During the process of adding the filters effects, your product image will change radically and might appear broken - this is to be expected - the final combination of filter effects is what makes the difference.
Filter effect 1 - Color MatrixLink copied!
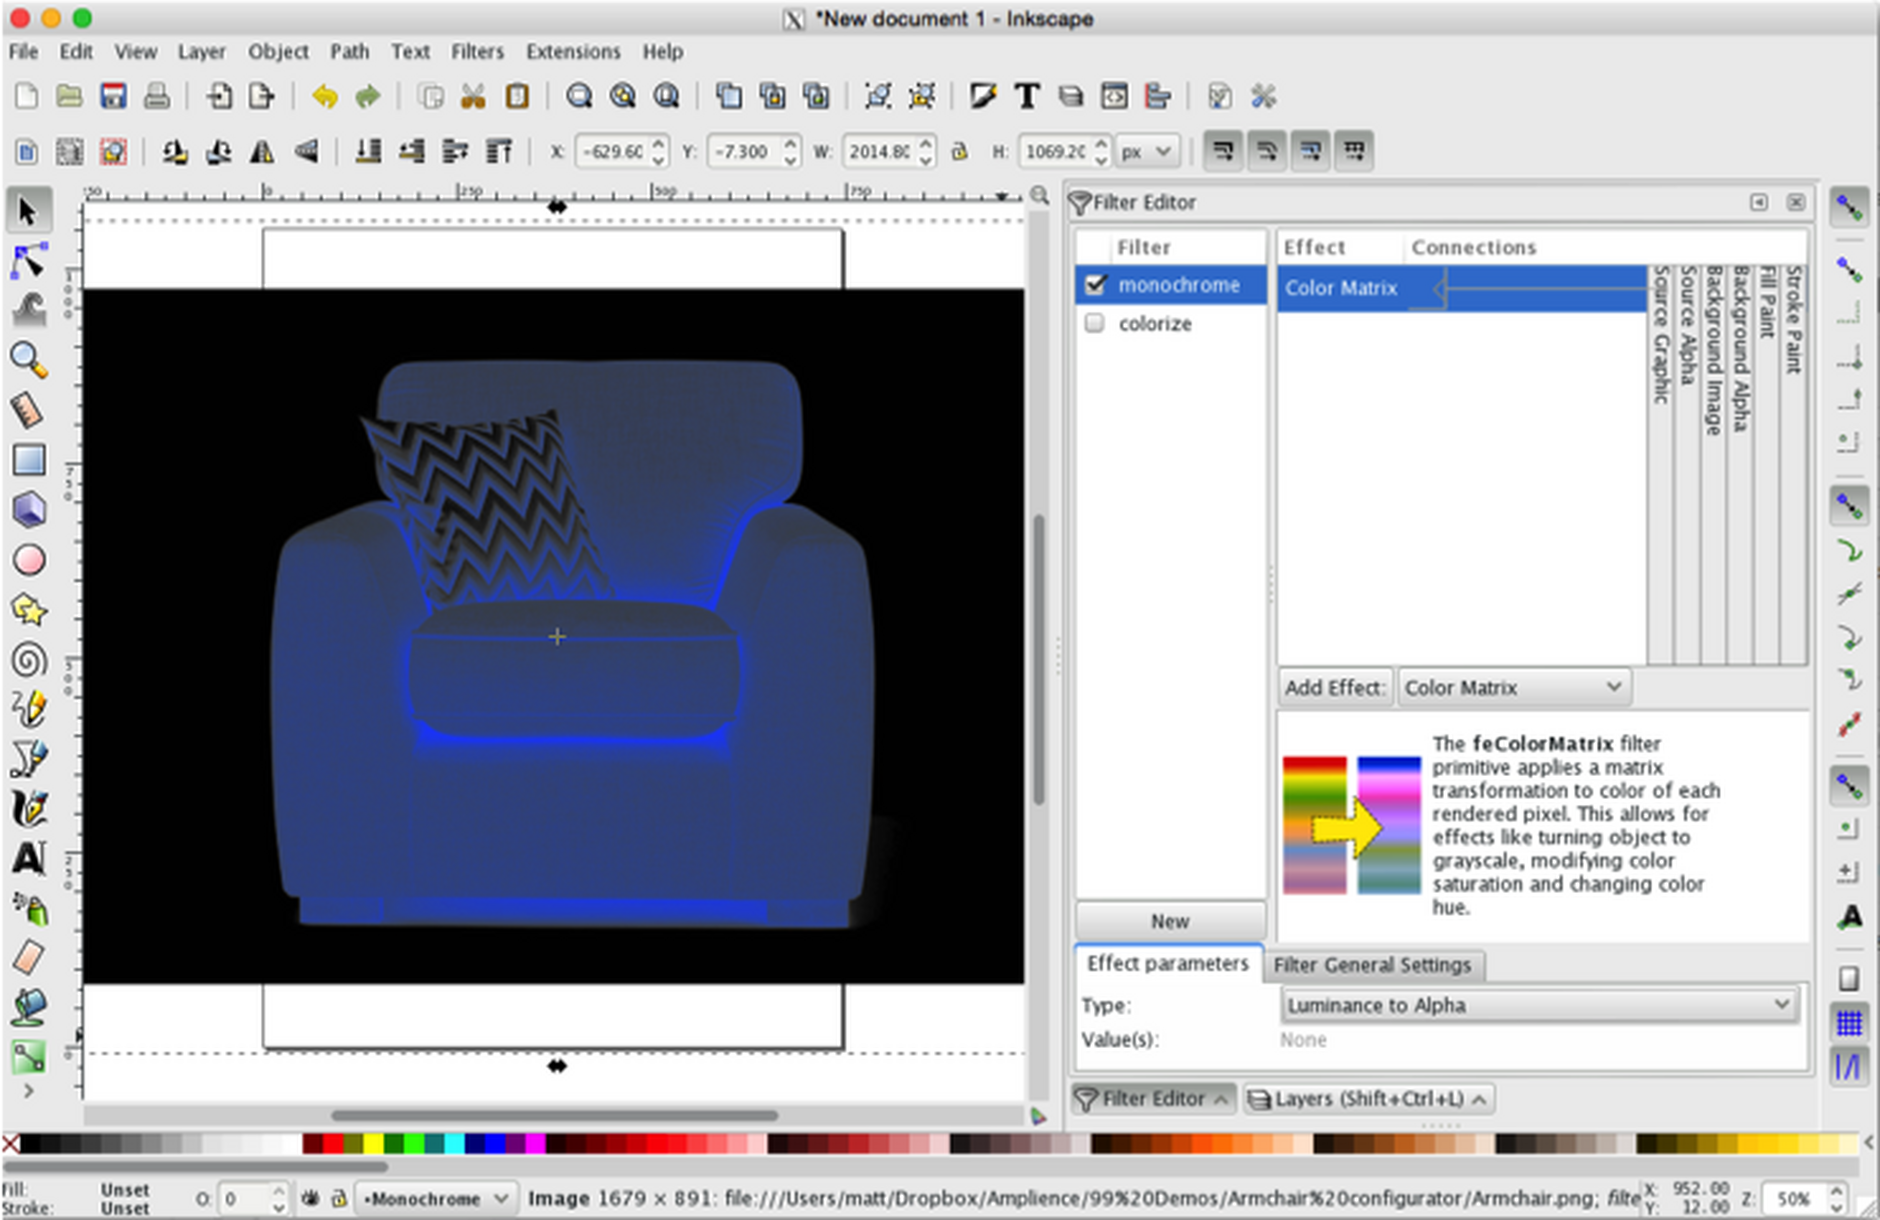
- Go to the droplist to the right of 'Add effect' button and this time select 'Color Matrix'
- Click the 'Add effect' button
- In 'Effect parameters' change type from 'Matrix' to 'Luminance to Alpha'
Filter effect 2 - FloodLink copied!
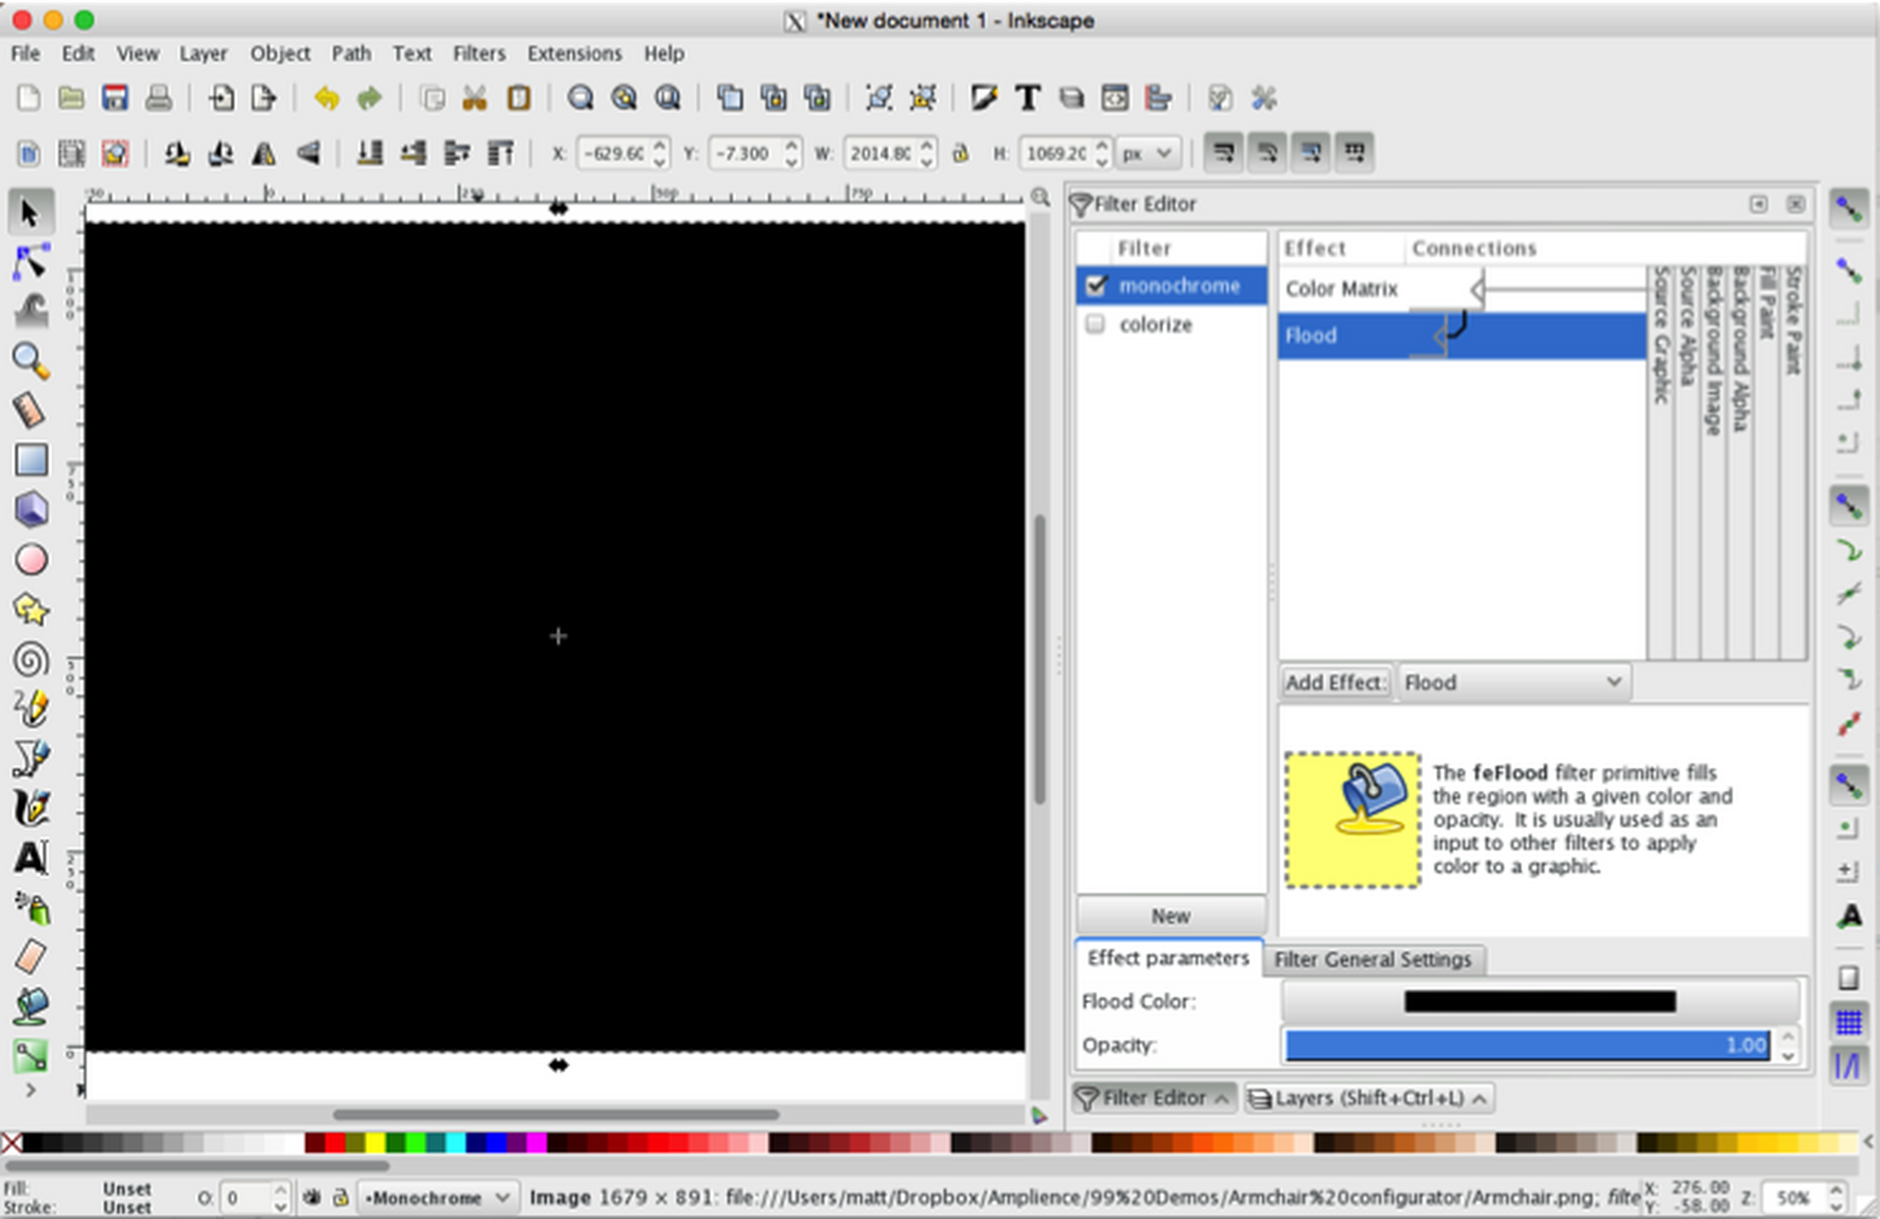
- Go to the droplist to the right of 'Add effect' button and select 'Flood'
- Click the 'Add effect' button (your product image will most likely go black at this point but don't worry - this is just temporary until we create the next filter effect).
- In 'Effect parameters' change the Flood color to black #000000
- Leave 'Opacity' setting at 1.00
Filter effect 3 - CompositeLink copied!
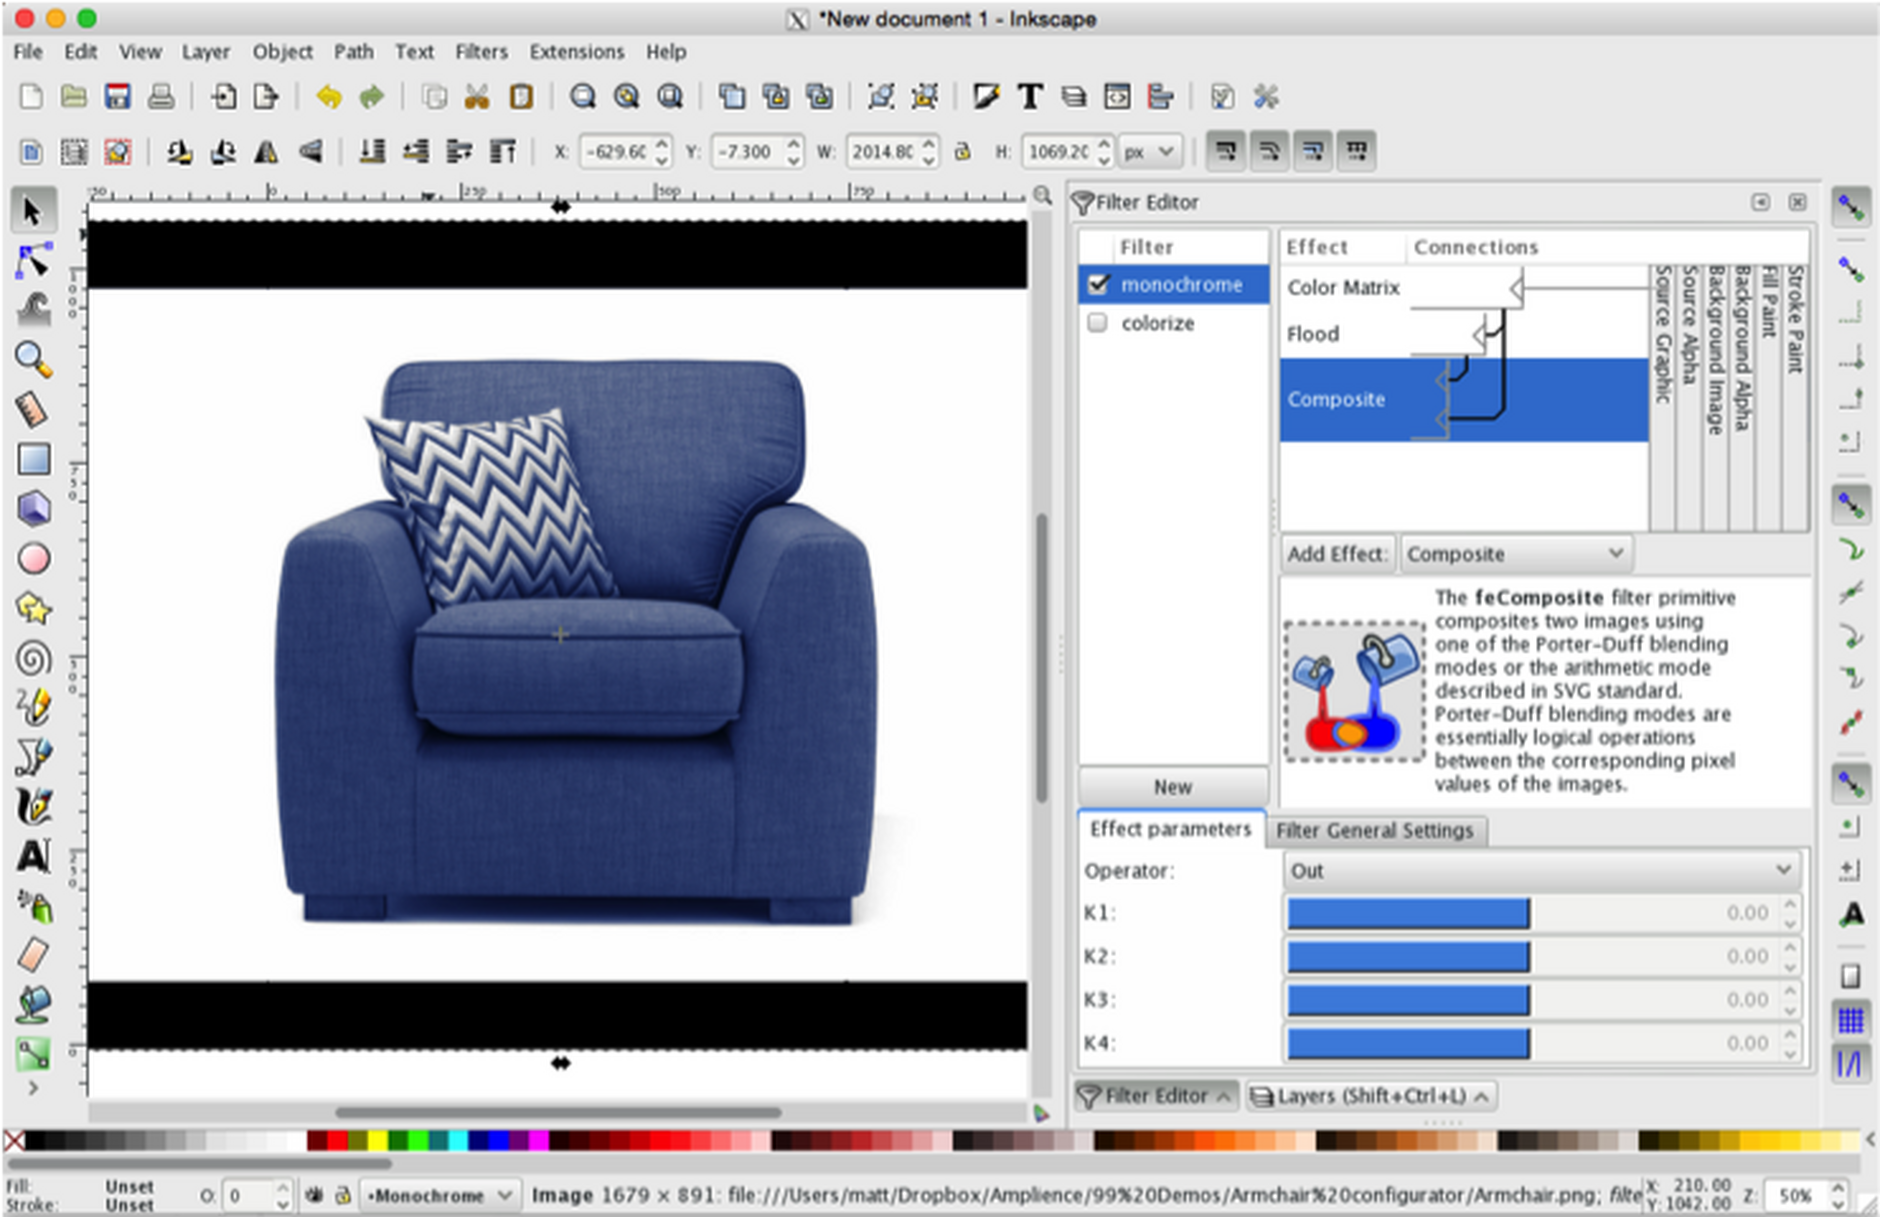
- Go to the droplist to the right of 'Add effect' button and select 'Composite'
- Click the 'Add effect' button
- Change the Operator from 'Arithmetic' to 'Out'
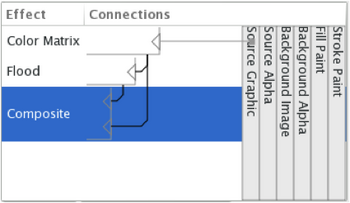
- Drag the lower to the two connector from 'Composite' to 'Color Matrix' - at this point your product will re-emerge with black information restored to the image.
Filter effect 4 - Composite (again)Link copied!
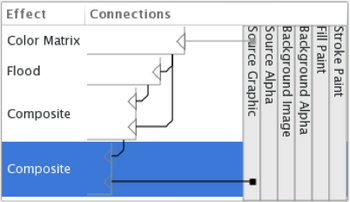
- Go to the droplist to the right of 'Add effect' button and select 'Composite'
- Click the 'Add effect' button
- In 'Effect parameters', change Operator from 'Over' to 'Arithmetic'
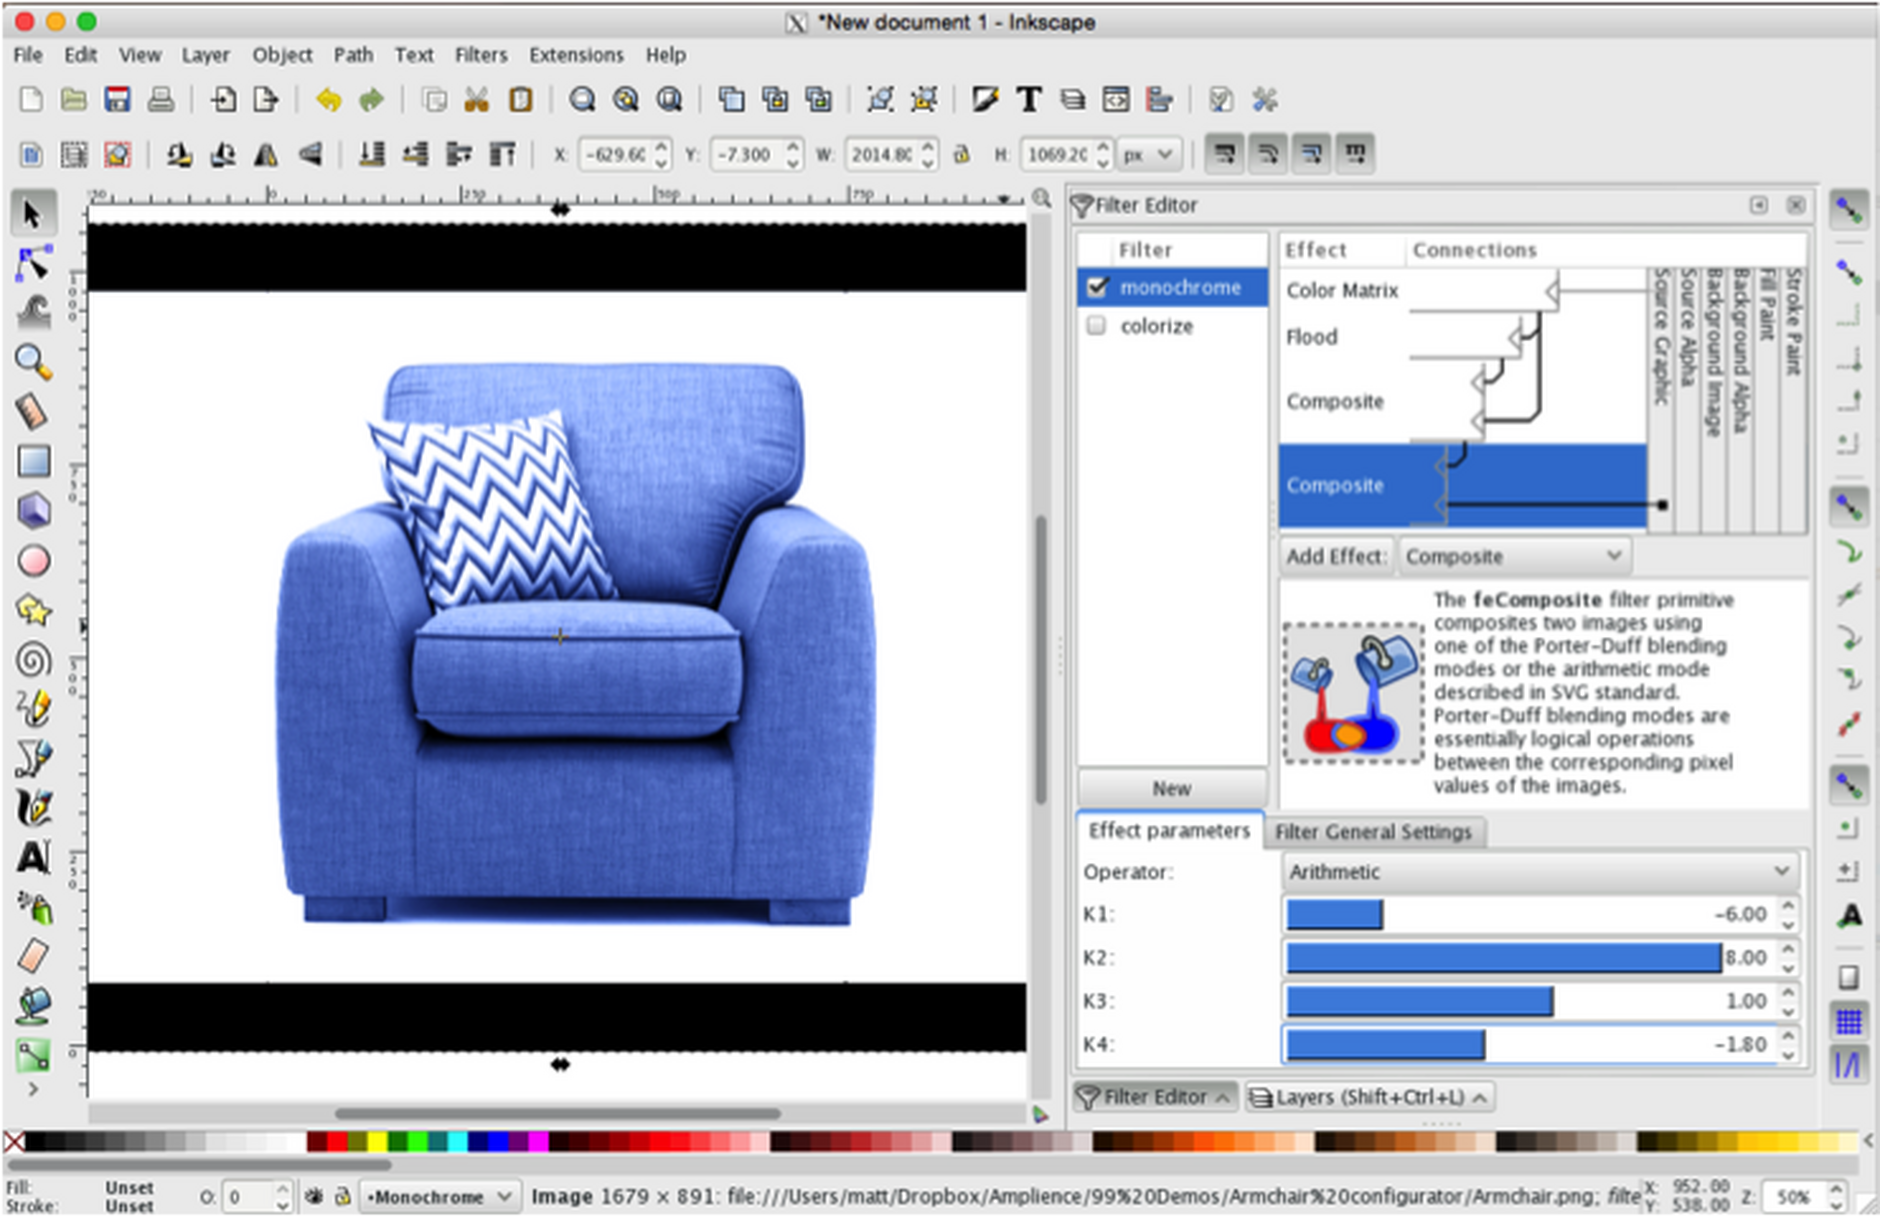
Change the K1, K2, K3 & K4 values to -6.00, 8.00, 1.00 & -1.80 (or thereabouts)
Drag the lower of the two connectors from 'Composite' to 'Source Graphic'
That's all the filter effects complete. You product image should now be fully colorized and should benefit from a realistic range of tones and shadows.
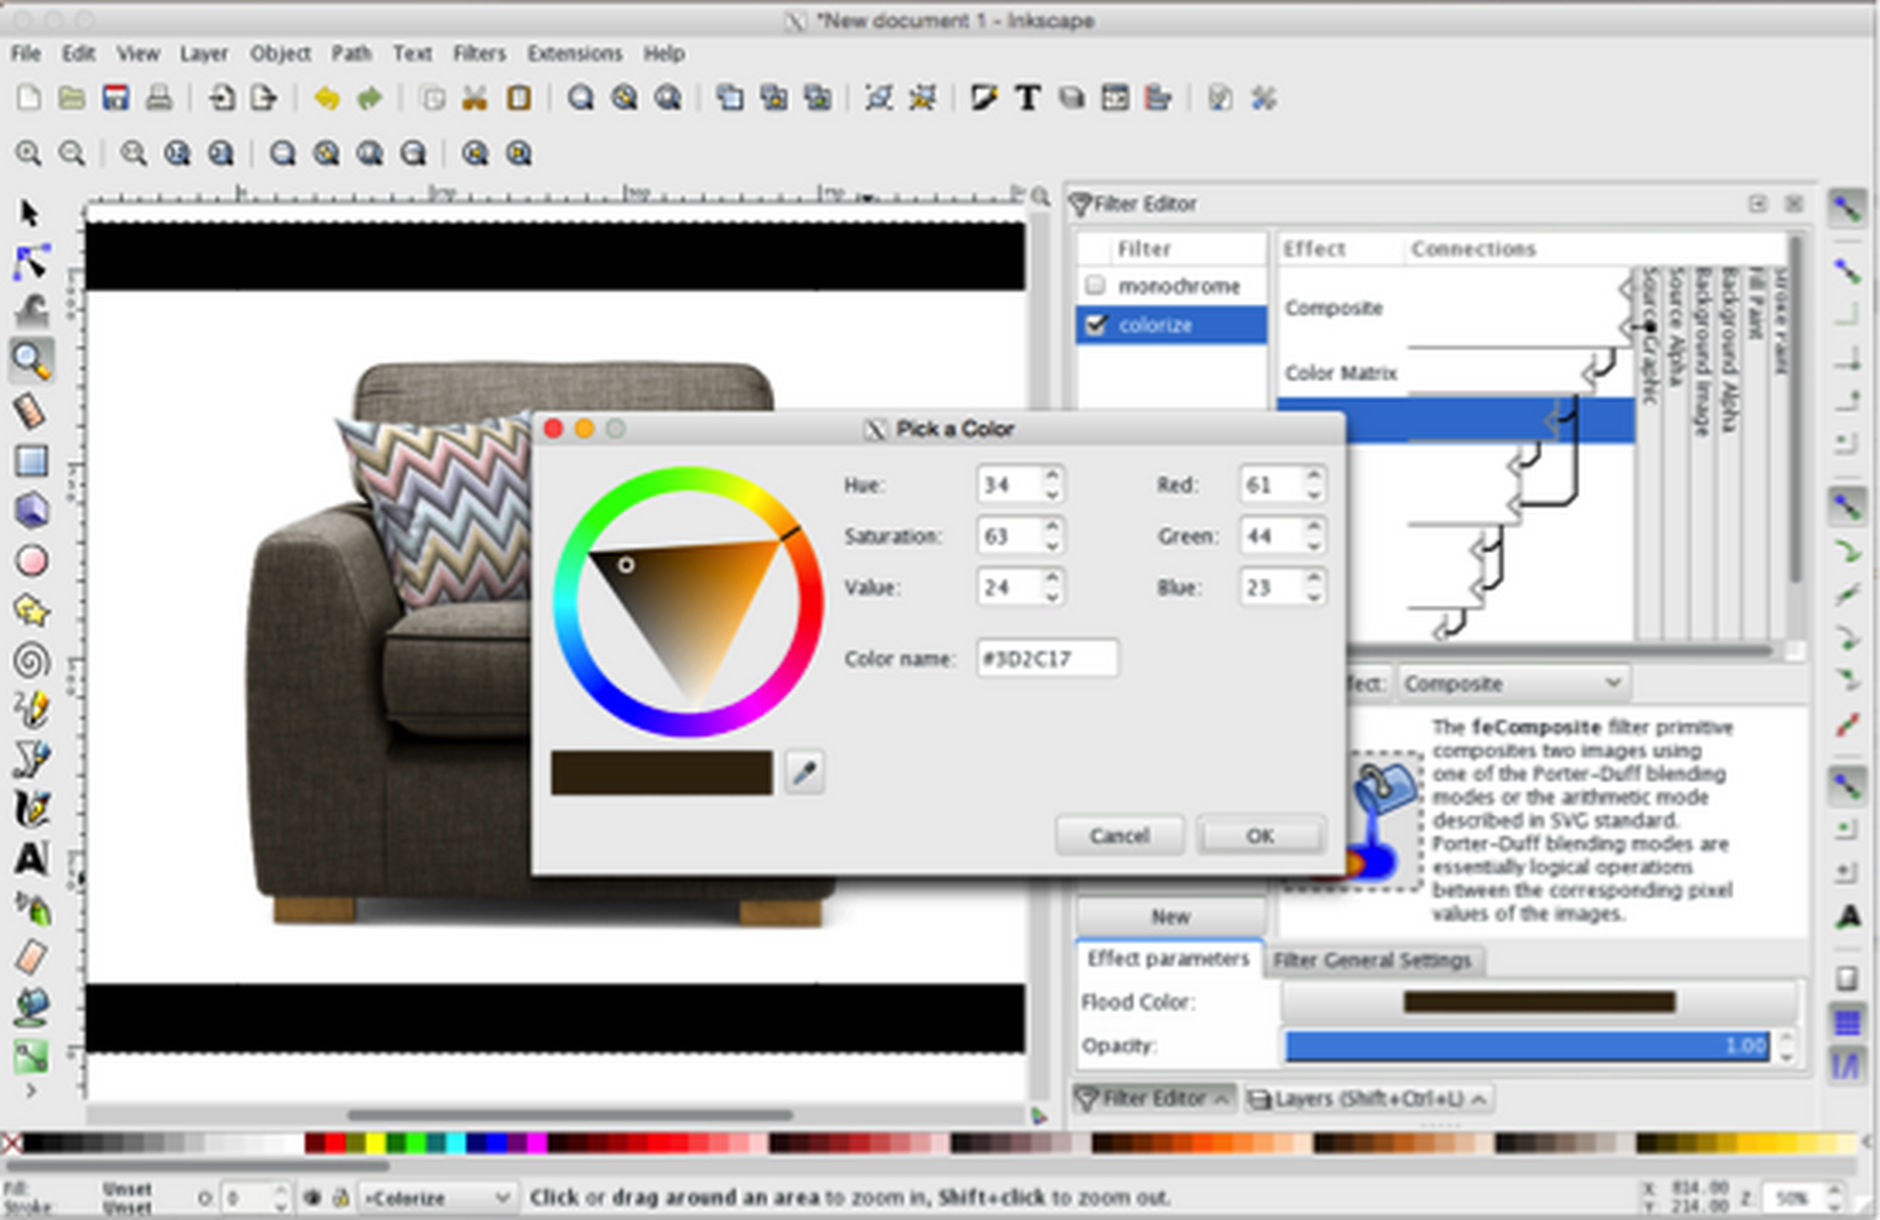
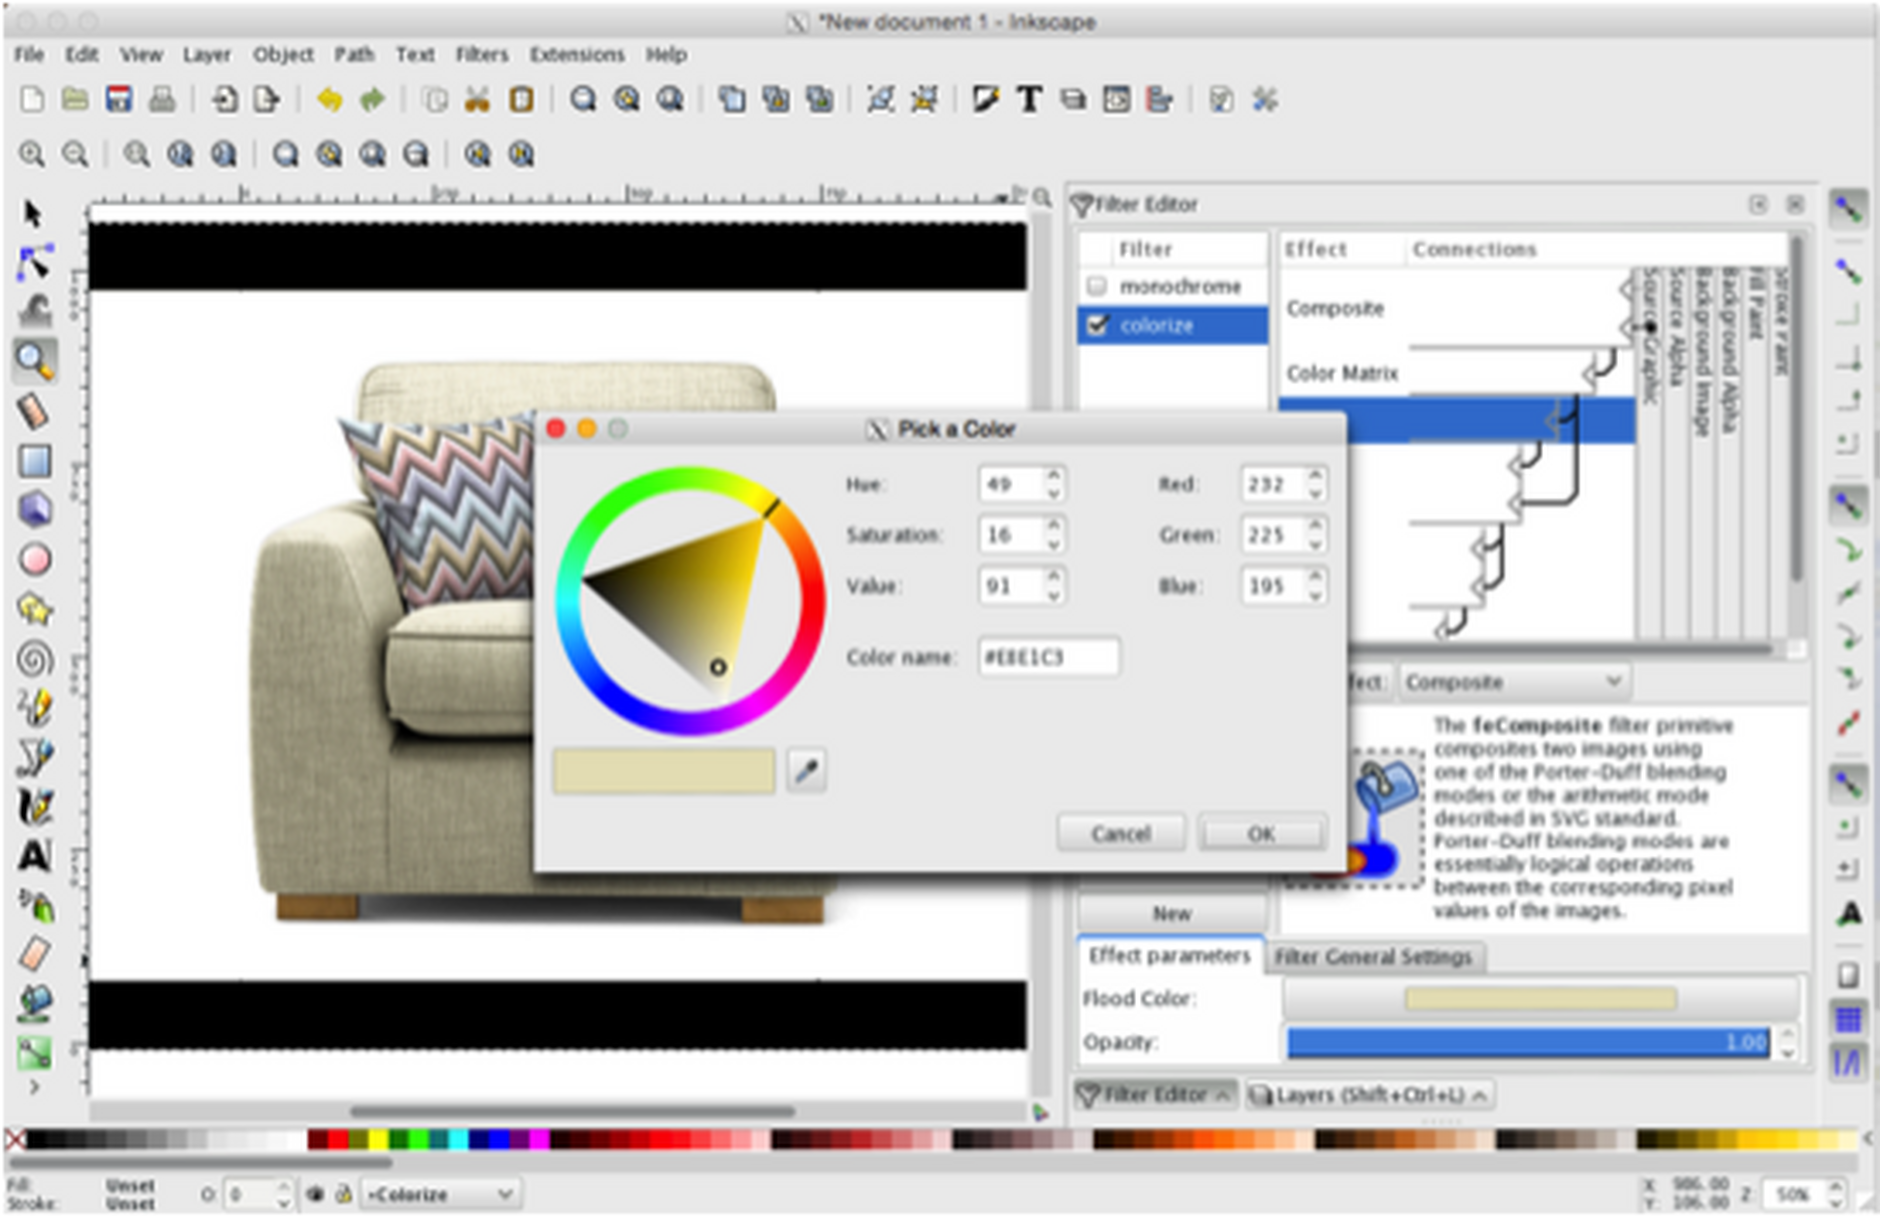
At this point, we generally recommend testing some colour variations to ensure the filter effects are correctly applied. This is best done by locking the Monochrome layer first (using the padlock icon in the Layer Editor palette). Then you can more easily select image asset associated with the Colorize layer. When you return to the Filter Editor, you'll see the Colorize layer has been selected. Click the Flood filter and then you are able to adjust the flood colour to perform your colour tests.
Once you are happy that the colorization is working as you need, the final step is to apply the product image mask to hide those parts of the product image that shouldn't be colorized
Step 3 - Applying the maskLink copied!
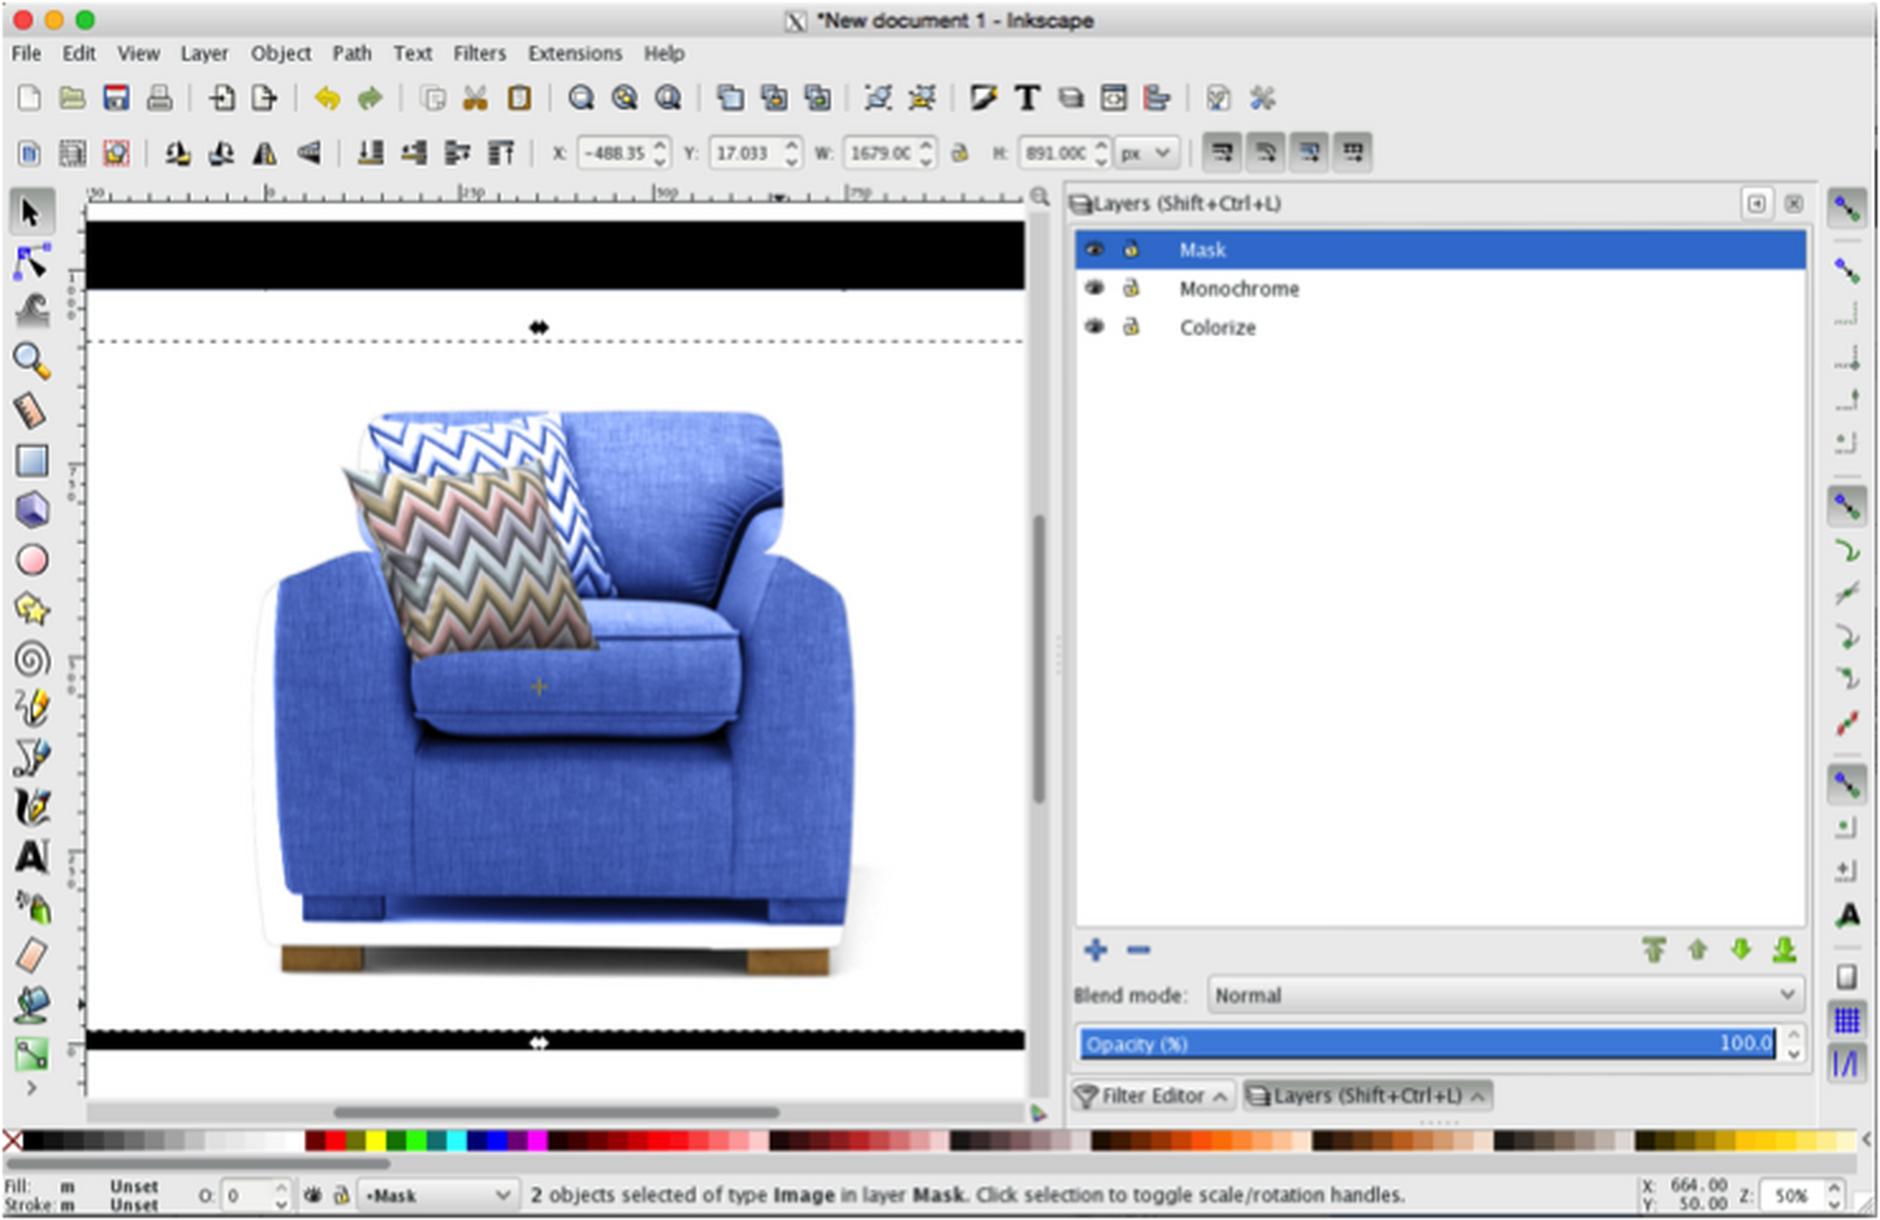
You might be glad to know that this is a very straightforward process (compared to creating the filters). The mask sits on top of the monochrome and colorize layers and its purpose is to hide the effects of these other two layers from view. That way you can select exactly what you'd like to colorise.
Creating the Mask LayerLink copied!
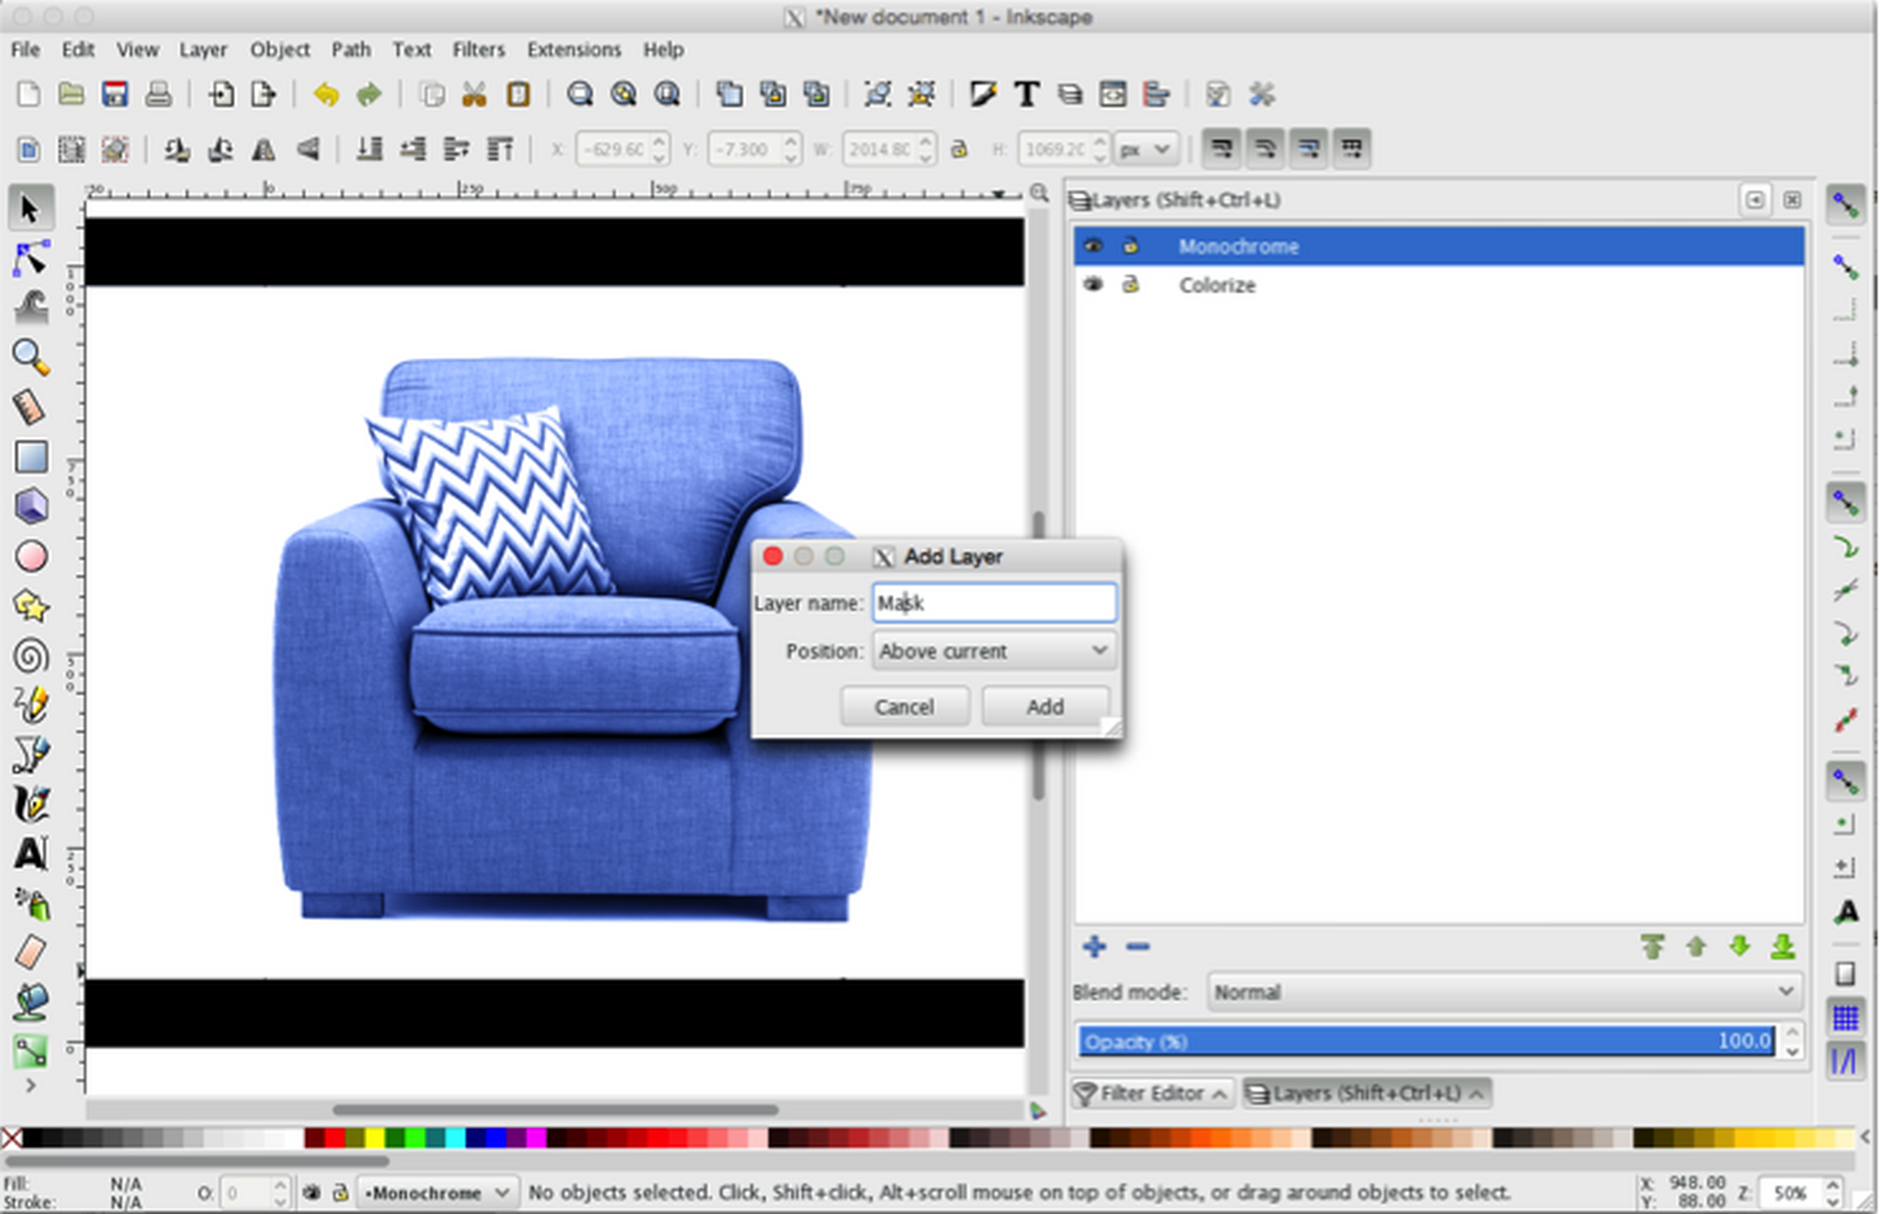
- On the Layers palette, click the '+' button to create a new layer.
- In the Add layer modal, name your layer 'Mask' (or something else meaningful)
- Add this layer 'Above current'
- Blend mode should be 'Normal' and leave opacity at '100.0'
- Go to 'File > Import' and navigate to your saved assets.
- Select your mask image and click 'Open'
- Choose between Embed and Link
- Your mask image will appear on your canvas.
- As before, ensure the image is aligned correctly with the versions beneath. It will snap into place if saved at the same dimensions as the other layers.
The finished article!Link copied!
You should now see the full effect of the completed SVG. By locking both the mask and monochrome layers, you can easily select the colorise layer and manipulate the flood effect colour.
Part 3 - Making the SVG dynamicLink copied!
When you are completely satisfied with the result, the SVG is ready to be parameterized. This is the process whereby a token is inserted in place of the flood color value. This value can be controlled dynamically, enabling any color variation to be created at will.
Step 1: Parameterize the SVGLink copied!
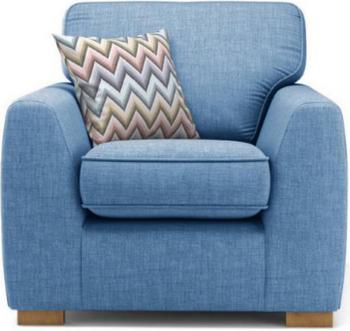
As the basis of this example, a designer has created an SVG image of an armchair that includes the necessary filters to support colorization. Take a look at the creating a colorized product image tutorial for a step by step guide to creating an SVG ready for parameterization.
Right click and save as to download the SVG XML code for this example.
When modifying the SVG XML code for this image, we will be referencing our ampsvg namespace. So before making any further modifications to the file, we must include the namespace definition in the list of namespaces at the head of the file like this:
In order to parameterize the SVG for colorization, the following code
snippet is inserted into the <metadata> section of the SVG XML.
The substitutions tag defines a parameter named $color that can be provided to Dynamic Media, and it also sets the mapping of that parameter value onto the flood-color attribute of the flood filter that was already defined in the SVG file as shown here: (it's what defines the color of the armchair):
The tokens tag of our newly-inserted metadata instructs the application to allow the substitution parameter value to be changed via the user interface.
Once parameterized, we upload the SVG to Content Hub.
Step 2: Locate the SVG in the SVG LibraryLink copied!
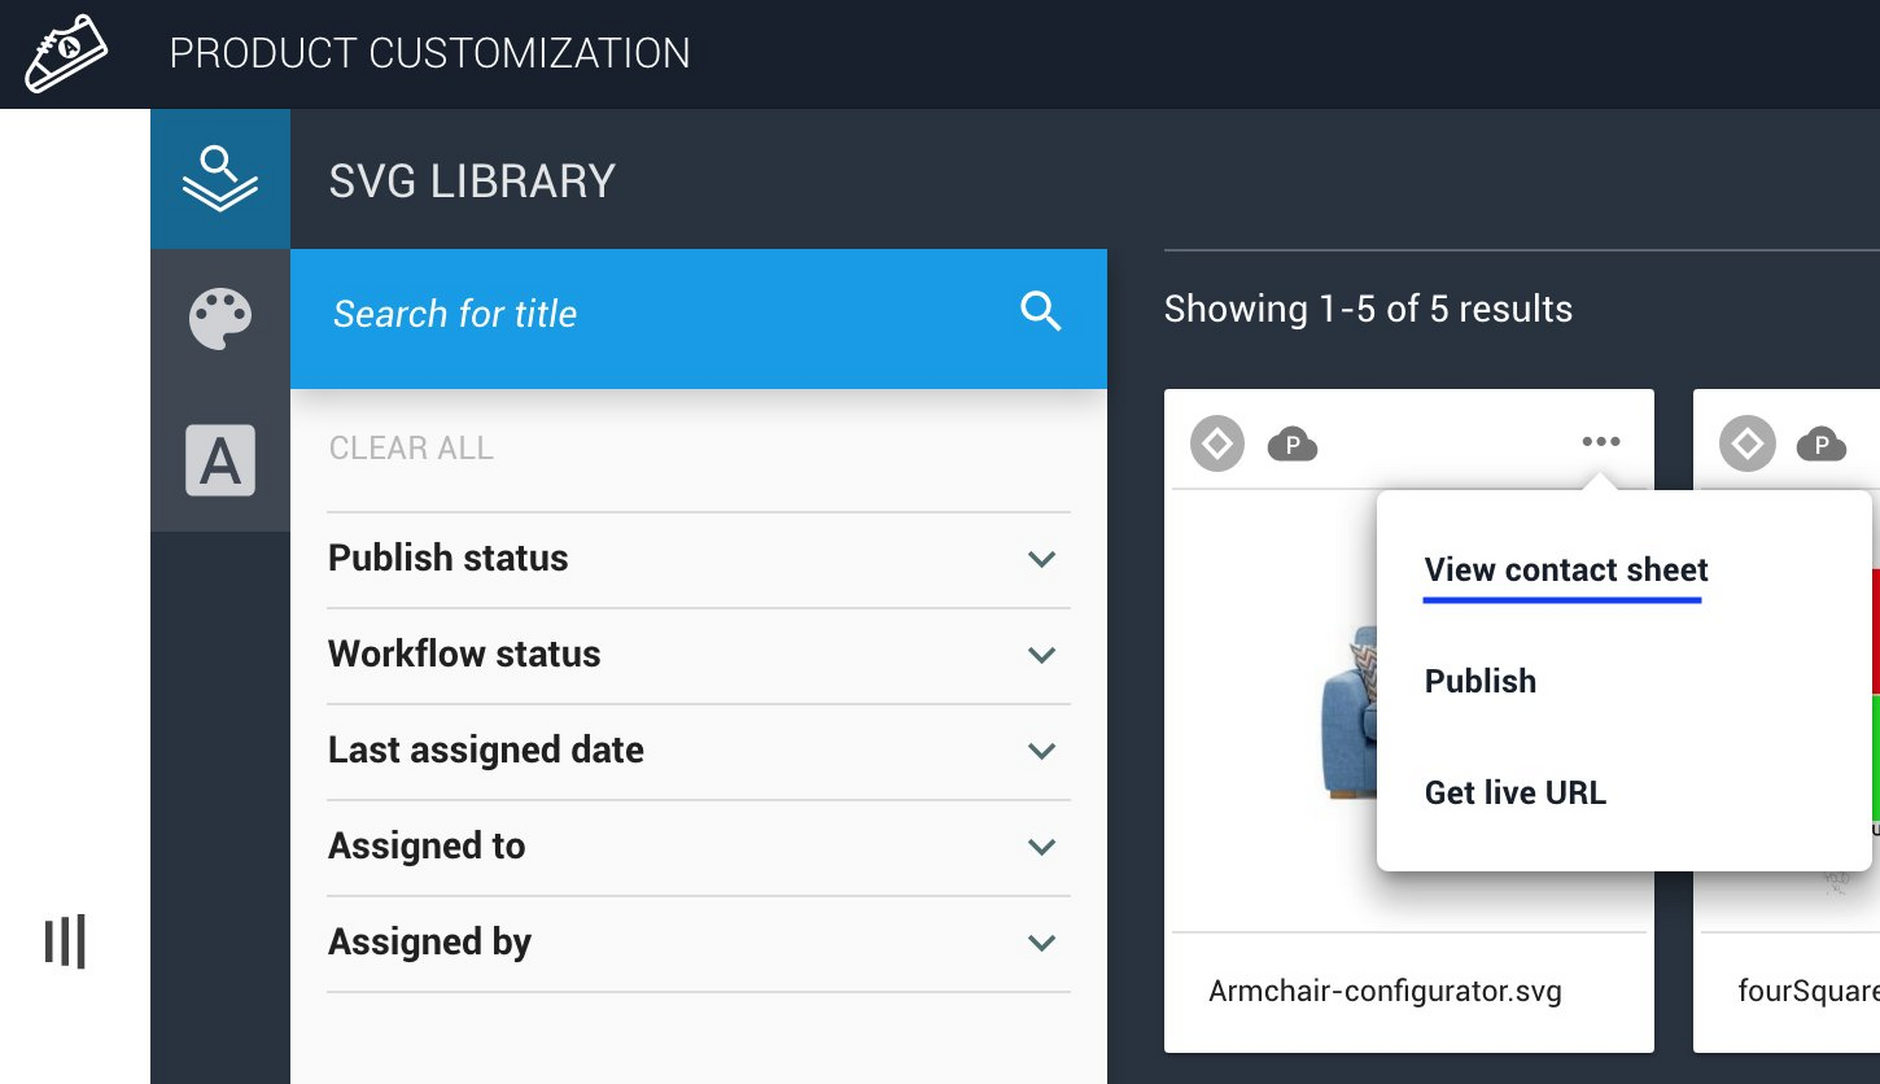
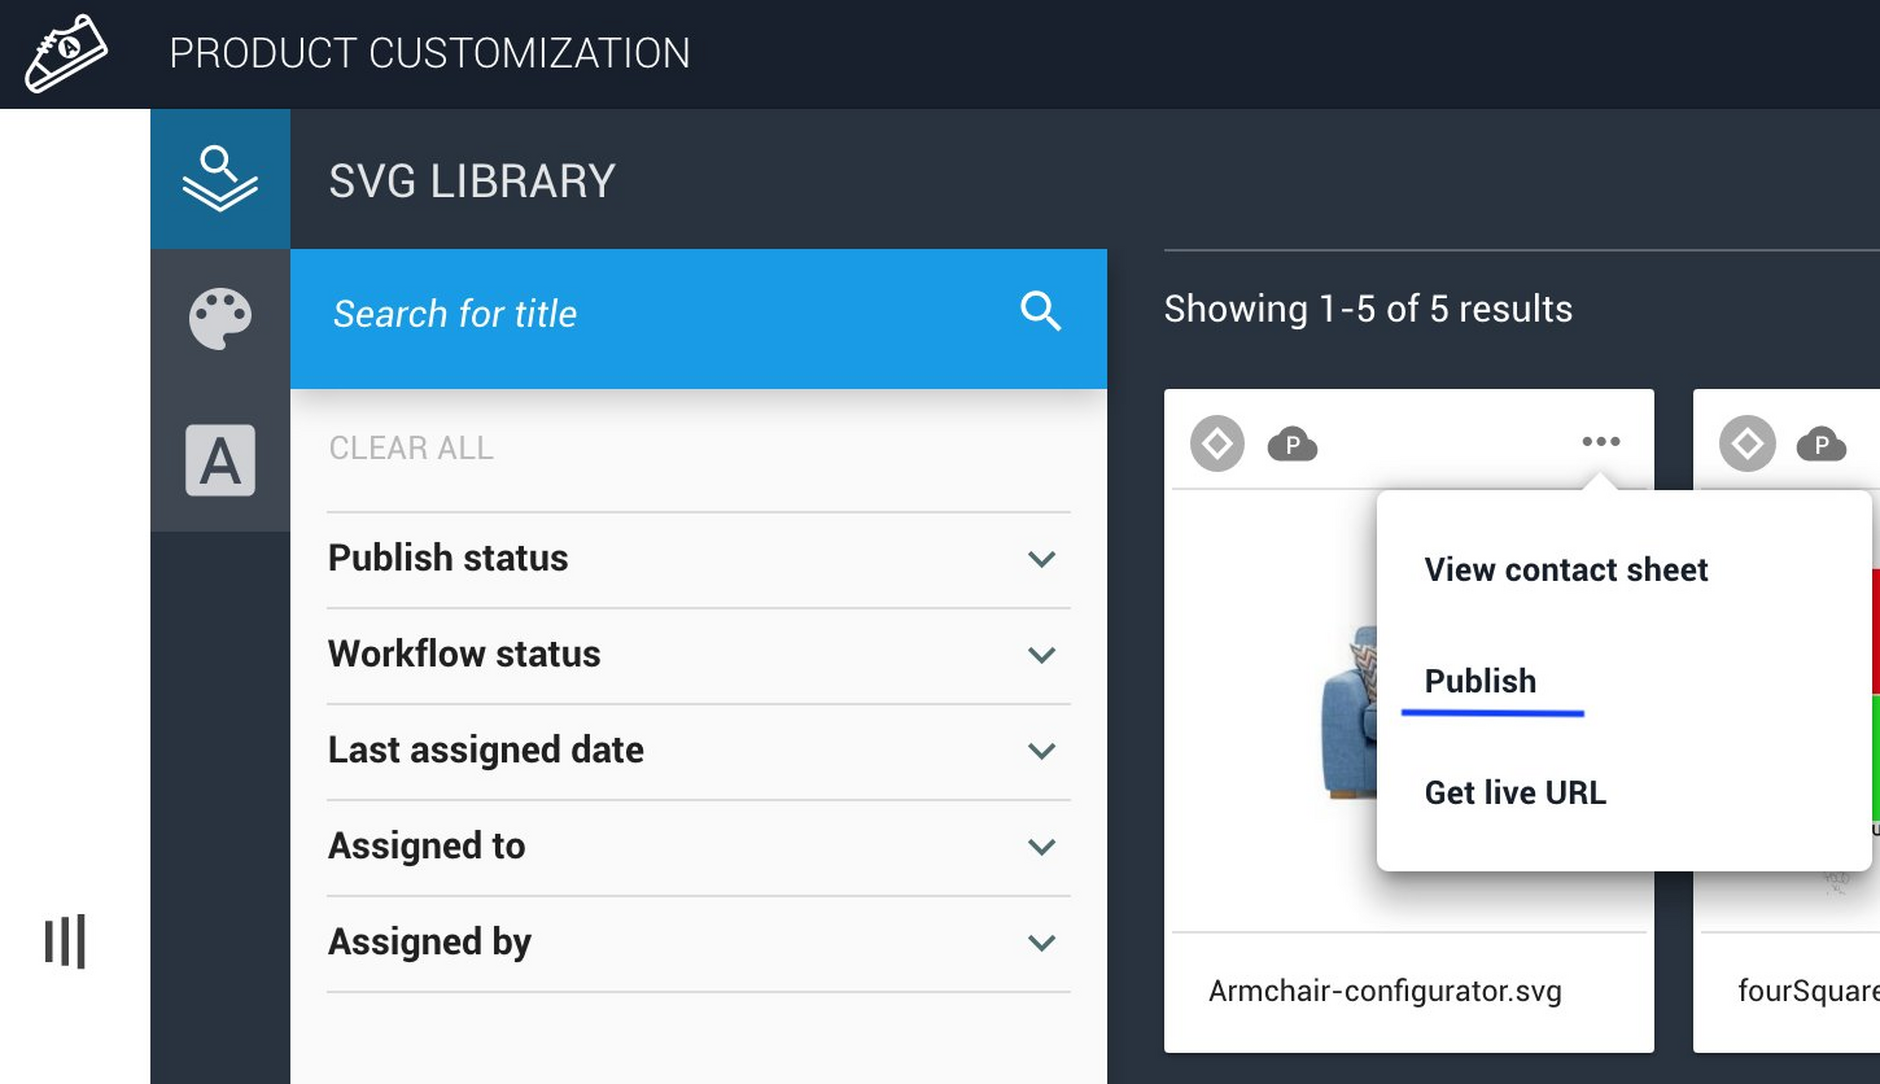
In this step we locate the SVG image in the SVG Library of the application. Select the "View contact sheet" option from the menu.
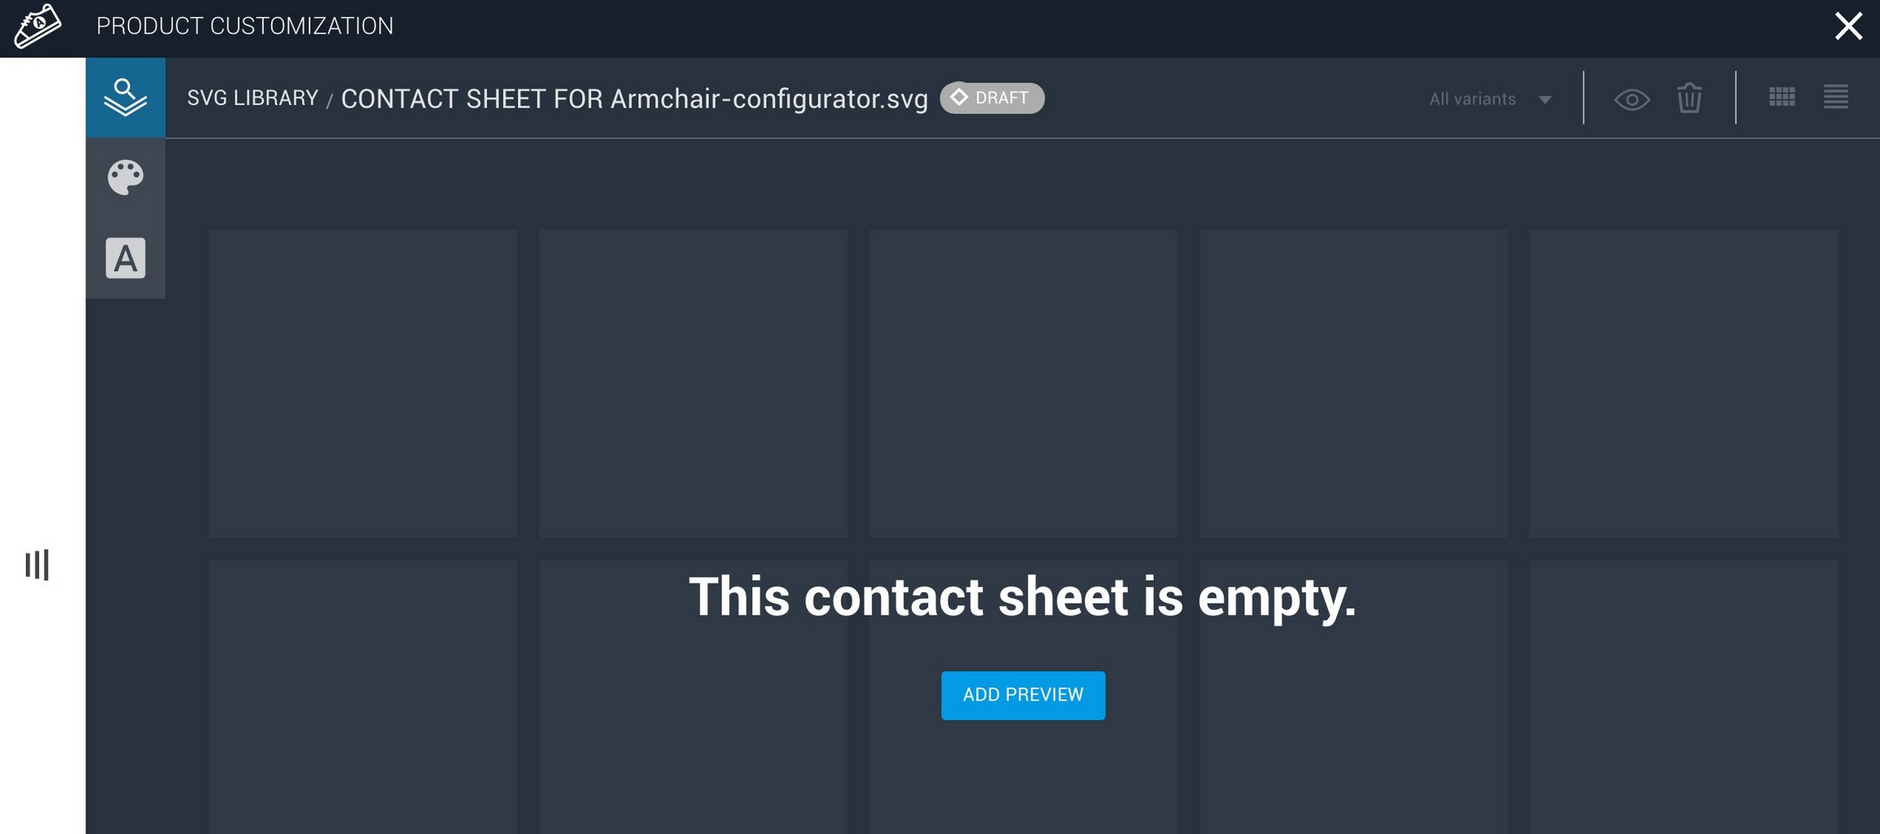
This will take you to the contact sheet which will be empty at this point. Click the "Add Preview" button.
Step 3: Preview the SVGLink copied!
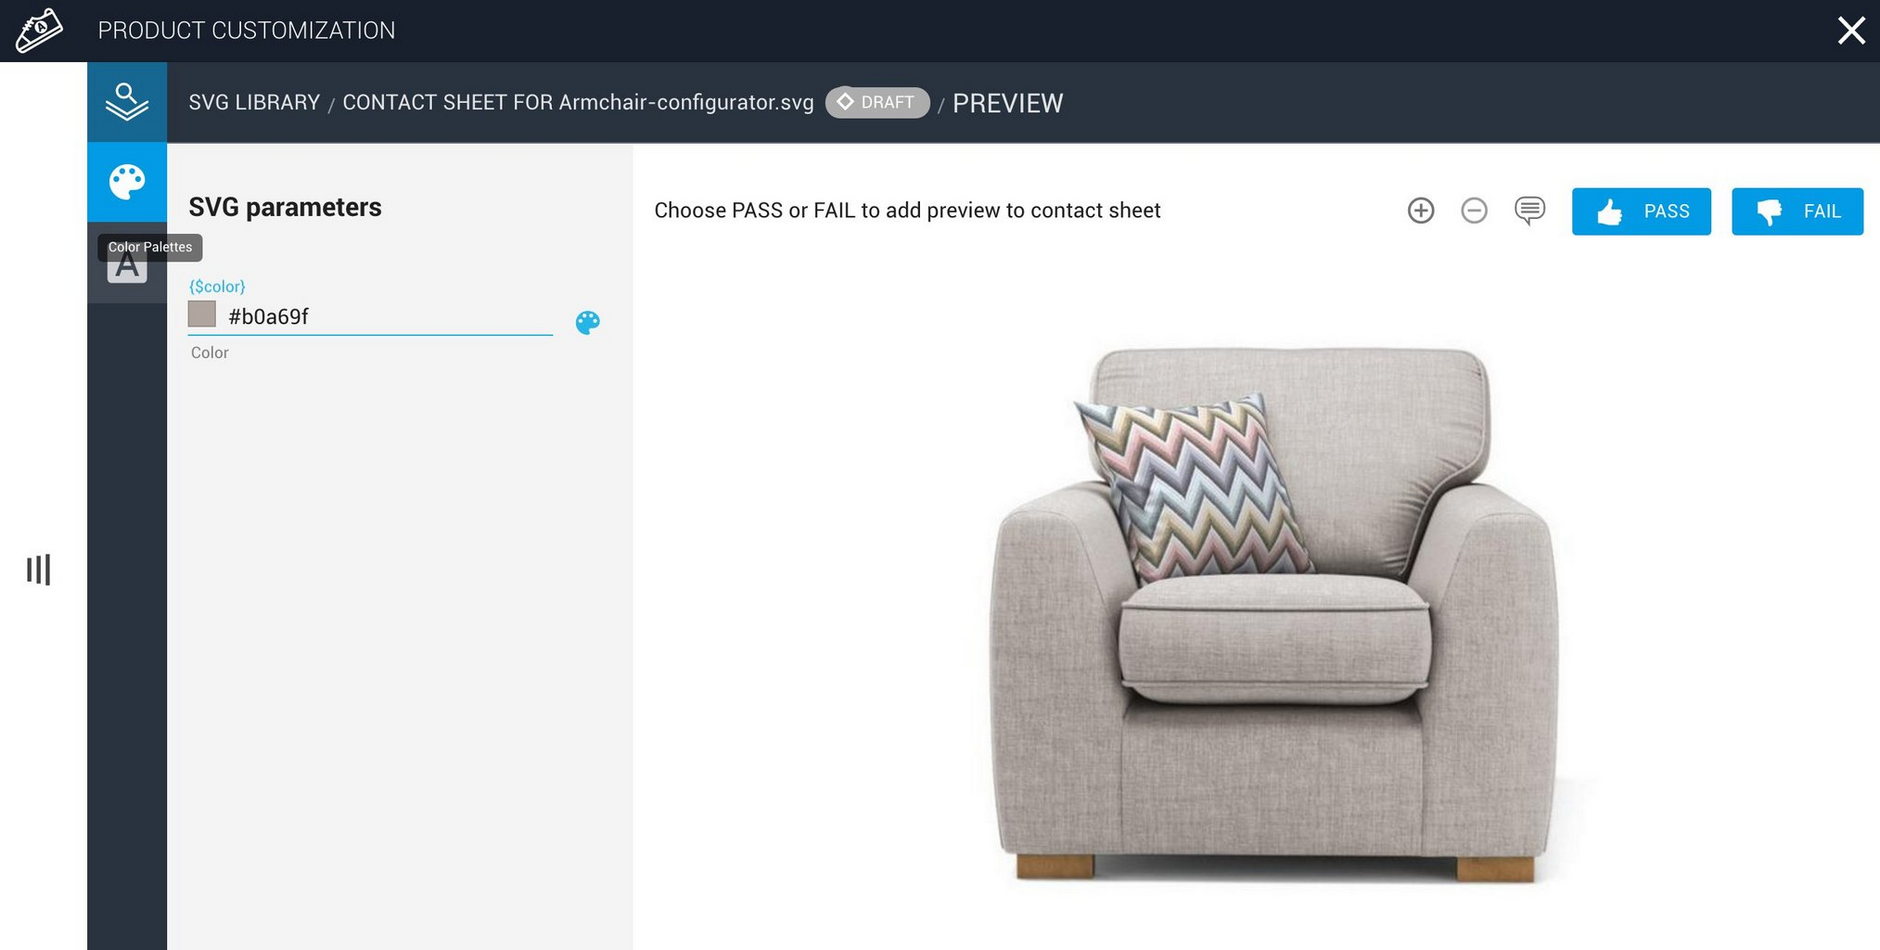
Now it's time to preview and test colorized variants of the SVG, which means:
- Changing the substitution parameter value for the armchair material color.
- The preview will generate automatically
- Selecting pass or fail will add the preview to the contact sheet
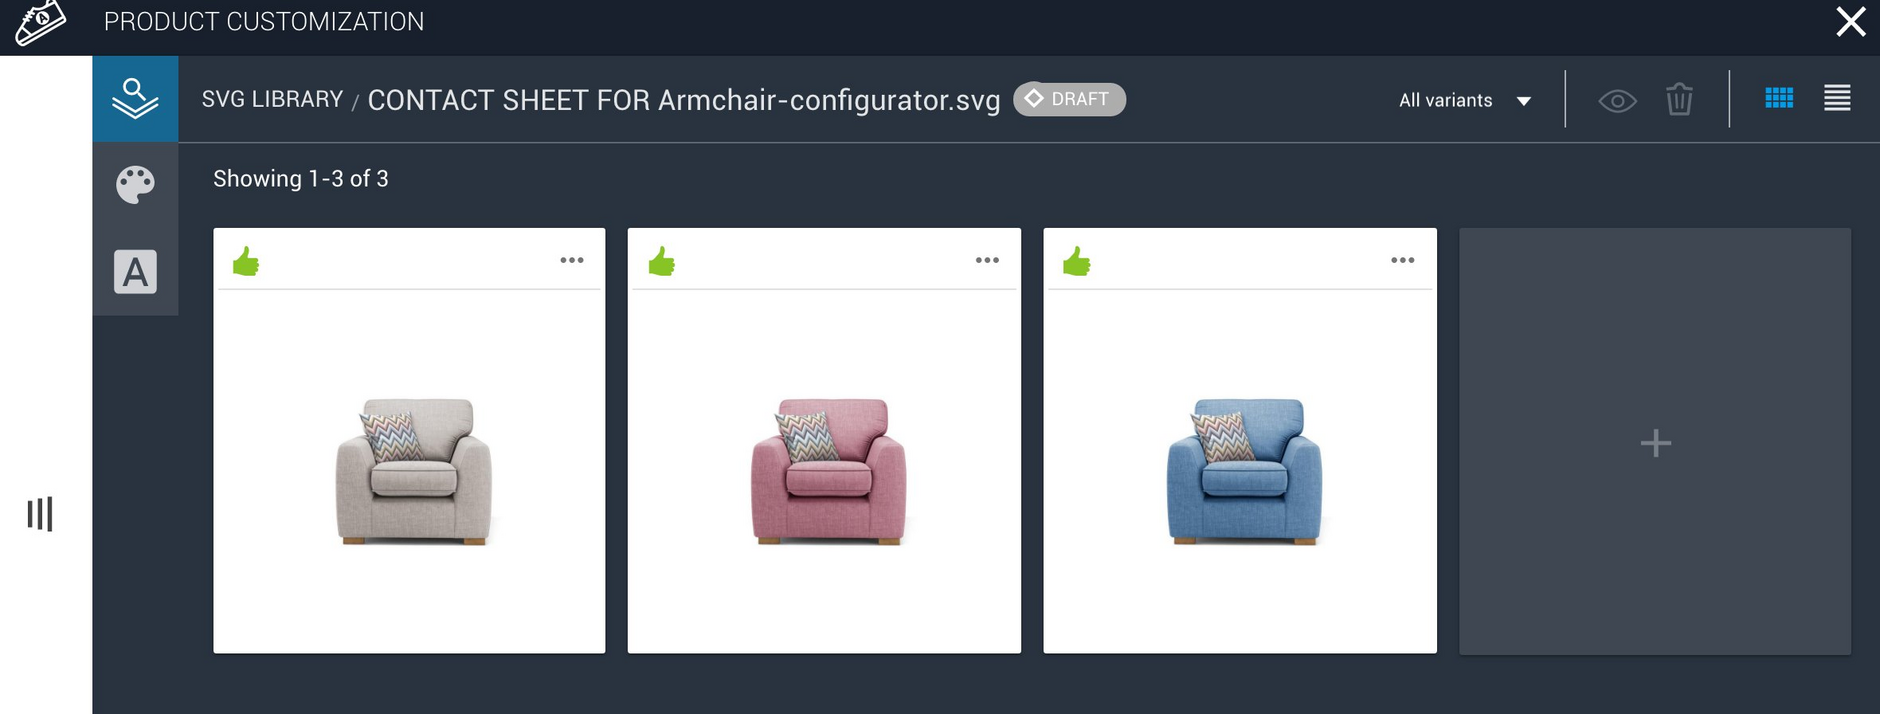
Step 4: View the Contact SheetLink copied!
Having run the preview process (Step 3) several times, we can then view the variants of the SVG image via the Contact Sheet:
Step 5: Publish the ImageLink copied!
The final step of the quick-start process is to publish the image, which can be done from the SVG Library as shown here:
Note that the application supports a workflow for reviewing and approving SVG variants. See workflow for more details.
Step 6: Manipulating the image dynamicallyLink copied!
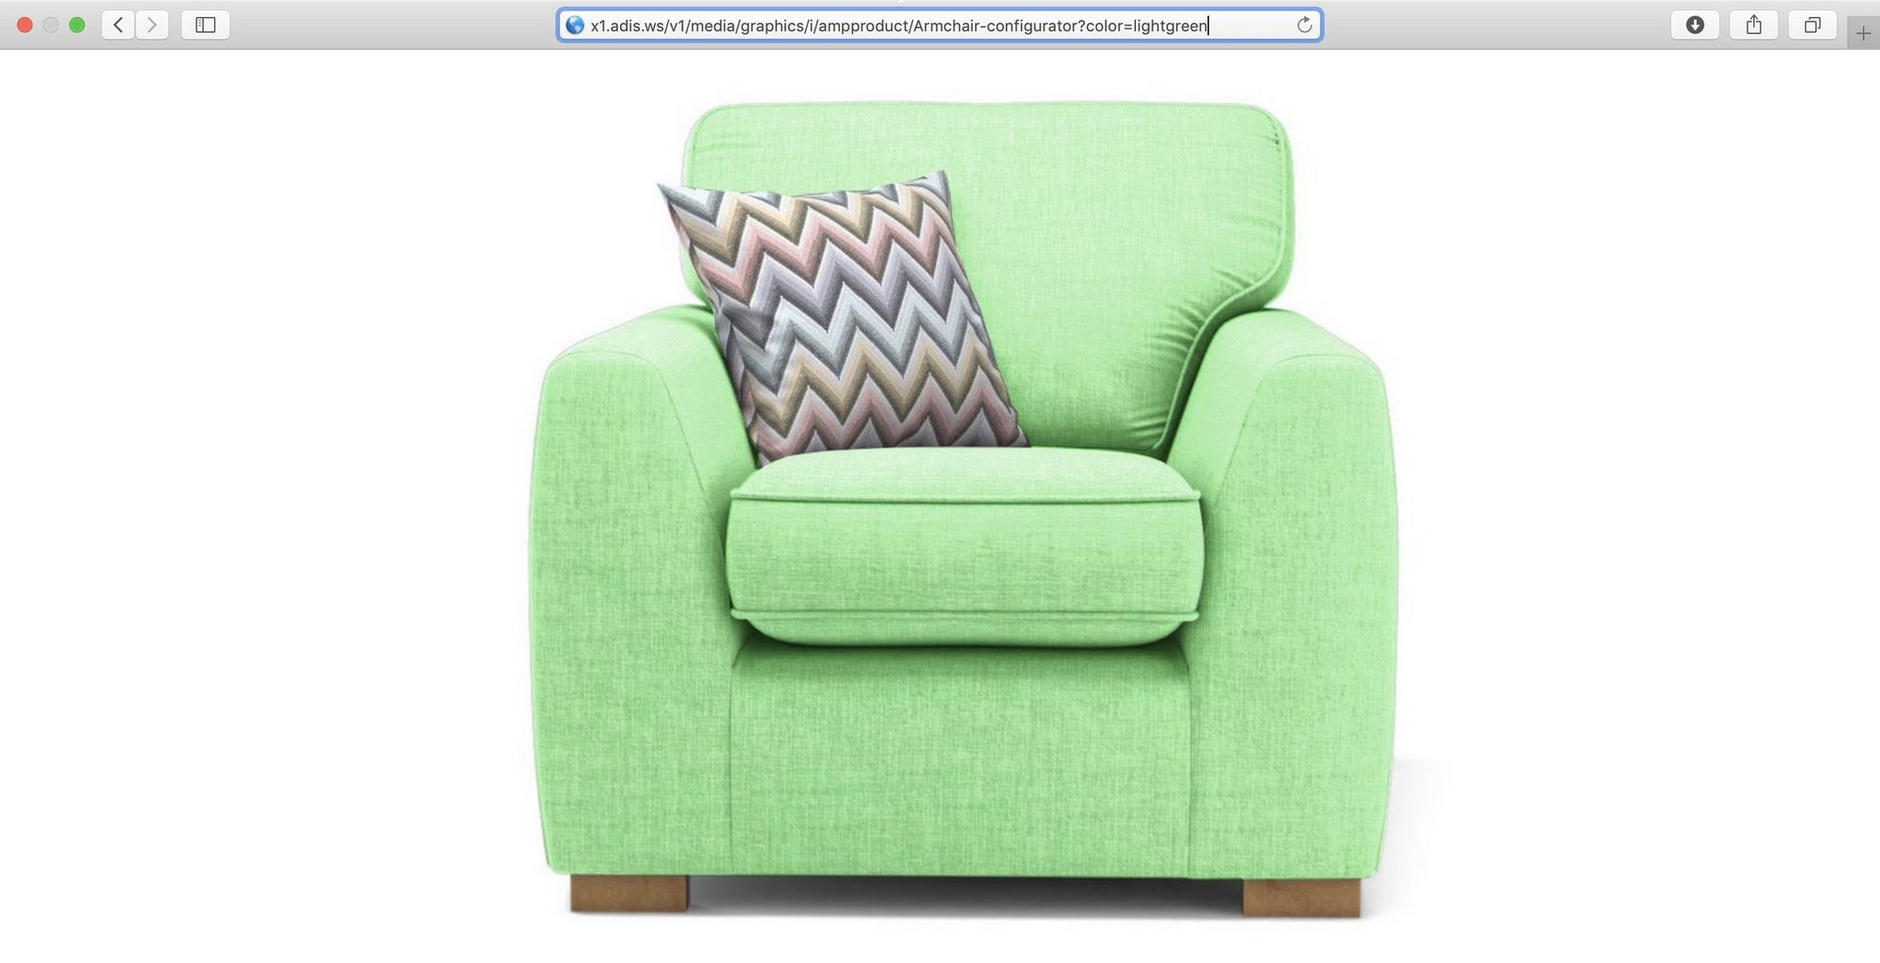
Once the SVG is published, you can change the color dynamically by appending ?color= to its media delivery URL. For example:
For SVG media delivery URLs you should use the format shown above. For more information, see URLs for SVG images.
Beyond colorization...Link copied!
SVG filters are completely configurable. Depending on the materials used in your product range you might wish to adjust filter settings to achieve a particular effect (for example, a more gloss finish or a higher sheen on a fabric).
The top Composite filter effect in Colorise layer drives these kinds of appearance and small adjustments to the K1 and K2 channels has a significant effect on the finish of the product image.
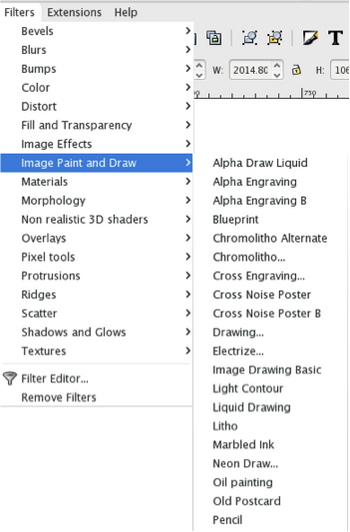
In addition, the SVG technology has in-built effects many of which are familiar to Photoshop users, (Blurs, distortions, materials etc) which can easily be included to enhance your dynamically created product images.
Troubleshooting notesLink copied!
Filters not being applied as you were expectingLink copied!
Ensure the correct image layer on your canvas is selected before selecting the filter in your Filter Editor. Also, make sure the filter is switched on using the checkbox.
Product images not the right level of color saturationLink copied!
On the Colorise filter, adjusting the 'Opacity' level on the Flood filter effect will reduce or increase color saturation of your product images.
Want more contrast and surface detailLink copied!
On the Monochrome filter, making small adjustments to the K1, K2, K3 & K4 setting of the second Composite filter effect will change the contrast, shadow level and surface details being applied.
