Managing members and teams
Account management enables users with the necessary admin permissions to control access to Dynamic Content hubs and repositories for:
-
Members - Member is the term used in account management to refer to users in an organization. A user must be an 'active member' of an organization to access its hubs and repositories.
-
Teams - Members can be grouped into teams for controlling access at a group level.
Organization administrators can perform all account management actions. Users with the hub admin role can perform a subset of the organization admin actions. See hub admin role.
Account Management shows the members and teams for your selected organization. If you have more than one organization, you can switch to a different one. If you log in as an organization or hub admin user, your permission level is displayed at the top of the window. In the example below, an organization admin user is logged in.
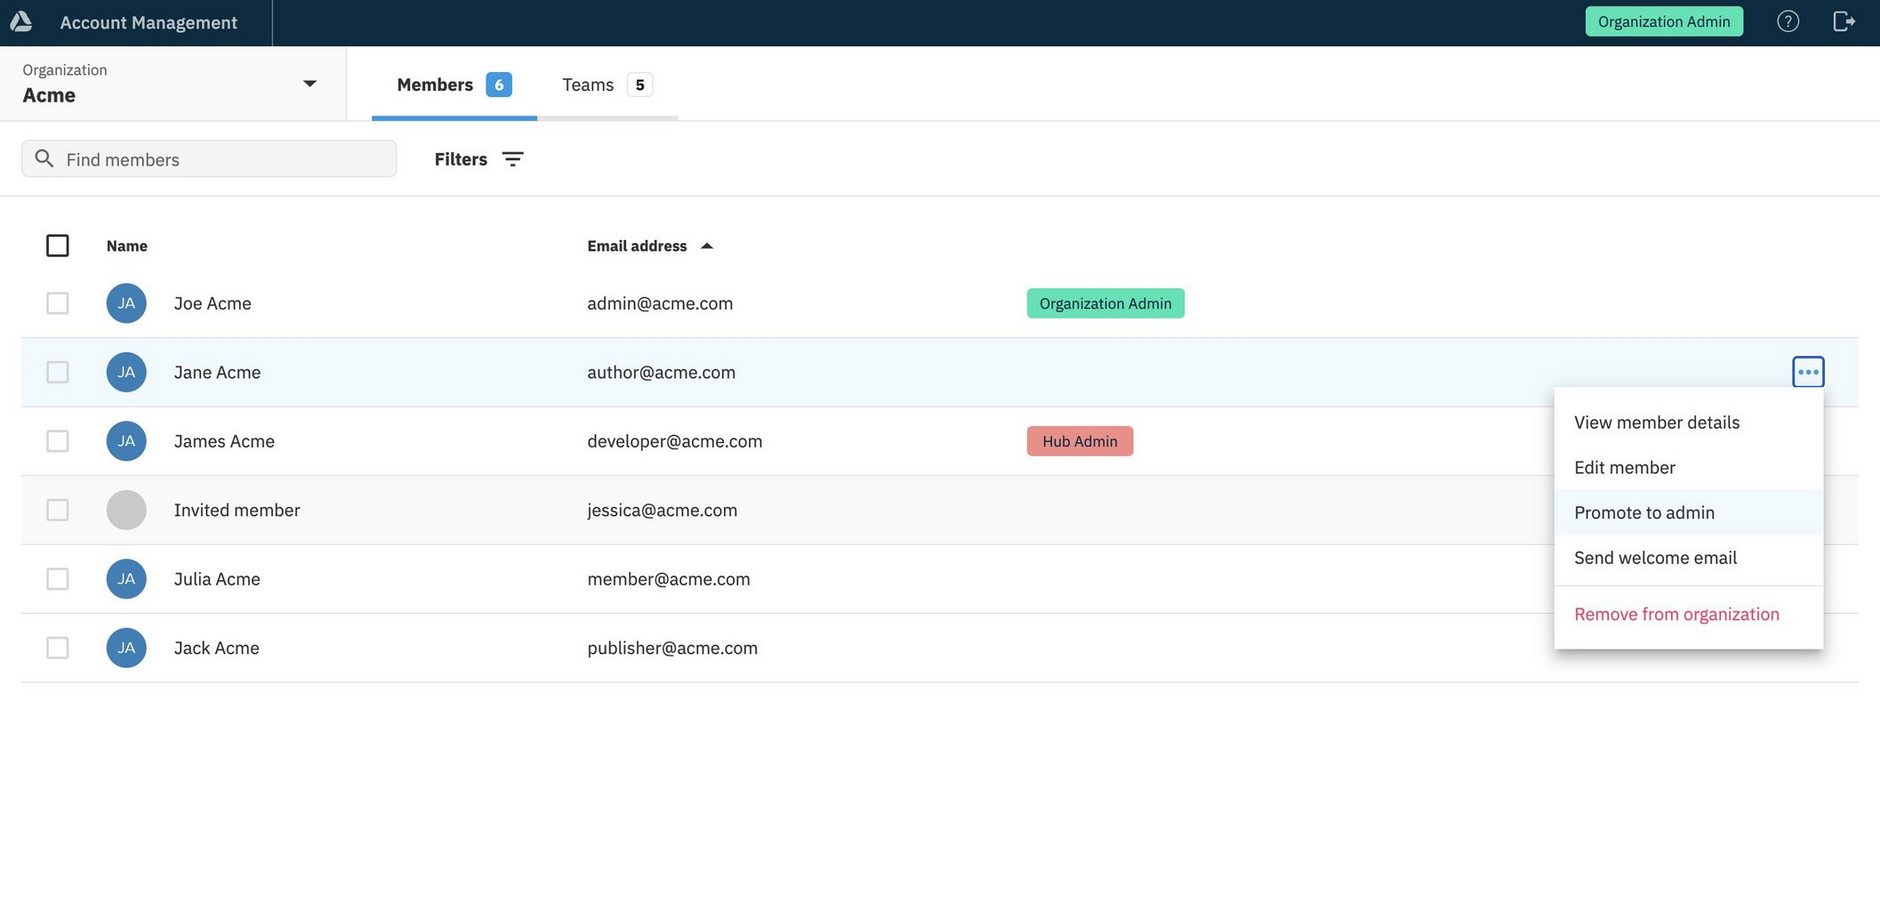
The "Members" tab lists all users who are members of the organization, along with their names. Users who haven't yet accepted their invitation are also listed, but have Invited member displayed instead of their user name. See Inviting members.
All members in an organization can see all other organization members, teams and permissions.
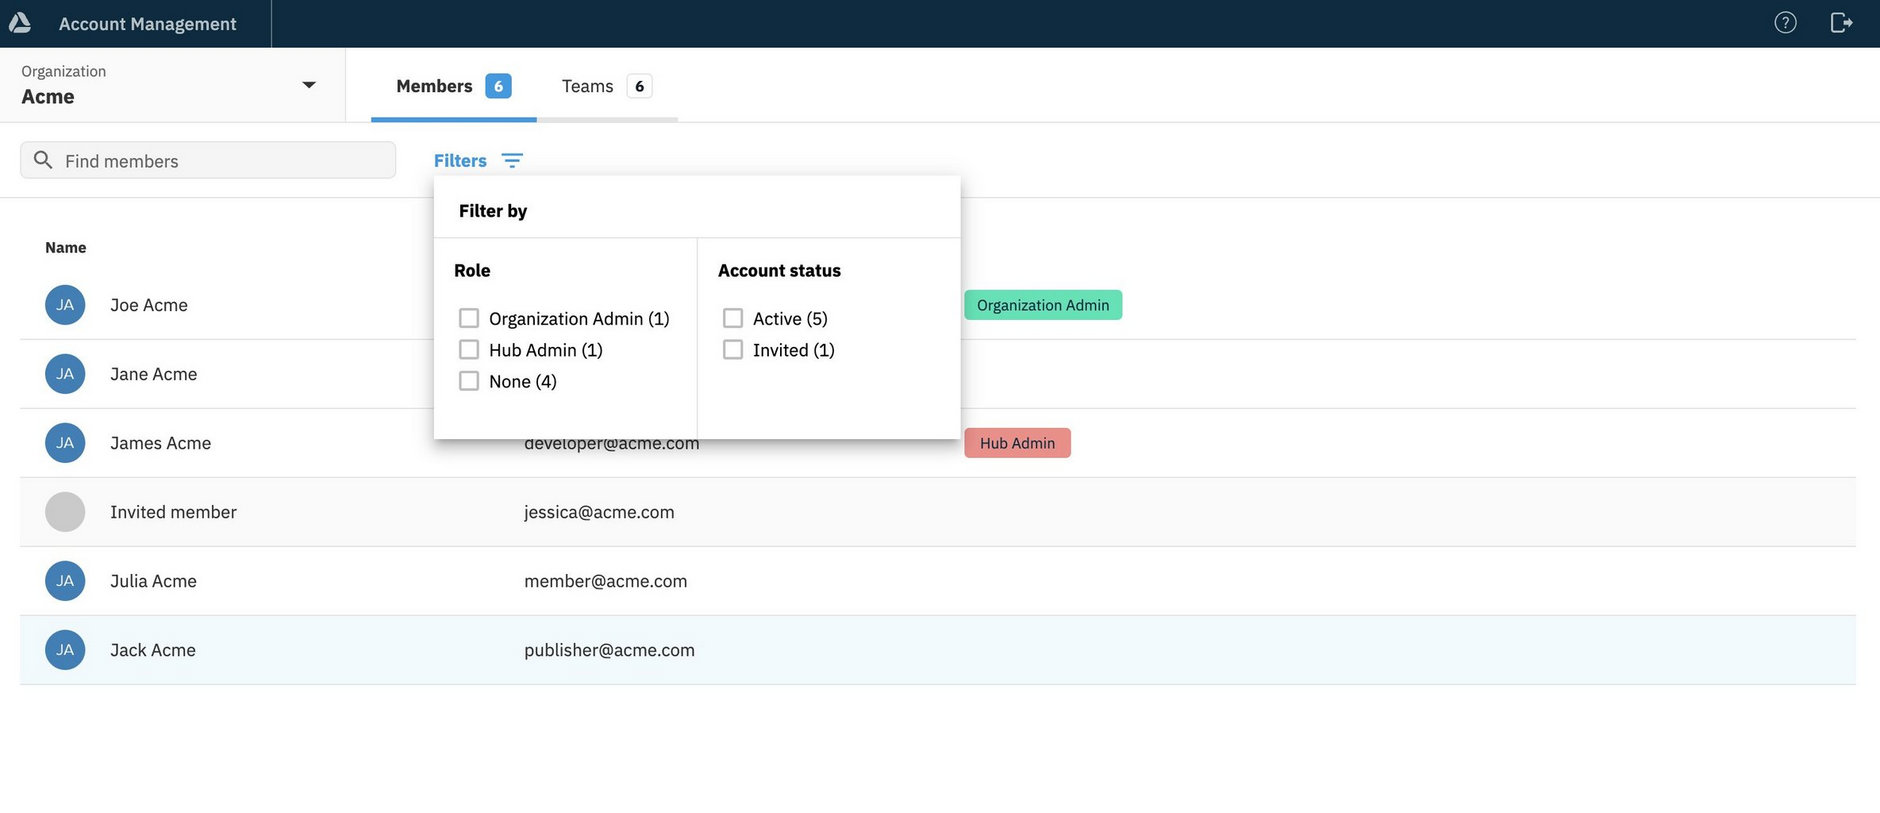
The number of members count (shown in the Members tab title) includes invited users. Quickly find the number of active and invited members, using the Filters.
Creating user accountsLink copied!
Dynamic Content user accounts can be created in the following ways:
-
Using single sign-on (SSO) - If your account is set up to use SSO, Dynamic Content user accounts will be automatically created when users log in, so you don't need to manually create accounts for them.
When creating user accounts, you can use just in time provisioning to provide users with permissions so they can start immediately without waiting for an administrator to give them access.
Dynamic Content user accounts also provide access for Workforce, provided studios are enabled for your account.
To create Content Hub user accounts, please raise a service ticket through the Amplience Support portal.
Inviting membersLink copied!
To create Dynamic Content user accounts through Account Management, your organization administrator invites members to join the organization. Initial permissions can optionally be included with the invite. Note, only the organization administrator can invite members.
Users must confirm their invites to complete account creation.
You don't need to invite users who use single sign-on, as their accounts will be automatically created when they log in. See Configuring permissions via SSO.
To start creating user accounts, from the "Members" tab choose "Invite members" and enter user email addresses.
The email addresses are checked to ensure they're unique within an organization, correctly formatted and don't exceed the number of allowed users for the organization.
You have the option to include permissions as part of the invite, by assigning teams and roles. You can do this by adding the members to existing teams or cloning permissions from an existing member. The permissions granted through that invite can be edited.
In this example, we've chosen to clone permissions from an existing member:
Setting permissions through invites will override any permissions that are set in onboarding teams.
Each invite you send reduces the number of remaining user accounts in your balance. You can check your user account balance on the Usage tab.
When you remove a user invite you remove that user from the organization.
Once users have been invited, they are listed on the "Members" tab as "Invited" until they confirm their invites.
Invitation confirmationLink copied!
Users complete the account creation process by doing the following:
- Accept their email invitation and set a password for their Dynamic Content account. This prompts a final verification email to be sent to the user.
- Open the final verification email and confirm their new account. This creates the new user account.
Users assigned initial roles can get started immediately, while those without will need an admin user to set their permissions.
Invites expire after 7 days if not accepted, and will need to be resent by the organization admin.
Editing and resending invitesLink copied!
The organization administrator can edit permissions for invitees and resend invites.
Editing invitee permissionsLink copied!
To edit the permissions included in an invite, click 'Edit invite' from either the member list contextual menu or the view pane.
Set the permissions and then save them. More about setting permissions.
Invites don't need to be resent when they've been edited. Once the invite edits are saved, a user subsequently accepting that invite will get the new permissions.
Note, removing the invitee will remove the invited member from the organization.
Reminding invited users to accept their inviteLink copied!
To remind an invited user to accept their invite, hover over the user and choose "Resend invitation email" from the contextual menu.
Using SSO to create usersLink copied!
If your account is set up for SSO, Dynamic Content user accounts will be automatically created when users log in. As part of SSO configuration you can use SSO claims to set permissions for new users.
In Account management, user accounts that are created by logging in through SSO are identified with the 'SSO' icon.
For Dynamic Content users who log in through SSO, permissions can be set as they log in (see Just in time provisioning) and manually once the user has logged in.
For more information about user accounts and SSO, see Single sign-on configuration.
Duplicate Dynamic Content user accountsLink copied!
If users log in to Dynamic Content using their email invite and then log in through their SSO account, they will appear in account management twice. Any permissions set for one account are automatically applied to the other account.
For improved account security, we recommend that when a Dynamic Content user has both a non-SSO account and a SSO account, organization admins delete the non-SSO user account and don't re-invite them.
To avoid duplicate Dynamic Content user accounts, only send email invites to users who will not log in using SSO.
Just in time provisioningLink copied!
To remove the time pressure of having to manually set permissions for new users as soon as their account is created, you can set them as part of user account creation. This is provided by "just in time provisioning".
Depending on your organization, you might want to provide initial roles that give new users sufficient permissions to get started, and then revisit them. Alternatively, you could assign roles that are suitable from the start.
You can set initial permissions in the following ways:
- Set permissions when sending invites. See Inviting members.
- If your identify provider allows, you can configure groups or teams that will provide the correct permissions when users log in through SSO. You will set this up in your own identity platform. See Configuring permissions via SSO.
- Use ‘onboarding teams’ to assign initial permissions to new user accounts automatically when permissions aren't specifically set with invites or SSO. See Onboarding teams.
-
Permissions that are set via invites or SSO claims will override any permissions in onboarding teams (which will simply be ignored).
-
If permissions are not set through invites or SSO and onboarding teams exist, users will be added to all onboarding teams and assume their permissions.
-
If there are no onboarding teams established, no roles assigned through an invitation, and no roles assigned via SSO, your administrator will need to manually set permissions for new users.
Searching and filtering membersLink copied!
All members of an organization can refine the list of members shown in Account Management, using the search and filters.
The search looks for your search text in member names and email addresses.
The members list shows all members in an organization, by default. To filter the list use:
-
Filter by Role - To show members with the organization admin role, hub admin role or members with no admin roles
-
Filter by Account status - To show members who are active or invited
Creating teamsLink copied!
To create teams in Account Management, you must be either:
- An organization admin
- A user with the admin role on a hub. Users with the hub admin role can use teams to set permissions on the relevant hubs
Users who have the necessary permissions can create teams in the following ways:
- From the Teams tab, click "Create team"
- From the Members tab, select the members, then choose "Create new team" from the Teams menu
From the Create a new team dialog, enter a team name that is unique within the organization. Note, if you chose to create the team based on selected members, those members are preselected in the dialog.
Choose whether this is to be an onboarding team that can be used for automatically setting new user account permissions.
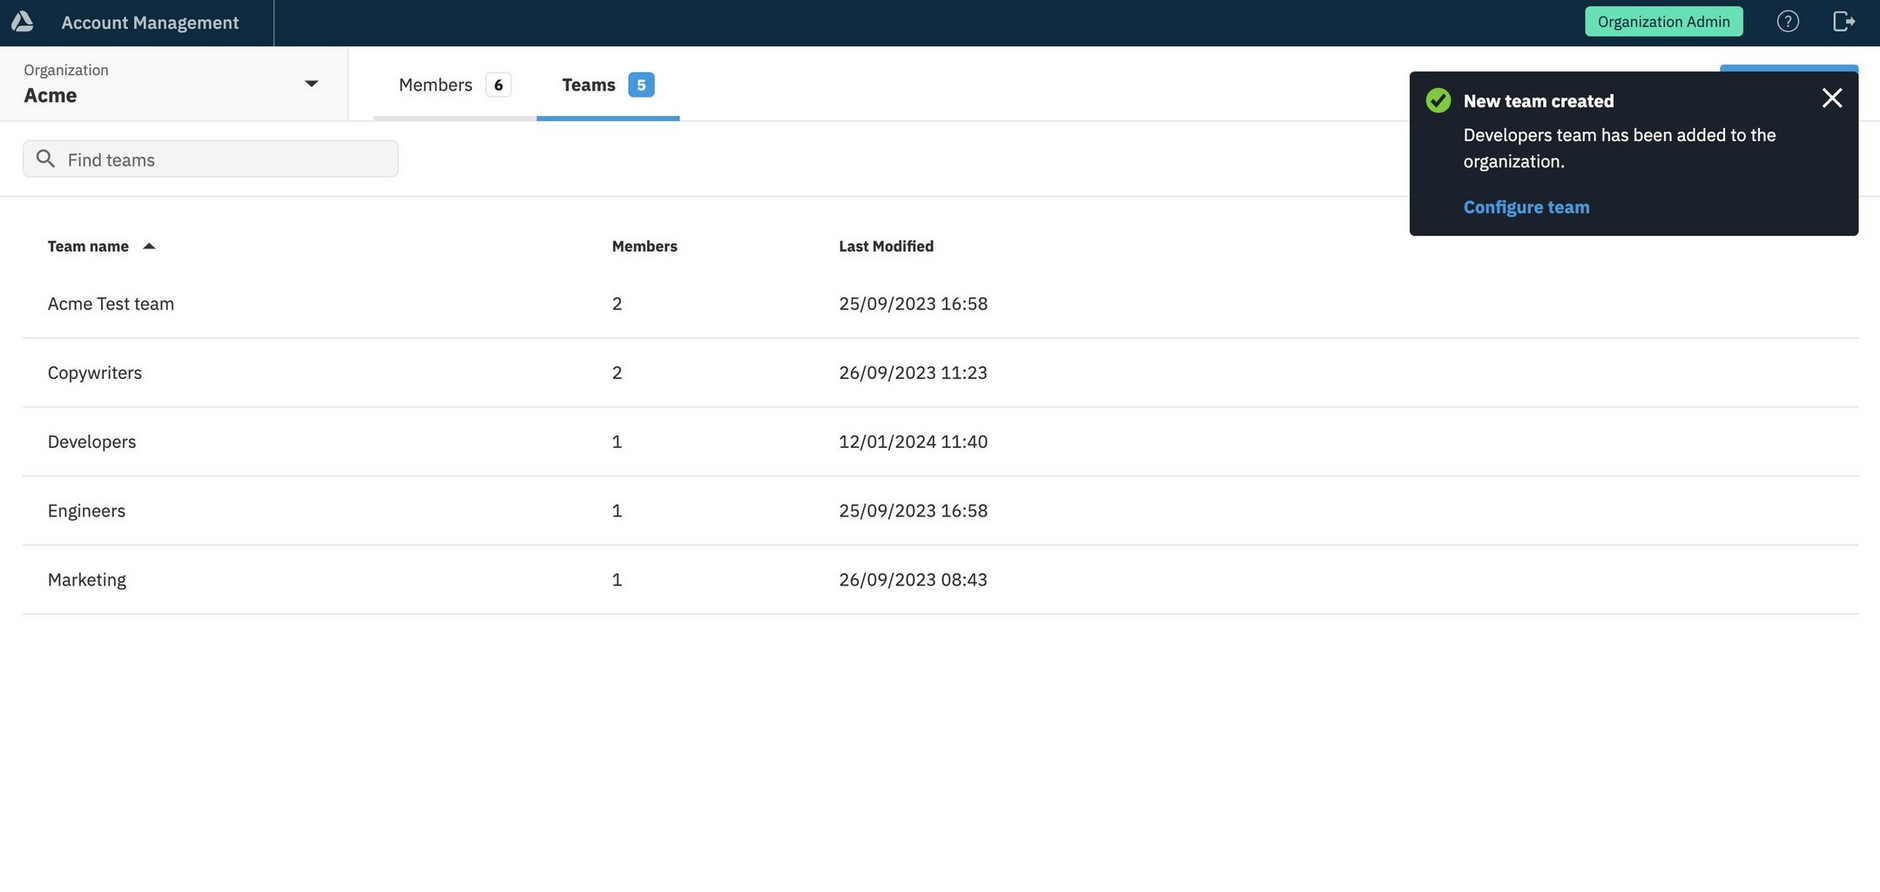
Click "Create team" to save the team. A notification confirms the team is created and gives the option to "configure" the team, by adding more members and setting permissions.
Onboarding teamsLink copied!
Onboarding teams are simply teams that can be used to provide default initial permissions for new user accounts. They are used if you don't include permissions in invites or in your SSO configuration during user account creation.
When you set permissions via invites or SSO at user creation time, onboarding teams are ignored.
If you remove users from onboarding teams at a later stage, you will need to ensure those users have other permissions set.
For more information about how onboarding teams are used, see Just in time provisioning.
Adding members to existing teamsLink copied!
You can add members to teams in the following ways:
You must be either:
- An organization admin
- A user with the hub admin role, who has created the team
Adding members to a single teamLink copied!
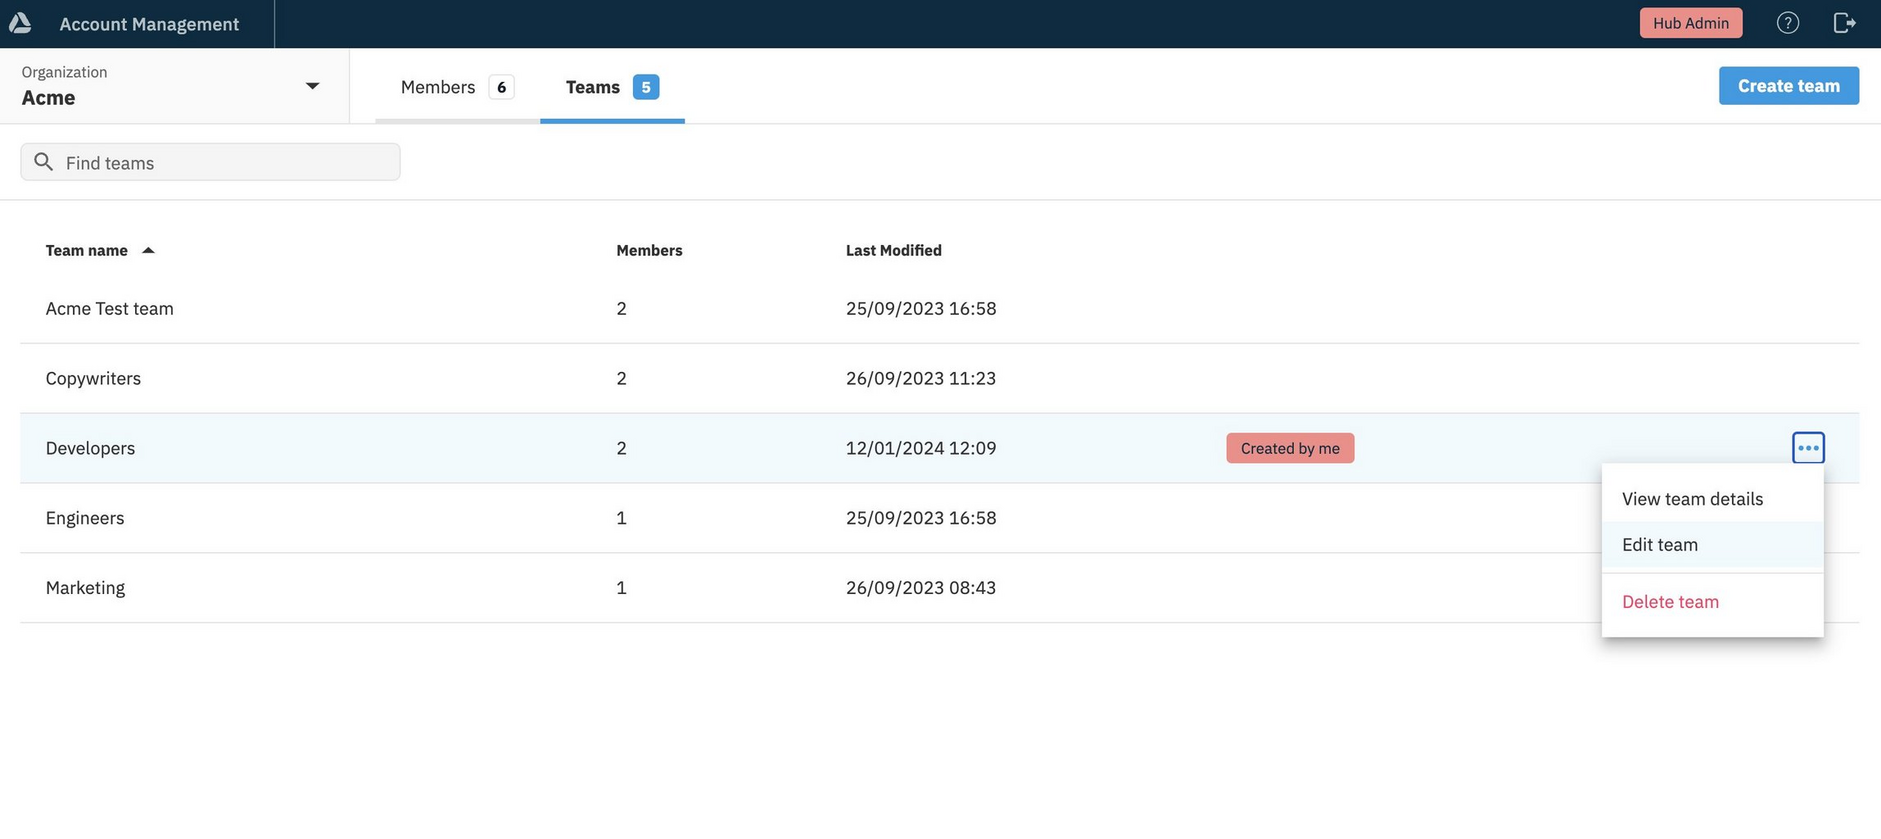
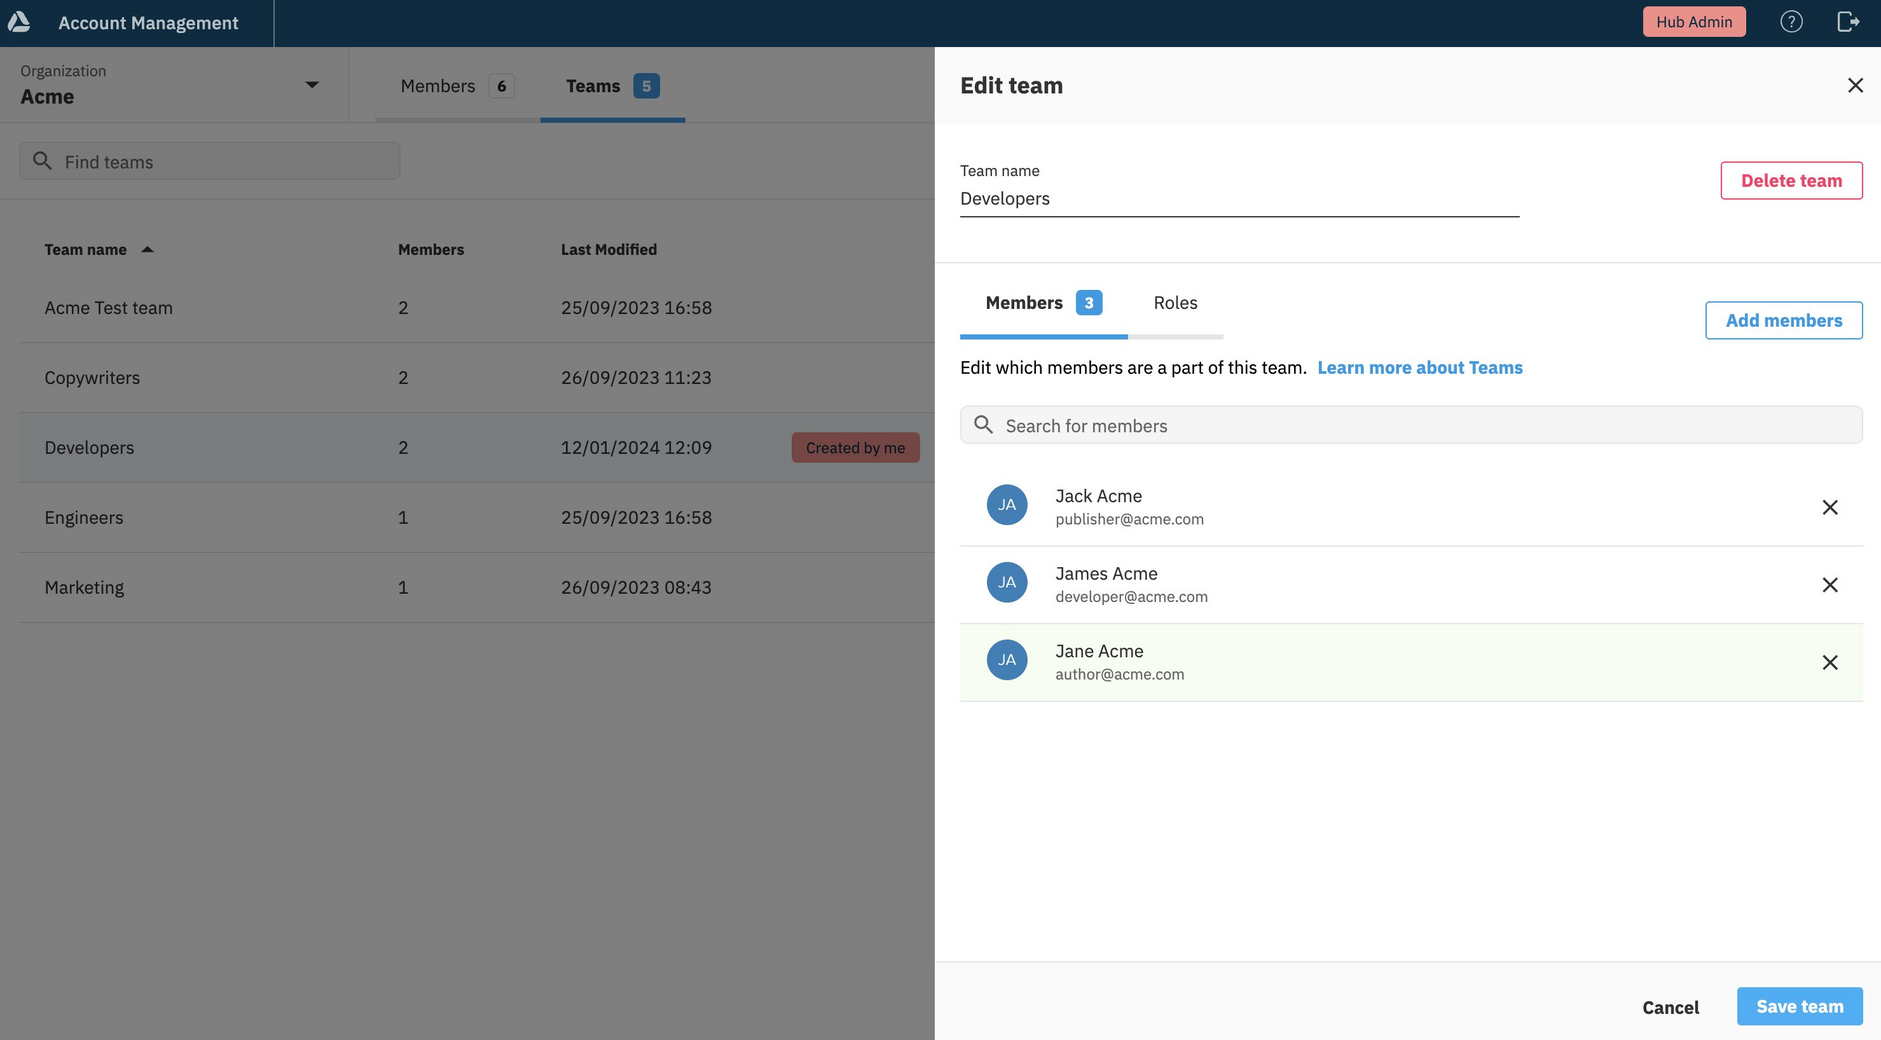
To add members to a single team, from the Teams tab select "Edit team" from the contextual menu. Notice in the example below, the logged in user has hub admin permissions (identified at the top of the window) and is therefore allowed to edit teams that they have created. The "Created by me" tag highlights which teams a hub admin user has created.
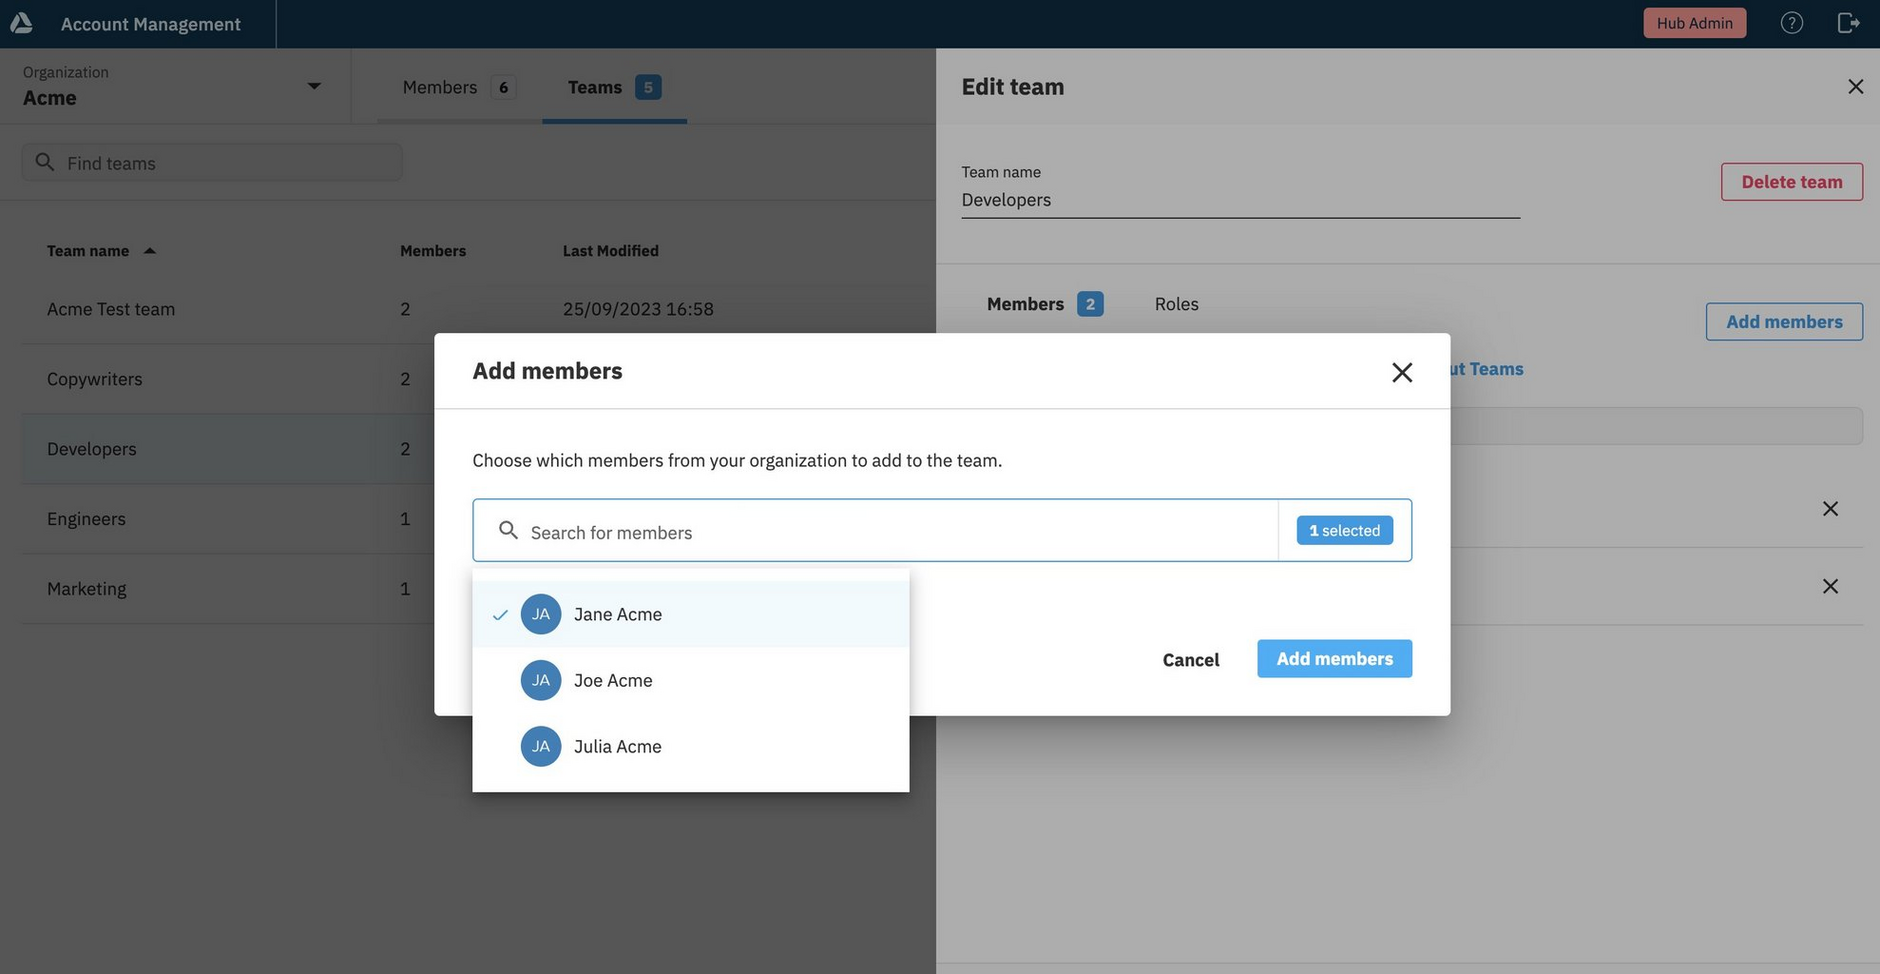
From the Edit team pane, use "Add members" to add the members you want. Members who are already in the team are not shown in the list.
Clicking "Add members" updates the Edit team pane, to show the proposed new members. To confirm the new team members, click "Save team". Any other changes you have made to the team will also be saved.
Adding members to multiple teamsLink copied!
You can quickly add a group of members to multiple teams as a bulk action.
To add members to multiple teams, select the members on the Members tab, then choose "Add to teams" from the Teams menu.
The Teams menu is shown on the Members tab, when one or more members are selected.
The "Add to teams" dialog is displayed for you to choose the teams to which you want to add the selected members.
Deleting teamsLink copied!
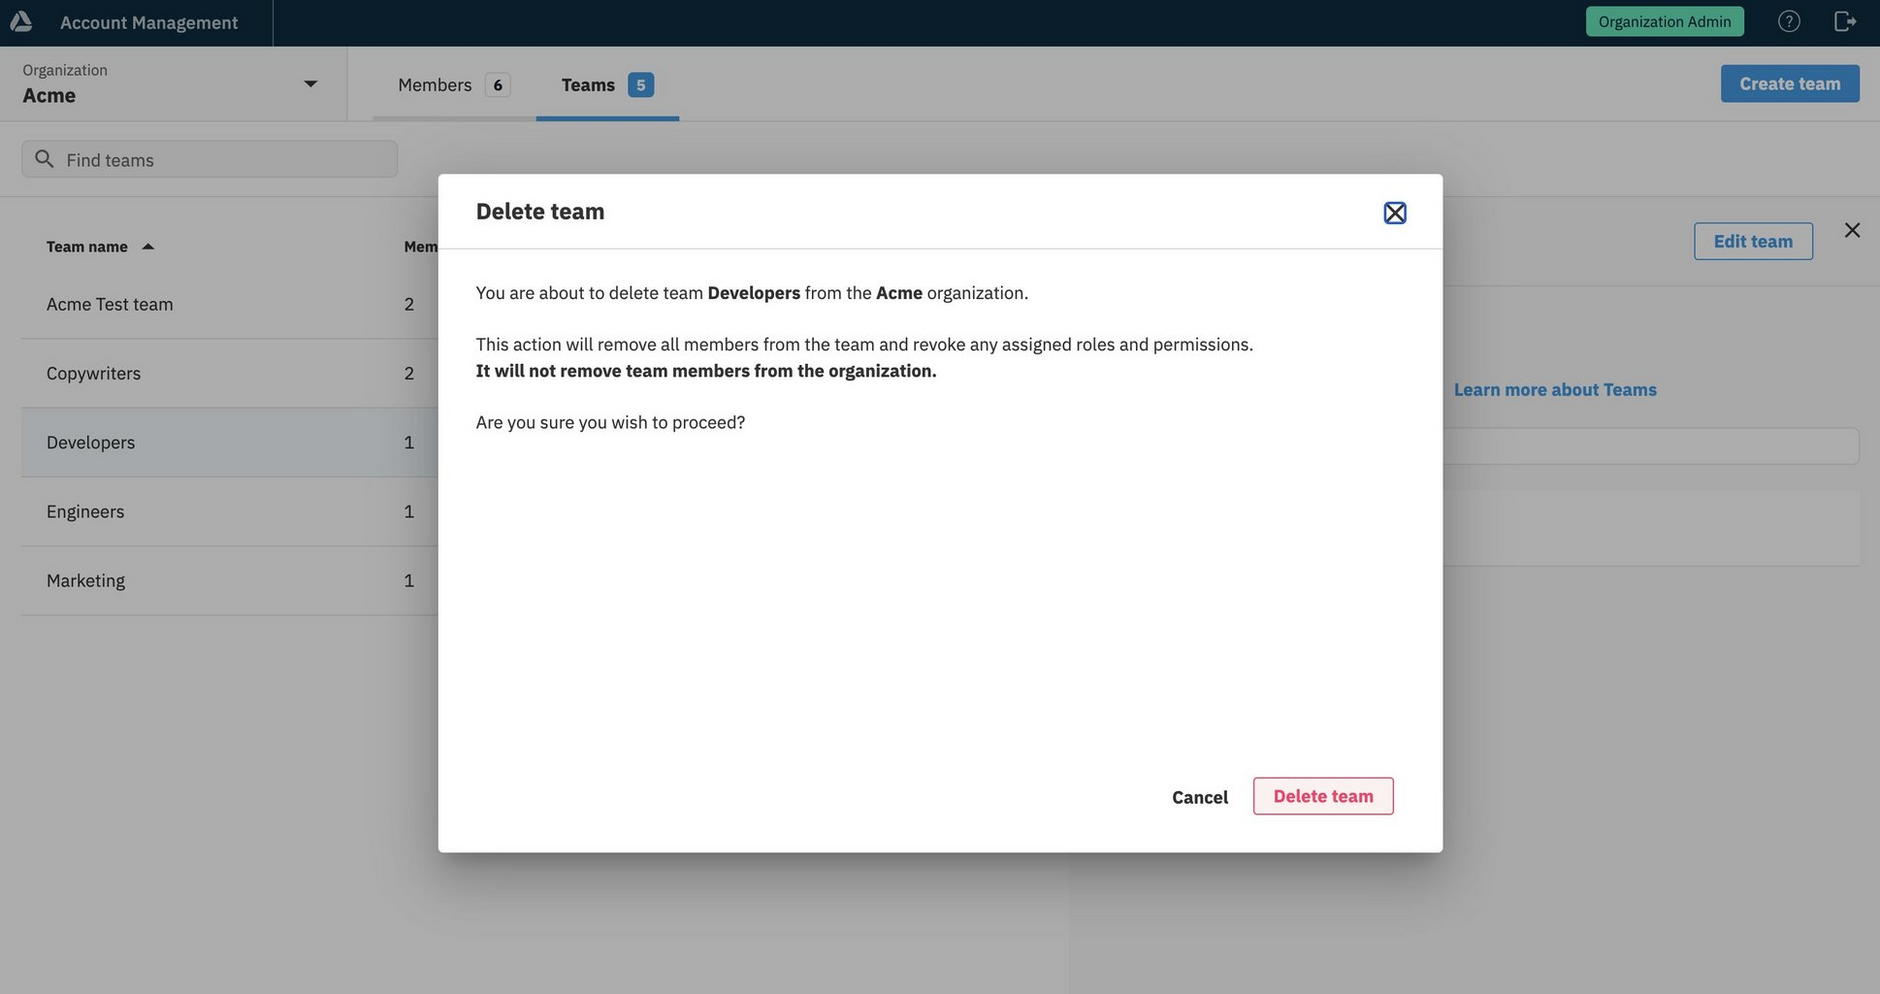
To delete a team, from the Teams tab, choose "Delete" from the team's contextual menu. You must be an organization admin or a user with the hub admin role who created the team.
You must be either:
- An organization admin
- A user with the hub admin role, who has created the team
When you delete a team, only the team is deleted. All members of the team remain in the organization and in any other teams in which they are included.
Removing members from teamsLink copied!
You can remove members from a single team and from multiple teams.
You must be either:
- An organization admin
- A user with the hub admin role, who has created the team
Removing members from a single teamLink copied!
From the Teams tab, select "Edit team" from the team's contextual menu. Then select the members to remove from the team, by clicking X.
Click "Save team" to remove the members. Any other changes you have made to the team will also be saved.
Removing members from multiple teamsLink copied!
You can quickly remove a selection of members from multiple teams, as a bulk action.
To remove members from multiple teams, select the members on the Members tab, then choose "Remove from teams" from the Teams menu.
The Teams menu is shown on the Members tab, when one or more members are selected.
The Remove from teams dialog is displayed, with members already selected. Choose the teams from which you want to remove the selected members.
Removing members from an organizationLink copied!
Organization administrators can remove member access to all Dynamic Content hubs and repositories in an organization, by removing those members from an organization. Removing a member from an organization automatically removes them from any teams they are in.
Invited users do not yet have a user account, so removing them from an organization completely removes them.
When you remove a user from an organization you are simply canceling them from being a member of an organization, but not removing their user account. If a user is in other organizations, they remain in those organizations, and if a user has access to Content Hub, that access still remains.
This action does not remove user accounts for active members. If the members you remove from an organization no longer require access to Dynamic Content or Content Hub, a support ticket must be raised to completely remove the users.
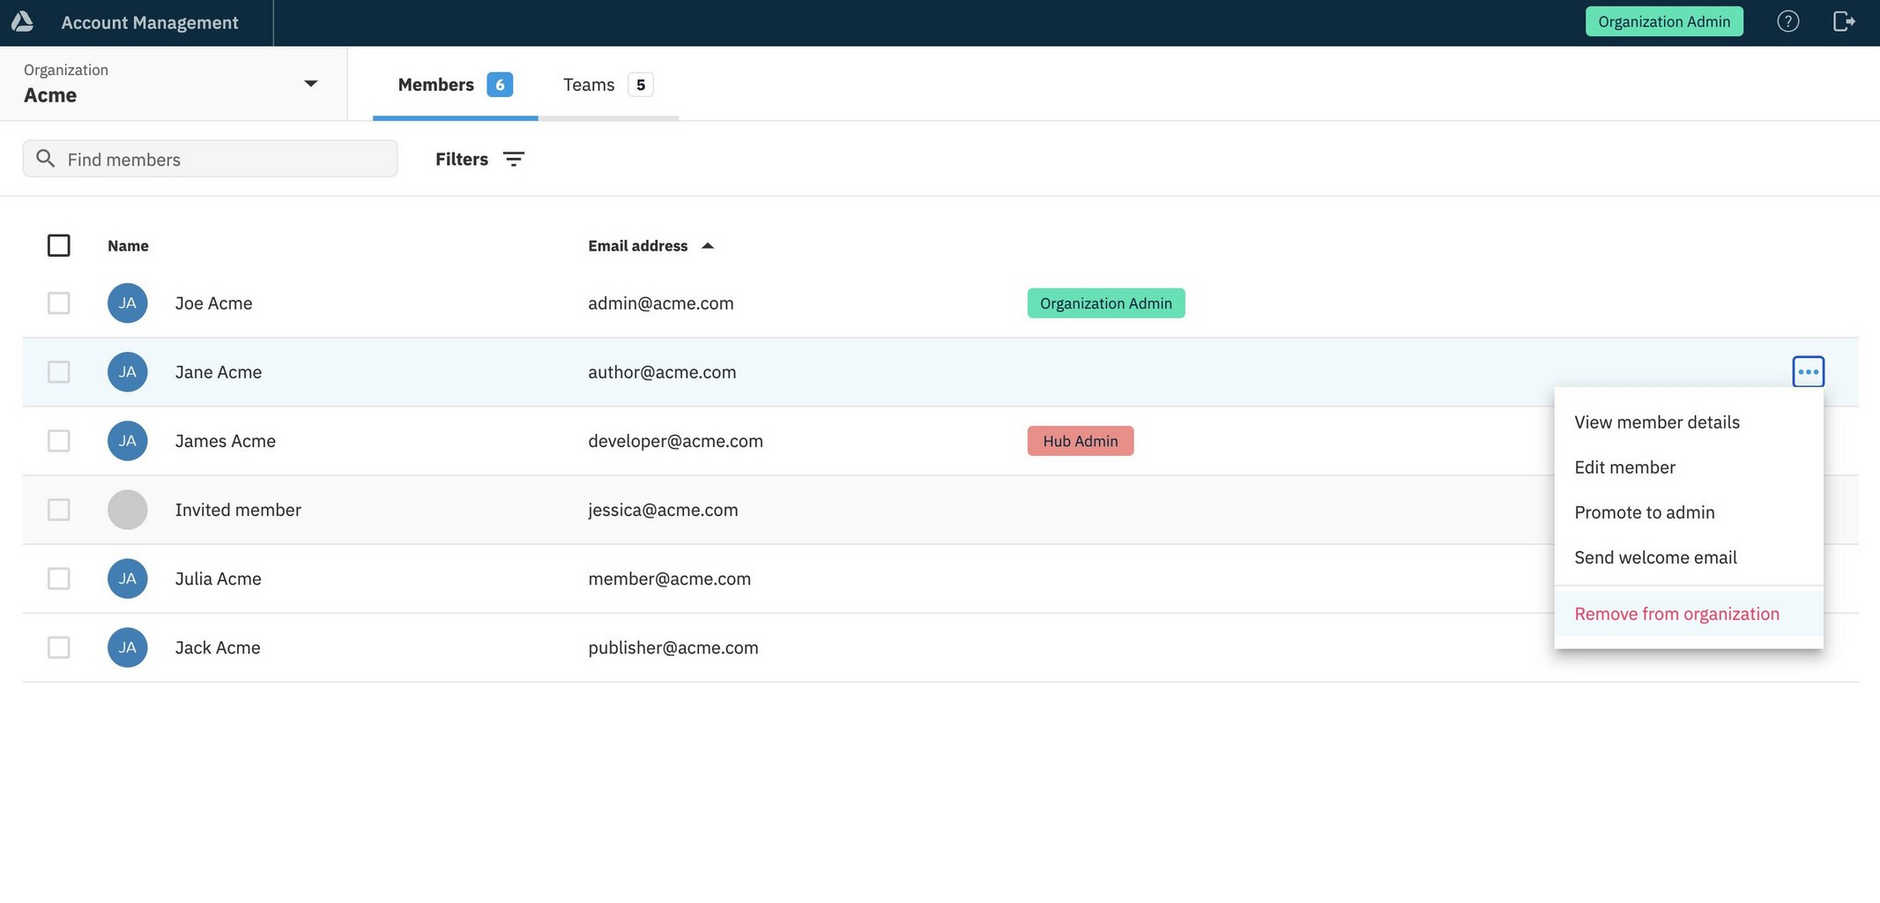
To remove an individual member from an organization: - From the Members tab, open the member's contextual menu and choose "Remove from organization".
To remove multiple members from an organization: - From the Members tab, select members and then choose "Remove from organization" from the toolbar.
The Remove from organization dialog is displayed, from which you can confirm or cancel.
If a member is removed from an organization by mistake, an invitation must be sent to the user and accepted by them to access the organization again. See Inviting members.
If the removed member was in any teams, they will need to be added to those teams again. See Adding members to teams.


