Working with video
This section explains how to upload video to Content Hub and how to choose a thumbnail to use as the video's poster frame. As with other assets, video can be uploaded to Content Hub manually or via bulk upload. For manual uploads, the maximum file size is 100MB.
Uploading video to Content HubLink copied!
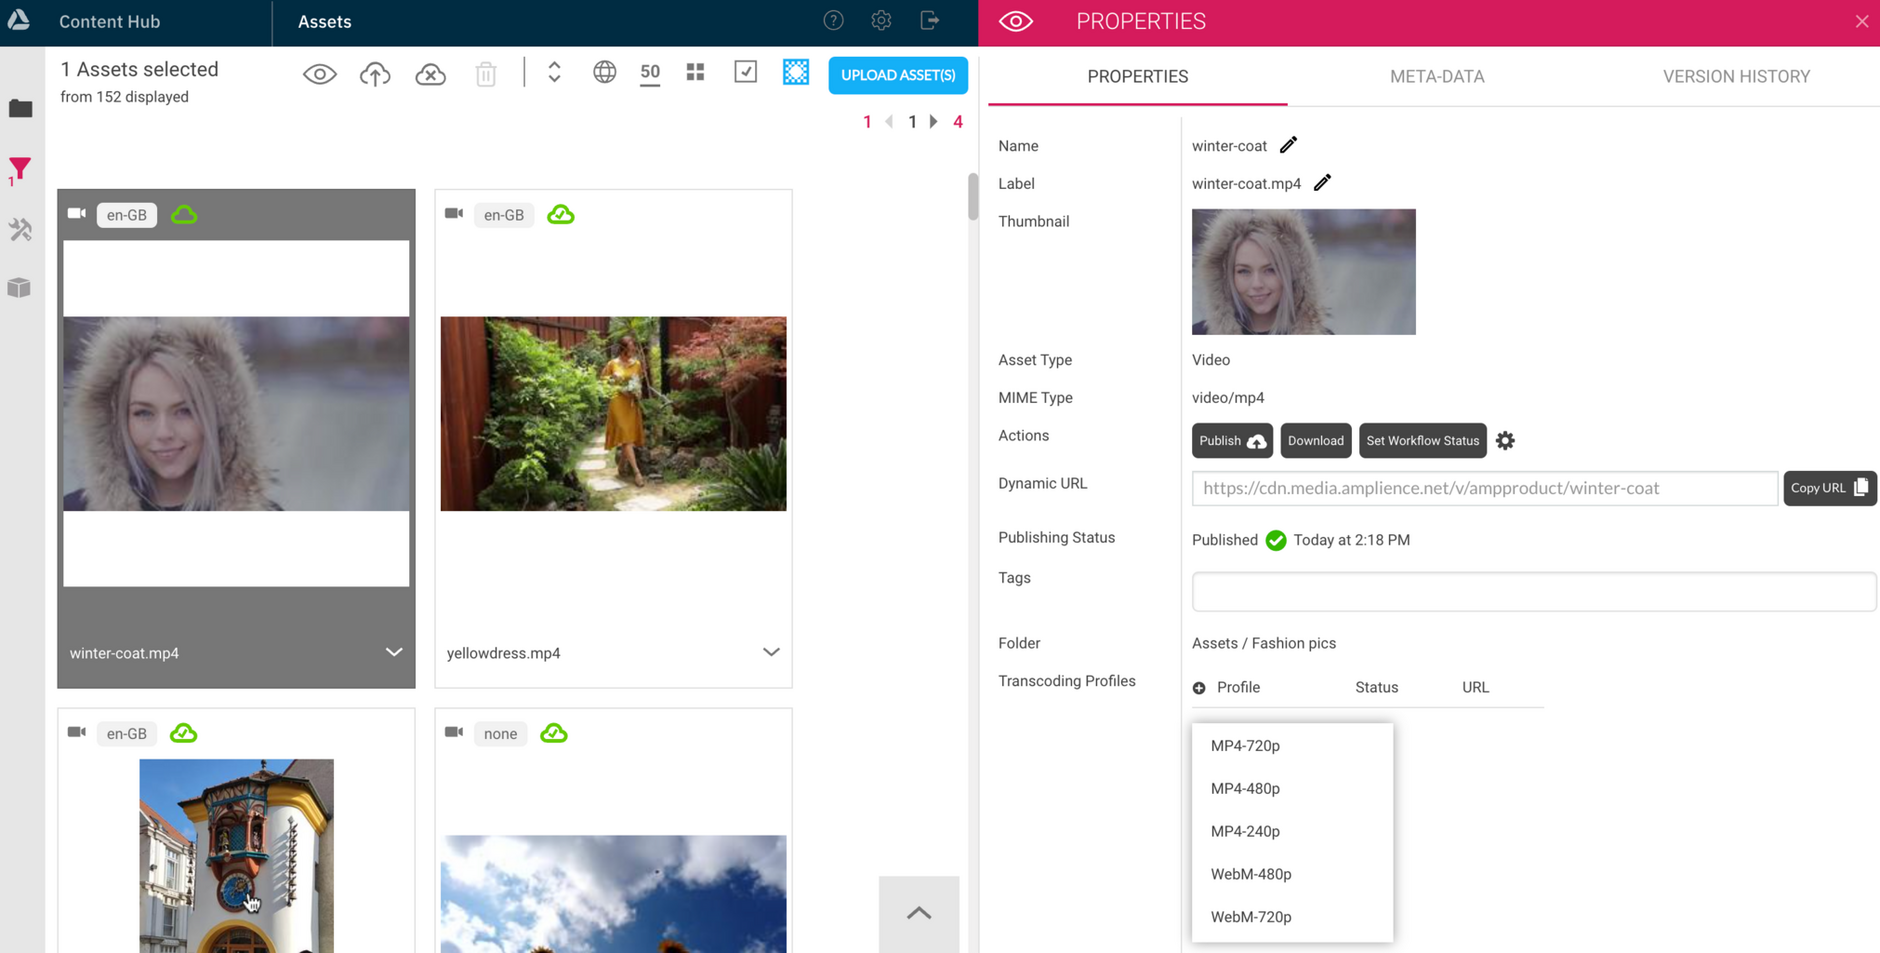
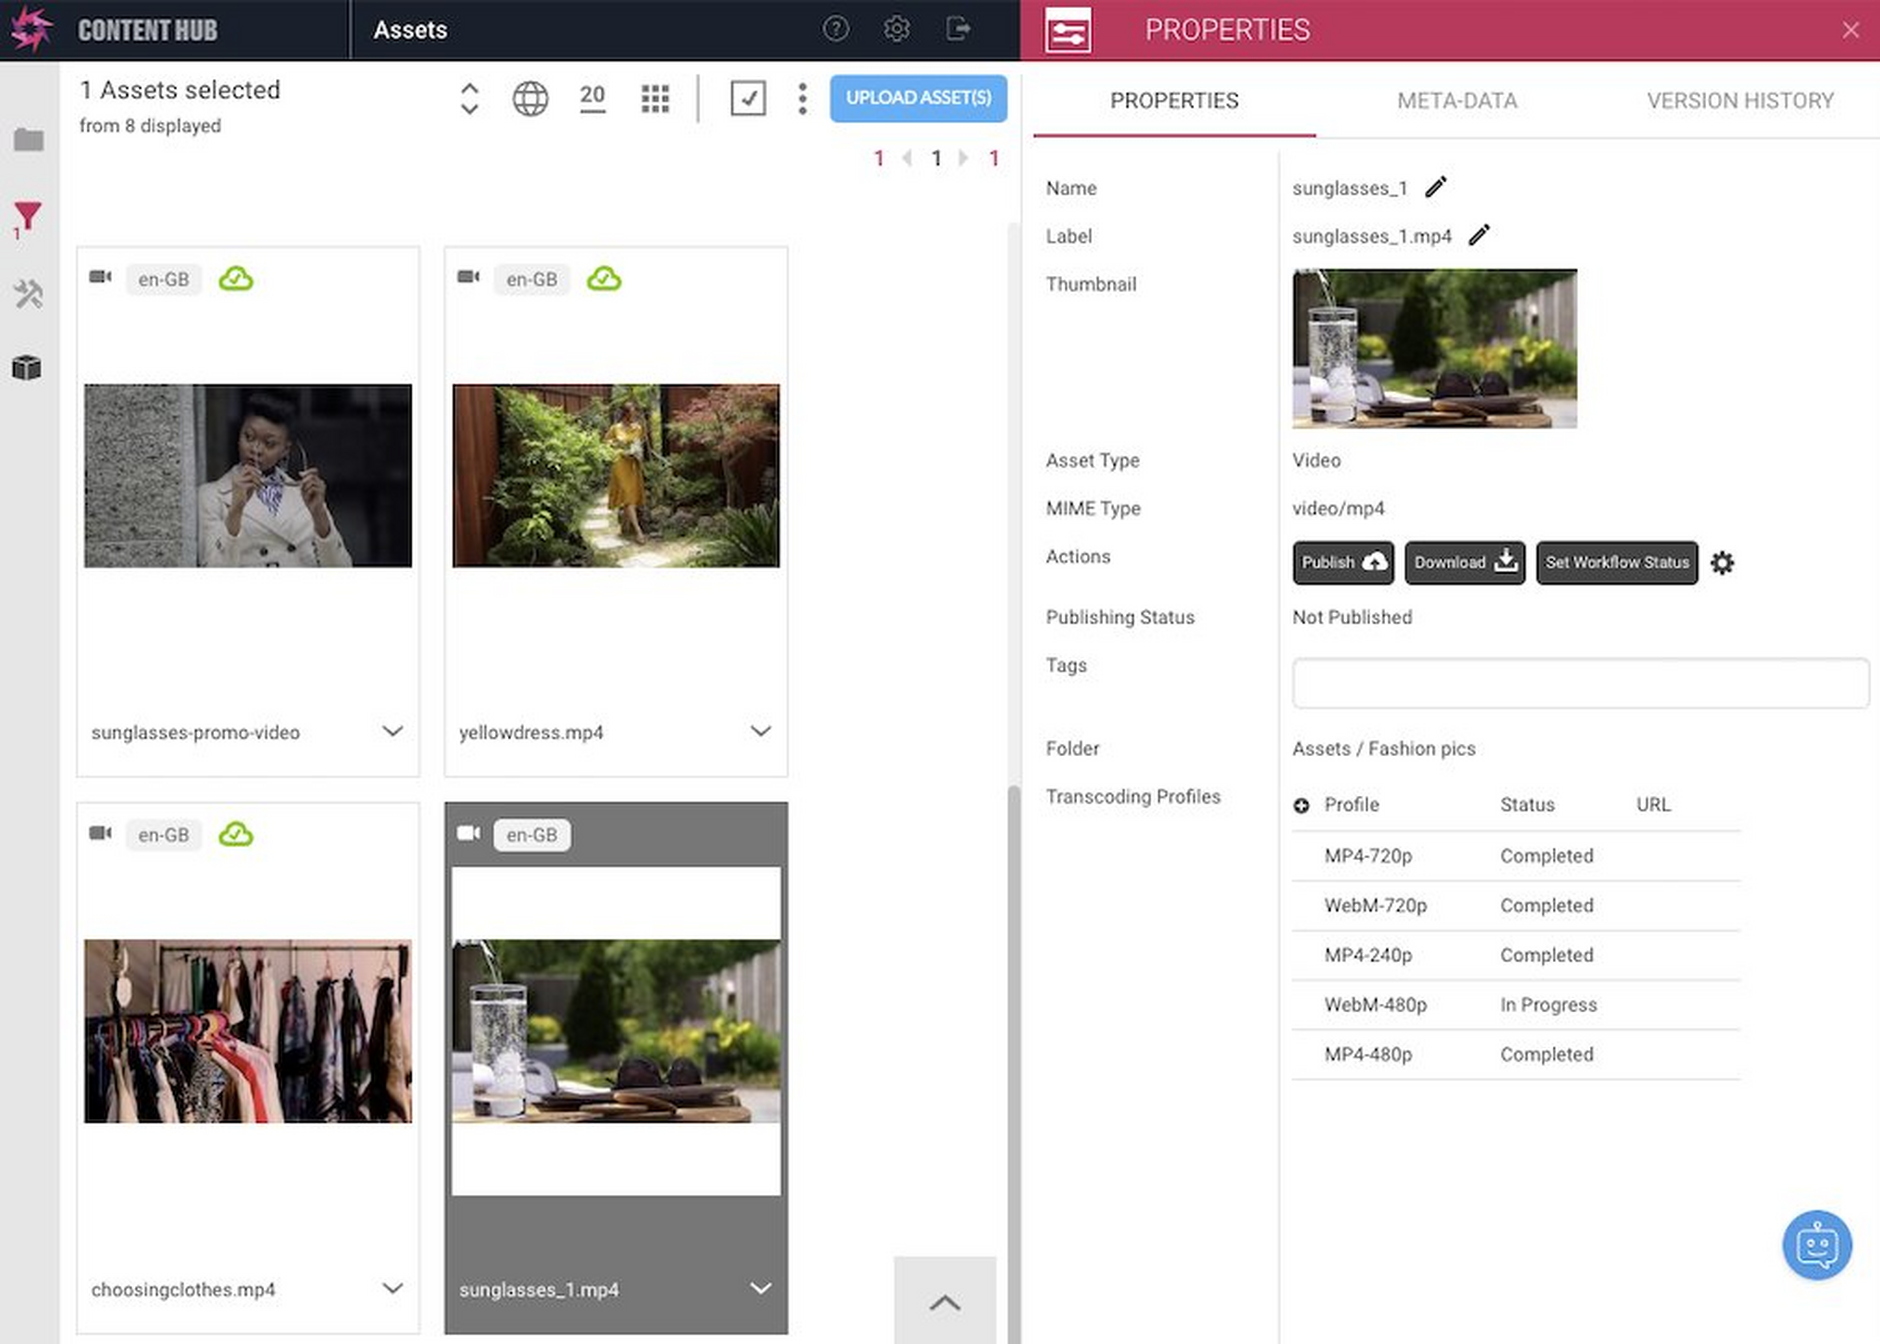
When you manually upload a video to Content Hub, you must add each of the video transcoding profiles that you want to use to encode the video. To add a profile, click the "+" icon to the left of the "Profile" label.
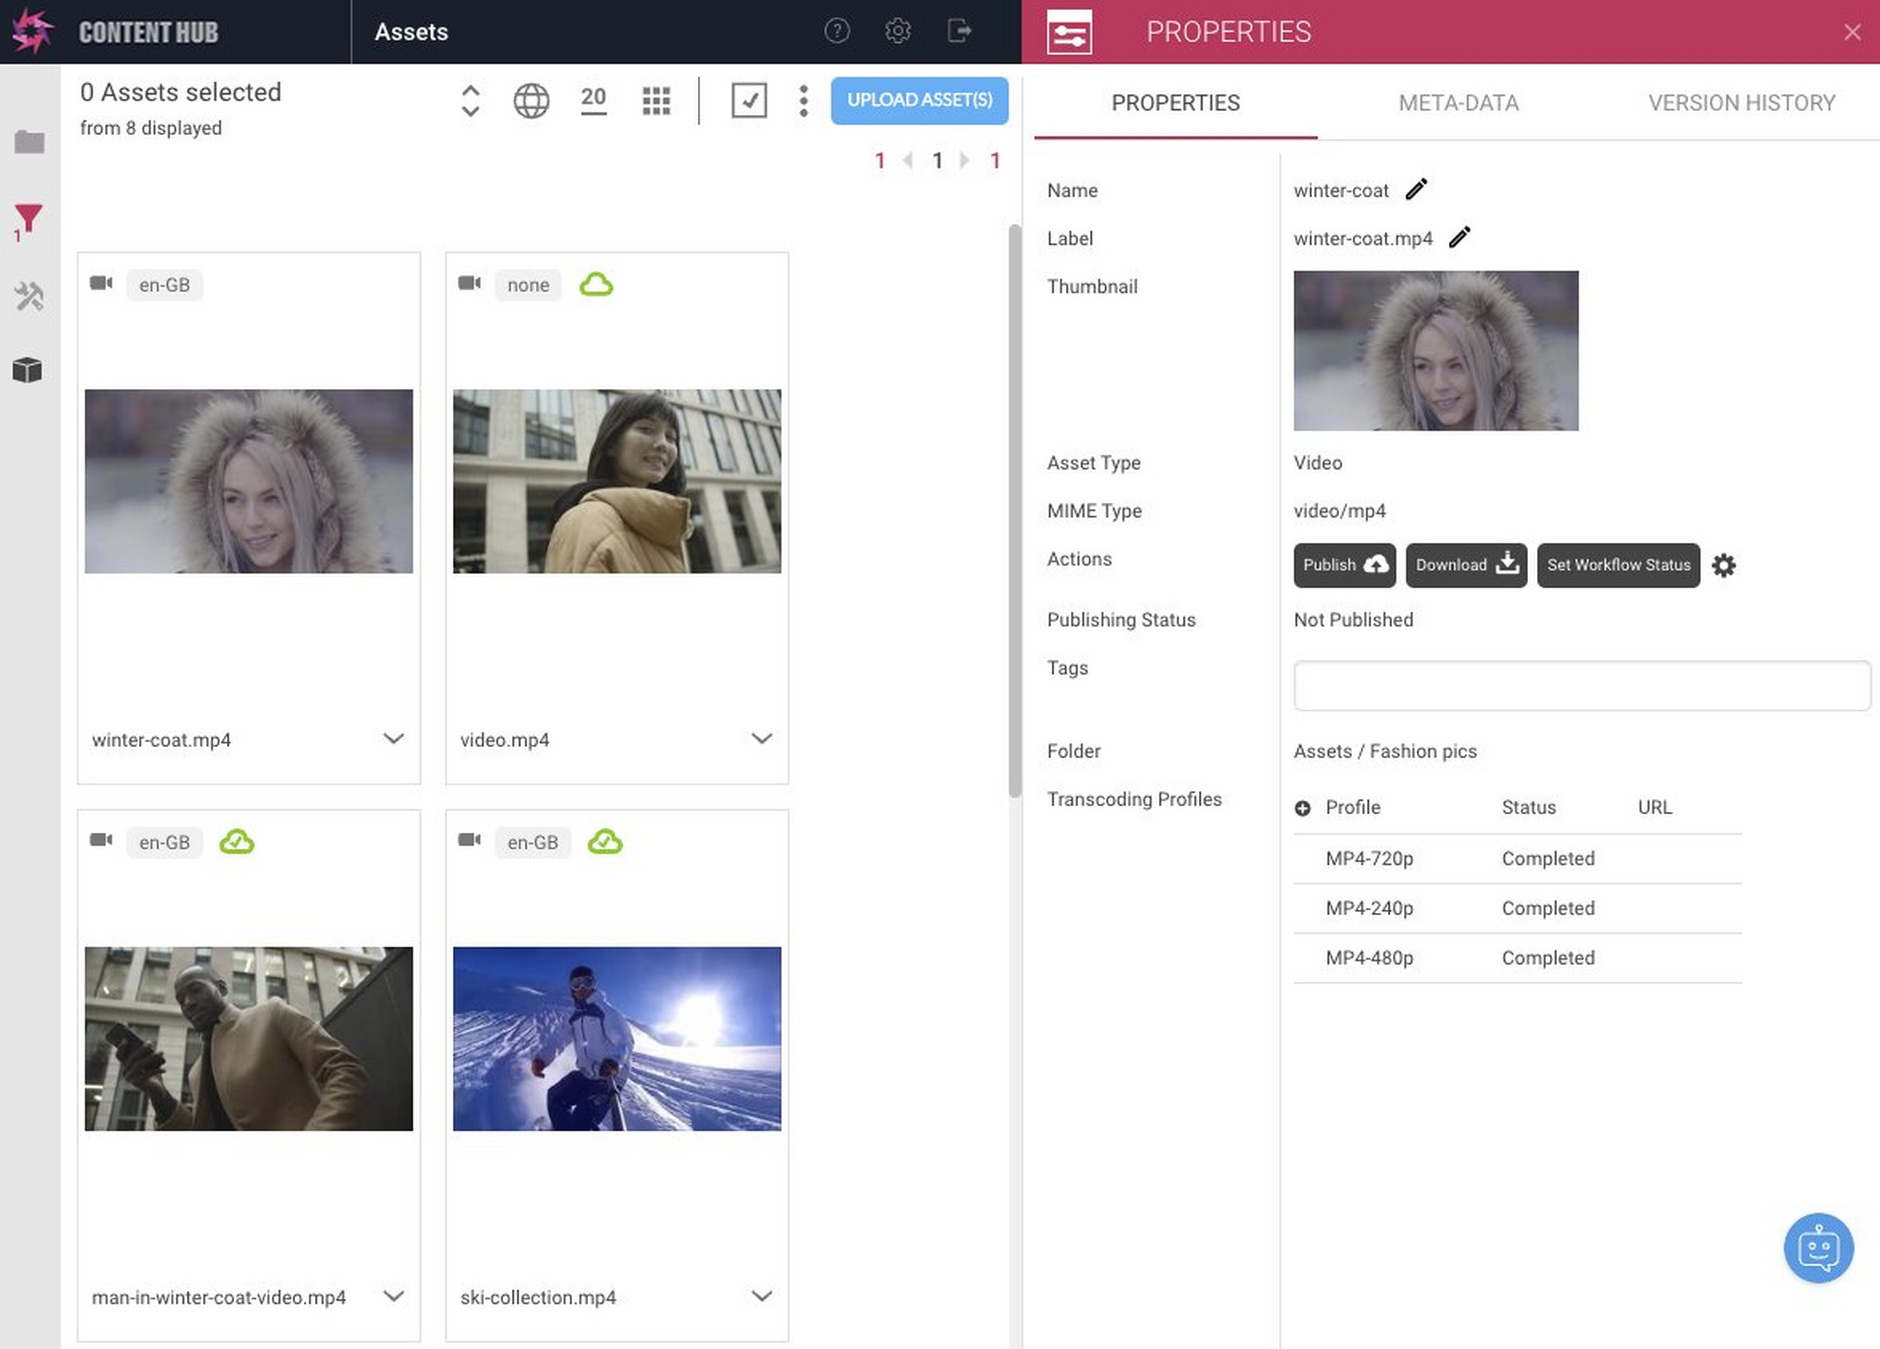
In the example below, the MP4-720, MP4-480 and MP4-240 profiles are available on the account and can be used to encode the winter-coat video.
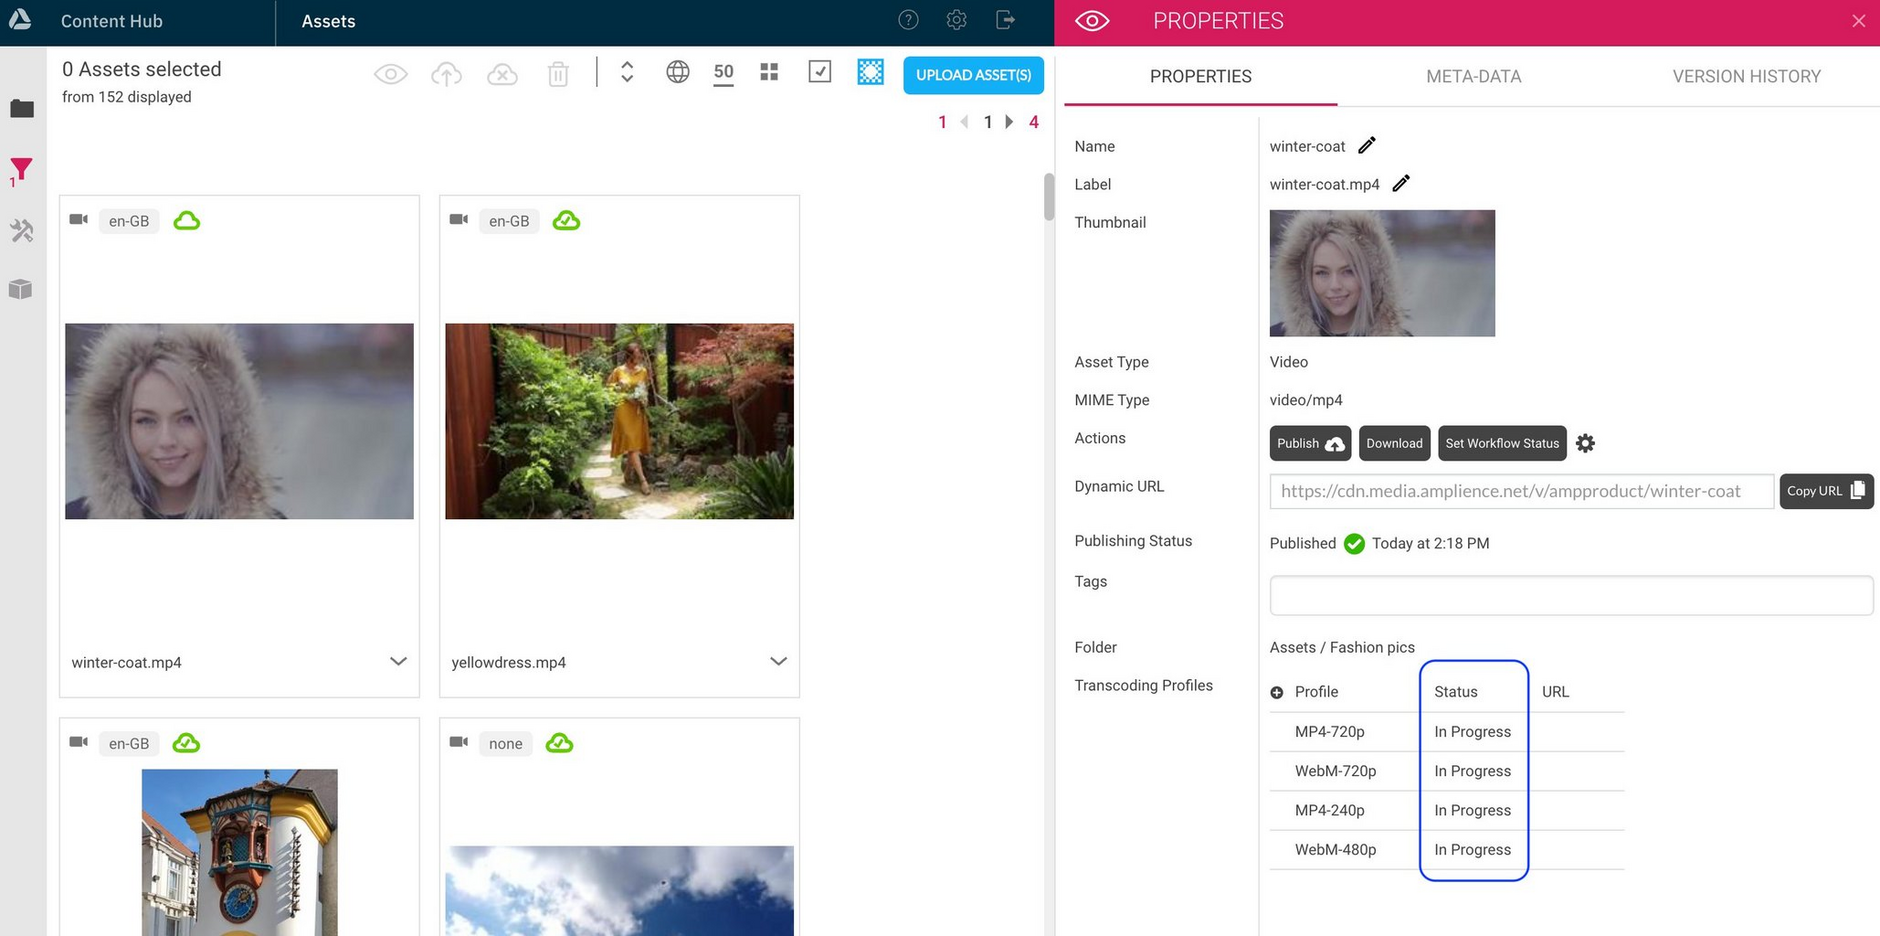
Video encoding starts when a profile is added to a video and the status bar will show the progress of the encoding process.
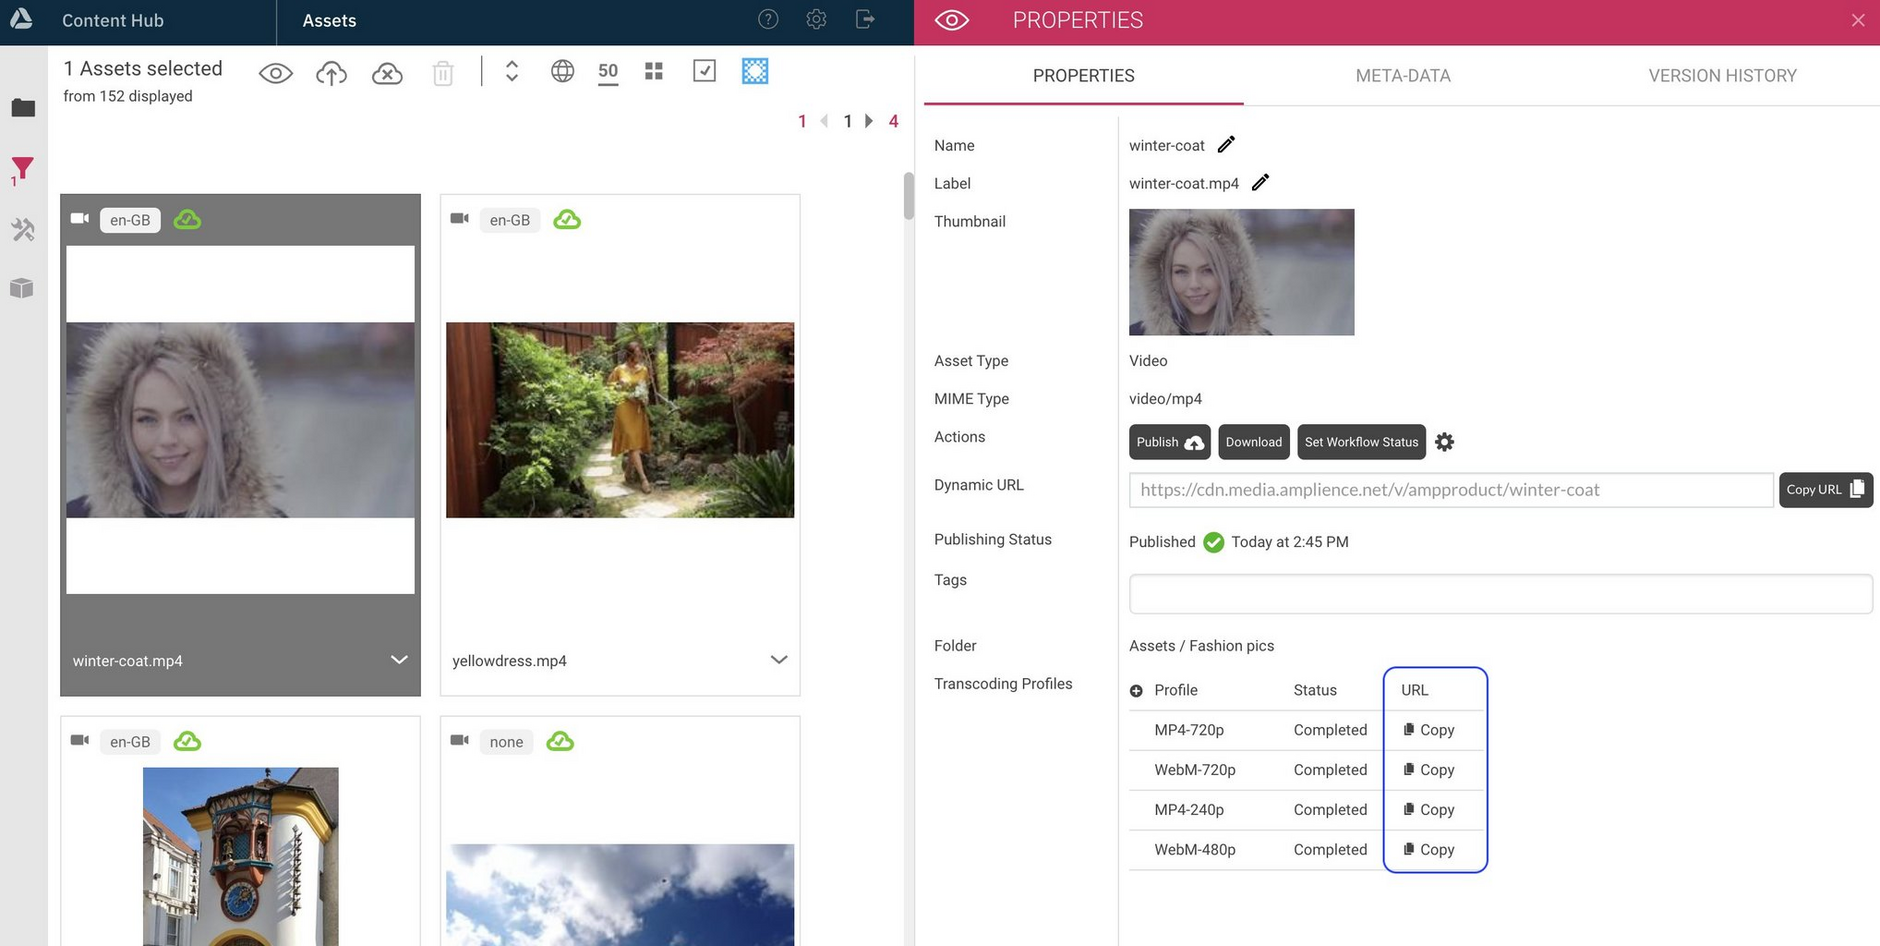
When encoding has finished, the profile will be shown as completed.
You can access a published video encoded using a specified profile by adding the profile name to the URL.
For example: https://cdn.media.amplience.net/v/ampproduct/winter-coat/mp4_720p will return the video encoded using the mp4_720p profile.
Click the "Copy" button to the right of each profile to copy a URL.
Ingesting video using bulk uploadLink copied!
If you upload video using an FTP bulk upload, then any transcoding profiles that you have set to be applied to batch jobs will automatically be applied to the video.
If you use the GraphQL Asset Management API to upload videos they will not be automatically transcoded, even if you have applied transcode profiles to the videos. Instead, you must transcode video files manually. See Uploading video to Content Hub.
You can also specify the profiles that should be attached to video ingested using a particular bulk upload job.
Setting a video thumbnailLink copied!
You can choose a video thumbnail to be the poster frame: the frame shown before the video starts playing. 100 thumbnails are generated from a video when it is uploaded to Content Hub. These thumbnails are taken from frames at regular intervals throughout the video and you can select one to use as a poster frame. If you do not choose a thumbnail then the first frame of the video is used.
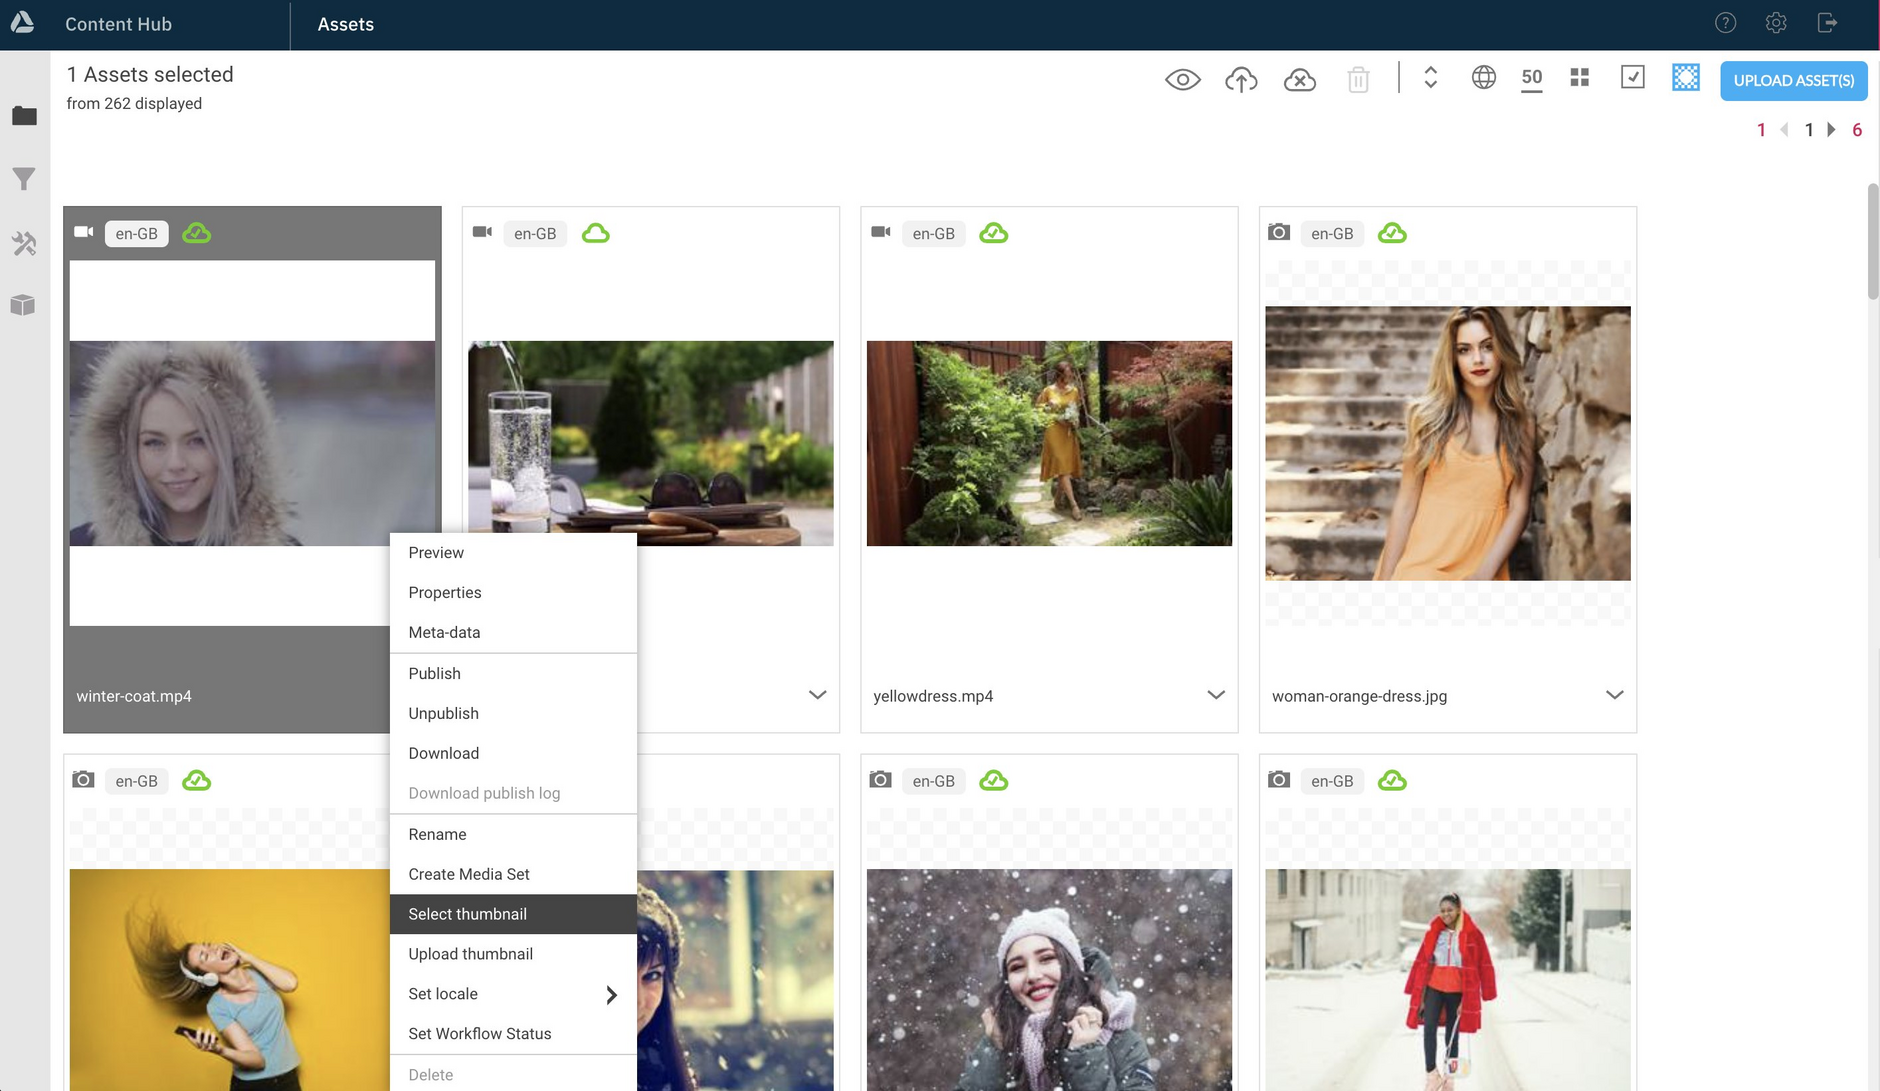
To select a thumbnail choose "Select thumbnail" from the asset's menu.
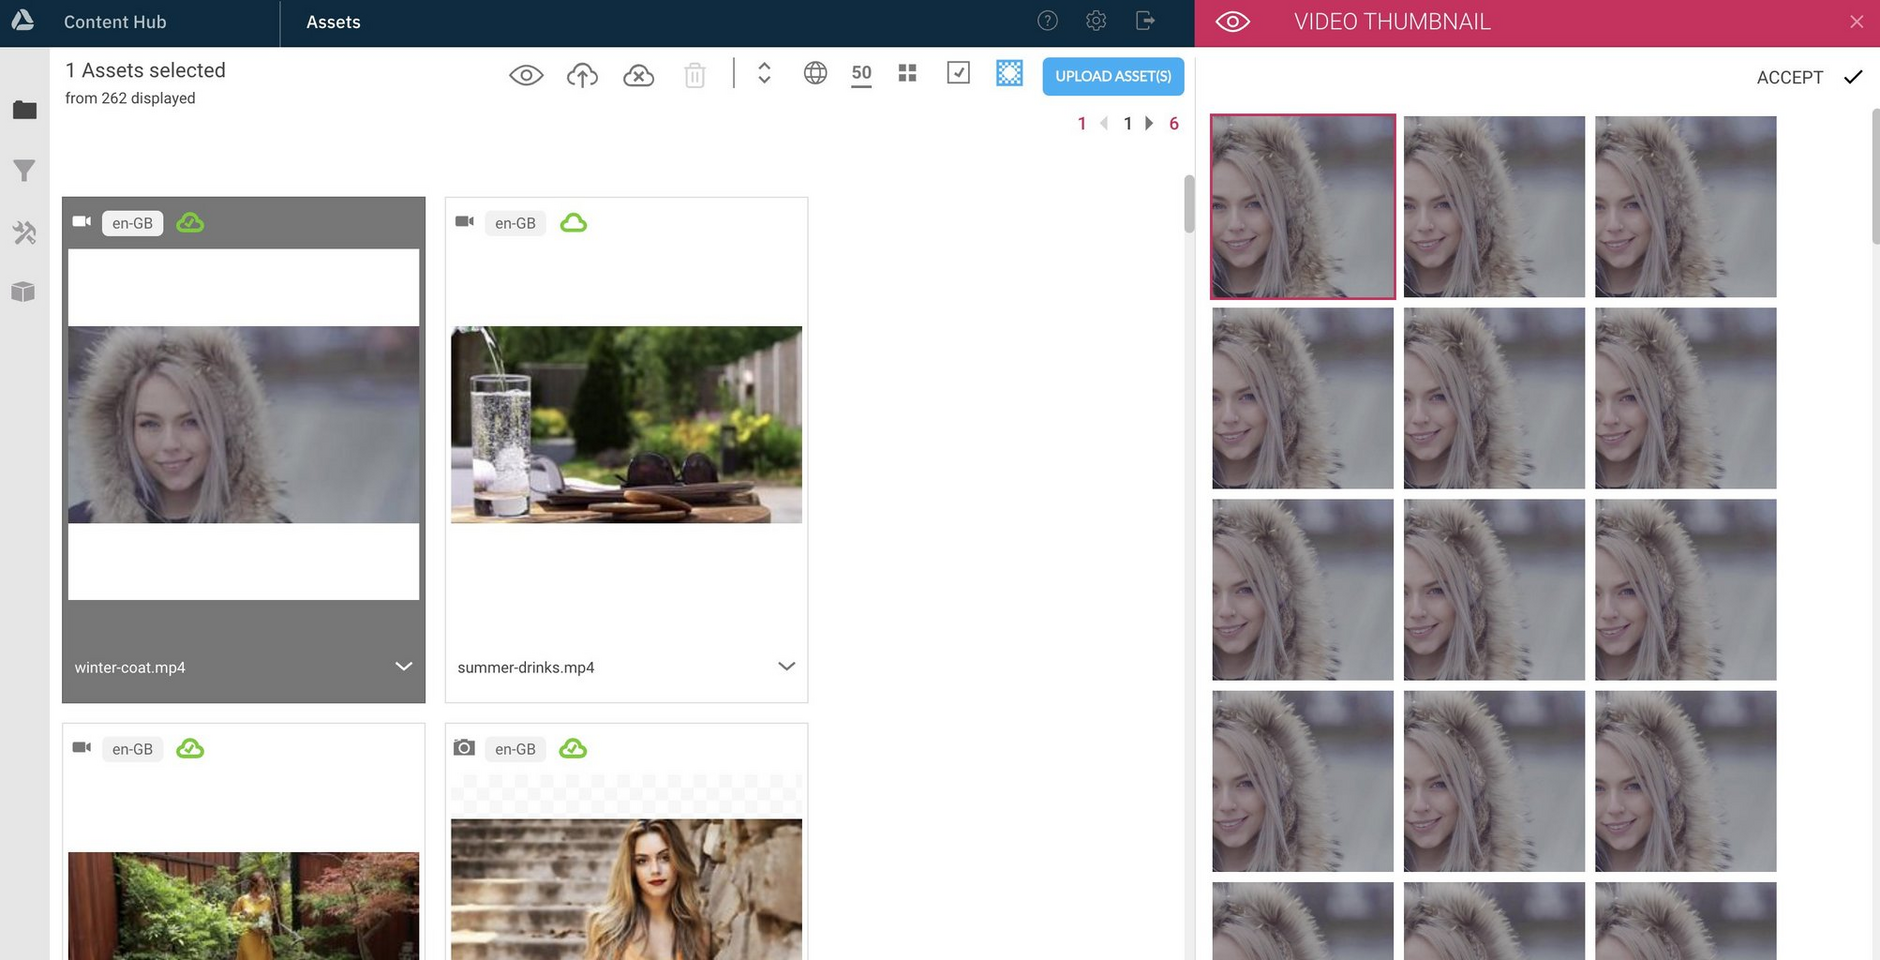
Choose the thumbnail you want to use from the thumbnails window and click the "Accept" button at the top of the window. The selected thumbnail is shown with a red border.
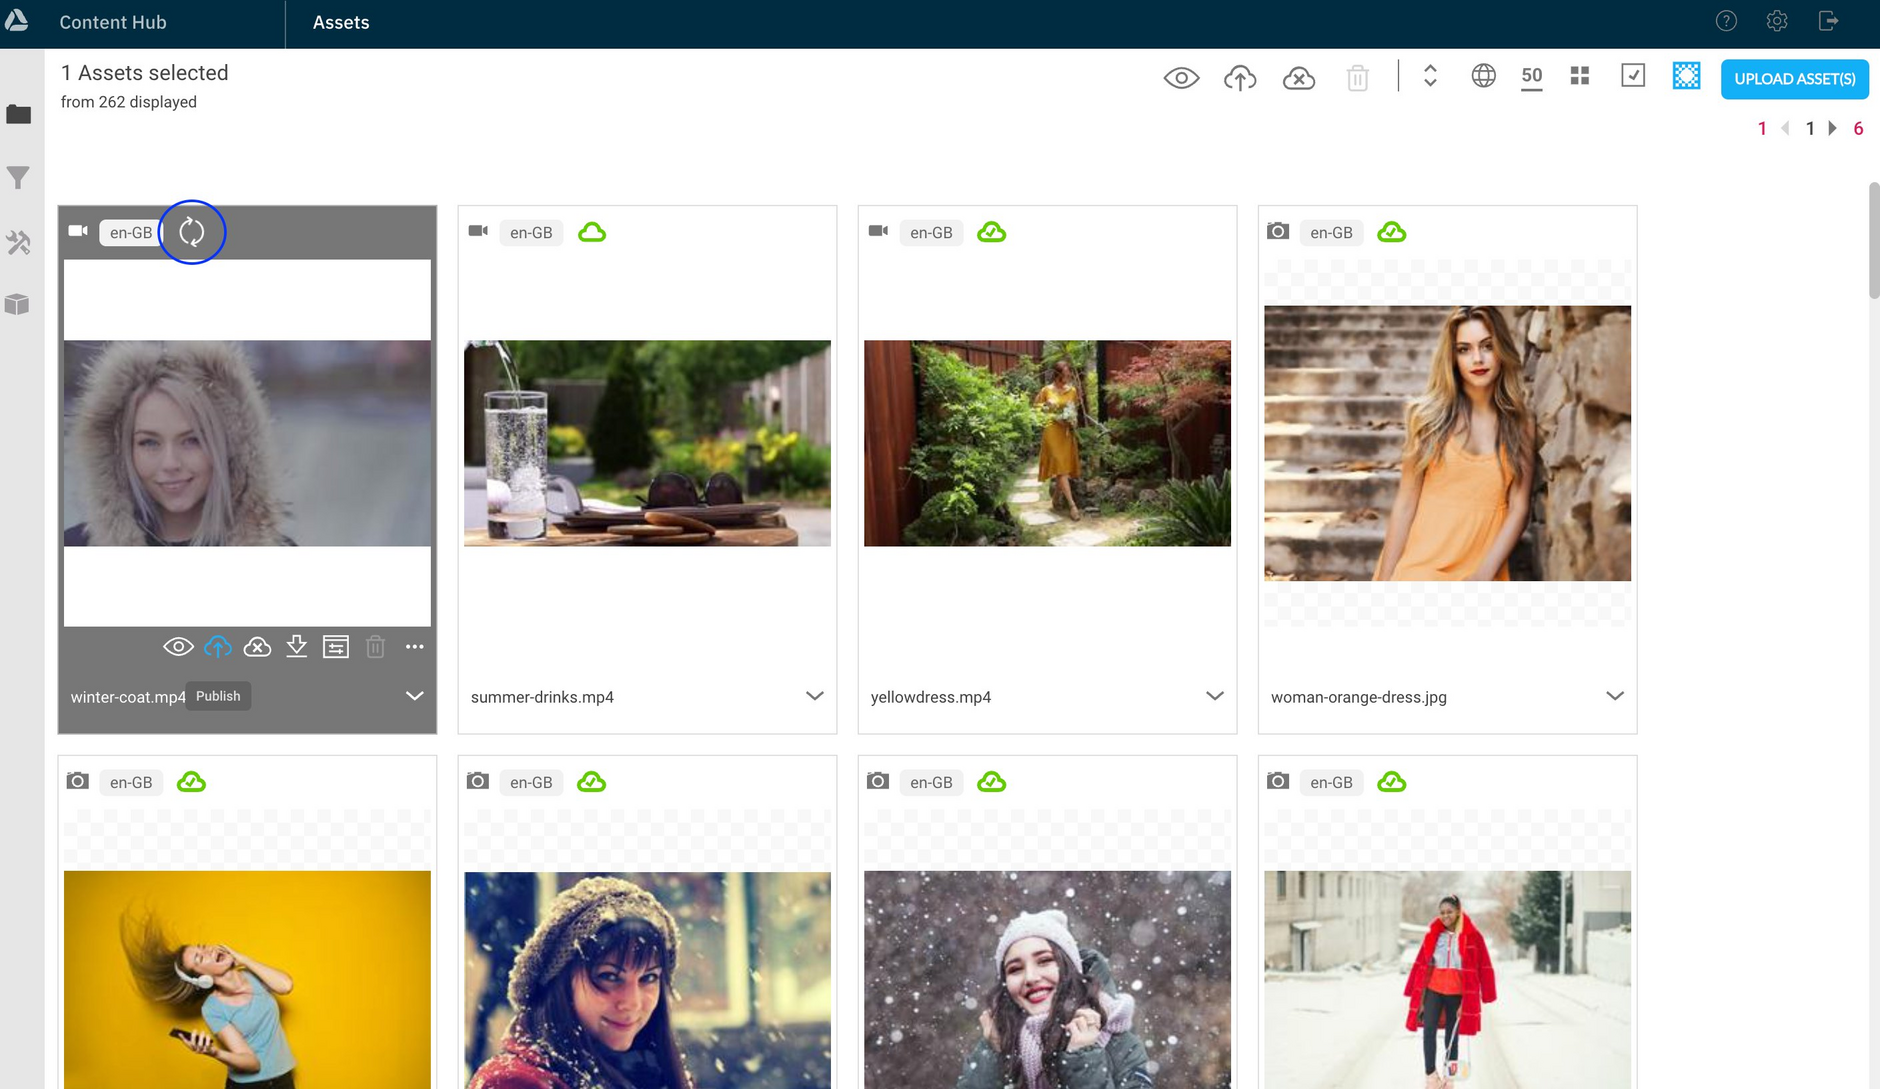
The updated poster frame is now shown in Content Hub. Publish the video to make the updated poster frame available when consuming the video.
You can also upload your own thumbnail by choosing "Upload thumbnail" and uploading the image you want to use.
Video transcode profilesLink copied!
A video transcode profile is a set of video conversion settings used to convert source videos into formats suitable for a range of devices and browsers.
Your account will be provisioned with default profiles, including MP4-240, MP4-280, MP4-720, WebM-480 and WebM-720, with settings to match most common devices and browsers, but in some circumstances you may want to create a new profile or edit an existing one.
On this page we'll show how to create and edit profiles and set parameters including video codec and bitrate and audio options.
Creating and editing profilesLink copied!
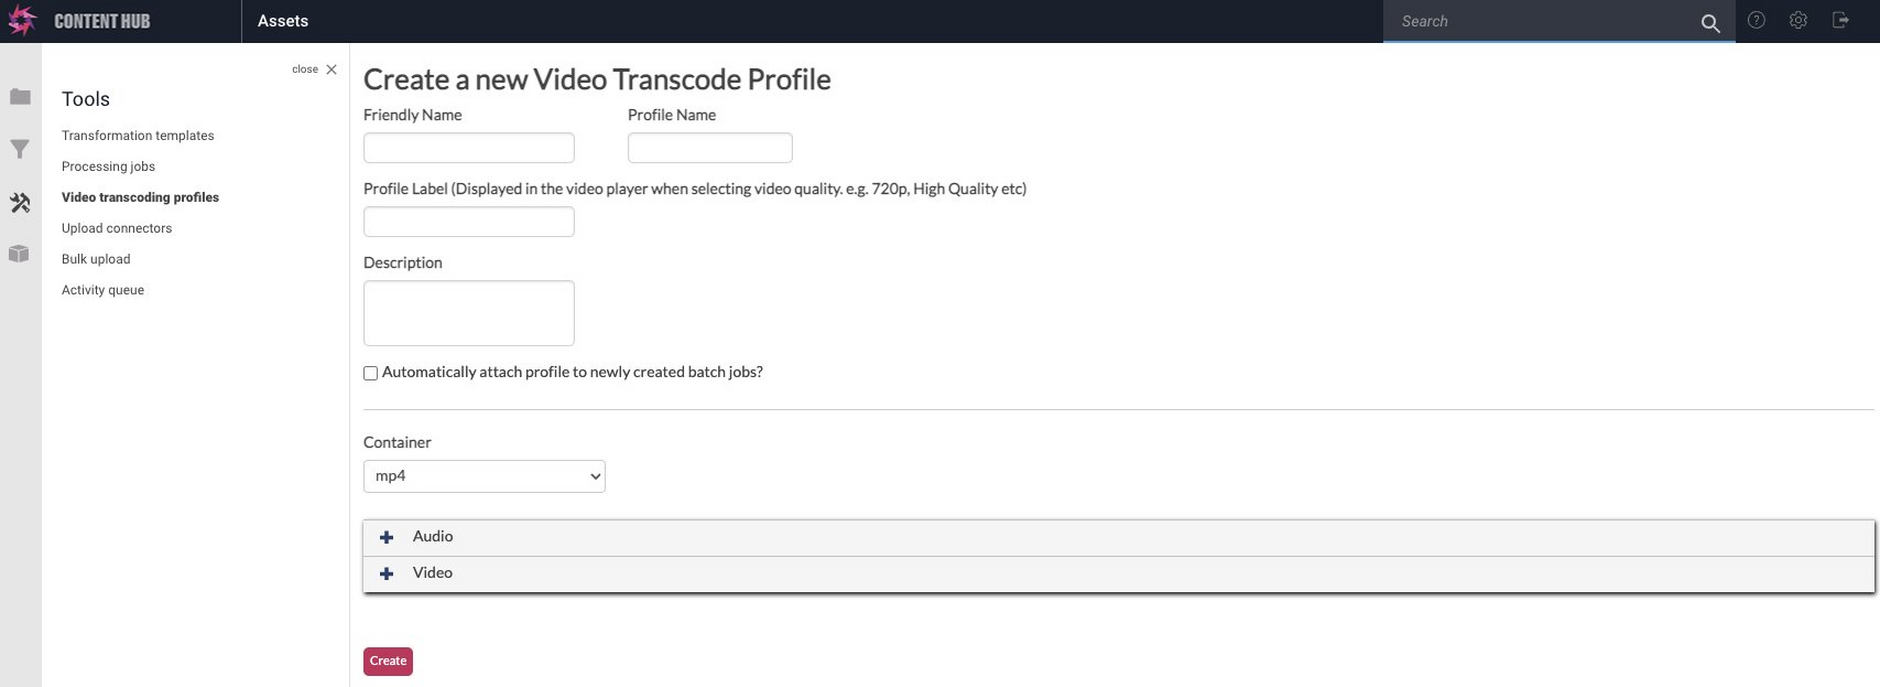
To create a new video transcoding profile, click the New button.
You can also edit an existing profile by clicking the icon to the left of the profile name and choosing "Edit profile".
When you create a new profile you can enter the name, label and description, or edit these values for an existing profile.
| Name | Value |
|---|---|
| Friendly name | Used to identify the profile within Content Hub |
| Profile name | HTTP friendly profile name included in the video URL |
| Profile label | Displayed in some players to allow the user to choose the quality. Also included in the <video> tag generated when creating embedded HTML for the video |
| Description | A description of the video profile |
| Automatically attach profile to newly created batch jobs | Tick this checkbox to automatically apply a profile to a video when it is ingested into Content Hub via bulk upload |
Container optionsLink copied!
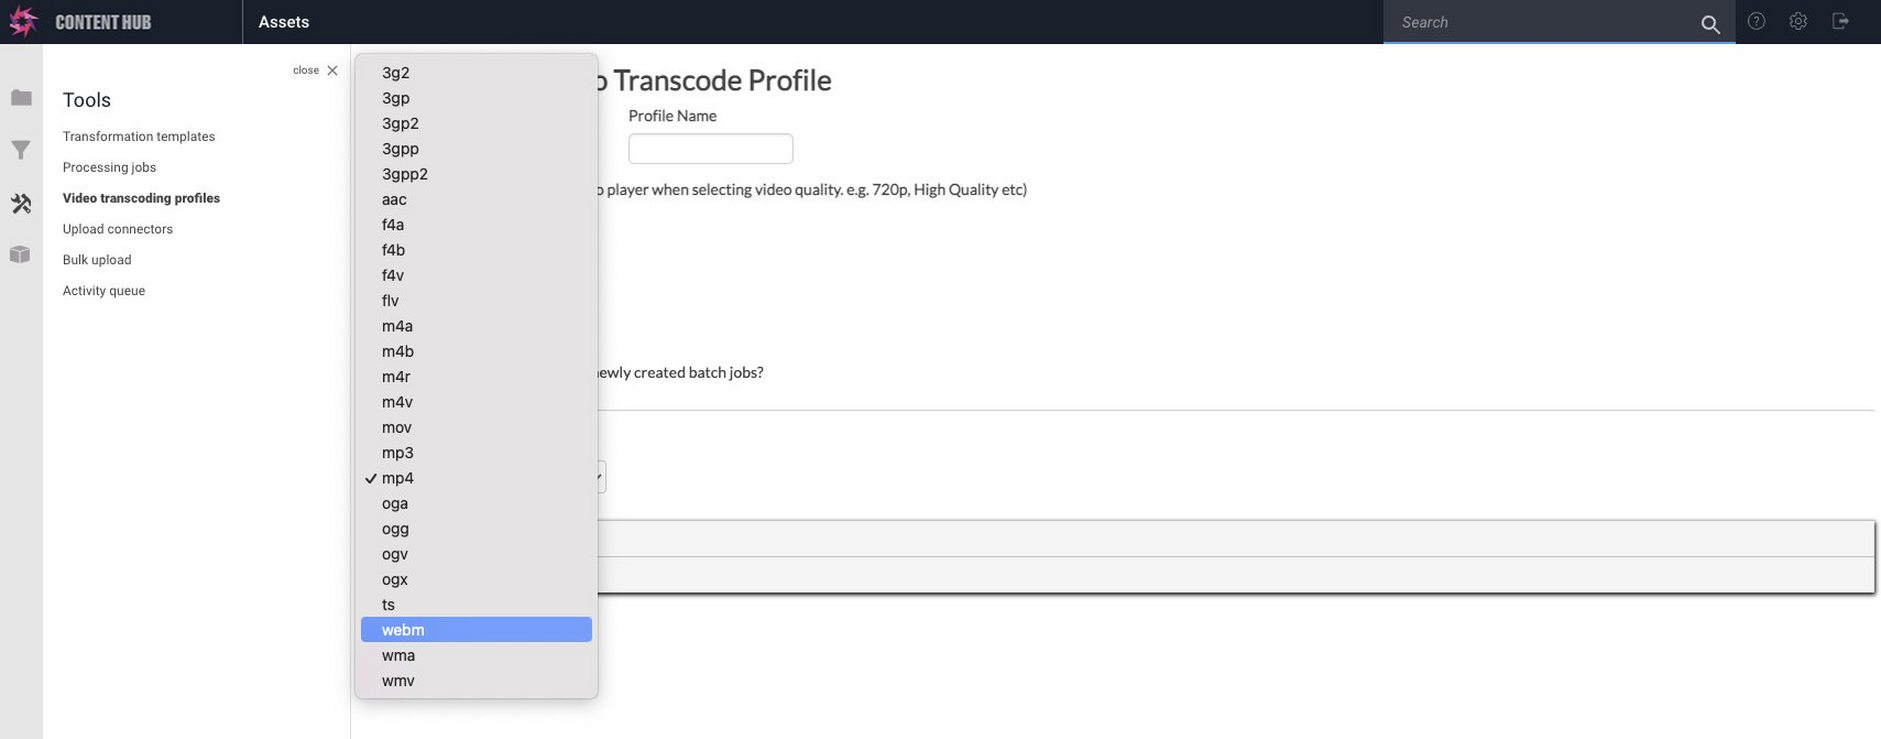
A profile container is the file format used to package the audio and video. Generally you will use MP4 or WebM for web content.
The list of available containers is shown below.
- 3G2
- 3GP
- 3GP2
- 3GPP
- 3GPP2
- AAC
- F4A
- F4B
- F4V
- FLV
- M4A
- MOV
- MP3
- MP4
- OGA
- OGG
- OGV
- OGX
- TS
- WEBM
- WMA
- WMV
Audio optionsLink copied!
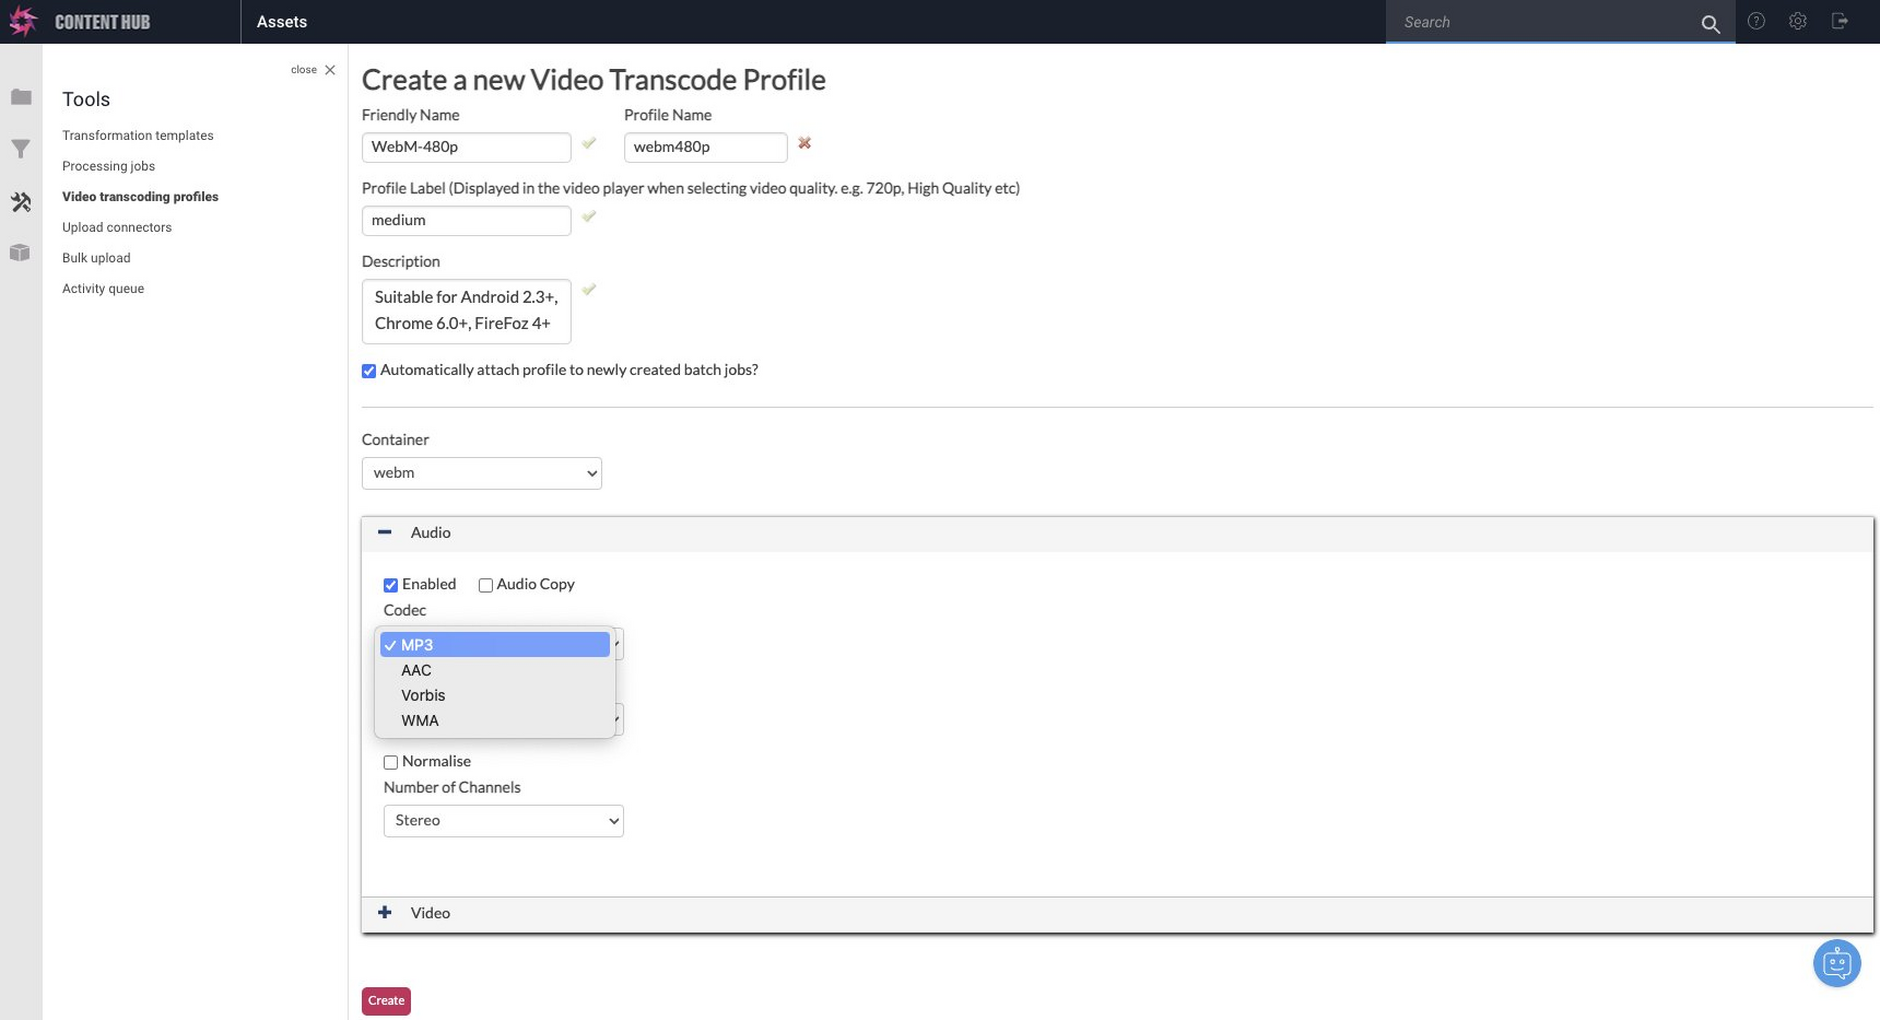
In the audio section you can choose options including the codec used to encode the video and the bit rate.
| Name | Value |
|---|---|
| Enabled | Tick this checkbox if audio is enabled for this profile |
| Audio copy | Copy the audio from the source video |
| Codec | The codec used to encode the audio. Select from MP3, AAC, Vorbis and WMA |
| Bit Rate | The bit rate used to encode the audio. Generally determines the audio quality. Choose from 64, 96, 128, 160, 192, 224, 256 and 320 kbps |
| Normalise | Increase / Decrease the volume to bring the average peak amplitude to a target normal level |
| Number of channels | Either Mono or Stereo |
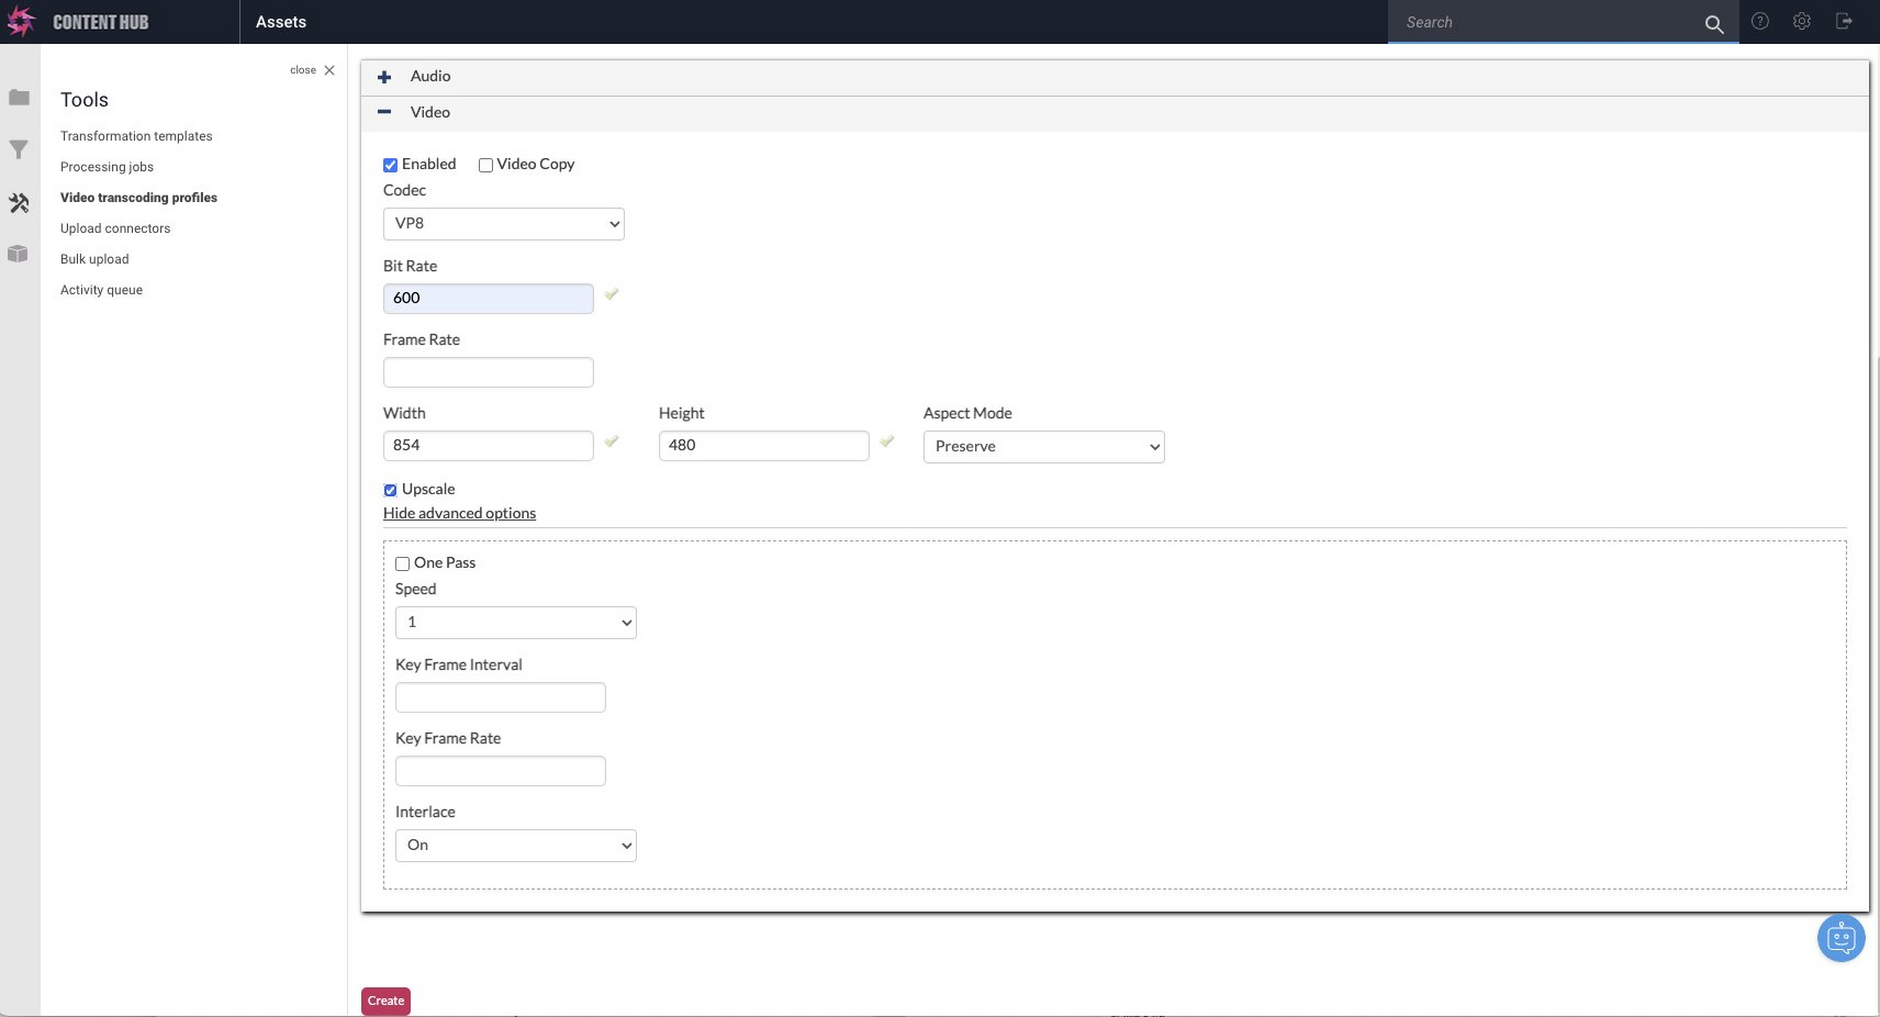
Video optionsLink copied!
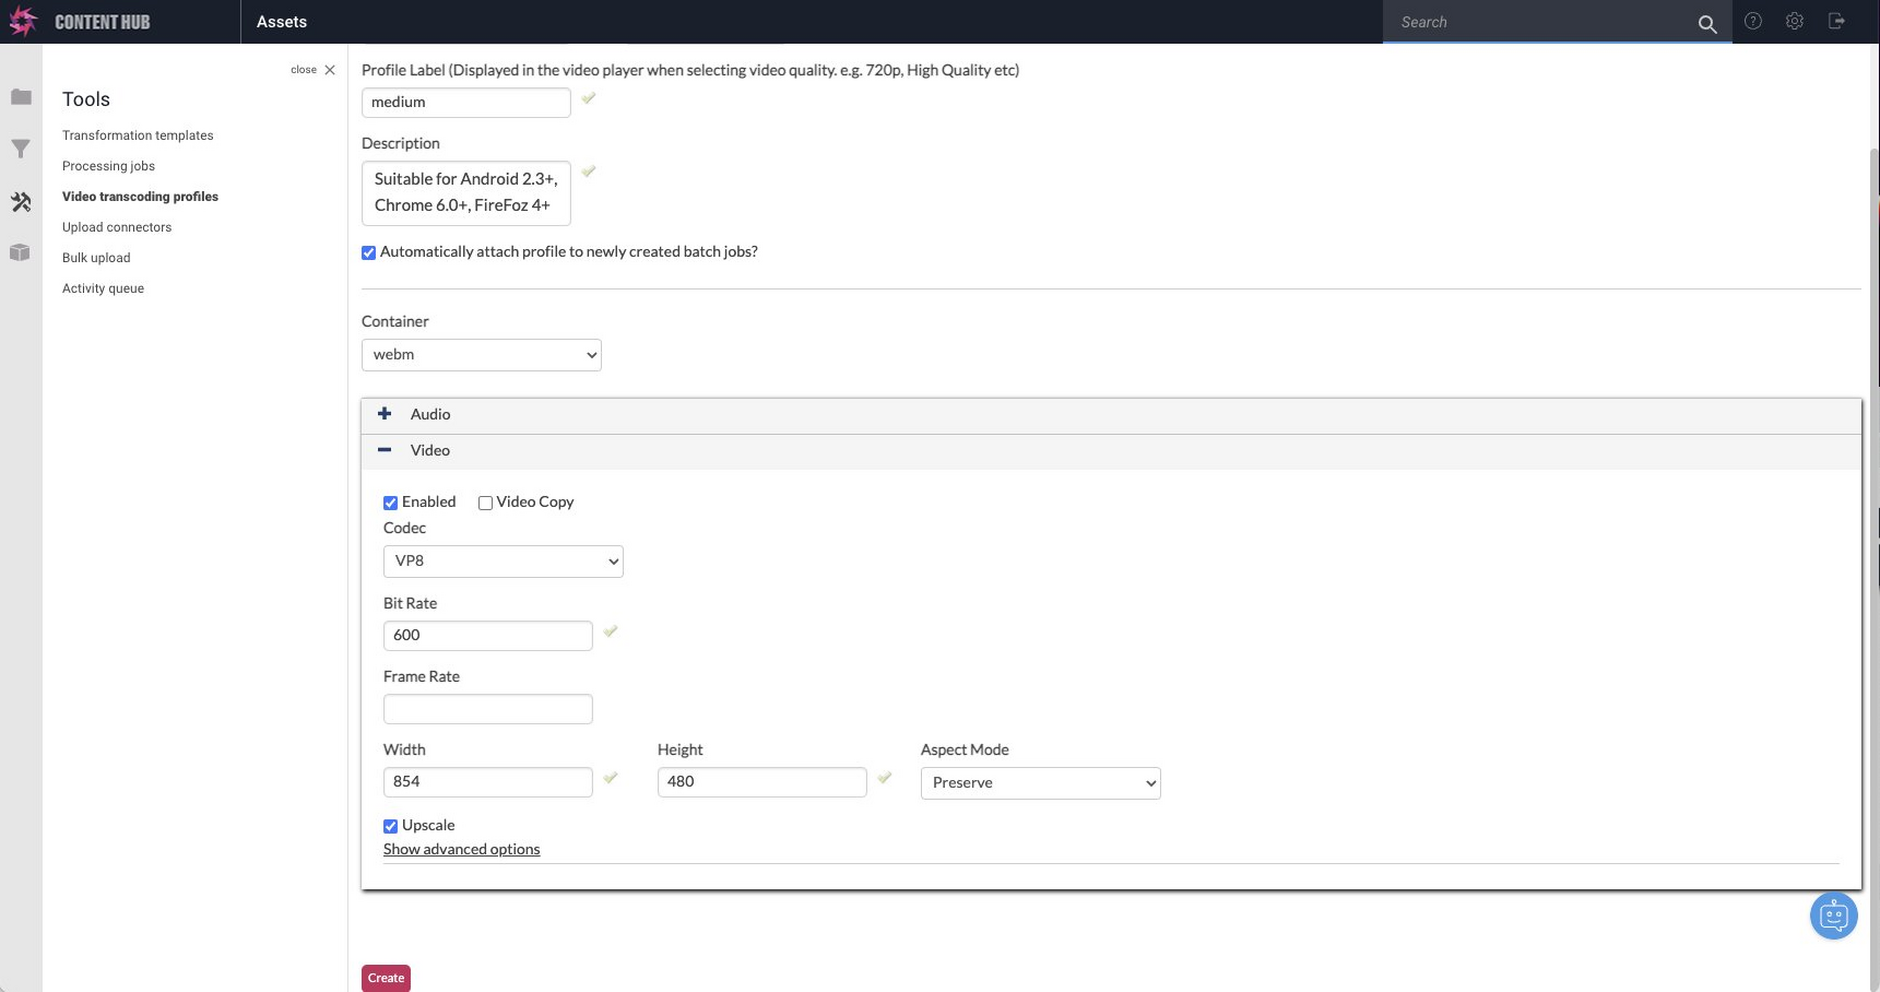
The video options include selecting the codec used to encode the video and the bit rate.
| Name | Value |
|---|---|
| Enabled | Tick this checkbox if video is enabled for this profile |
| Video copy | Copy the video from the source video |
| Codec | The codec used to encode the video |
| Bit Rate | The quality of the video in kbps |
| Frame rate | The number of frames per second (1-300) |
| Width | Video width |
| Height | Video height |
| Aspect mode | Crop, Stretch, Preserve or Pad |
| Upscale | Select this option to upscale the original video to match profile settings |
Advanced video optionsLink copied!
You can also choose some advanced options for the video transcoding profile.
| Name | Value |
|---|---|
| One Pass | Analyses and encodes the video in one pass. Can result in a larger file size. |
| Speed | Quality of video from speed of conversion ( 1 is slow, 5 is fast). |
| Key Frame Interval | 0-250. Number of frames between each keyframe. This setting takes precedence over the Key Frame Rate |
| Key Frame Rate | 0-250. The more key frames the better navigation in the video, although more key frames increases the file size. |
| Interlace | On, Off or Detect |
When you've finished entering the profile settings click the "Create" button if to create a new profile, or "Update" if you are editing an existing one. When a new profile is saved, it will be shown in the Video Transcode Profile list.
LimitationsLink copied!
The maximum resolution at which video can be encoded is 4096 x 4096.
