The schema editor
The schema editor makes it easier to create and edit content type schemas. Schemas can still be created and stored externally to Dynamic Content in AWS, GitHub or whatever hosting service you choose, but the editor allows you to create, edit and manage schemas within your Dynamic Content hub. The schema editor includes snippets for most common property types, validates your syntax as you type and includes a preview feature that lets you see how content created using a schema will look in the content form. You can also use the editor for creating slot type schemas, as well as managing partials, or common definitions that can be used in many different schemas.
On this page we'll provide an overview of the features of the schema editor using the following several example use cases:
-
Text block example Showing how to create a simple text block content type using the schema editor. This demonstrates the creation of a content type schema and the addition of text properties.
-
Simple banner example Showing how to create the tutorial banner content type schema using the schema editor. This demonstrates adding an image browser property and string field validation.
-
Slot example shows how to use the schema editor to create a slot type schema
-
Partials example shows how to use the schema editor to create a partial- a schema with just a definitions section- and include these definitions in other schemas. It also shows how to include and refer to a definitions section within the same content type schema.
Editing an existing schema, schema versioning and archiving schemas is covered in the viewing and editing schemas section.
Overview of creating a content type schemaLink copied!
Here are the steps you need to follow to create a content type schema and register it as a content type from which the user can create content.
- Create a content type schema and give it a unique URL. The URL just needs to be valid to ensure that the schema is valid JSON schema format. The URL will not be resolved and we do not enforce any naming standards
- Choose the validation to be used by the schema editor. For a content type schema choose "content type". You can also create slot schemas and partials
- Save the schema and open the schema editing window
- Add the properties you require. The schema editor provides shortcuts for most property types. You can preview how content created from this schema will appear in the content editing form
- Save the schema. The schema editor will only allow you to the save the schema if it is valid
- Register a content type from the schema. To create a content type you specify the schema URL, label and optionally an icon, card and visualizations. You also select which repositories the content type is associated with.
- The content type is now available for the user to create content.
The following example takes you through these steps in more detail.
Creating a content type schemaLink copied!
To create or edit a content type schema, choose "Content type schemas" from the development menu in the Dynamic Content app. If the Development menu is not shown, contact your Custom Success Manager to ensure that you have the required permissions.
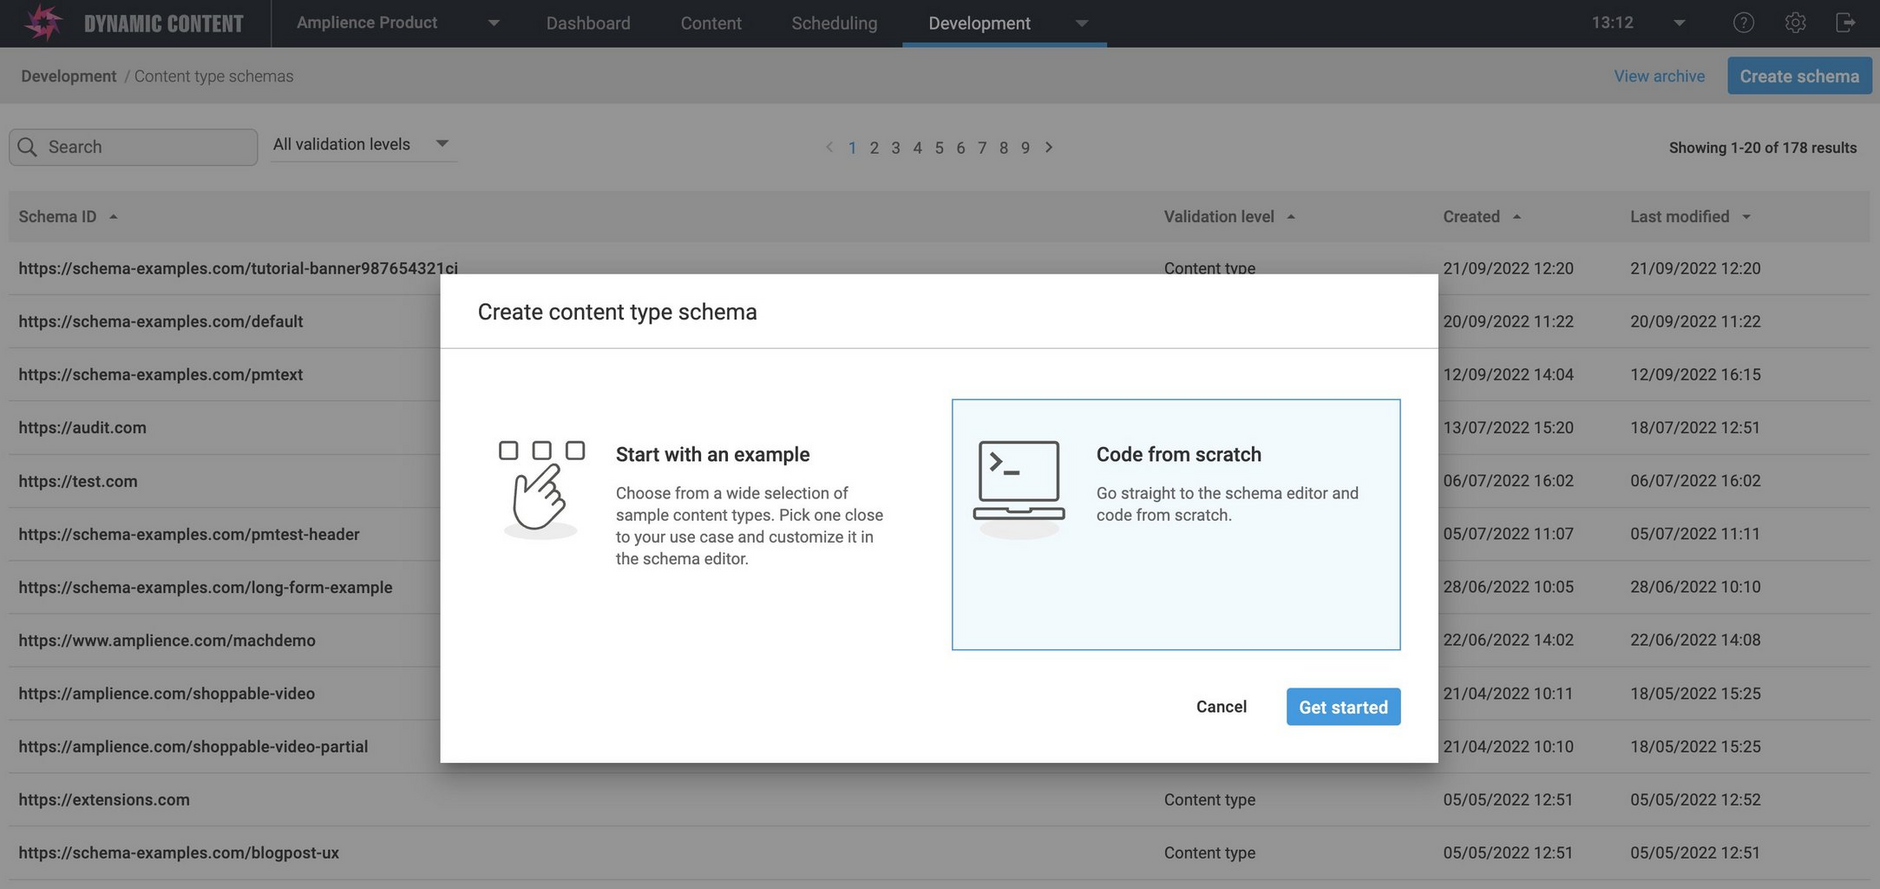
The content type schemas screen will be shown. From here you can view existing schemas or create a new one. To create a new schema click the "Create schema" button as shown in the image below.
A dialog will be displayed from which you can choose to create a schema from one of the built in schema templates, or build your own from scratch. In this section we'll show you how to build your own schema. For more information about the content type schema templates, see the schema examples page.
Select "Code from scratch" and click the "Get started" button.
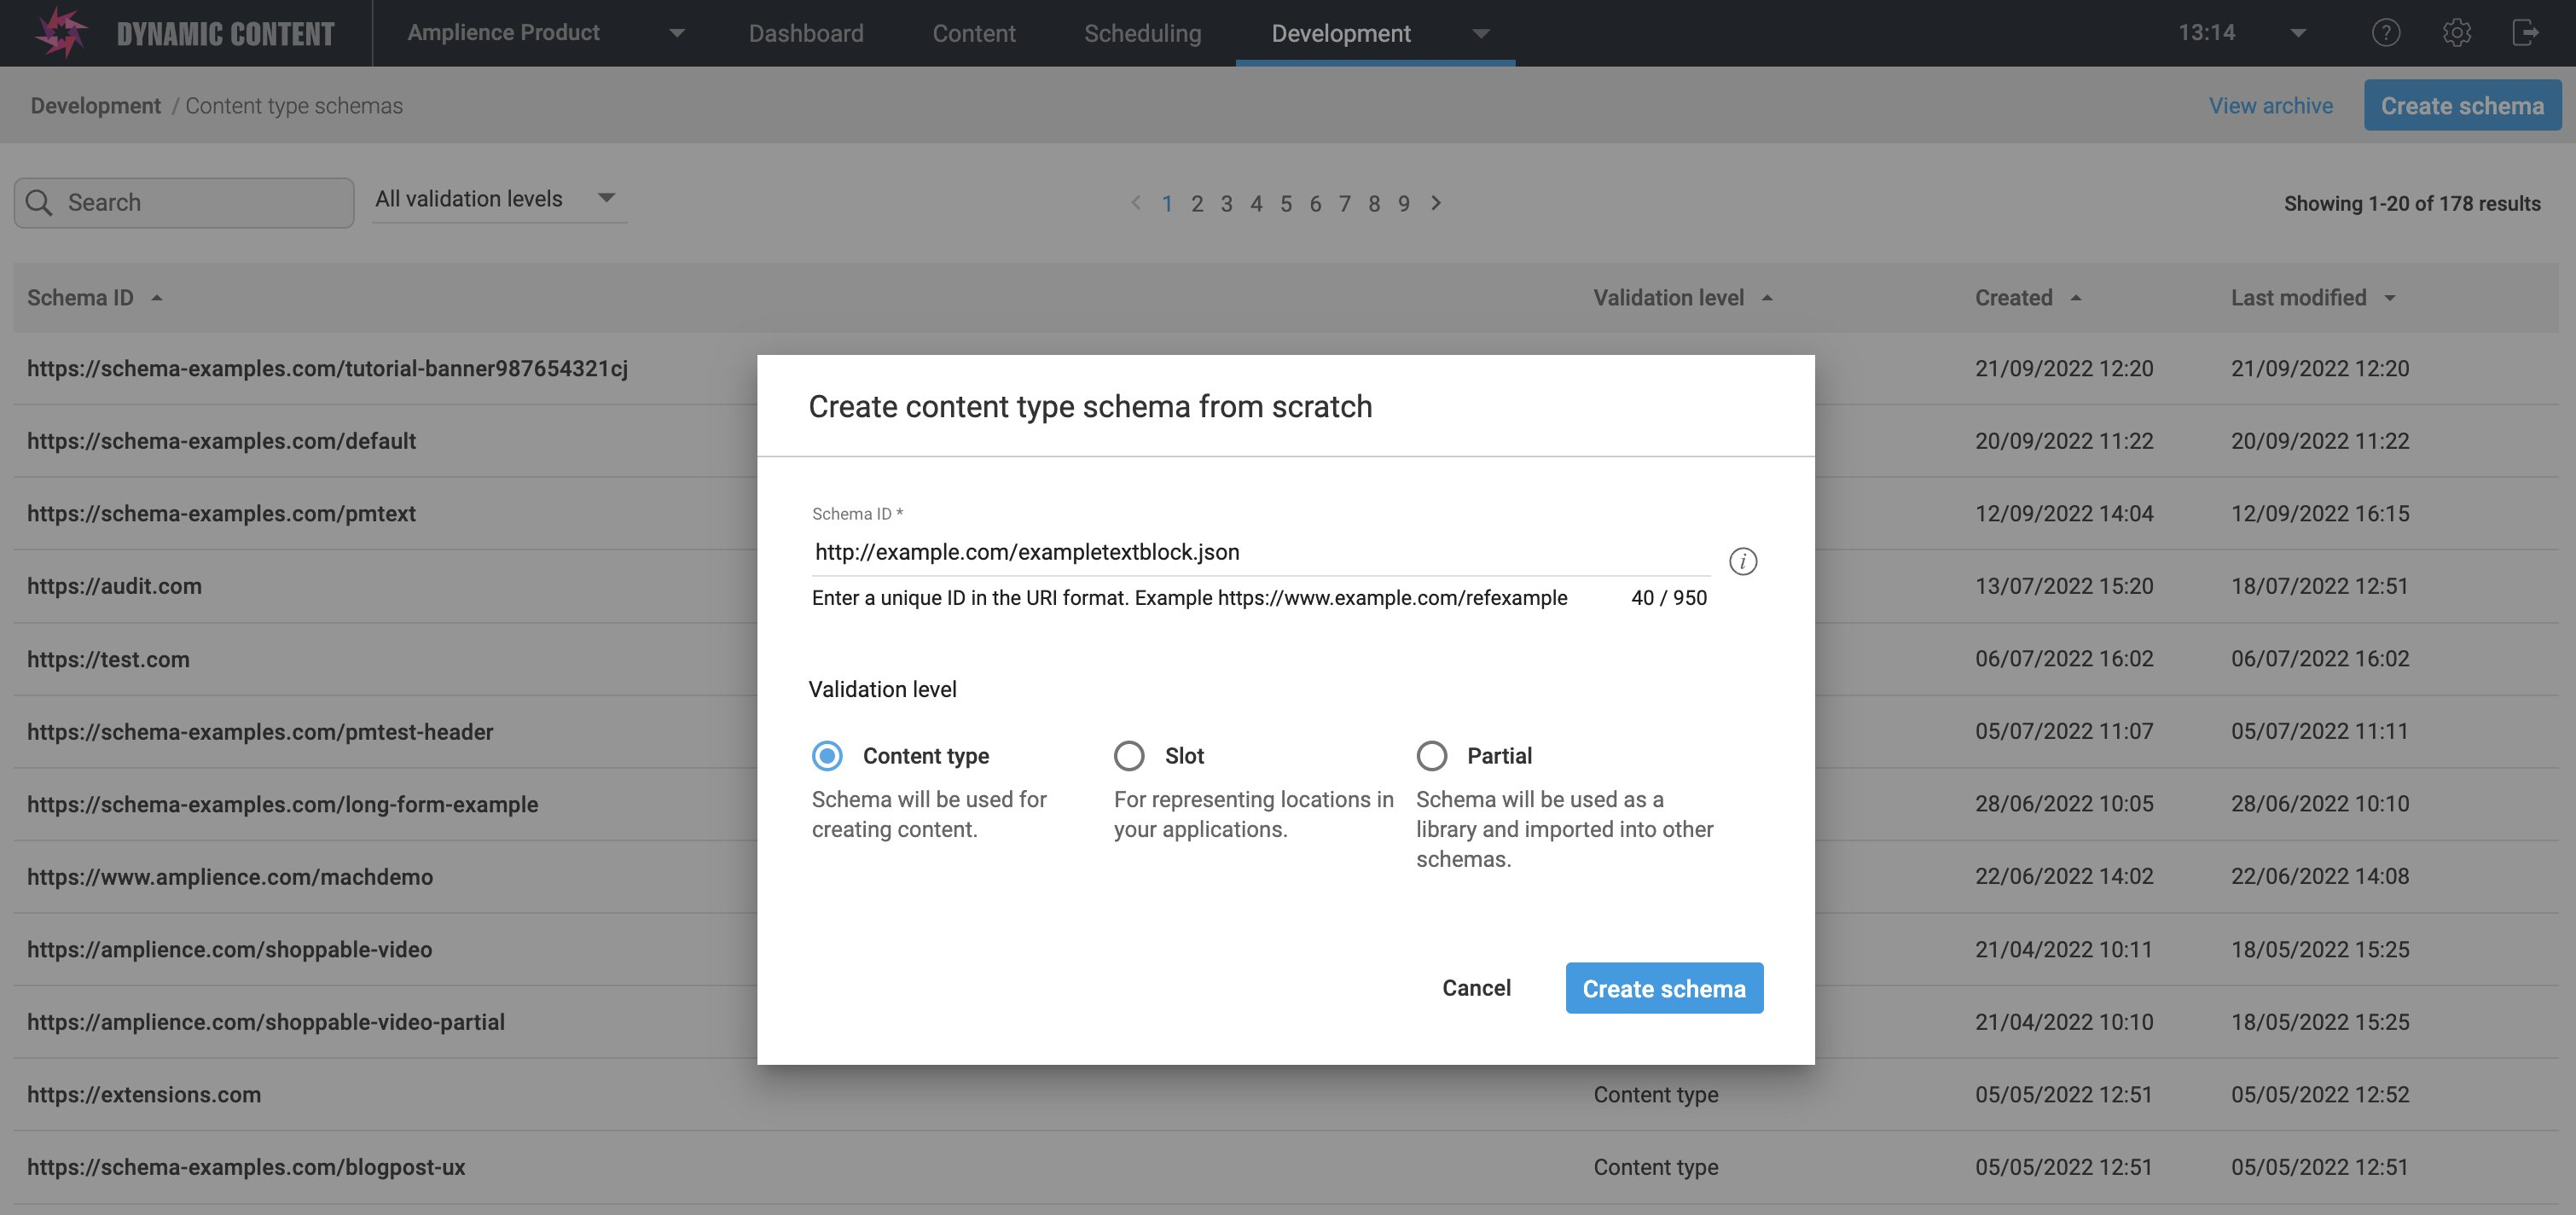
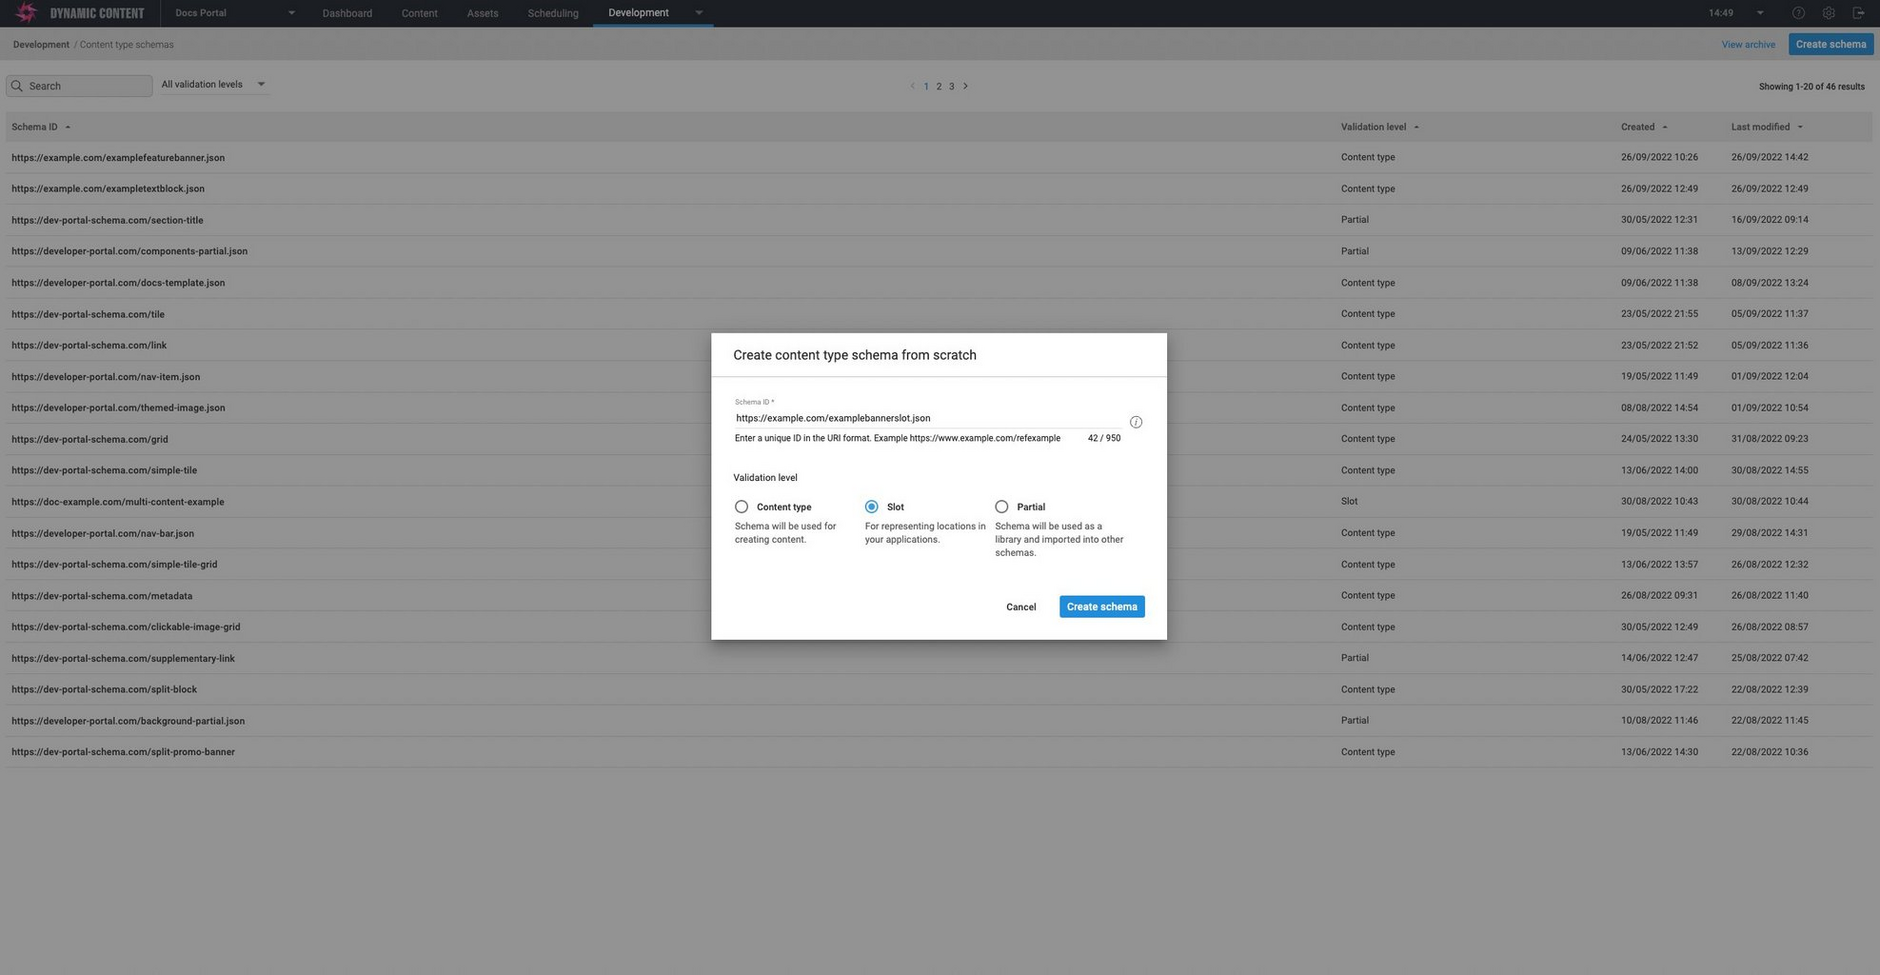
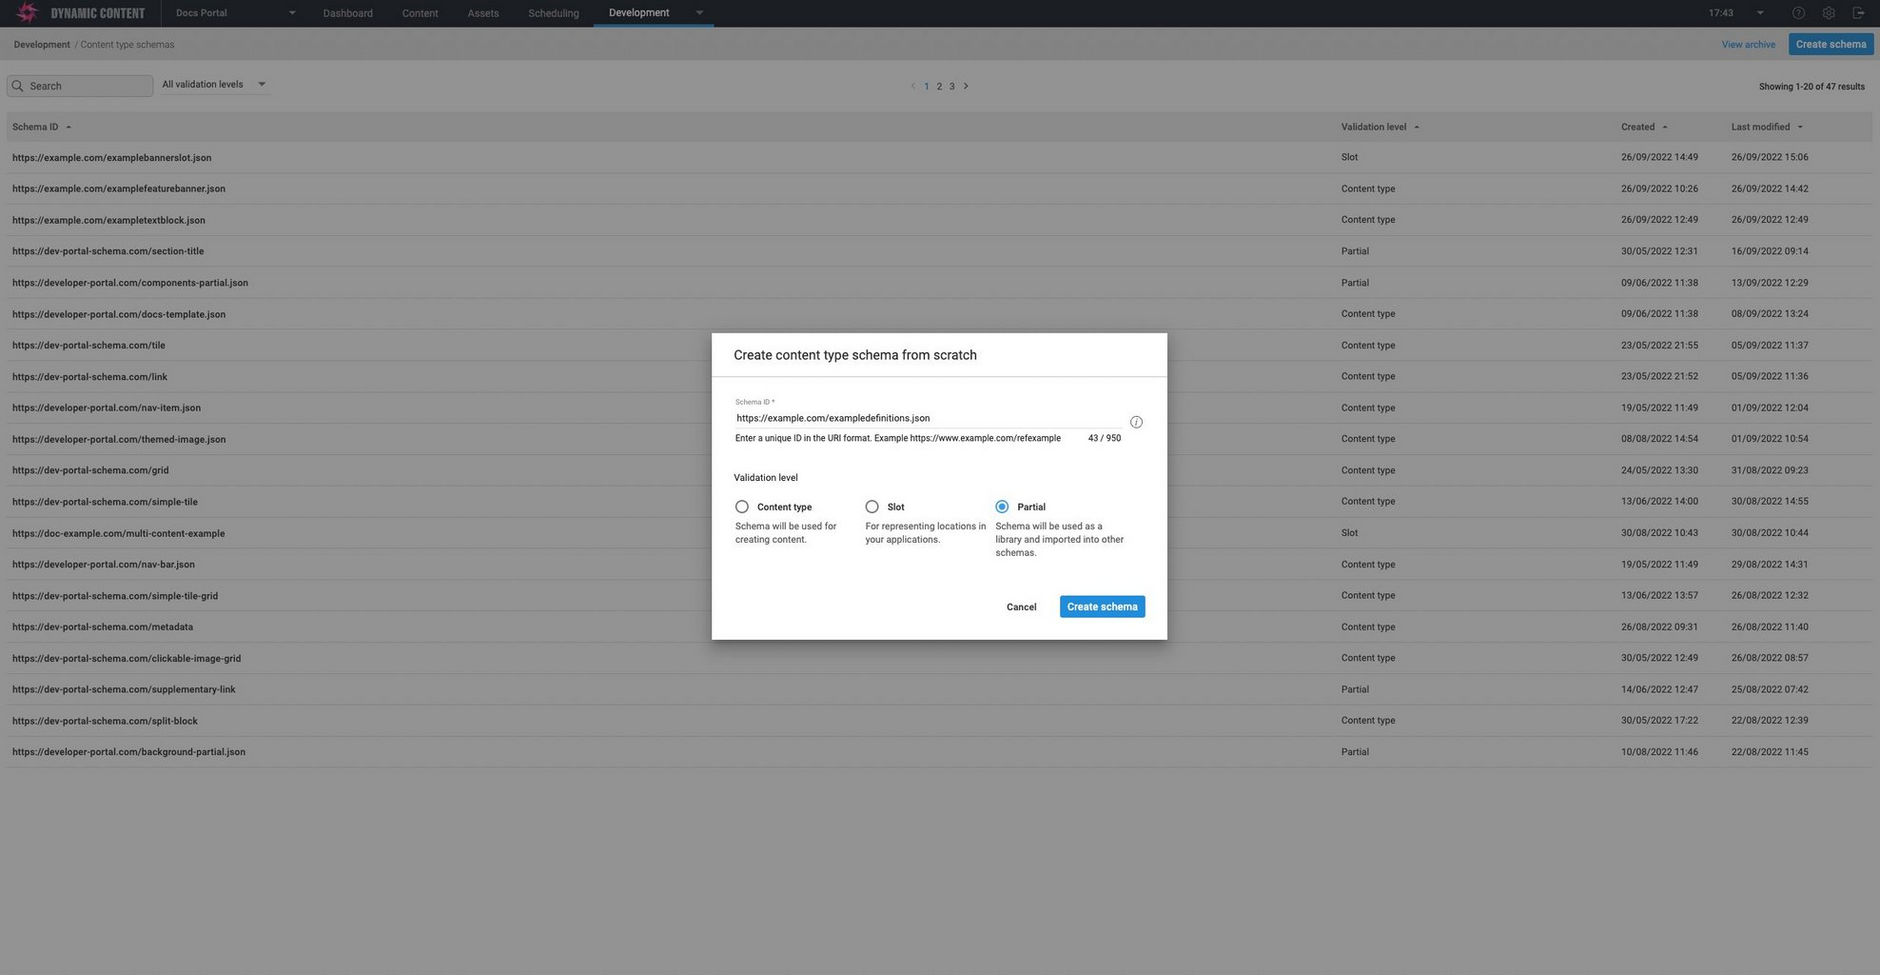
Give the schema a unique ID. To ensure that it is a valid JSON Schema, the schema ID must be a valid URL. The URL will never be resolved, so it can be anything you like. As shown in the image below, we have three options: a content type, a slot or a partial.
The schema editor will validate the schema based on what it's being used for. Slots can only contain certain property types, while partials refer to schemas containing definitions that can be shared and reused between multiple schemas and will just contain a "definitions" section.
ExamplesLink copied!
Text block exampleLink copied!
In this case we're creating a content type. We will be creating a simple text block using the url: http://example.com/exampletextblock.json. You may wish to use your own domain as a way of organizing your schema types, but we don't enforce any standard. This is the process to follow whether you are creating a text block, banner or any other content type.
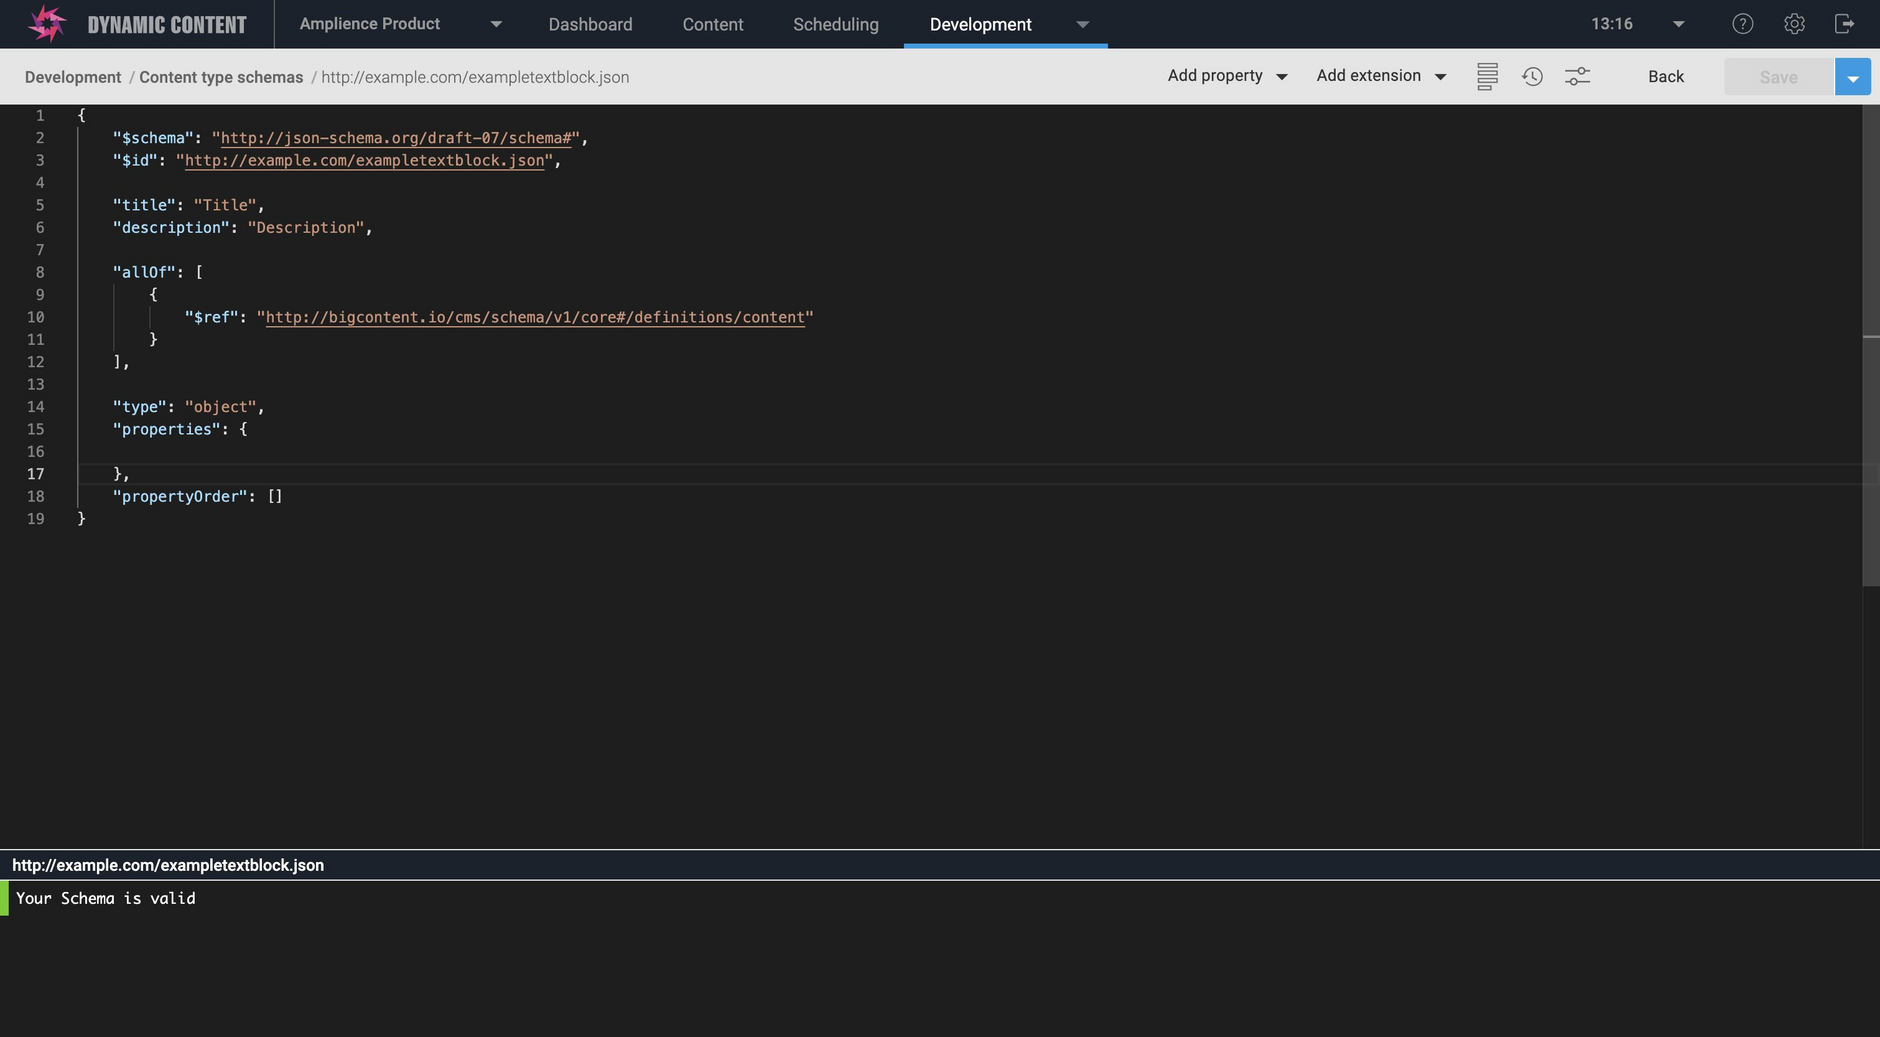
Click the "Create schema" button to open the schema for editing.
Adding propertiesLink copied!
The schema editor opens with an outline of the schema already filled in. All you need to do is add the properties you require.
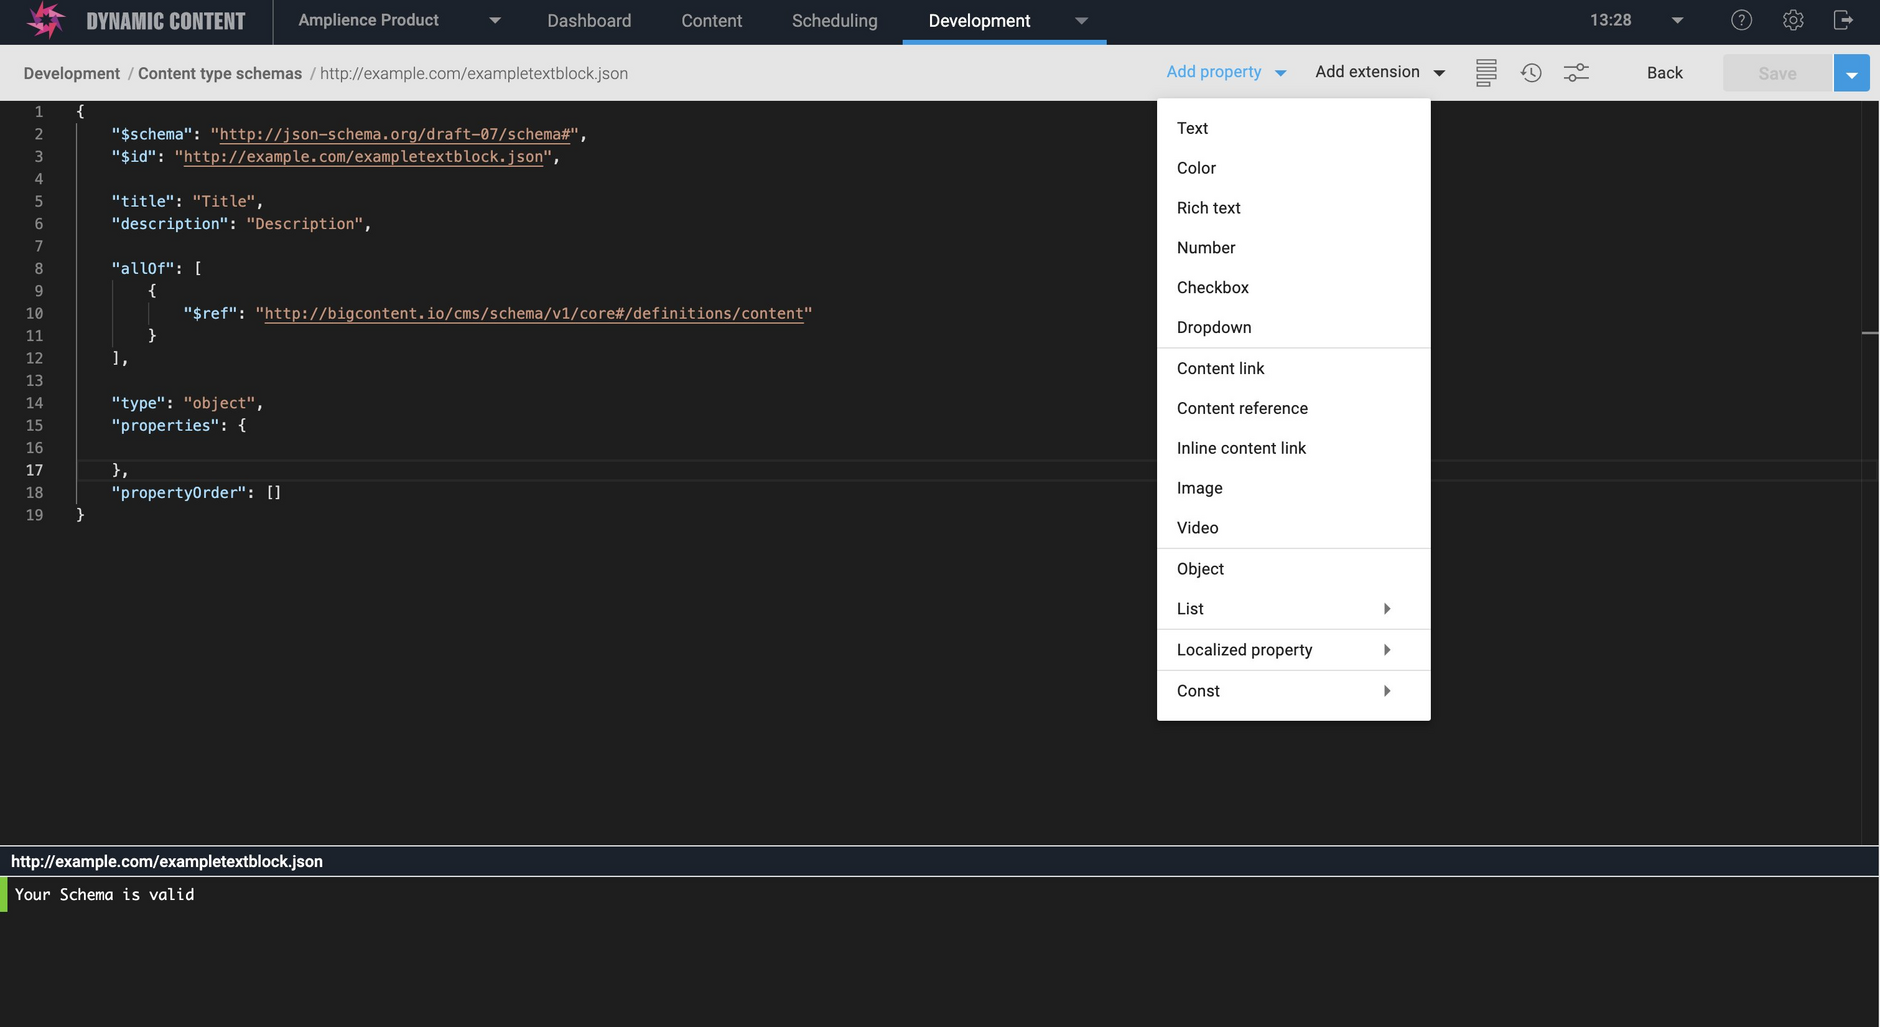
The editor has type ahead features that will attempt to fill in properties as you type or you can choose the properties you want to add from the "Add property" menu. From here you can choose simple properties such as strings, rich text and numbers as well as chooser properties: content links and content references, image and video types. We also support arrays and localized properties. For the simple text block we'll choose a text property.
The text property is added with default values for the property name, title and description, as well as the validation. Change these values to whatever you want, ensuring the property name is unique within the schema. In this example we want to allow the user to enter a string of up to 200 characters, so we'll change the maxLength to 200.
The content form previewLink copied!
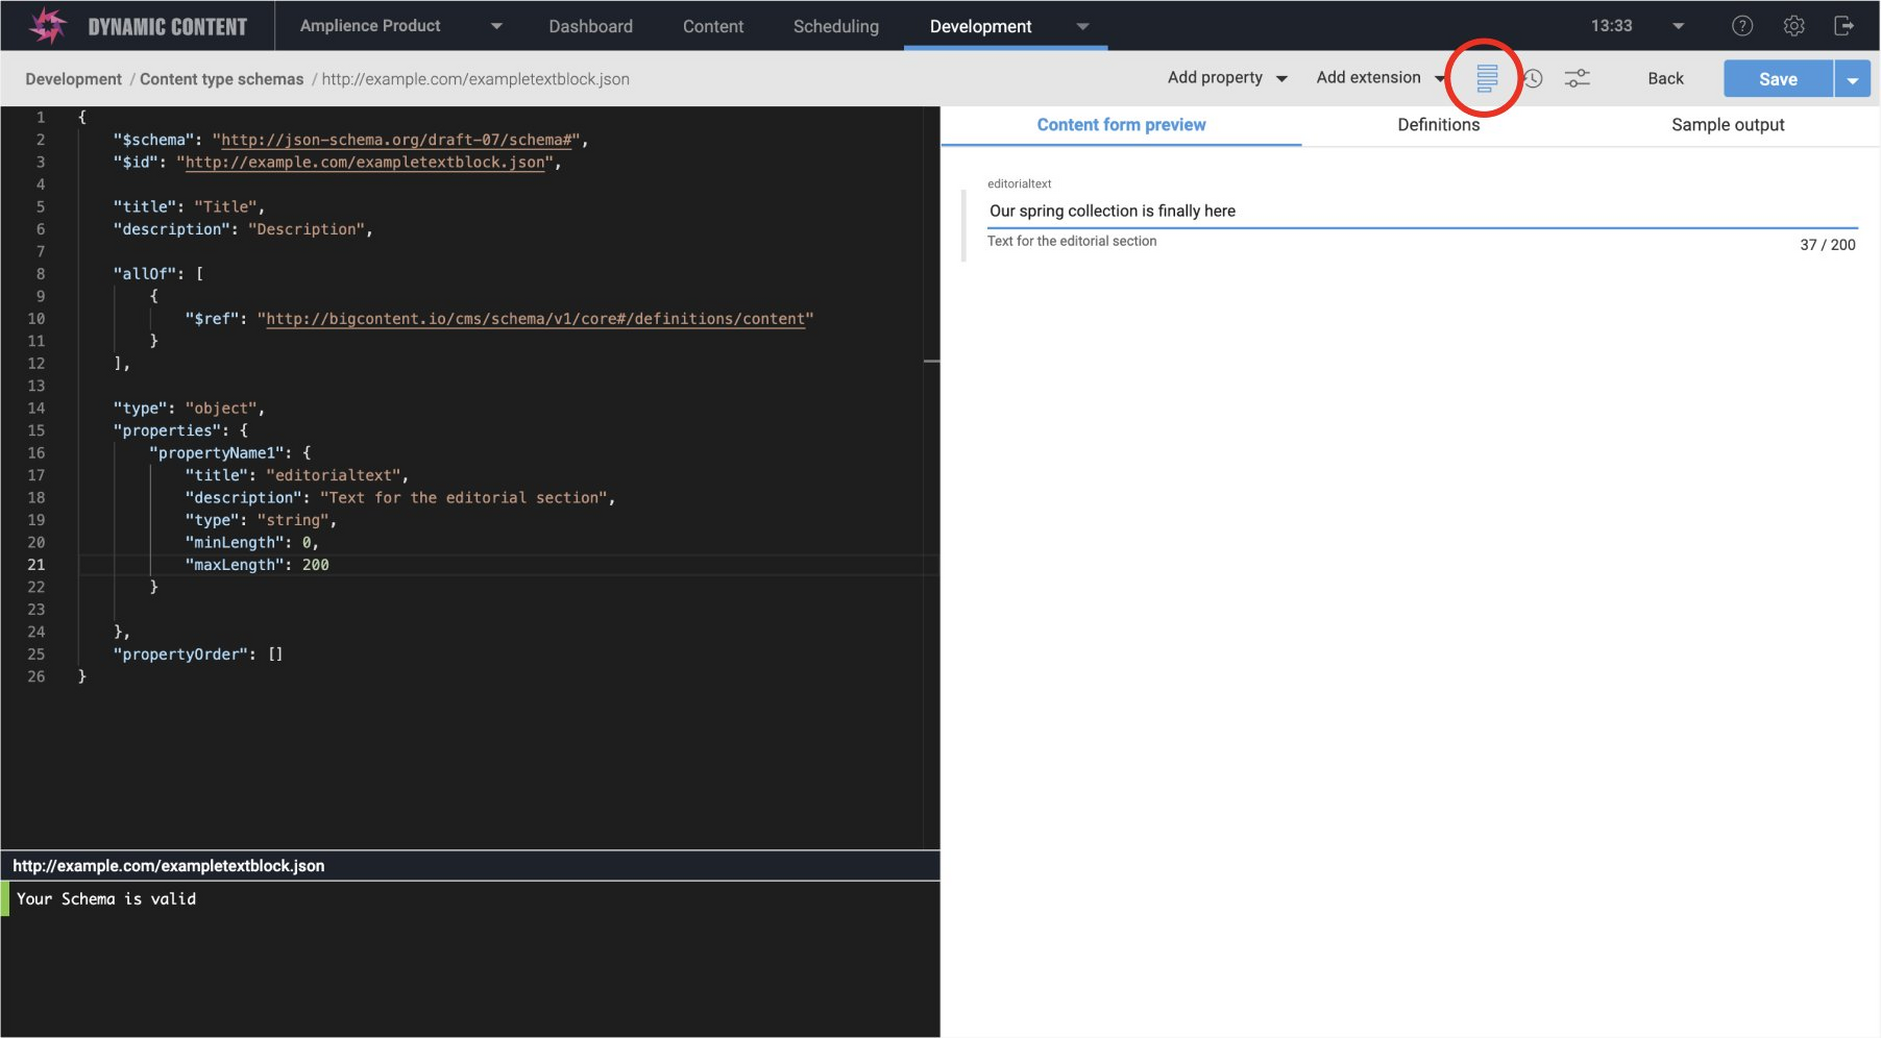
You can show a preview of how a content type registered from this schema will look in the content form by clicking the "preview" icon as highlighted below.
The preview also applies any validation that you have defined for a property, so in this case the text is limited to 200 characters.
Adding array propertiesLink copied!
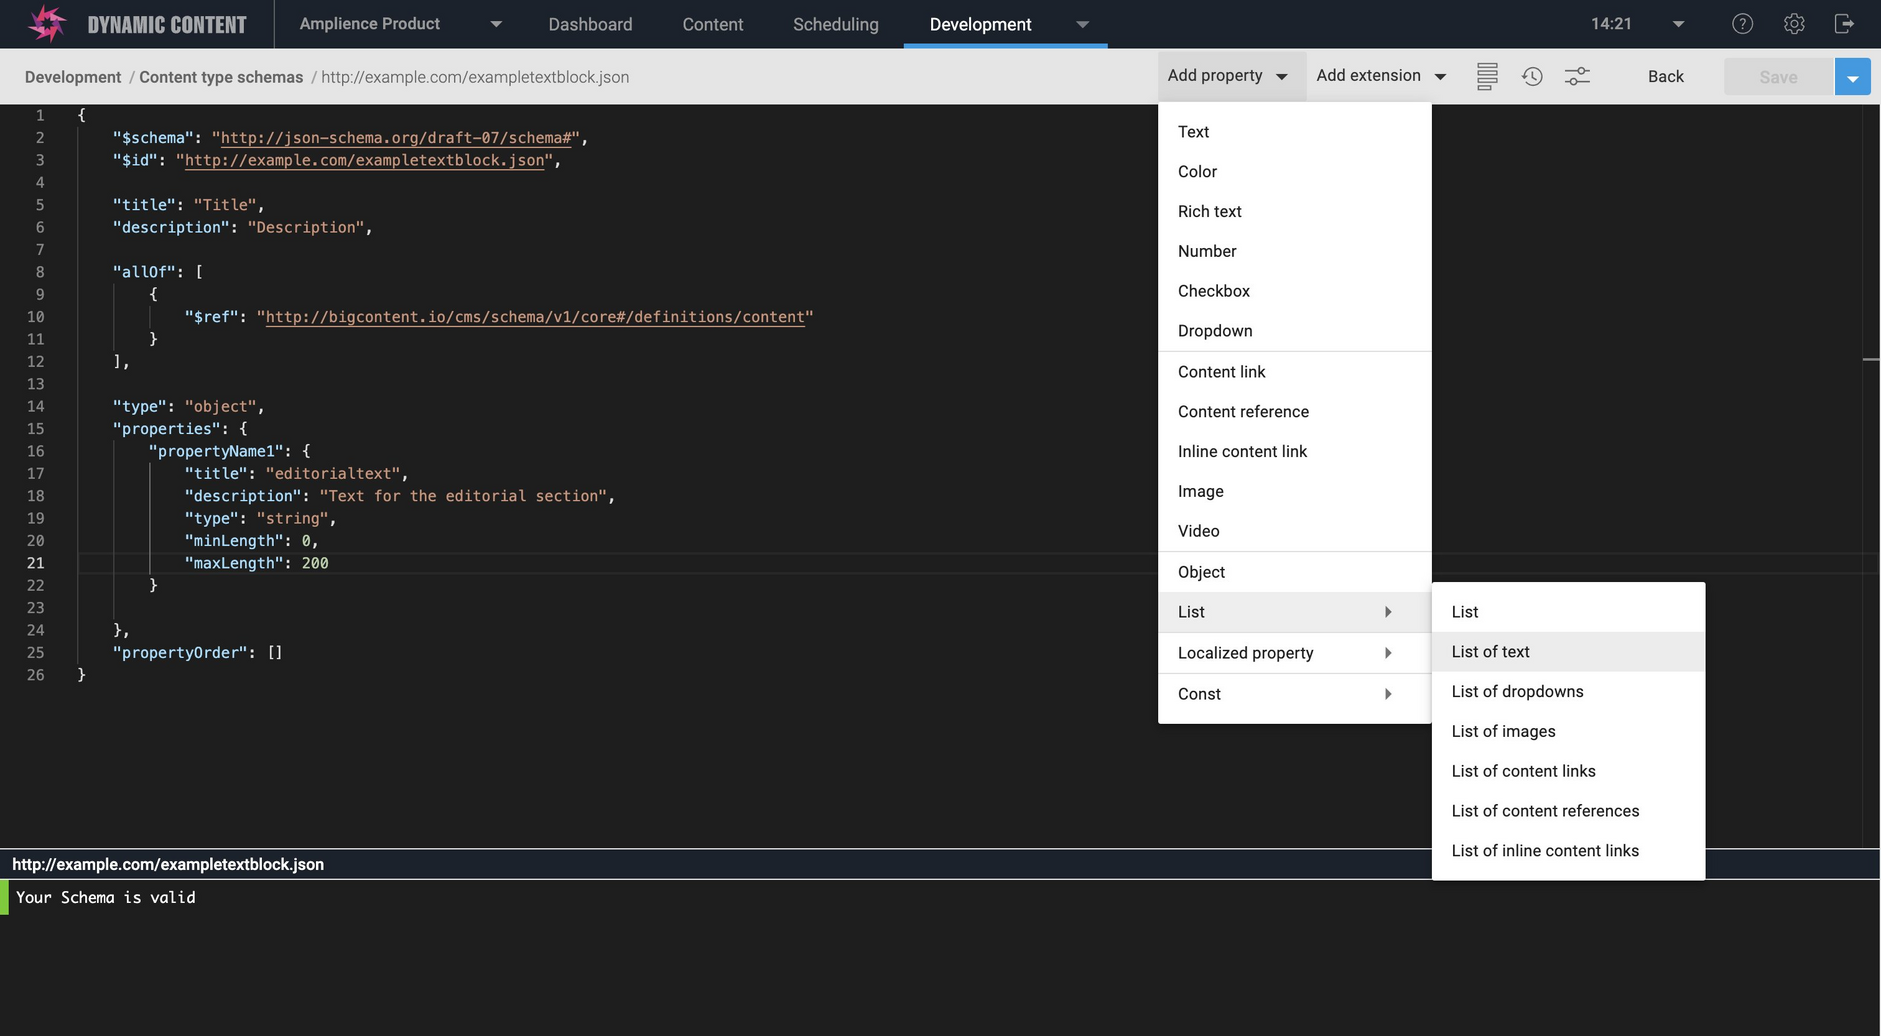
The add property menu also provides some shortcuts for adding lists. In the text block example we want to add an array of paragraphs, so we choose "List of text" from the menu. You can also choose images, content links or enums- which are represented in JSON Schema as enums.
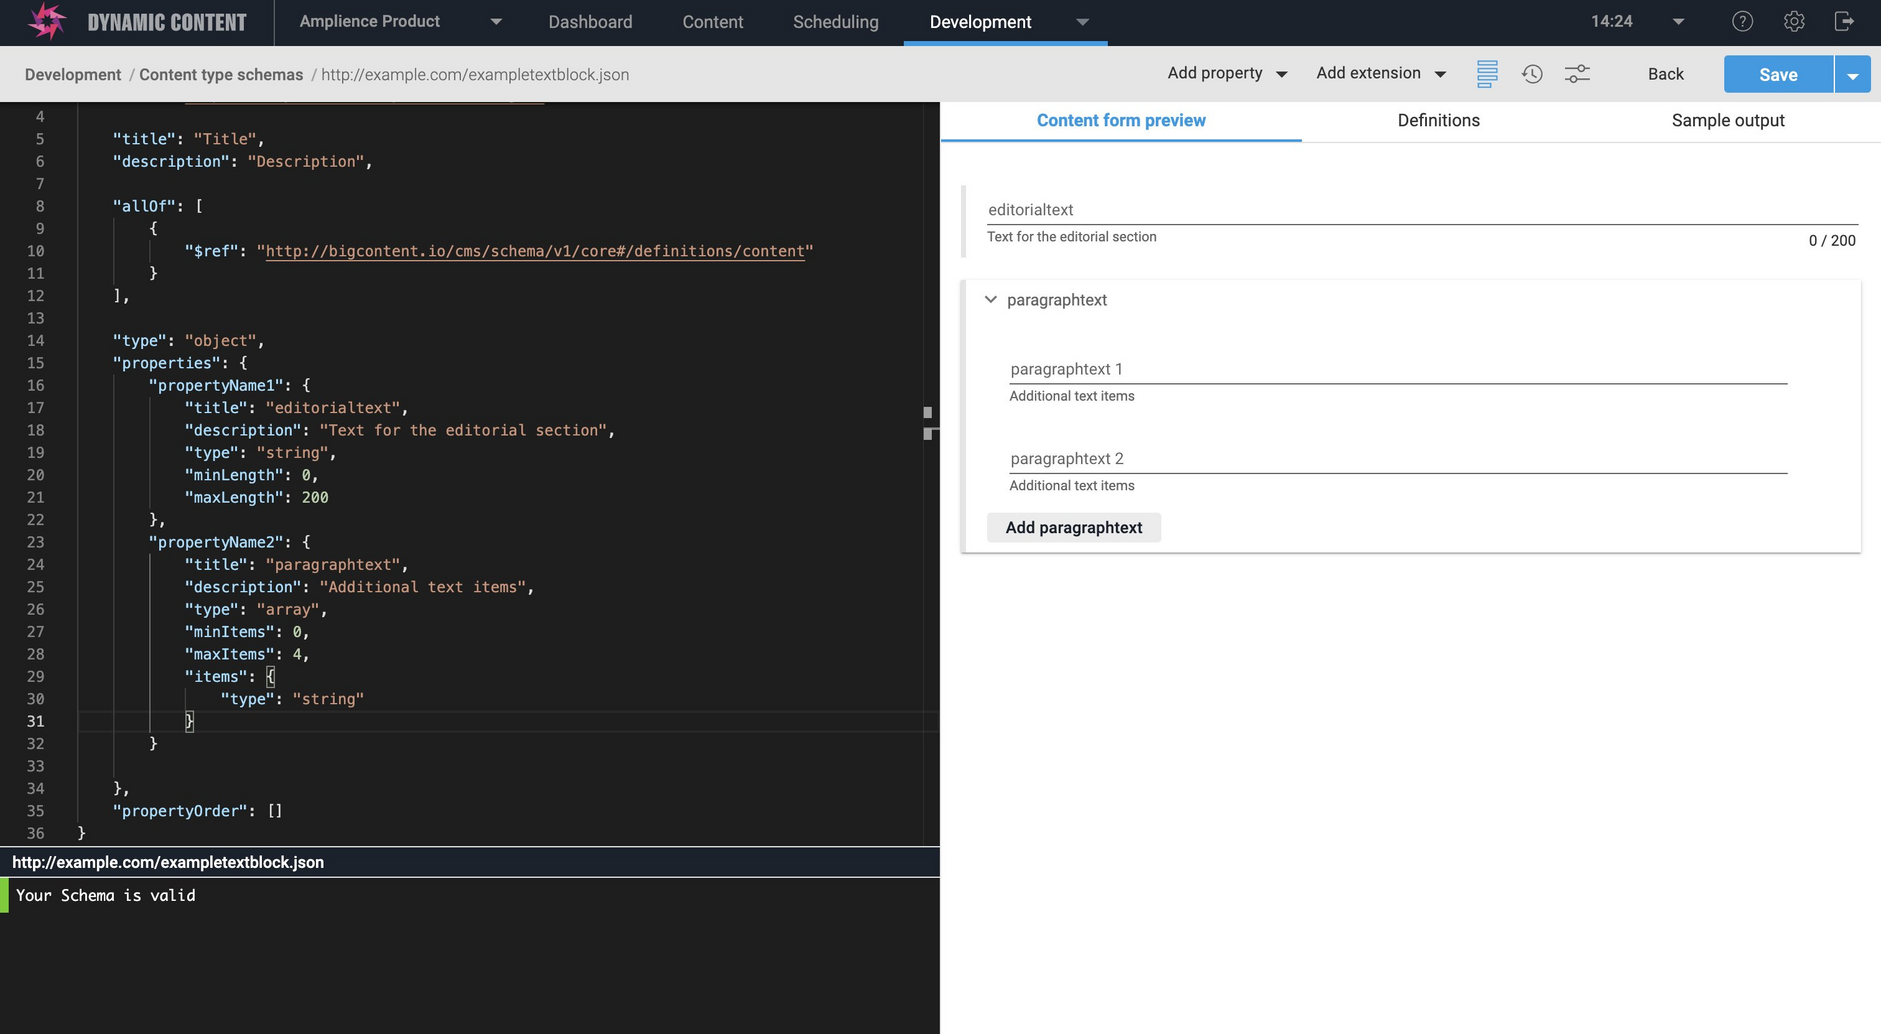
An outline of the array property is added to the schema window. For this example the maximum number of items will be set to 4. Notice that the preview shows the array as it will appear in the content form, allowing up to 4 array items to be added.
When you've added all the properties you want in your content type schema, click the "Save" button to save it. If any validation errors are shown in the schema editor window, you'll need to correct these before the schema can be saved.
Simple banner exampleLink copied!
This example walks you through using the schema editor to create the content type schema for a banner: the tutorial banner used in many of the examples. We'll also show how to register a content type from this schema from which the user can create content.
The banner contains the following properties:
- A headline and strapline. These are text properties with a maximum length of 255 characters
- A background image
- Call to action text
- A call to action URI
The section below shows the complete content type schema shown in this example.
Creating the banner content type schemaLink copied!
To create the banner schema, you would follow the same steps outlined in the text block example above. Open the content type schema window by choosing "Content type schema" from the development menu and clicking the "Create schema" button.
Adding propertiesLink copied!
In the schema editor choose each property to add from the "Add property" menu. In the banner example the headline and strapline properties are strings with a maximum length of 255 characters. To add these properties choose "Text" as the property type and add each one in turn.
Adding an image and text with a URI formatLink copied!
To add the banner's background image property, choose "Image" from the "Add property" menu. An image chooser property will be added to the schema window. Edit the default values, changing the property name to "background".
For the call to action URL, we want to ensure that a valid URL is entered and so this needs to be a string with the format of "uri".
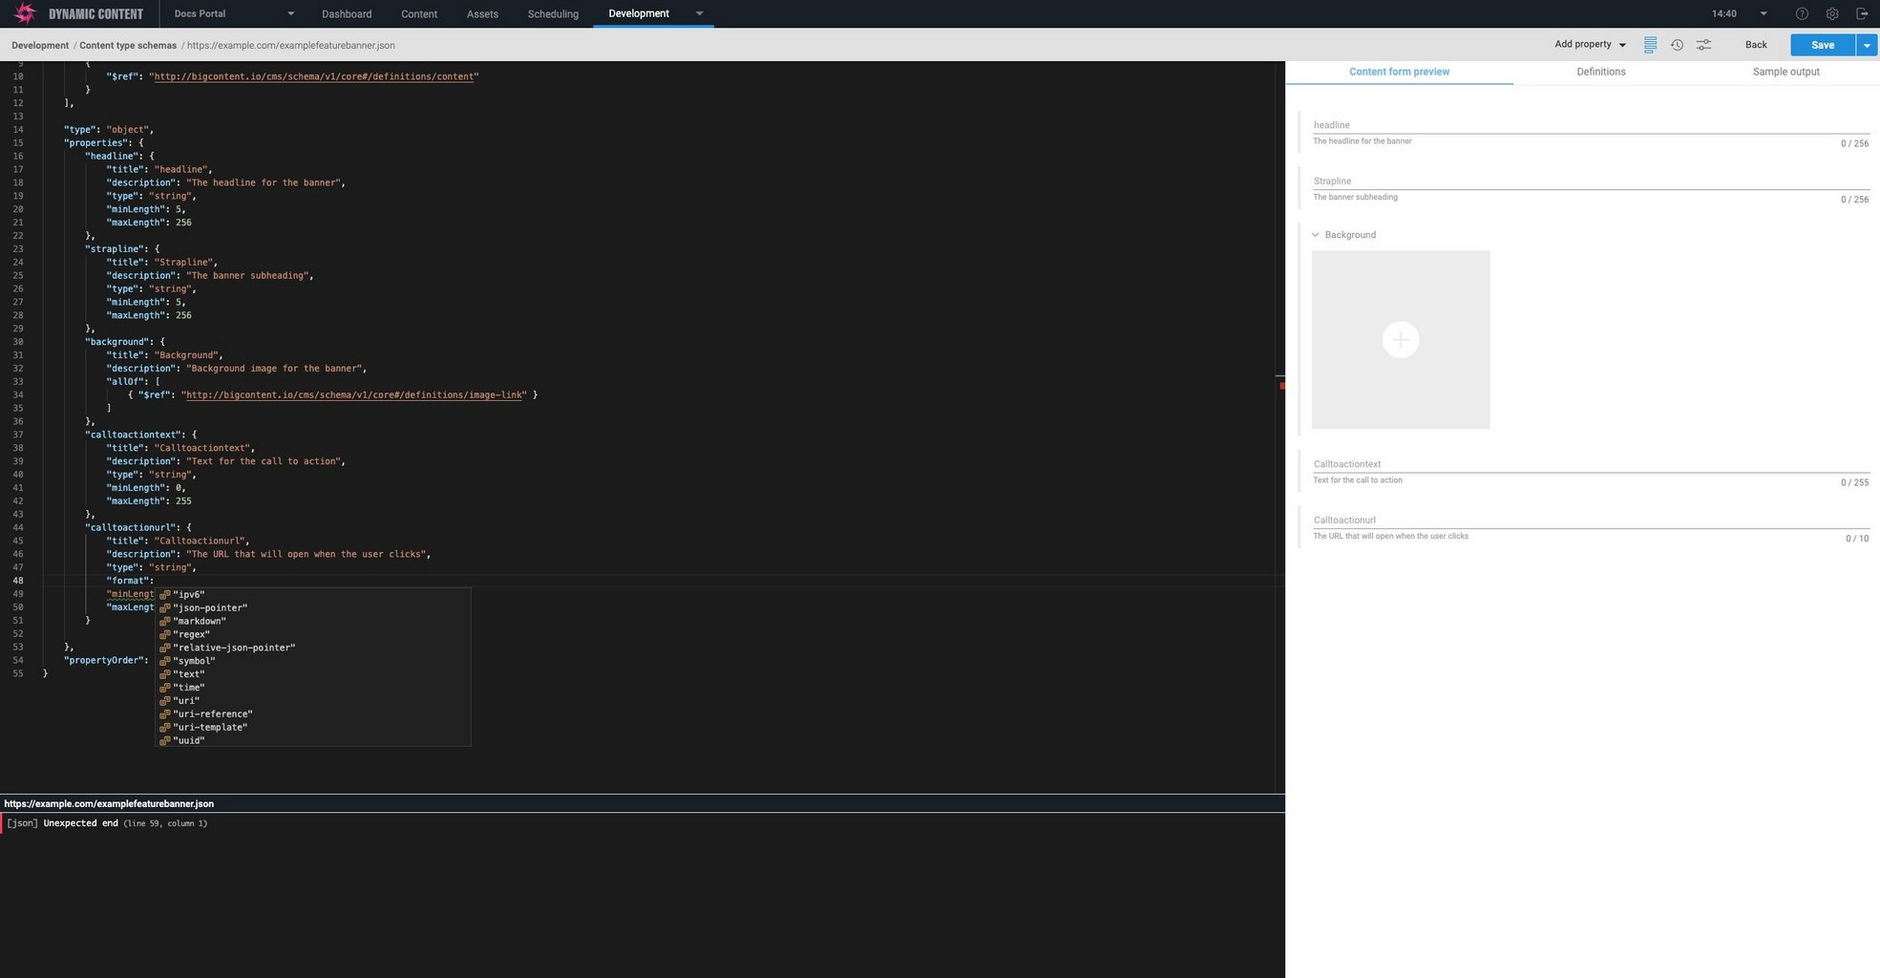
To add the call to action URL, choose "Text" from the "Add property" menu and edit the property name, text and description. To specify that the property should be validated as a URI, add a line after "type:string" and type "format":. A menu will be displayed with the available formatting options for the string. Choose "uri" from the list.
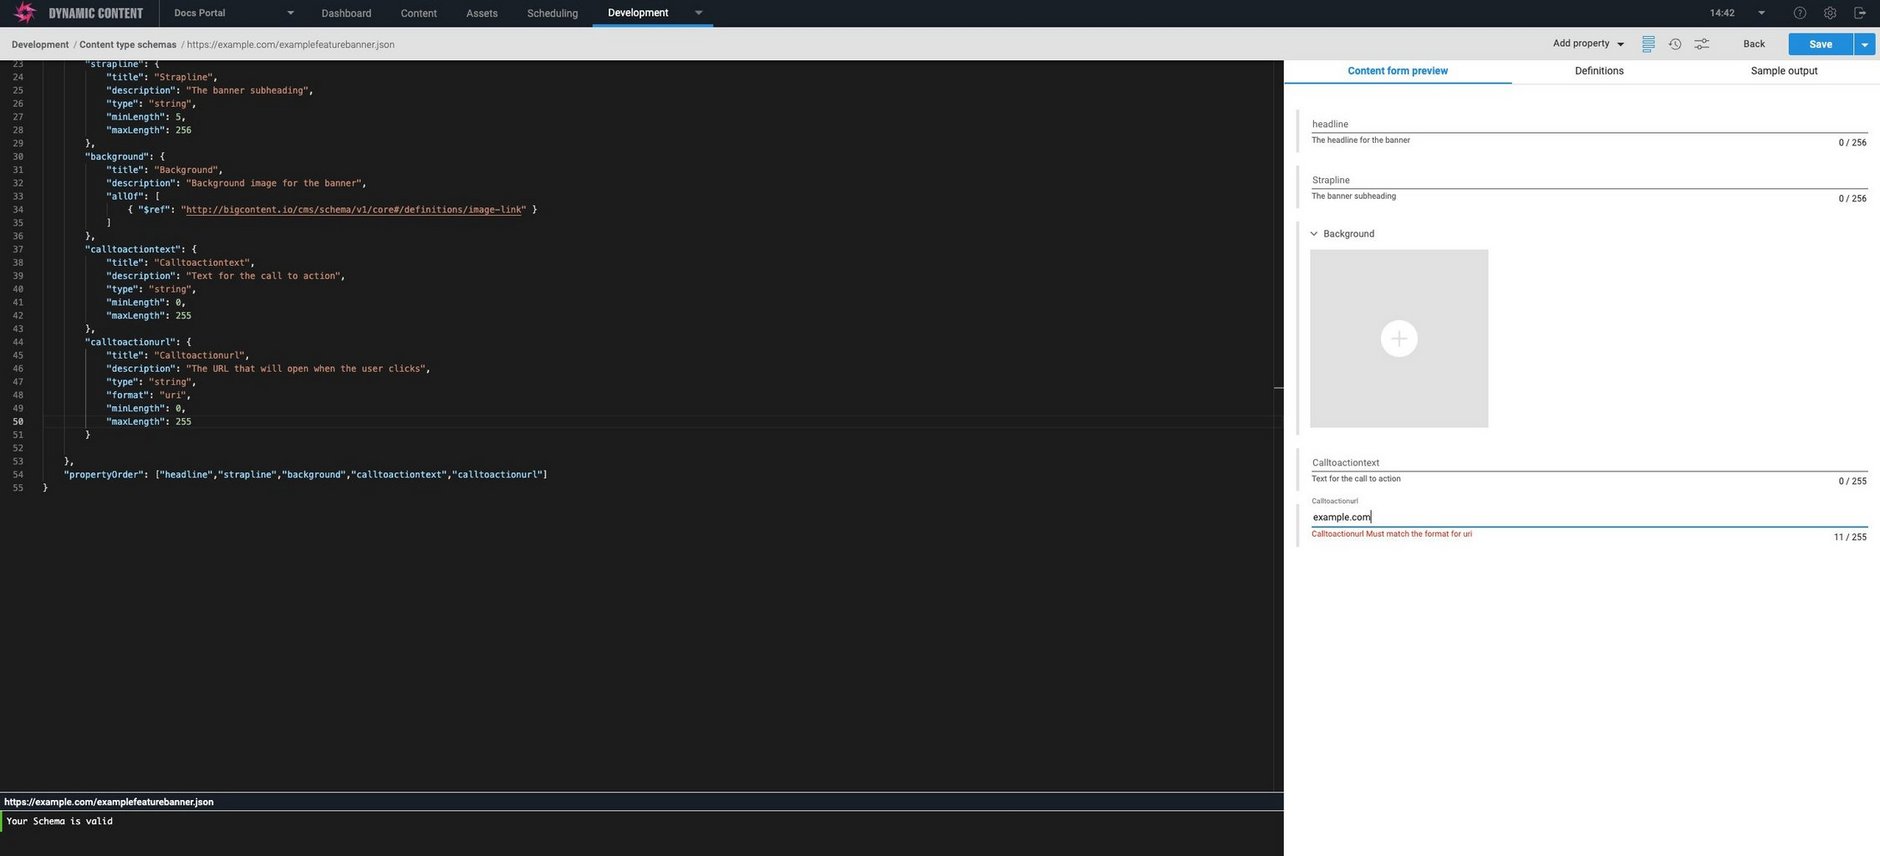
In the content form preview, you can check that validation for the calltoactionurl property. In the image below you can see that an error is shown in the content form preview when an invalid URL is entered.
When all the properties have been added and the schema is valid, click "Save".
Previewing JSON outputLink copied!
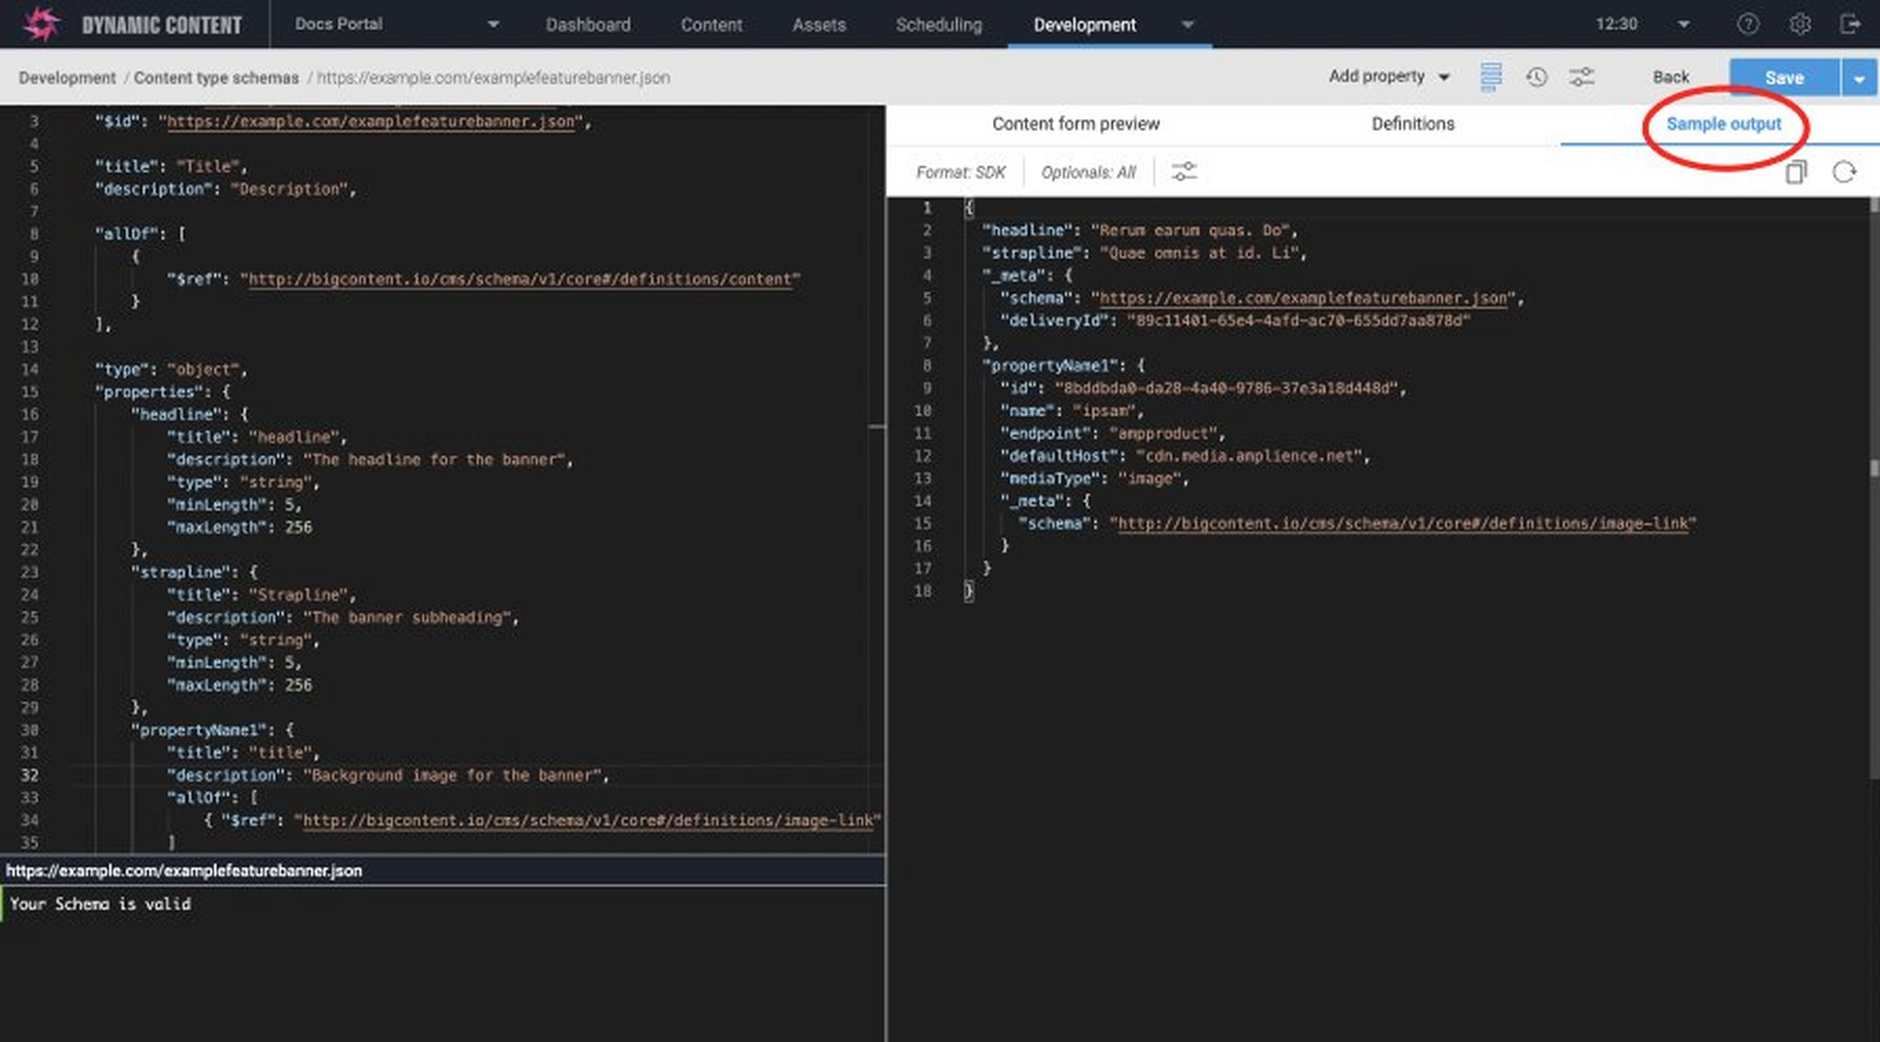
You can view sample JSON data generated from the current schema by choosing the "Sample JSON Output" tab. The generated JSON includes sample values for all property types including strings, images, video and any localized properties. This feature helps save you time when creating your rendering code and templates by giving you example JSON output to work with.
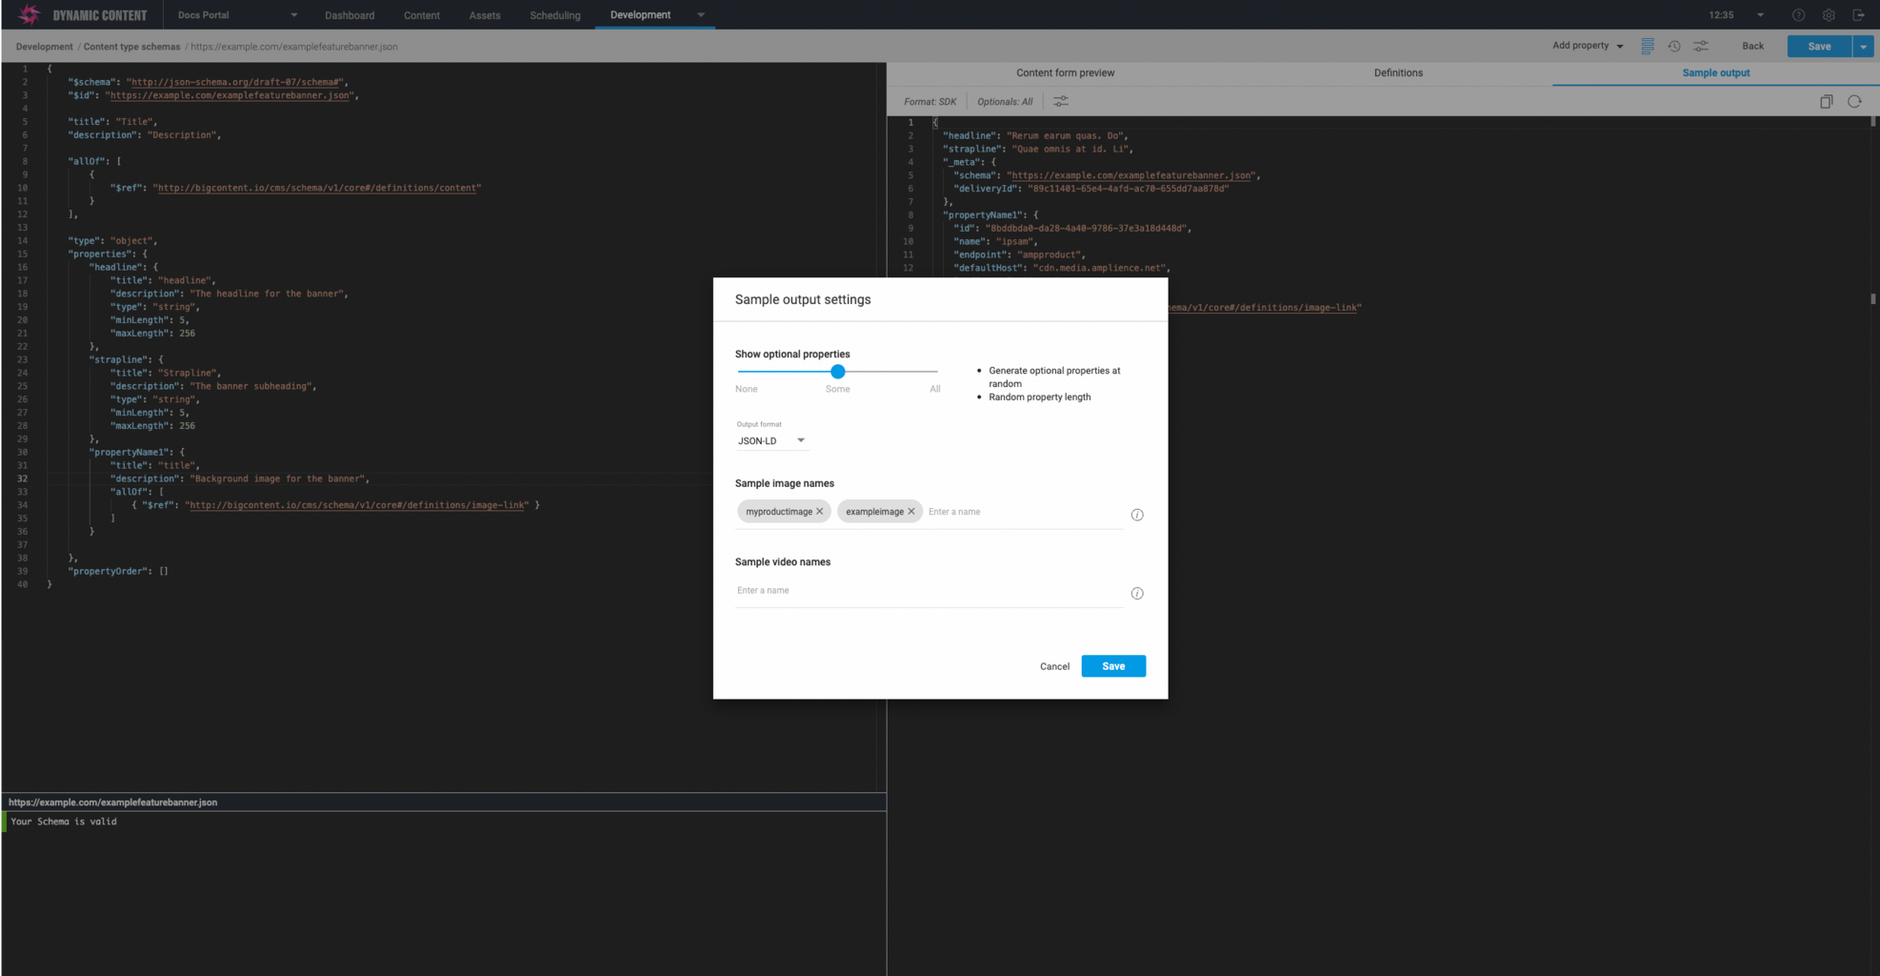
You can configure the format of the generated JSON from the settings dialog. The "Show optional properties" setting allows you to control how optional properties, those not defined as required in your schema, are included in the JSON output. If you choose "some", then the optional properties will be chosen randomly, while if you choose "none", only the required properties will be included.
Sample names can also be included to be used for images and video, so you can include example asset names from your Content Hub account.
You can also choose the output format: either "SDK" format, which represents content as a content tree, or JSON linked data (JSON-LD). In most cases you will work with content in SDK format. See the Content Delivery API and Content Delivery SDK pages for more details.
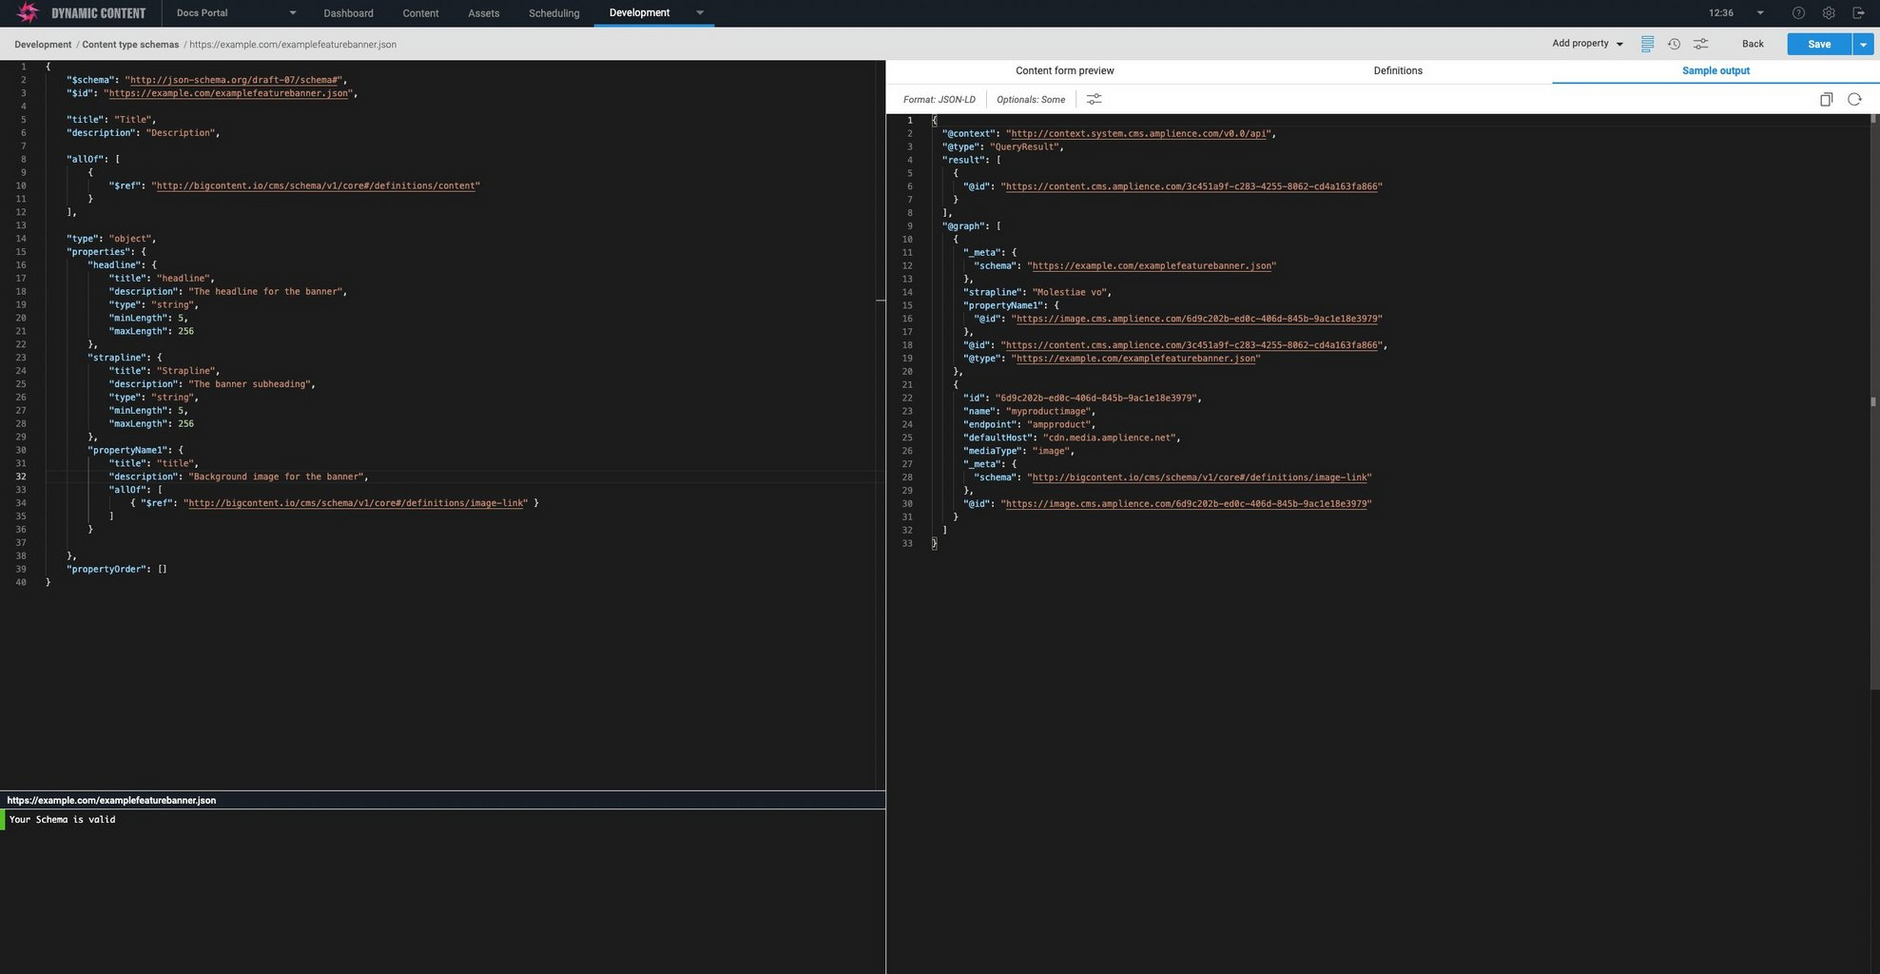
In the image below we have chosen to display some of the optional properties. The properties displayed will be chosen at random and have random property lengths. If you choose to include all optional properties then the properties are generated to use the maximum length of each property.
Registering a content typeLink copied!
In order for the content type schema to be used, you first have to use it to register a content type. A content type consists of the schema URL, together with a label and optionally an icon, card and one or more visualizations. Content types are what are what the users will use to create content in the production view of the Dynamic Content app.
There are two ways of choosing to register a content type: from the schema editor, or by choosing "Register content type" in the content types window. On this page we'll show you how to register a content type from the schema editor. The registering content types page shows you how to register a content type from the content types window in detail.
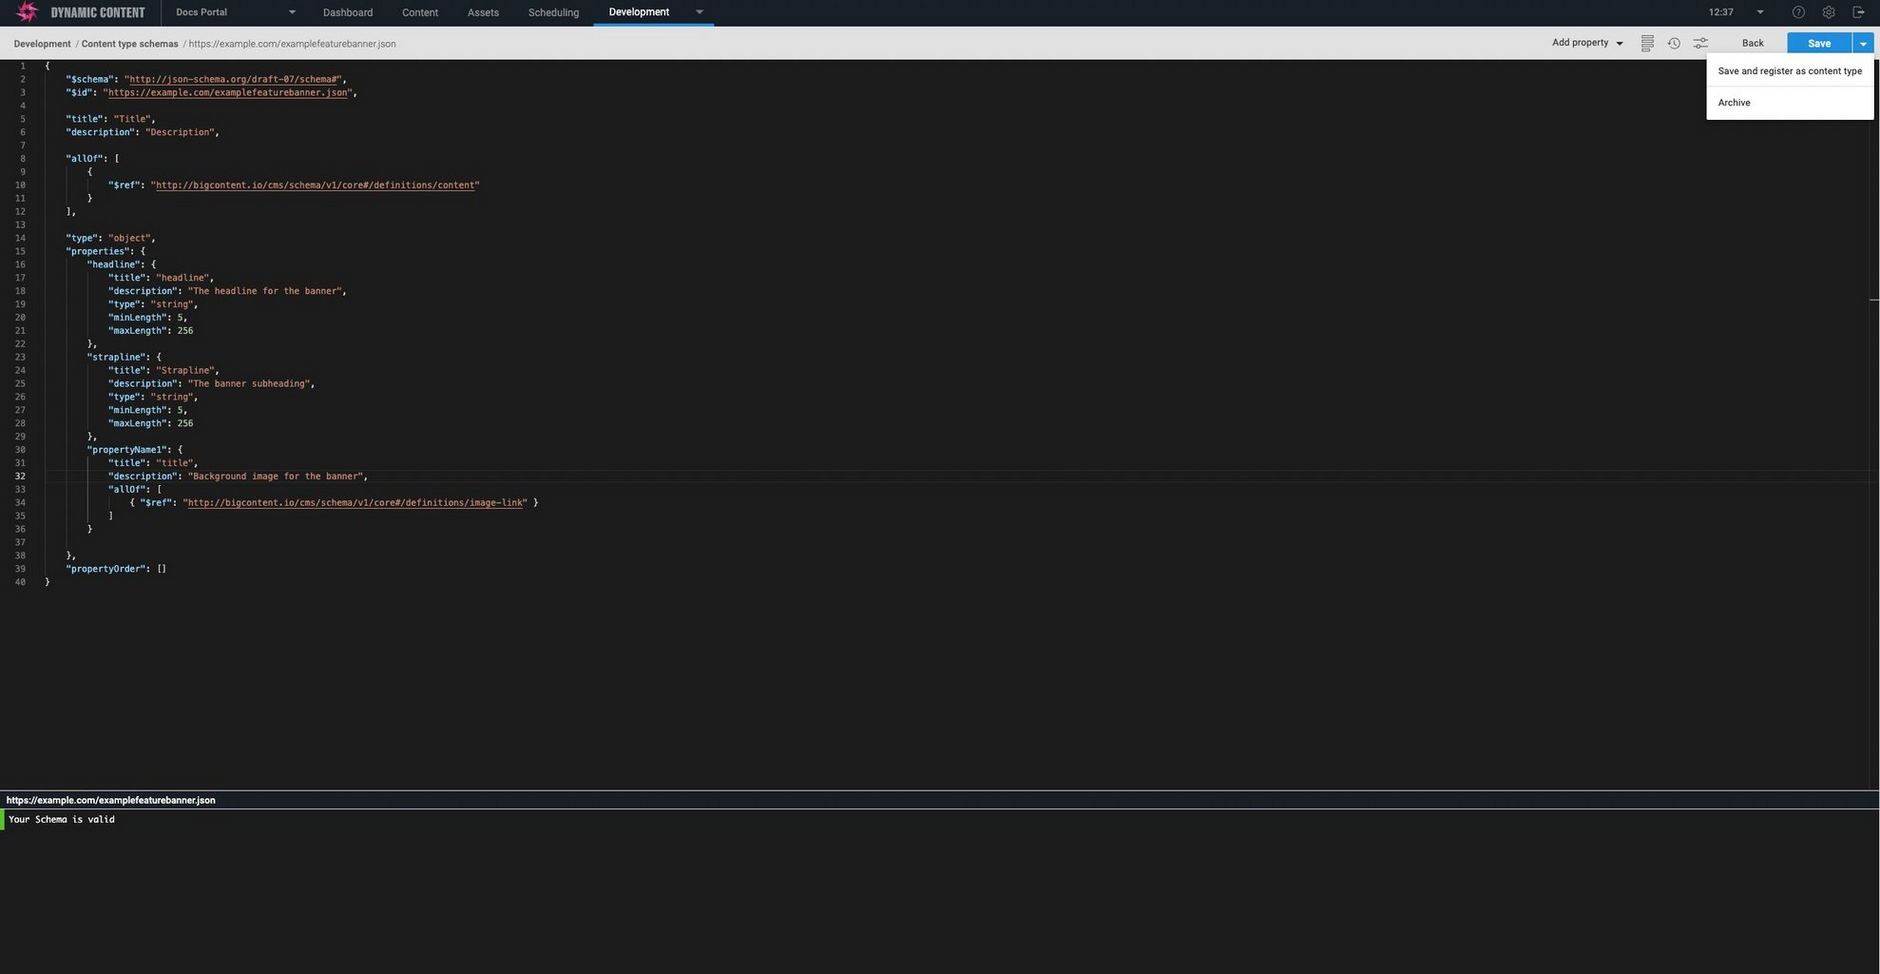
When you've finished creating a content type schema, you can choose to register a schema as a content type by choosing "Save and register as content type" from the schema editor Save menu. If you've already saved your schema, then the menu item will be "Register as a content type".
The content type registration window will then open, with your schema already selected.
See registering content types for more details about associating content types with repositories and adding icons, cards and visualizations. Once a content type is registered, you can update its label, icon, card and visualization, but the URL cannot be changed.
When you've filled in all the fields you require, click the "Save" button. The content type is now registered with the hub and available to use to create content in the repositories you associated it with.
In the production view, choose "Create content". The simple banner is now available for users to use to create content.
For more details about consuming content created a slightly modified version of this content type, see the Consume step of our Get started guide.
Viewing and editing schemasLink copied!
In this section we explain how to edit an existing schema and ensure that the updated schema is synced with a content type registered from that schema. We also cover schema versioning and archiving schemas.
Editing a schemaLink copied!
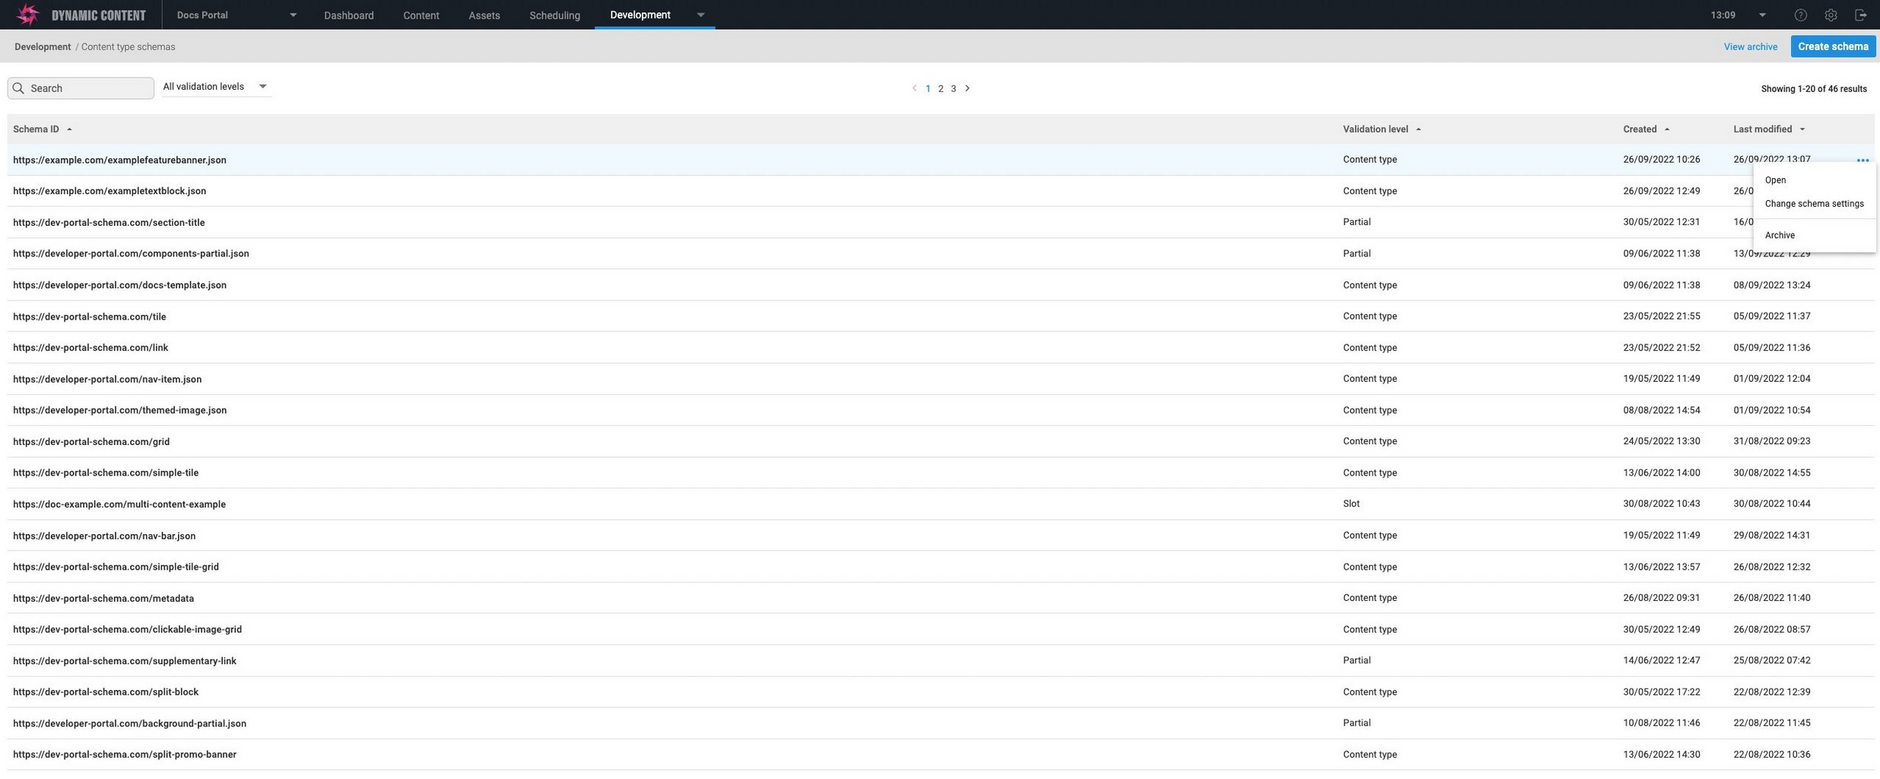
You can edit a schema by double-clicking it in the schema list or choosing "Open" from its contextual menu.
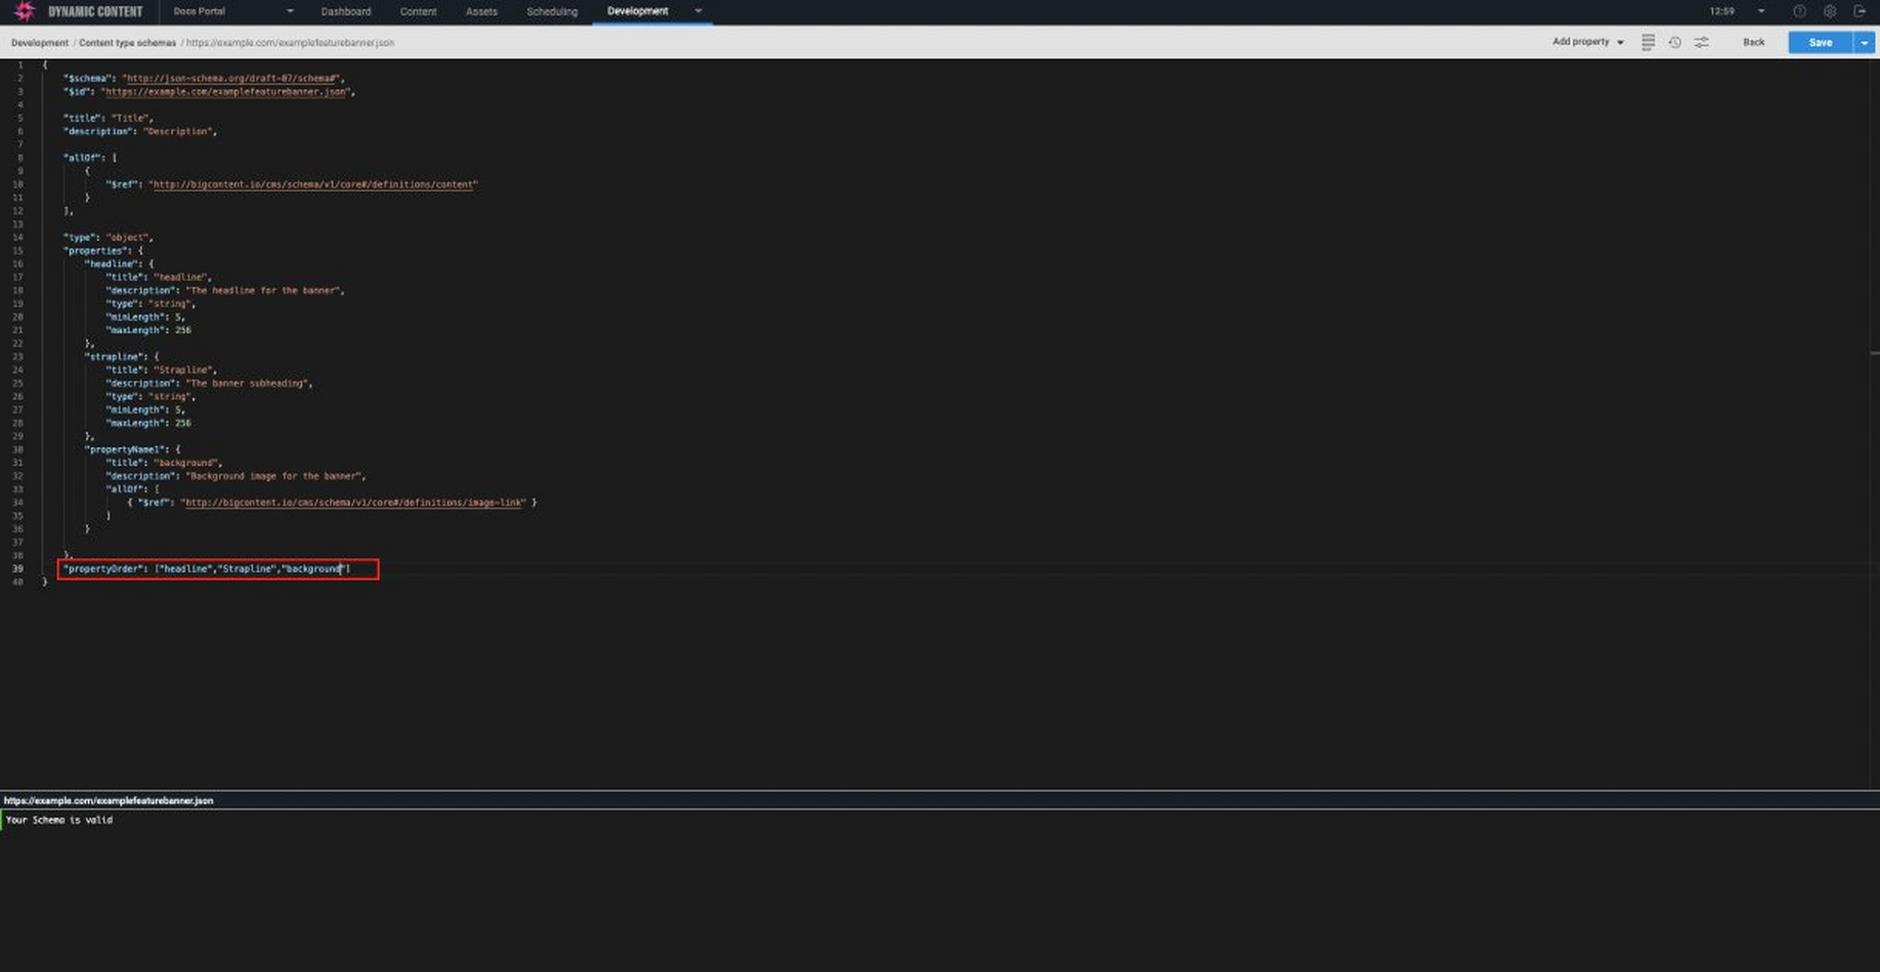
In this example, we want to edit the "propertyOrder" property to ensure that the properties are shown in the correct order in the content editing form. When you make a change to a schema, make the change and click "Save". If the schema is still valid, your change will be applied.
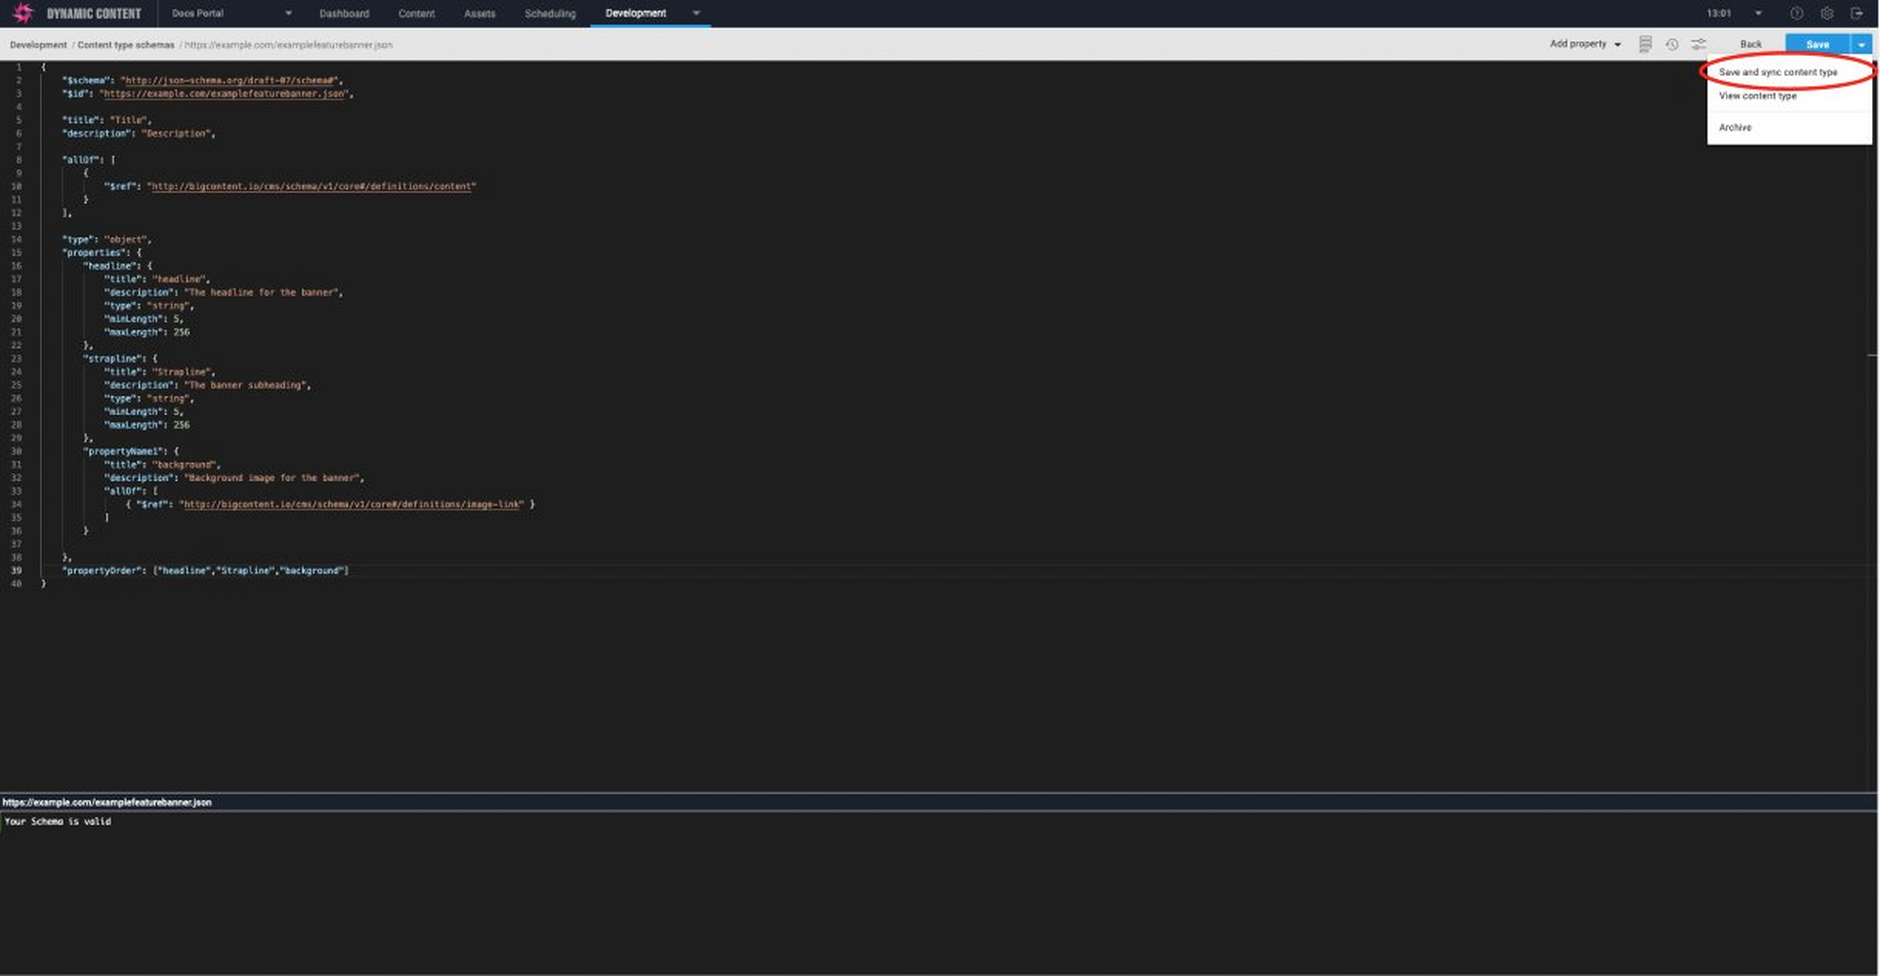
If you make a change to the schema and you've already used it to register a content type then you need to "sync" the content type with the schema to ensure that the content type uses the latest version.
To update, choose "Sync with schema" from its menu in the content types window.
When the user views or edits content of this type in the production view, the properties are now shown in the correct order.
Note that changing the order of properties in a content type schema will not effect any content already created, but care should be taken when updating a schema. See Syncing a content type with its schema for more information.
Schema versioningLink copied!
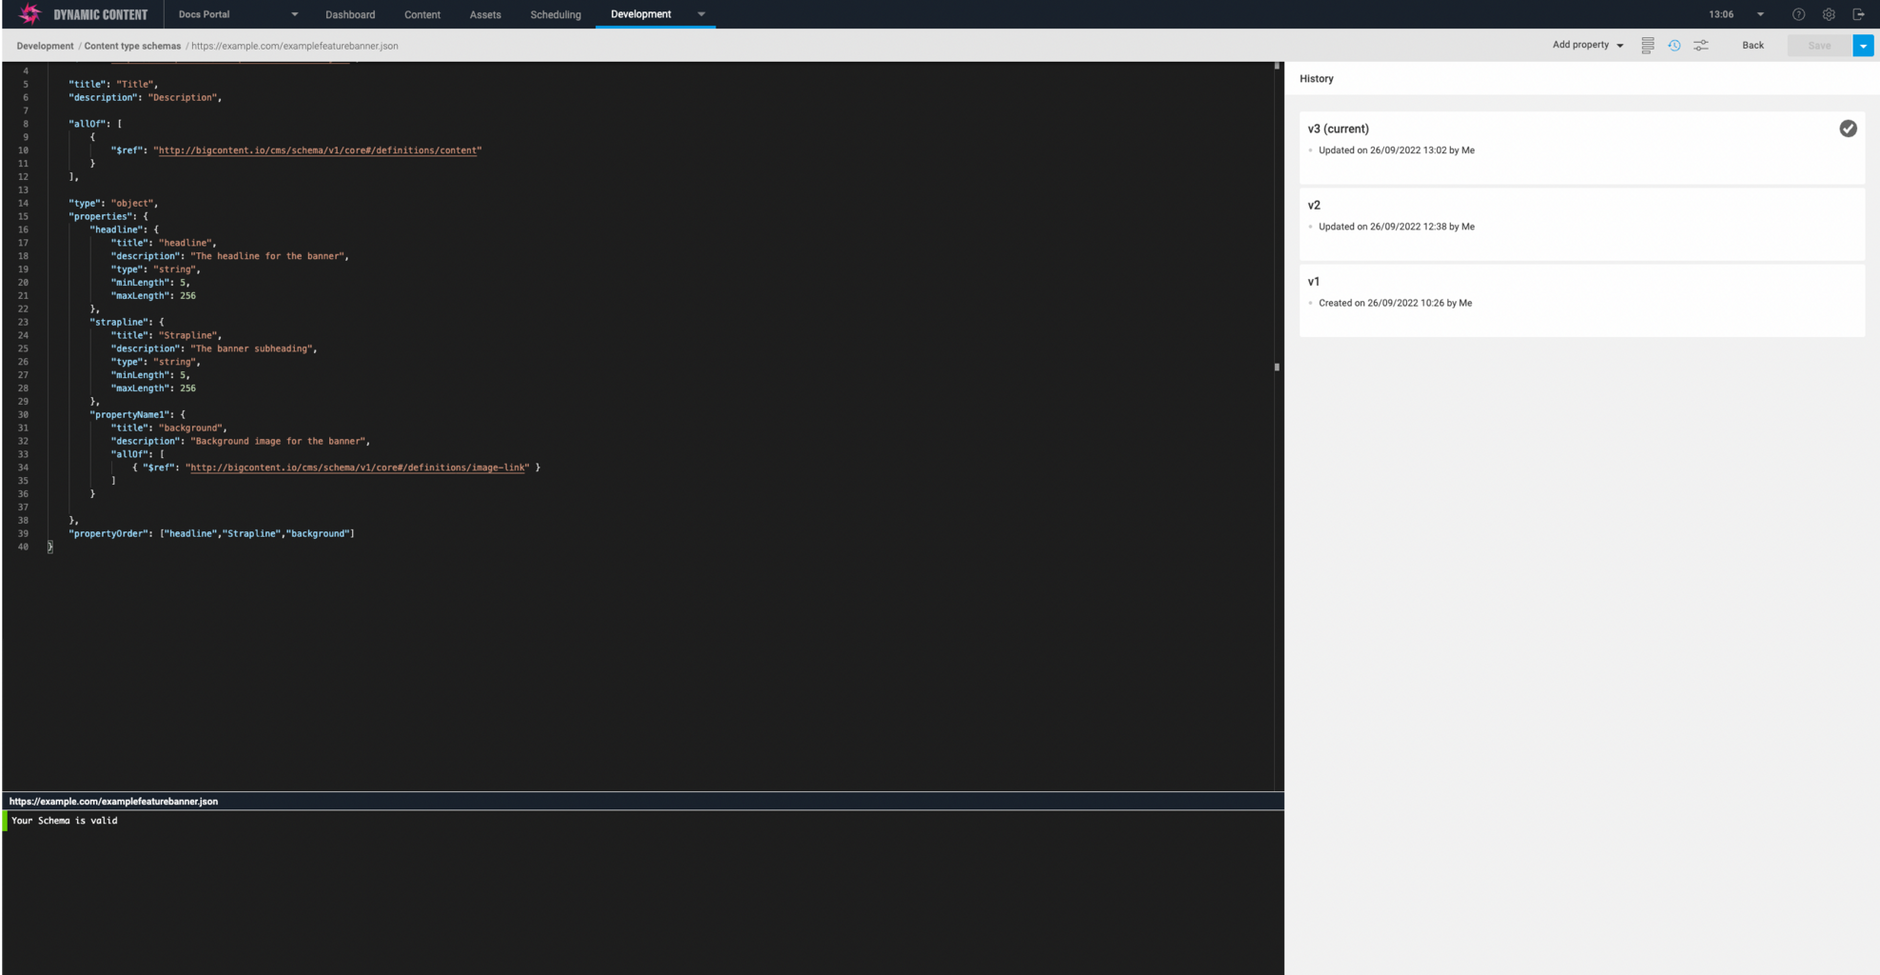
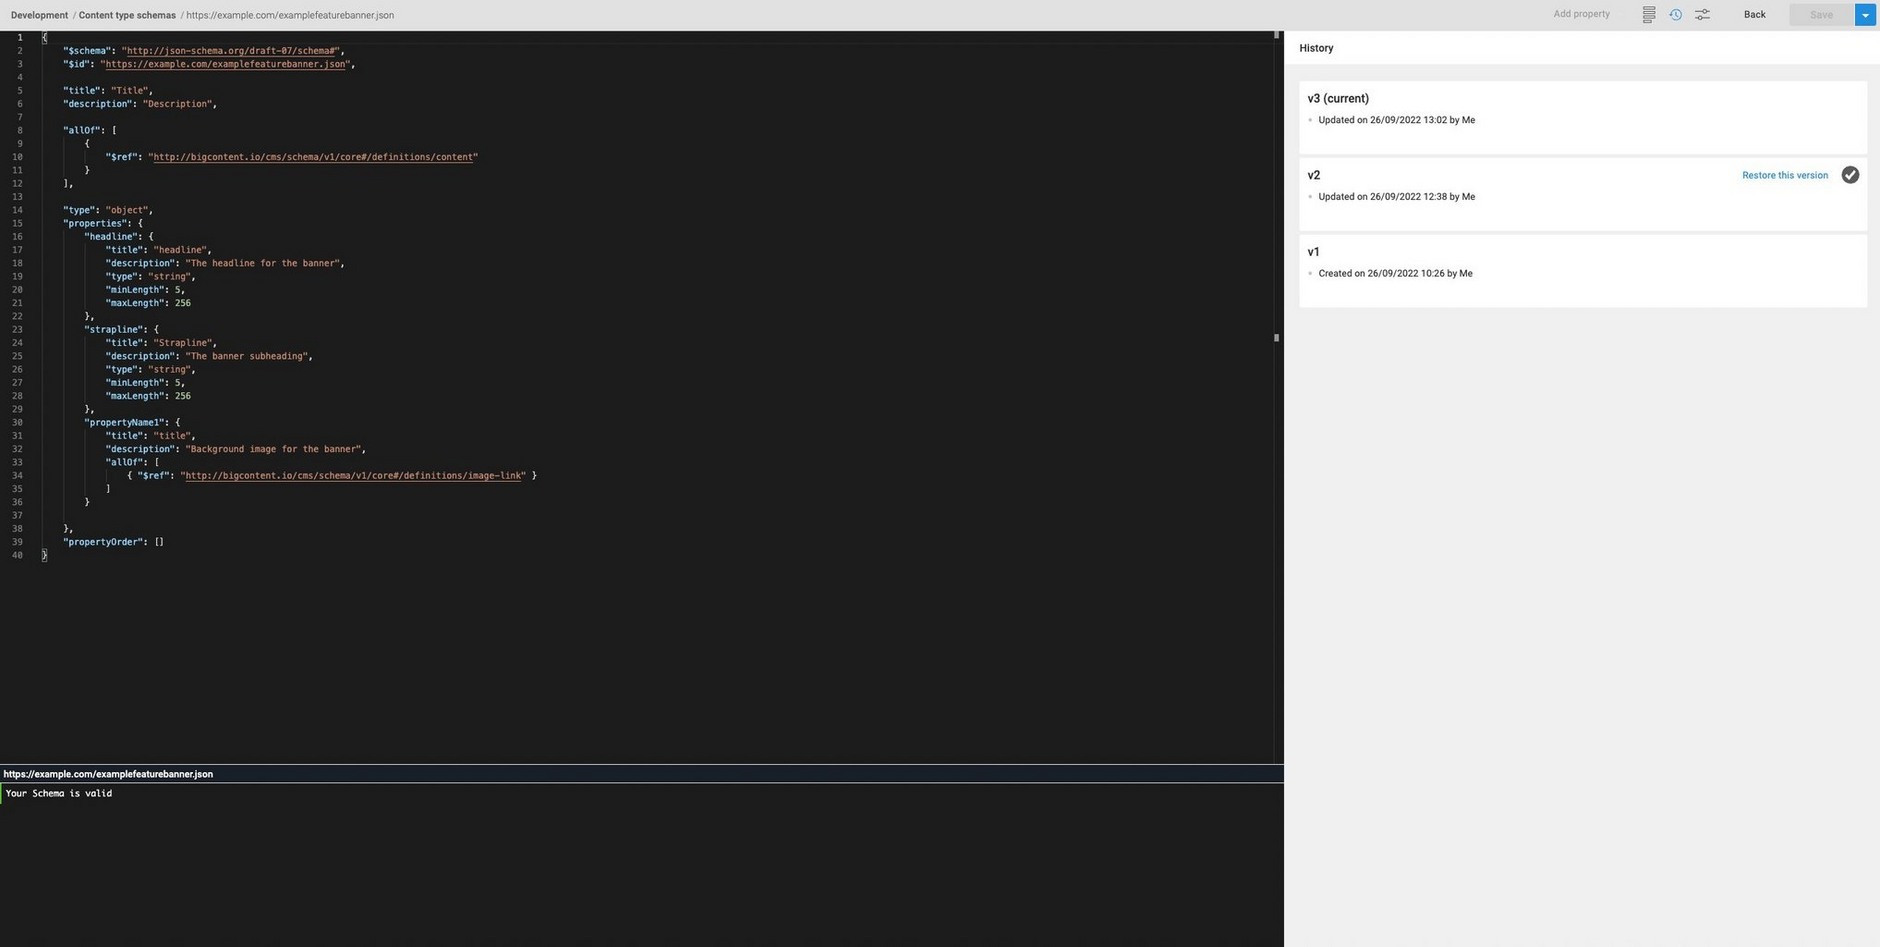
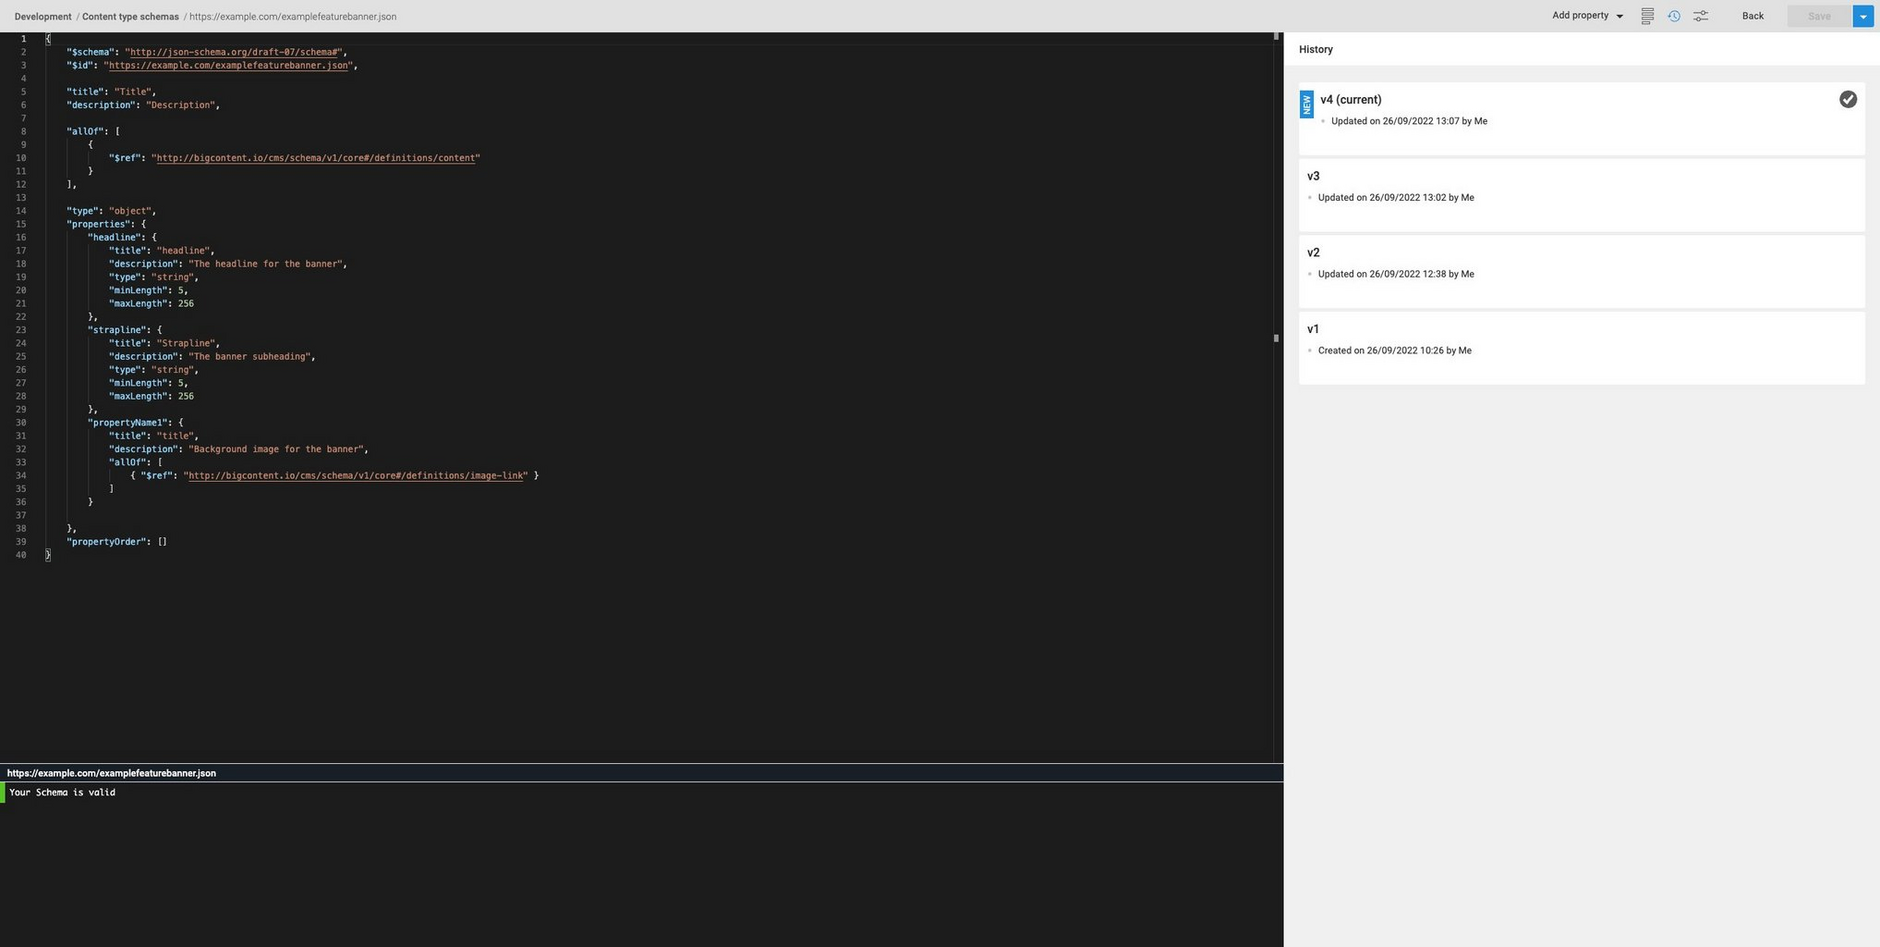
You can view a schema's version history and restore to a previous version. To view the version history for a schema, click the clock icon at the top of the schema window. A list of available versions will be displayed, including information about when a change was made and who made it.
In the example shown below, a property called "categorytext" has been added to the schema and then the schema has been saved. A new version, version 11 has been created.
You can select a previous version to view it in read only mode in the schema window. In the example shown below, version 8 of the schema is selected, a version that doesn't include the "categorytext" property. To restore to a selected previous version, click "Restore this version".
When the schema is restored from a previous version, a new version is created. In this example, a new version, version 12 is created, restored from version 8 of the schema.
If a content type has already been registered from this schema, you will need to sync the content type with the schema to ensure it is using the latest version. See Syncing a content type with its schema for more information.
Archiving a schemaLink copied!
To help you manage your list of schemas, you can choose to archive schemas, allowing you to move any schemas that you no longer wish to work with to a separate archive.
To archive a schema, choose "Archive" from the menu in the content type schemas window or open the schema window and choose "Archive" from the Save menu. The schema will be moved to the schema archive.
Click "View archive" at the top of the schema window to open the schema archive.
Once a schema has been archived, it cannot be registered as a content type. However, content types already registered and content created from these content types will not be effected.
You can open an archived schema, but it will be read only, as shown in the image below. An archived schema can be unarchived by clicking the "Unarchive" button or choosing "Unarchive" from its contextual menu.
Slot exampleLink copied!
This example walks you through creating a slot schema using the schema editor, registering it as a slot type and using it to create a slot.
The slot used in this example is a banner slot and it accepts content of the type created from the tutorial banner schema. To use this example yourself, ensure that the URL of the banner schema is included in the enum in the slot schema.
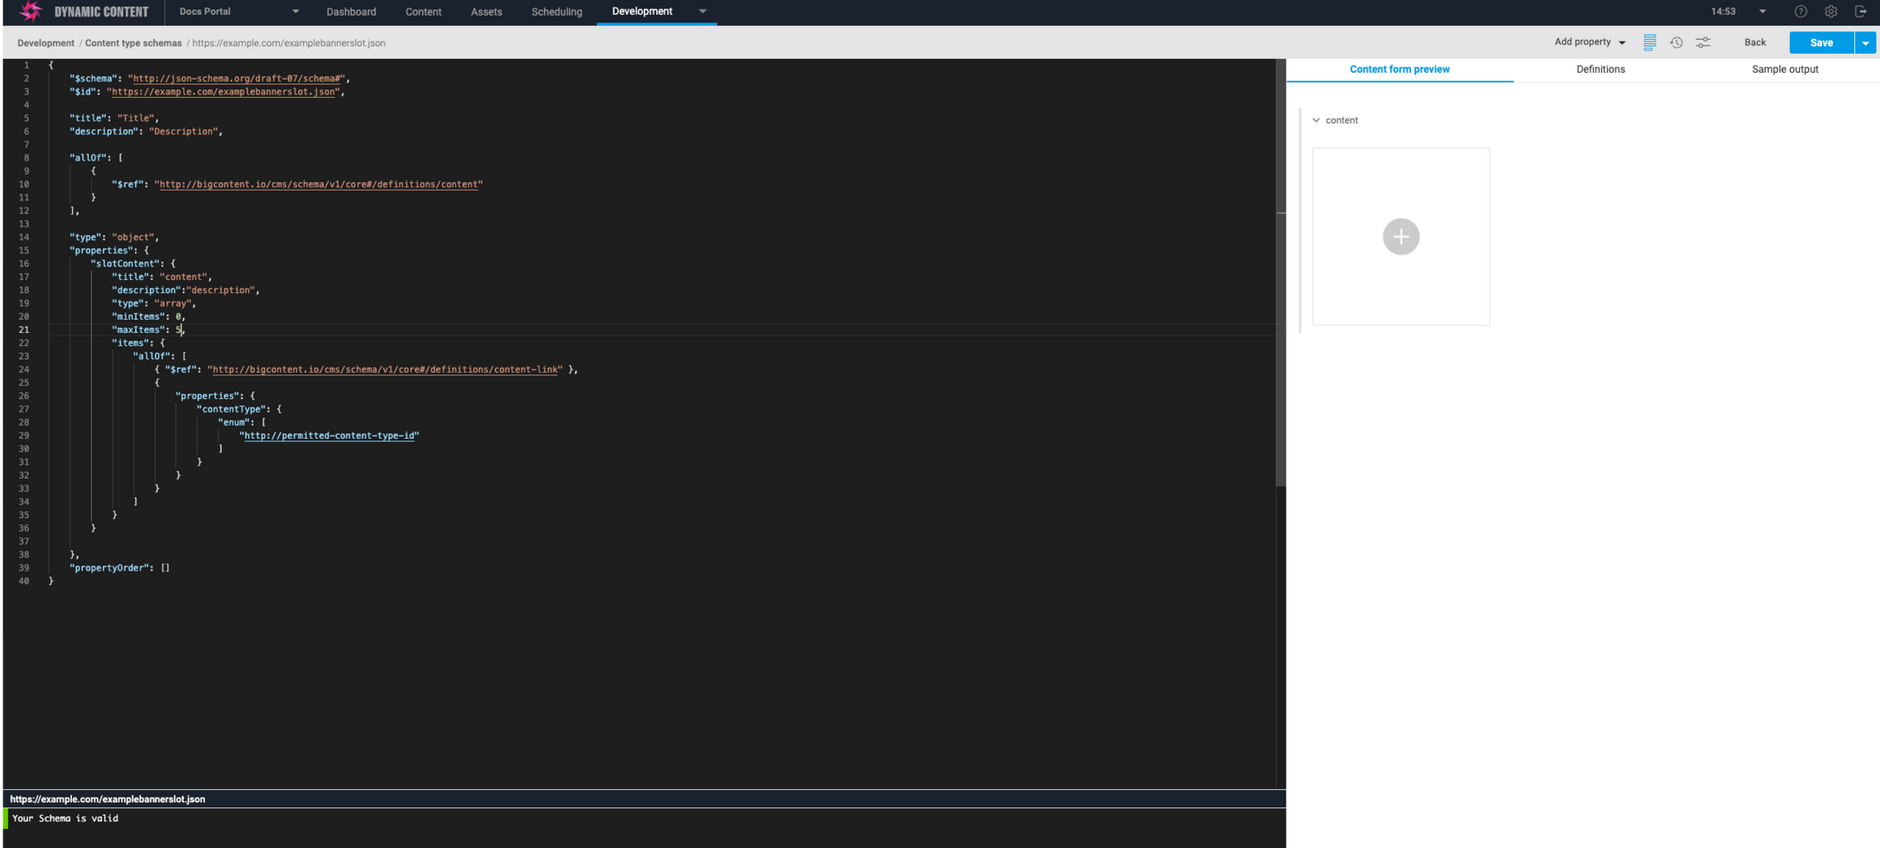
The section below shows the complete banner slot schema used in this example.
Creating a slot type schemaLink copied!
To create a new slot schema, choose "Content type schemas" from the "Development" menu and click the "Create schema" button. Enter a valid URL for the slot schema and choose "Slot" as the validation type. In contrast with content types, certain properties such as image and video choosers cannot be included in a slot type, so the schema editor validation will ensure that the schema is valid.
Click "Save and open schema" to open the schema editor.
Adding propertiesLink copied!
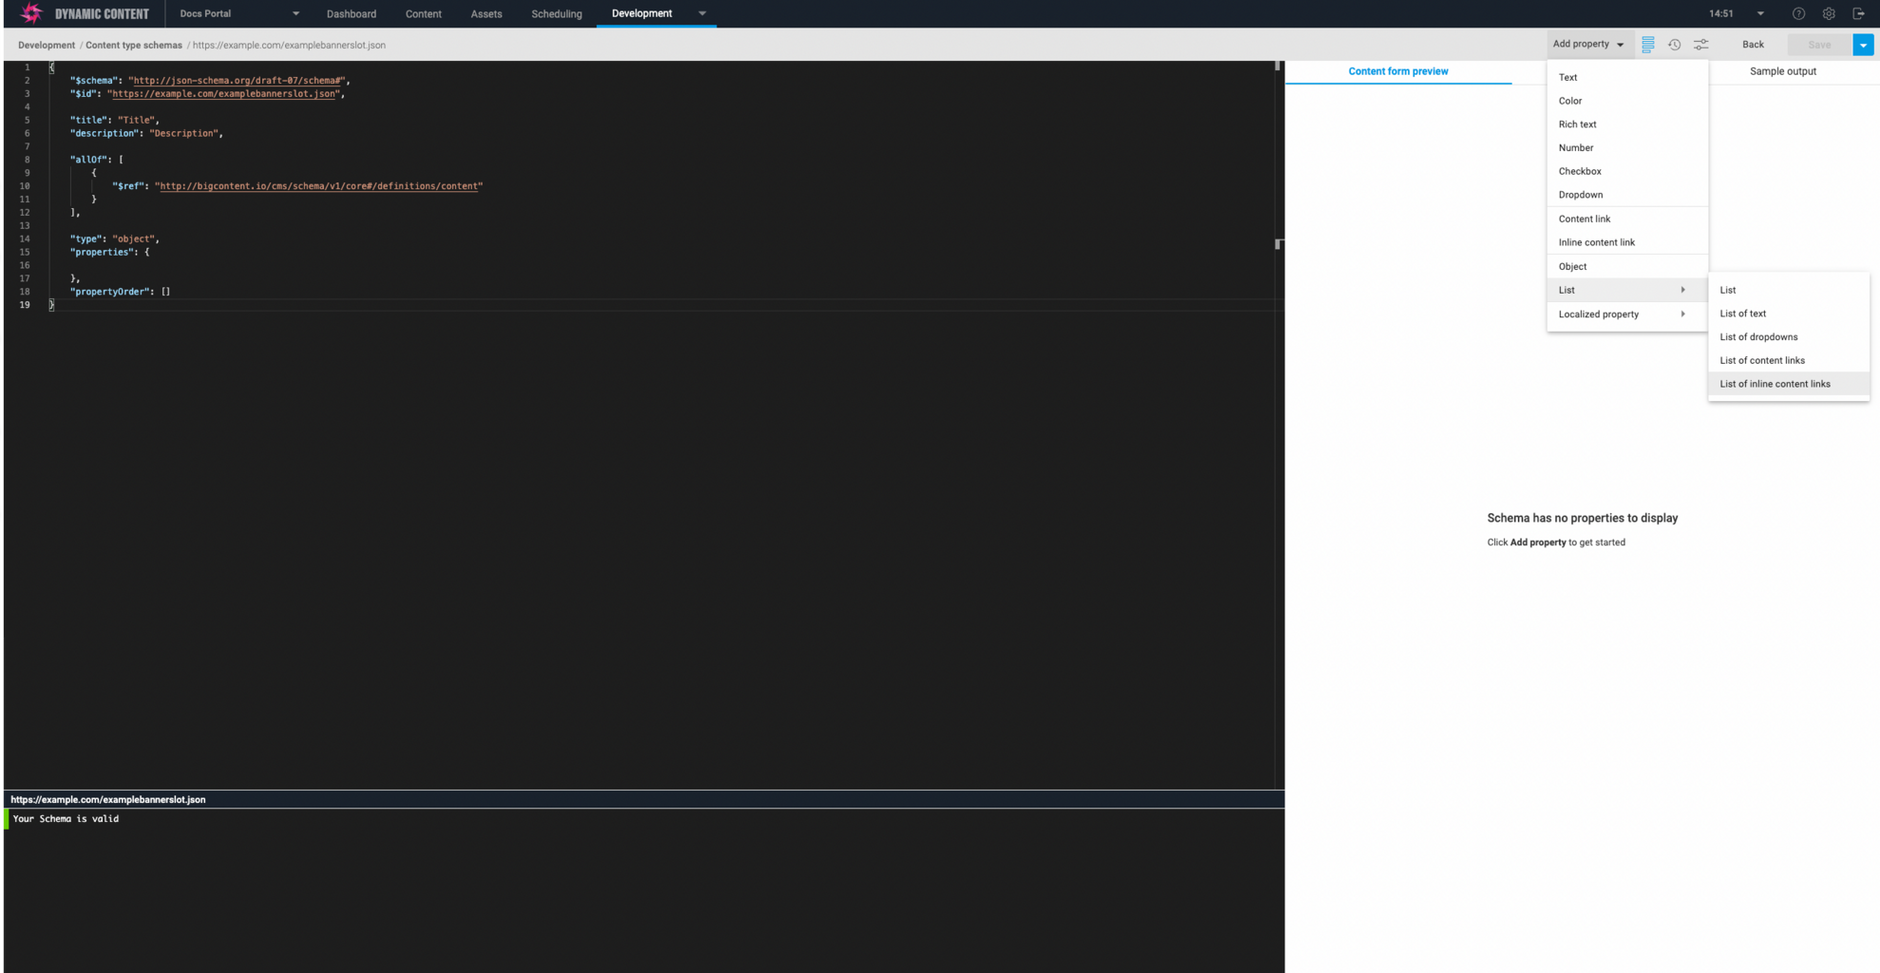
This slot just contains a single property, an array of content that can be added to it. To add the property, choose "List of content links" from the "Add property" menu as shown below.
Ensure that the URL for the banner schema is included in the enum so that content of this type can be added to the slot. It should be noted that if you try and add image or video properties to a slot, the schema validation will fail.
Once you've finished entering the slot properties, click "Save".
Registering a slot typeLink copied!
In order to create a slot from a slot schema, you must first register a slot type by choosing "Content types" from the "Development" menu and choosing "Register content type". The slot type is registered in the same way as a a content type and consists of the slot schema URL, a label and optional settings such as an icon, card and visualization.
To register a slot type from the banner slot schema, select "internal" and choose the banner slot schema from the list of available schemas. Give the slot type a label, in this case "Banner slot". Then choose which slot repositories this slot type should be associated with, in this example we're enabling it on the repository named "Slots". Click "Save" to register the slot type with the hub.
Creating a slotLink copied!
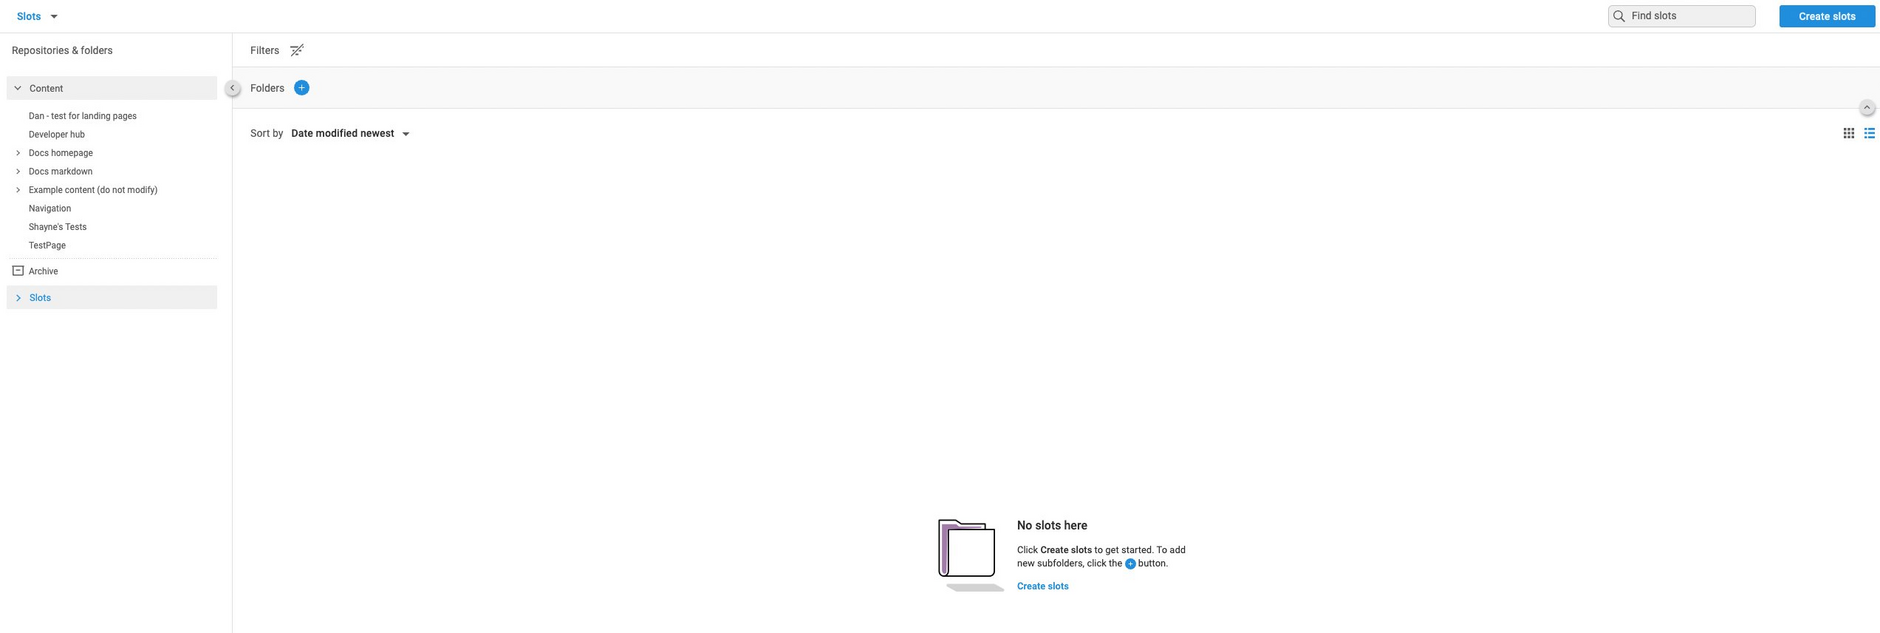
The slot type can now be used to create a slot. In the content view choose the slots repository and click "Create slot".
You will be taken to a screen that shows your newly created slot as an option.
This means the slot is now available to add to an edition. Planners will then add content to the slot.
Partials exampleLink copied!
Partials are schemas that contain just a definitions section. These definitions can be referenced in multiple schemas, particularly useful if you have some complex properties that you want to store and refer to in one place.
On this page we'll walk you through creating a simple partial using the schema editor.
Creating a partialLink copied!
To create a partial, choose "Content type schemas" from the "Development" menu and click the "Create schema" button. Give the schema a valid URL and click "Save and open schema" to open the schema editor.
The schema editor opens with a definitions section included. Add properties to this section in the same way as you would add properties to content types.
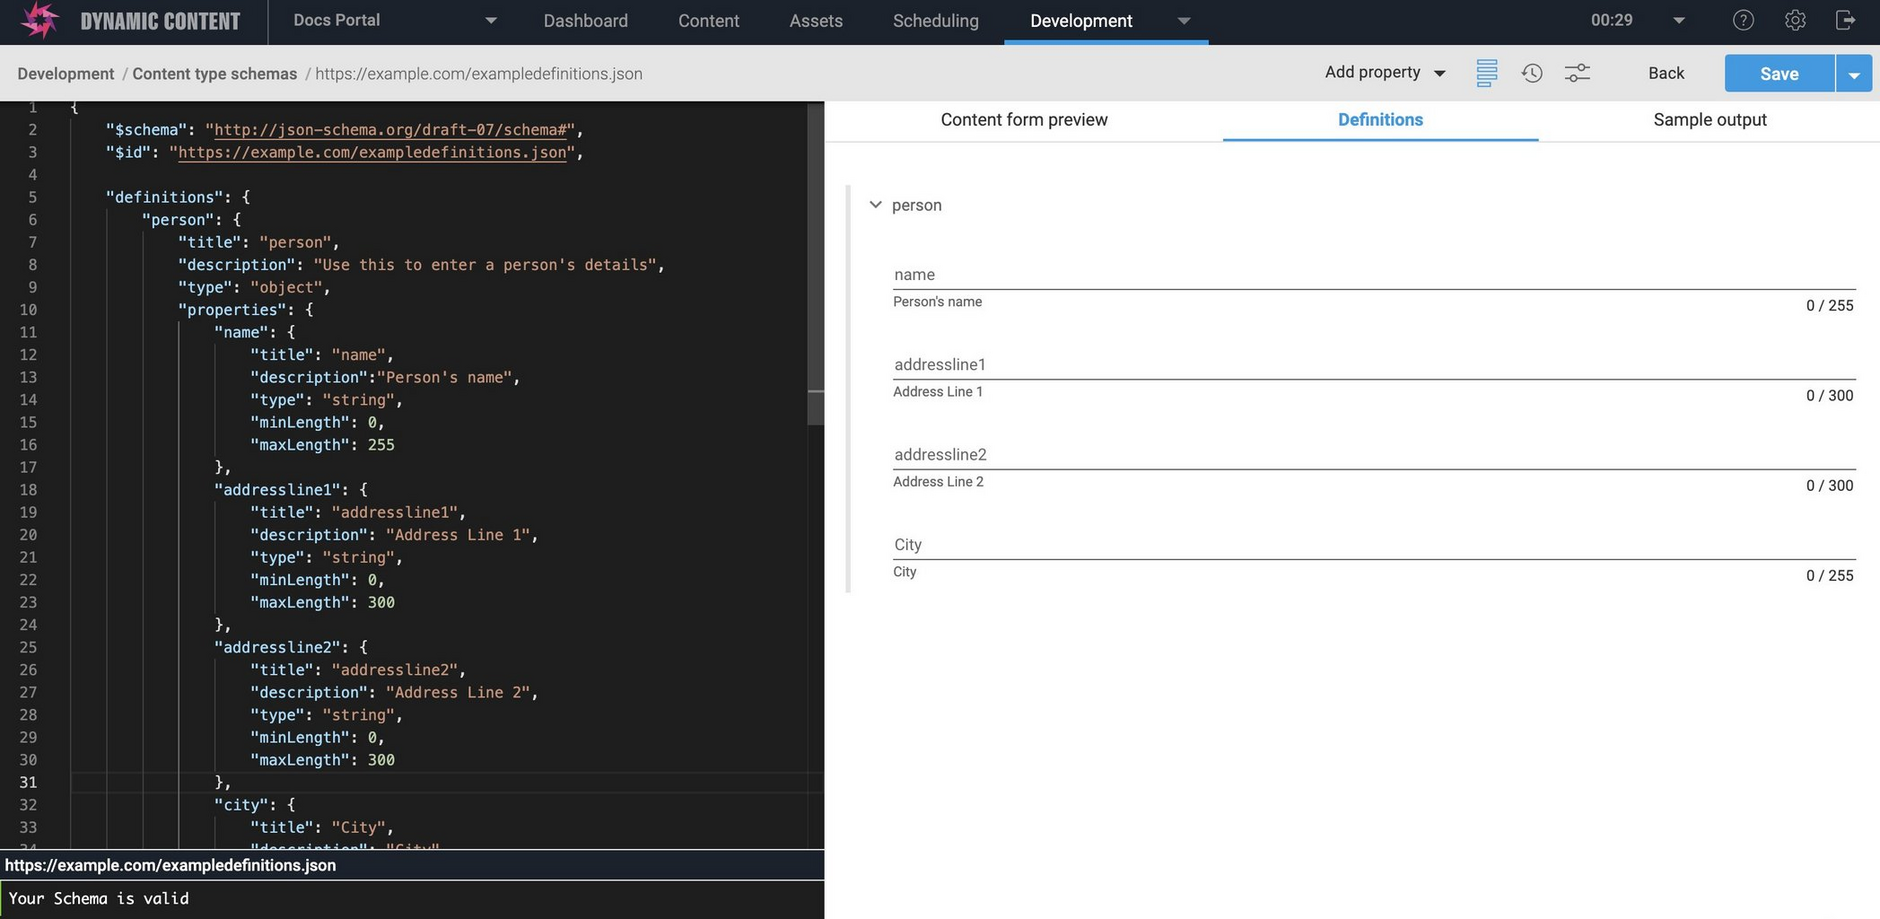
If you click the preview icon and then select the "Definitions" section, a preview of the definitions will be displayed. In this example we are added a simple "person" object with text properties for name and address.
When you've finished adding the properties you want to add to the definition, click the "Save" button.
Using the partialLink copied!
The simple definitions schema is shown below.
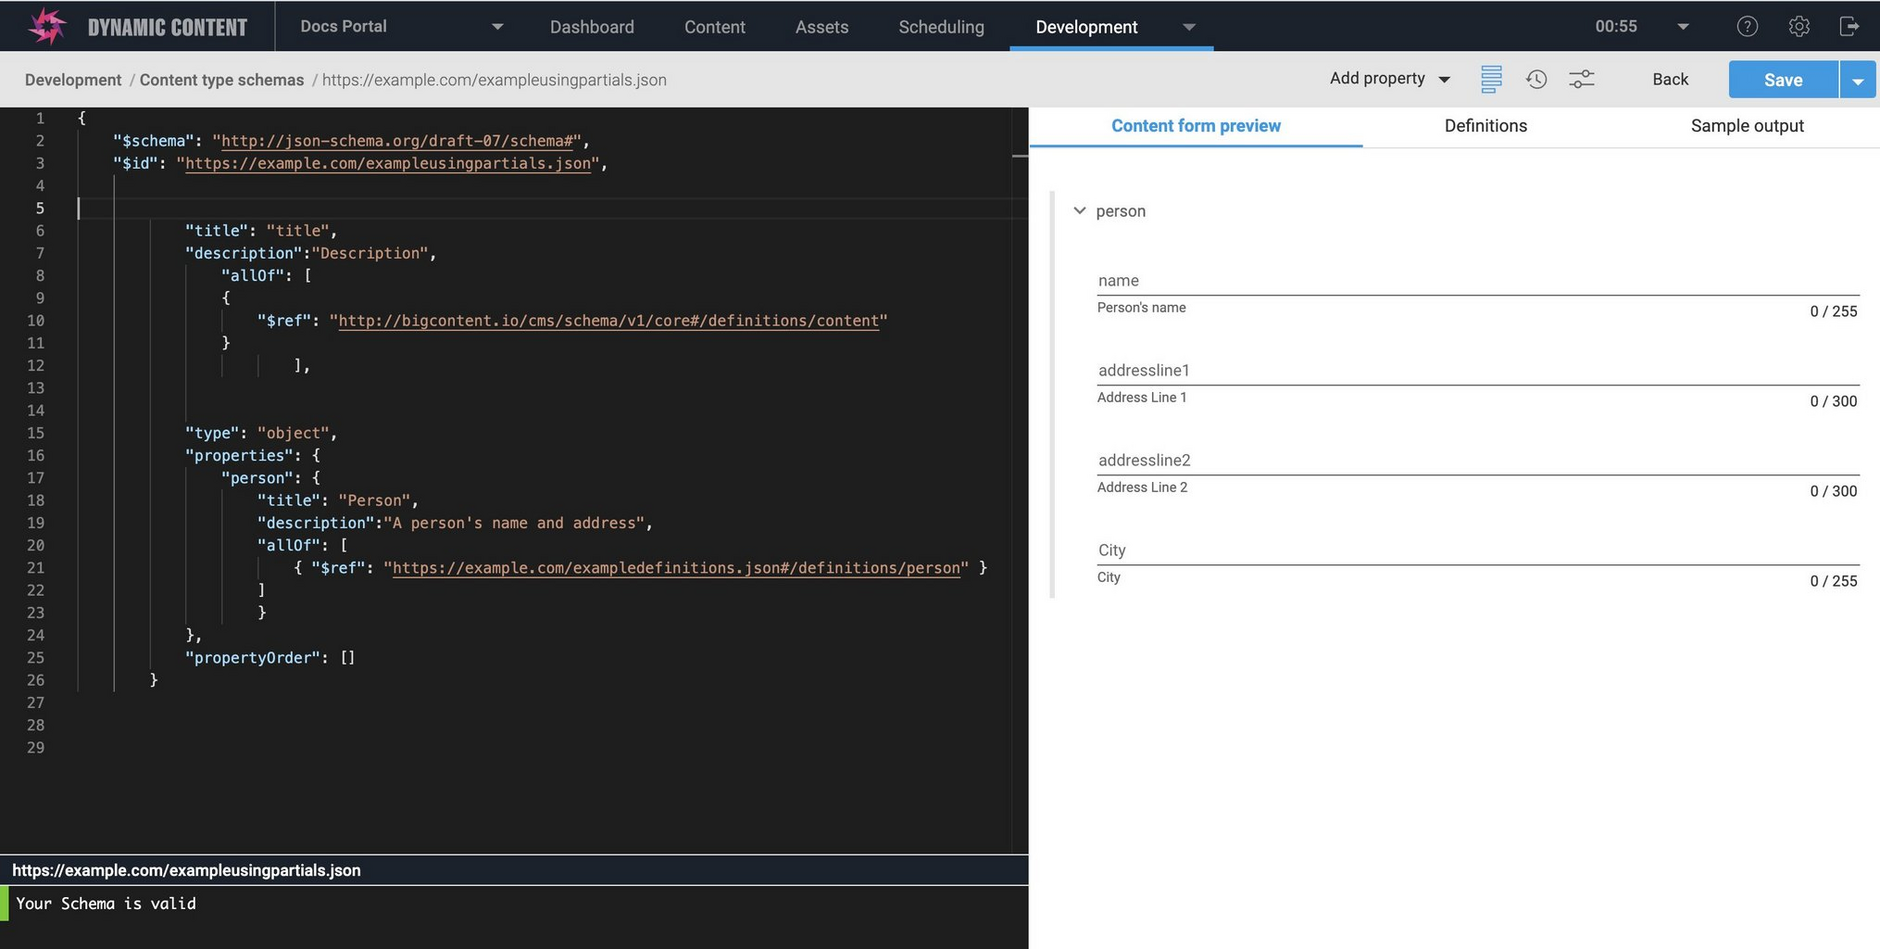
You can refer to the "Person" definition from another schema as follows:
Here's how the "person" property is previewed in the content form preview when included in another schema.
Using definitions in the same schemaLink copied!
You can also use definitions within the same schema. In the example below a definitions section has been added to include the "person" object. To refer to the person object you'd just use:
Note that partials are not registered as content types.
Video: Creating and registering a content type schemaLink copied!
Using the example of a simple banner, this video shows you how to create a content type schema with the Schema Editor, how to register the schema as a content type and how this content type is used to create content.


