Customizing your indexing webhook
On this page we'll explain how to customize the custom payload generated when you create an Algolia search webhook.
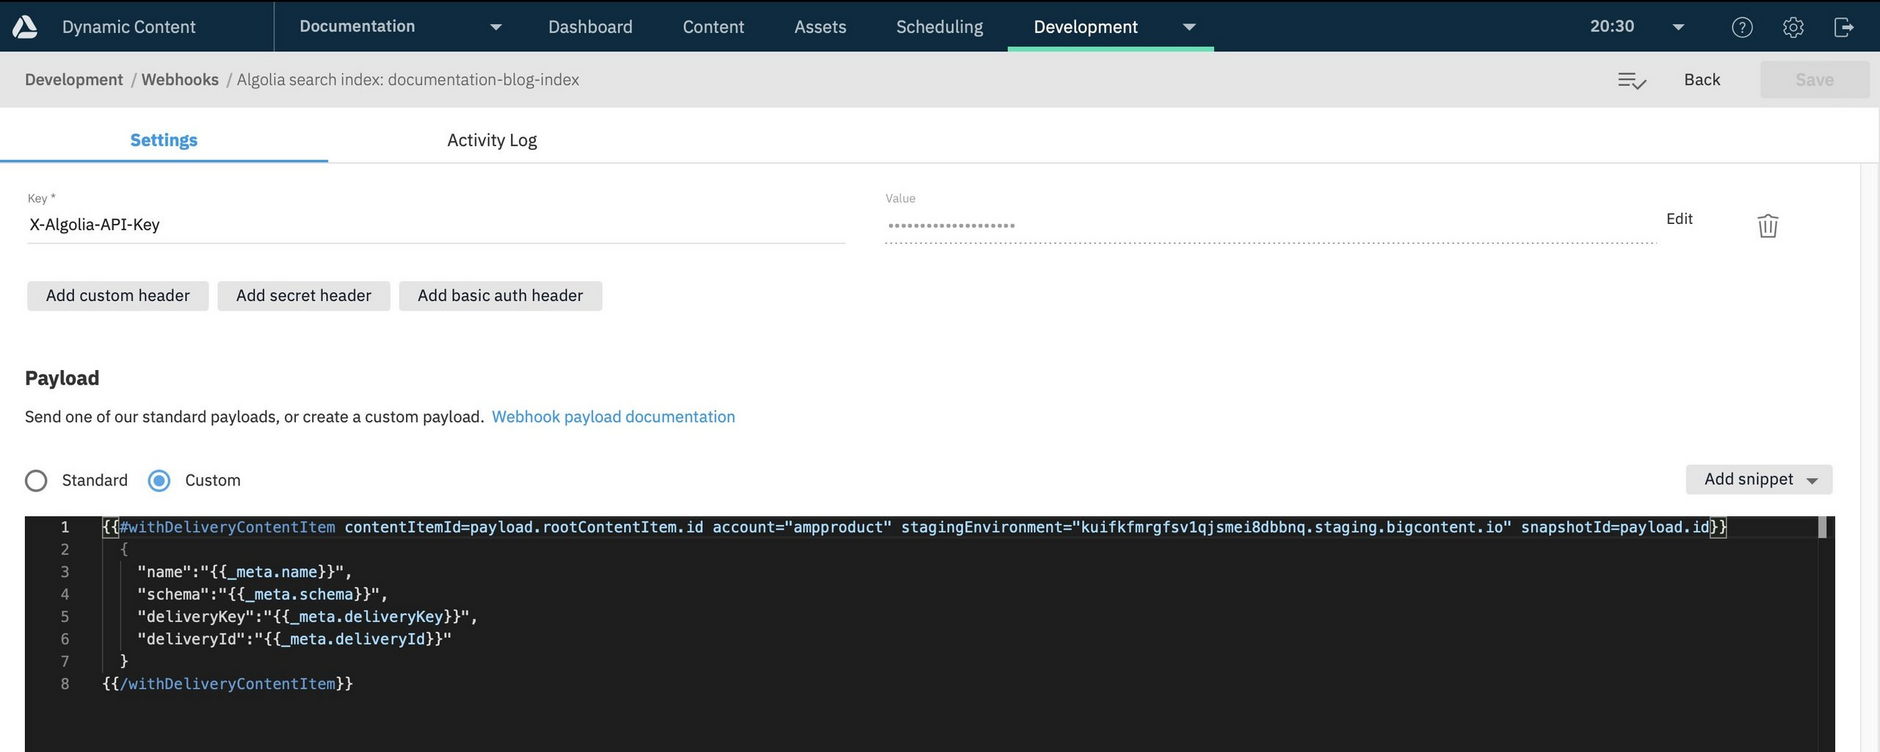
The custom payload is the handlebars used to generate the body of the webhook request sent to the Algolia API. The custom payload determines what will be indexed in Algolia. By default, when an Algolia search webhook is created, the custom payload is configured to include the content item name, schema, delivery key and delivery id. You can refine the custom payload to include only those properties that you want to be searchable.
The example on this page makes use of the blog content item from our schema examples, but you can use the same approach for any content type.
Viewing the custom payloadLink copied!
To view the custom payload, first open the indexing webhook by double-clicking its label in the webhook list or choosing "View" from the ellipsis menu to the right of the webhook. Scroll to the "payload" section.
By default, the custom payload will appear as follows:
To update the custom payload, you will need to update the handlebars included in the payload window and then save the webhook.
Updating the custom payload for the blogLink copied!
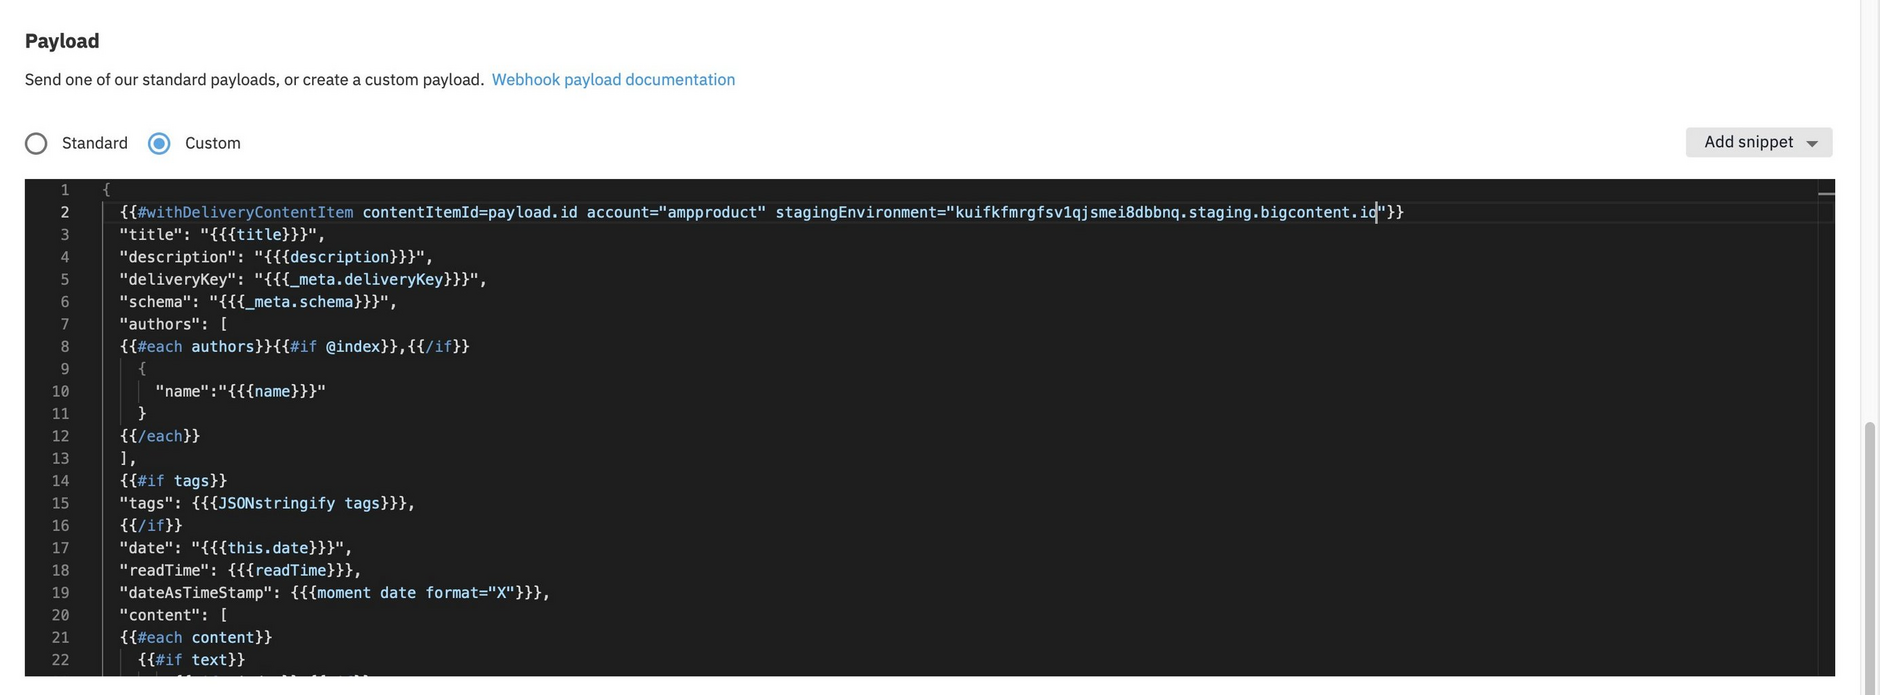
The following custom payload can be used to create a record for each blog article, including the information we want to be indexable: title, description, author names, tags, date, readTime and the content itself. Replace myAccountId with your account and stagingEnvironment with your virtual staging environment (this can be found in visualization settings).
Your payload should include all the fields that are used in your Algolia search configuration: searchAttributes, attributesForFaceting and customRanking, together with any fields that you need to display your search frontend. For the blog post content, you might choose to include just an excerpt to prevent your record from becoming too large.
If you're using the blog content type, paste the handlebars shown above into your webhook's custom payload and save the webhook.
Some points to note about the custom payload:
-
The contentItemId is set to
payload.rootContentItem.idwhich is sent as part of the standard payload from a snapshot published webhook event (sent when a content item is published). If you have set the webhook to be triggered when a content item is created or updated, you would usepayload.idinstead -
deliveryKey is a friendlier way of referring to the delivery key than _meta.deliveryKey
-
In the custom payload we iterate through authors and create authors.name to use with attributesForFaceting
-
dateAsTimeStamp contains the date converted from a string to unix timestamp format so that it can be used for sorting. To sort using dateAsTimeStamp you can update your custom ranking as follows:
- The image endpoint and name are concatenated to make the image path. This doesn't include mediaHost as this should be an environment variable in your app.
After updating your custom payload, if you have changed the names of any attributes, or added new ones, you may need to update your search settings. See your Algolia dashboard for these settings.
Trying out the updated custom payloadLink copied!
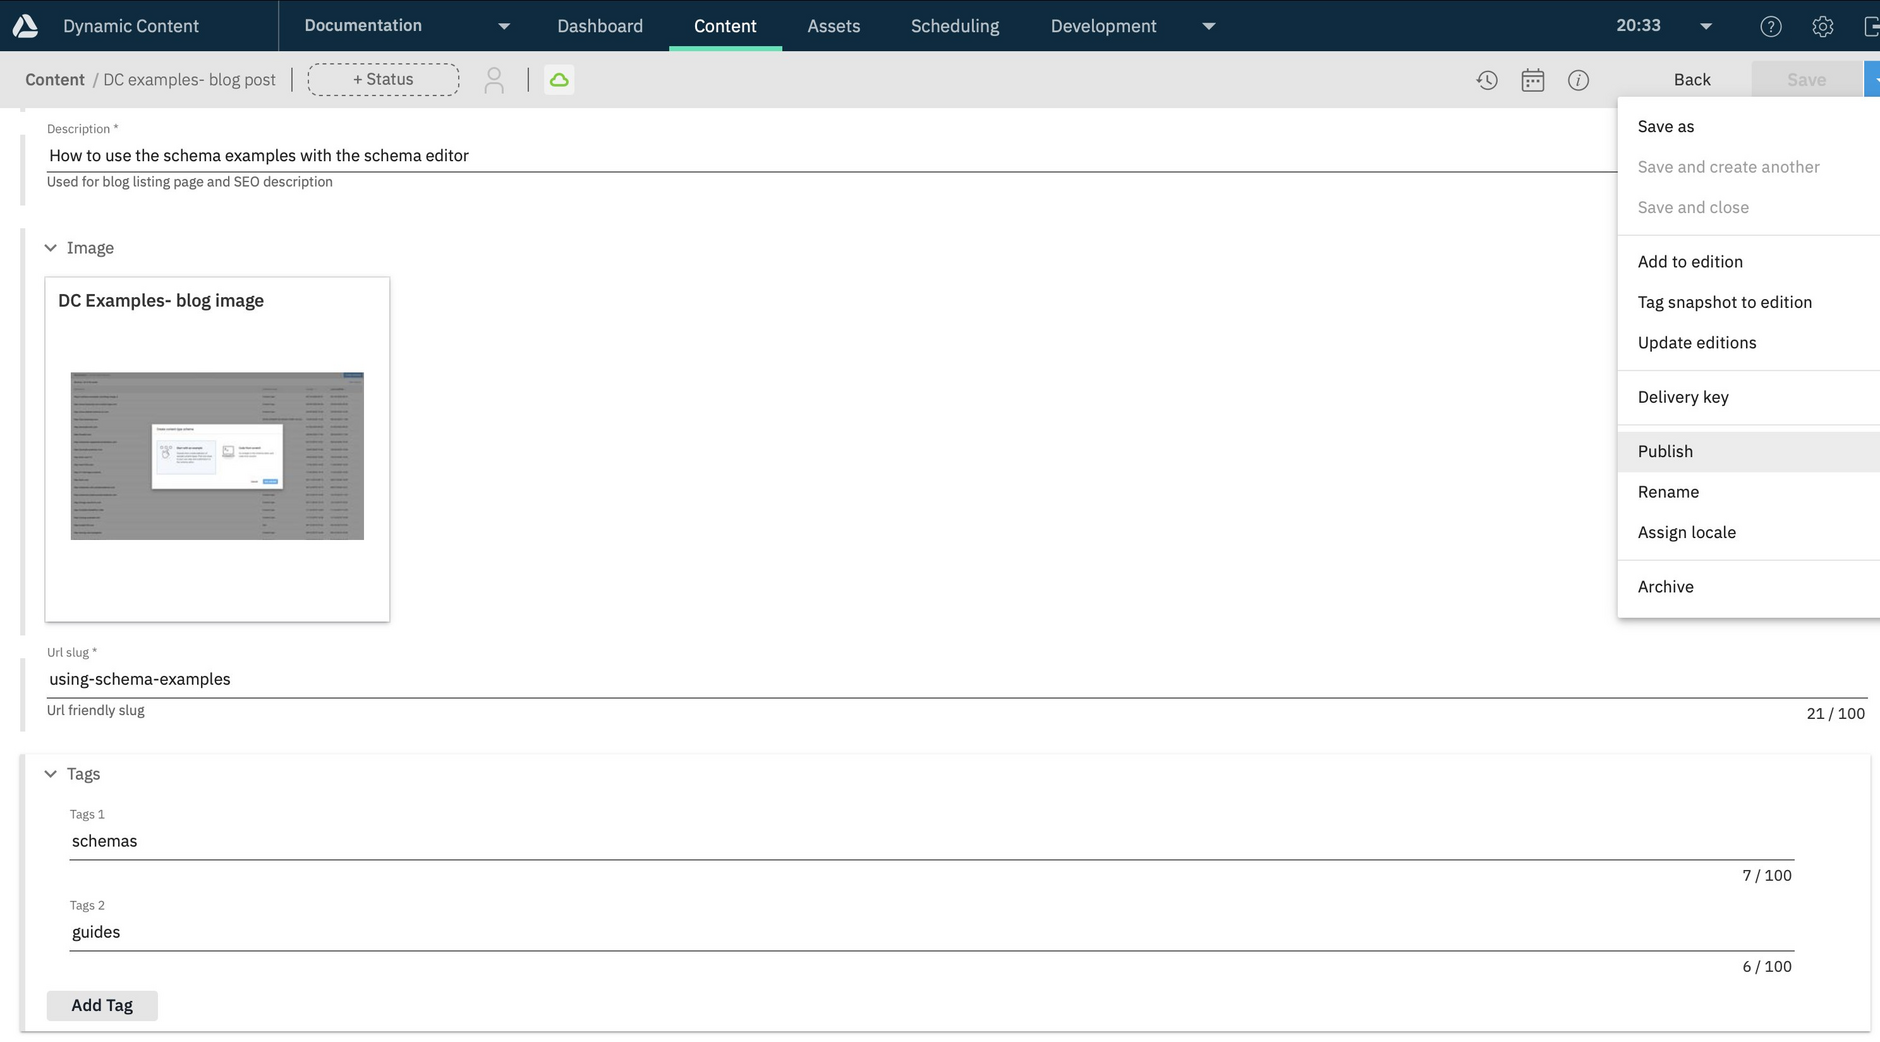
To test out the updated custom payload, publish, create or update, a content item of your chosen type. For this example we've set up to be triggered when a blog content item is published.
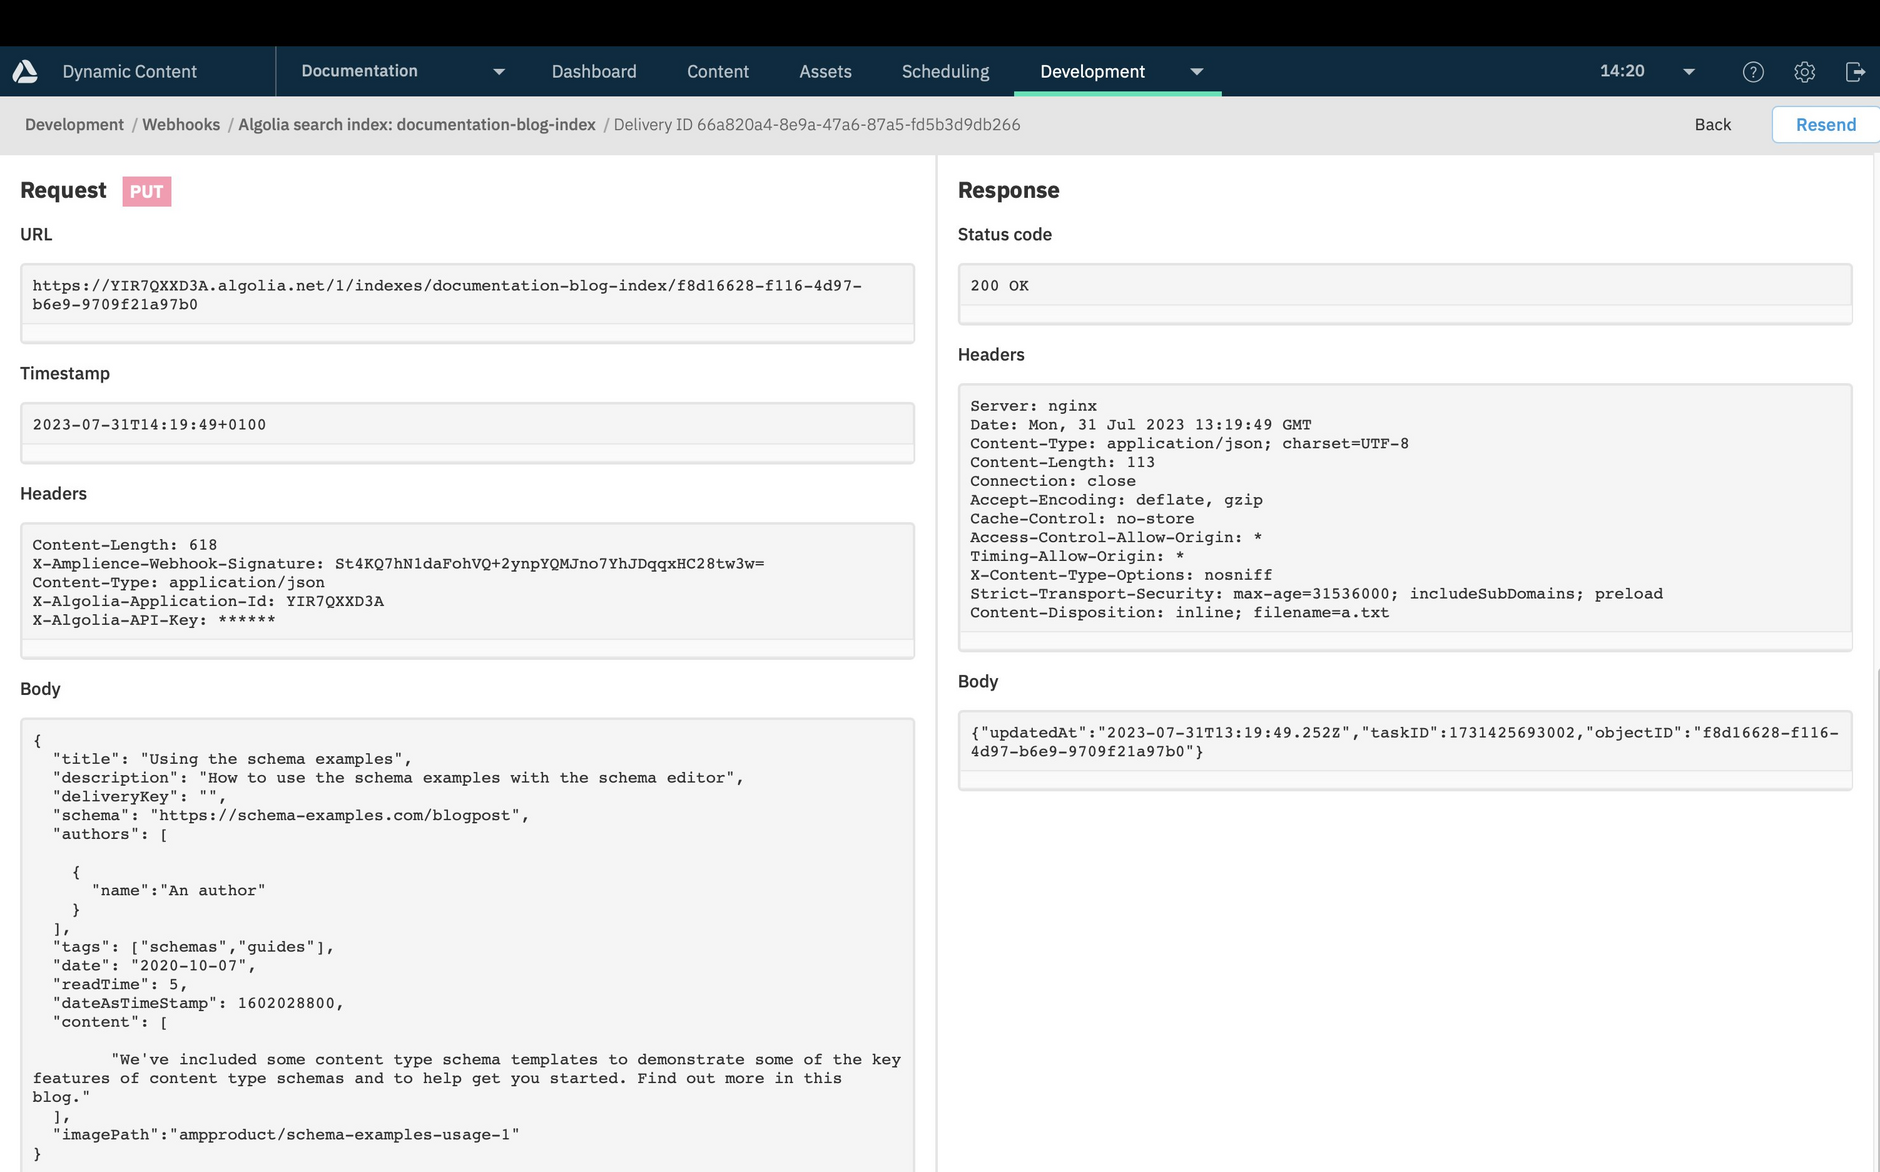
The indexing webhook will be triggered and a request sent to the Algolia API. Viewing the indexing webhook and open the activity log. The log should show that a request has been successfully sent. Click the "View details" button to view the request.
The webhook delivery details should look something like the following and include the request body that was generated from the custom payload.
Related pagesLink copied!
Creating your indexing webhook


