Creating your indexing webhook
The Algolia search webhook template makes it easy to index your Dynamic Content data in Algolia.
When a user creates, updates, or publishes a content item of the content type that you are indexing, a webhook will be triggered and a request sent to the Algolia API to update the specified search index.
See Algolia search webhooks overview for more information about how the integration works and what you need before you begin.
Adding the webhookLink copied!
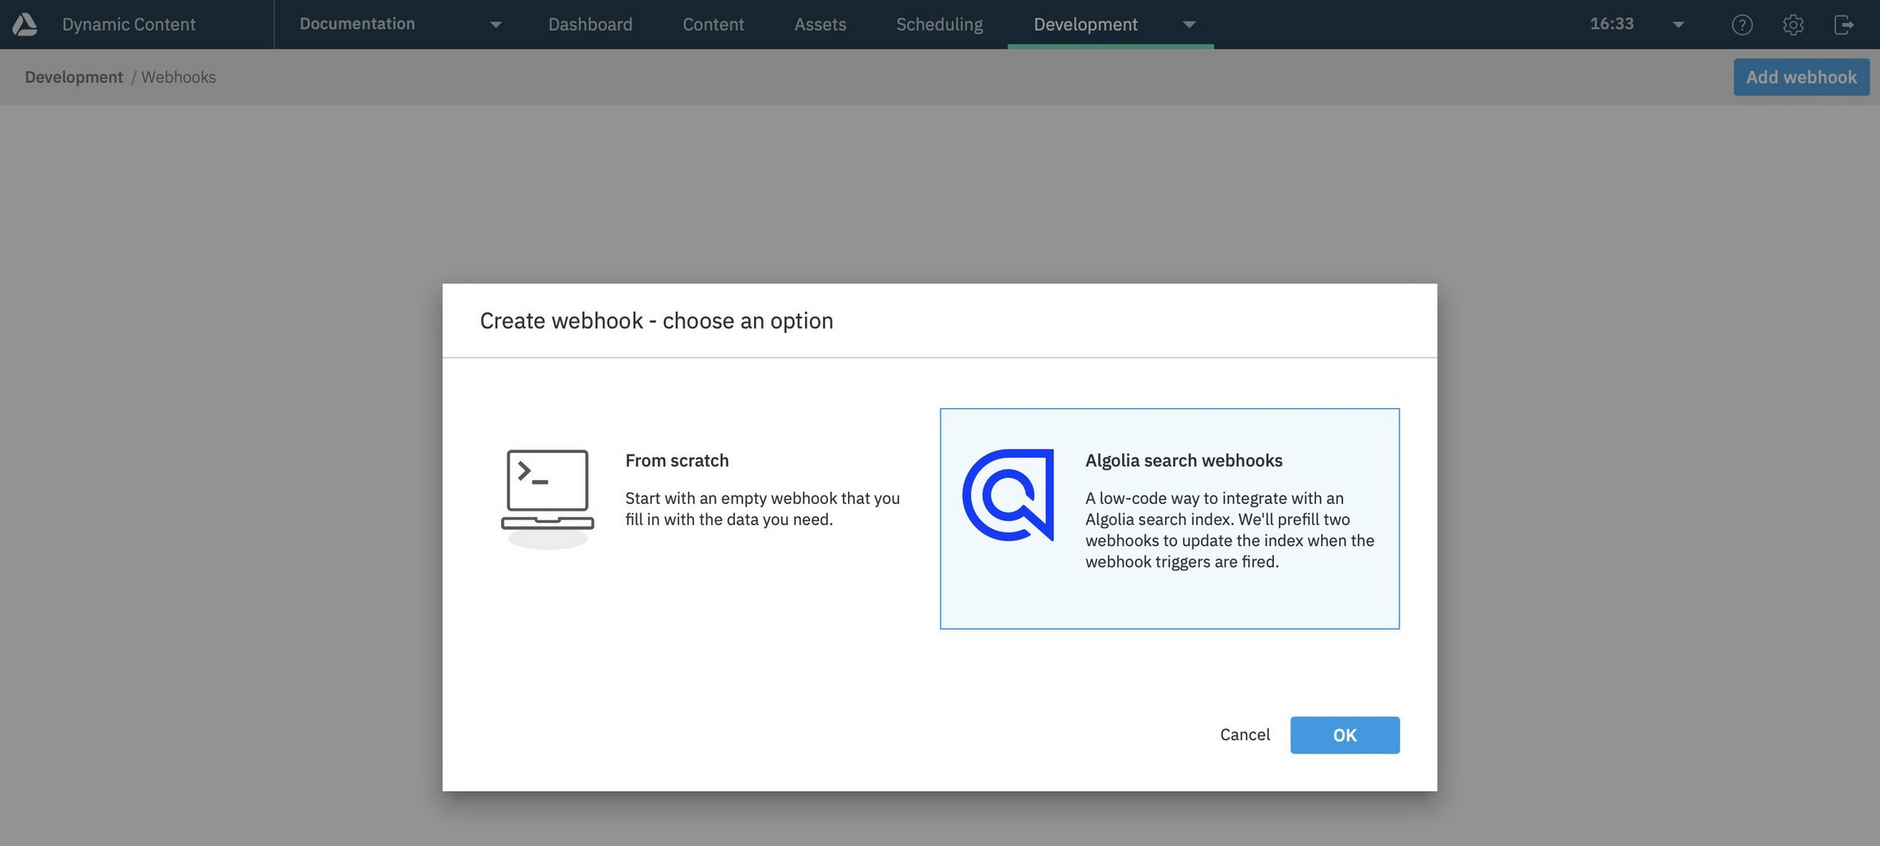
To create an indexing webhook, choose "Webhooks" from the development menu and click the "Add webhook" button at the top of the window. A dialog will be displayed allowing you to choose whether to add a webhook from scratch, or to create a webhook to integrate with an Algolia search index. In the example below we've chosen an Algolia search webhook.
Information you need to provideLink copied!
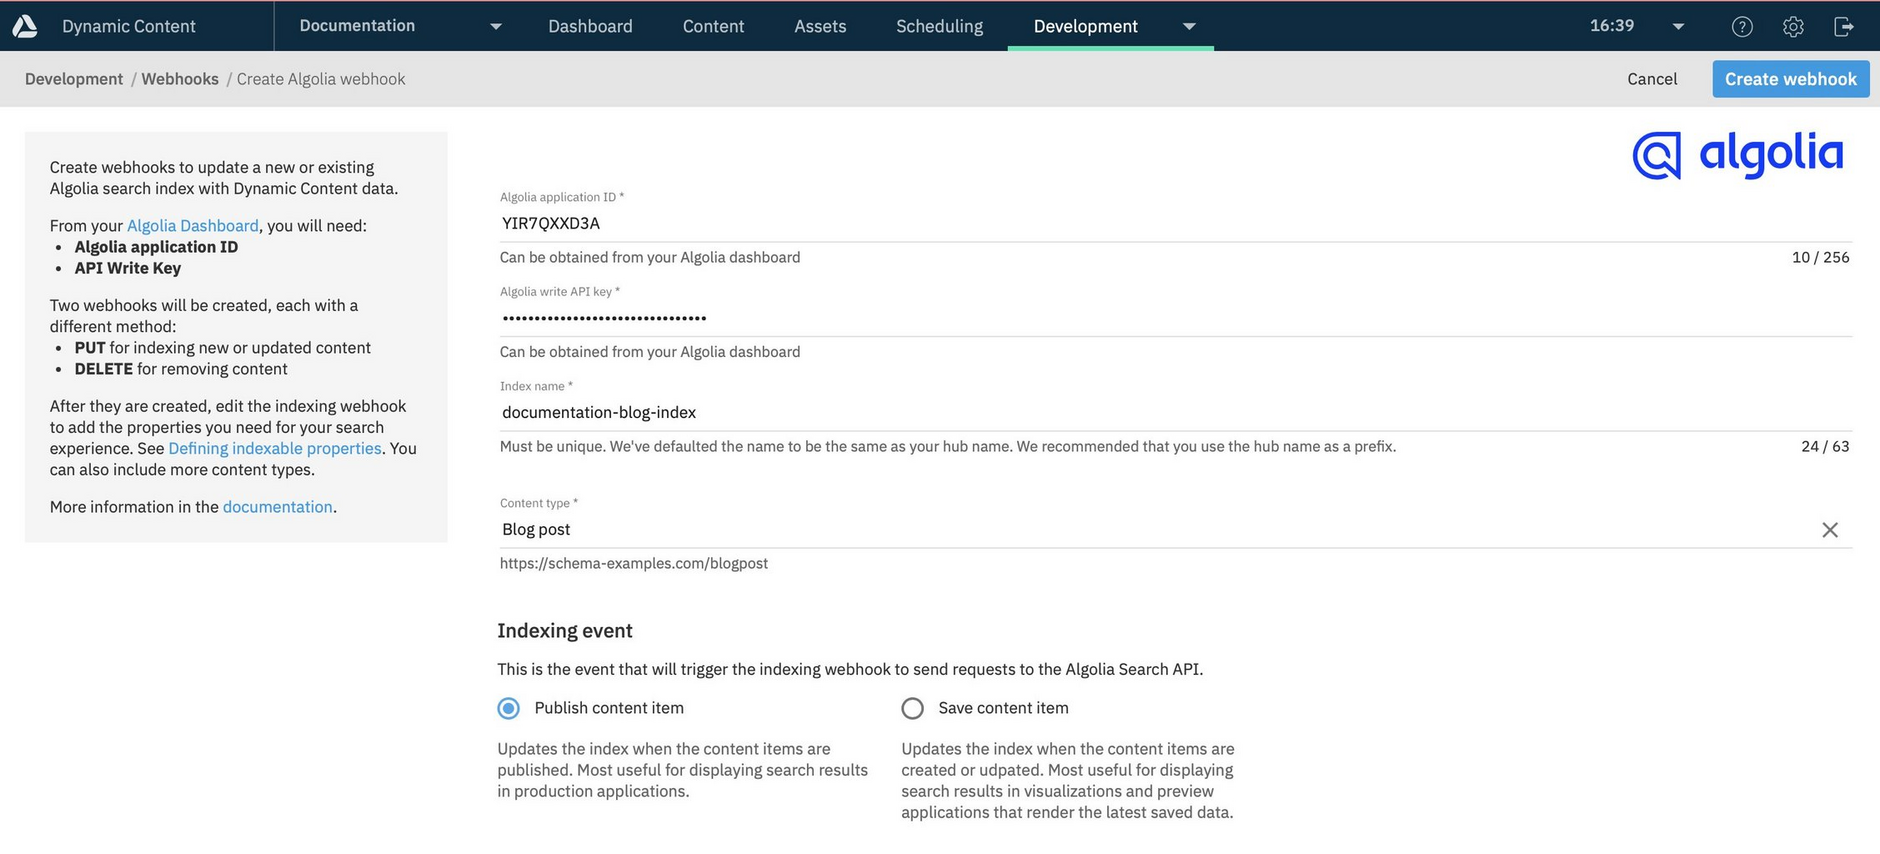
In the "Create Algolia webhook" dialog, you'll need to provide the following information:
- The application ID and write API Key from your Algolia account. You can find this information in the API Keys section of your Algolia dashboard. The write API Key is referred to on the dashboard as the "Admin API Key".
- The index name. This is the index to which records will be added when the webhook is triggered. This will default to the hub name and we recommend you use this as a prefix followed by a descriptive label. In this example we've chosen the index name "documentation-blog-index". If you want to update an existing index, you will need to remove the hub name prefix and type the exact name. When requests are sent to the Algolia API, the specified index will be updated. If the index does not exist, it will be created in Algolia the first time a request is sent.
- The content type to index. You can choose from any content type registered on the hub. We want to allow our users to search blog content, so the blog content type is chosen.
- The indexing event. This is the trigger for the webhook that sends a request to the Algolia API to update the index. You can choose for the webhook to be triggered when content is published, or when it is created or updated. For indexing content in production applications you should choose "Publish content item", for allowing content to be searched in preview applications, choose "Save content item".
Click the "Create webhook" button when you've finished the configuration.
Webhooks added to your hubLink copied!
Creating the webhook will actually add two webhooks to your hub: the indexing webhook, used to send the request to the Algolia API to update the search index on your chosen trigger. An archiving webhook is also created, which will send a request to delete content from the index when a content item is unpublished or archived, depending on the indexing event you chose.
With the webhooks set up, you can now publish or update content of your chosen type to update your Algolia index.
Trying it outLink copied!
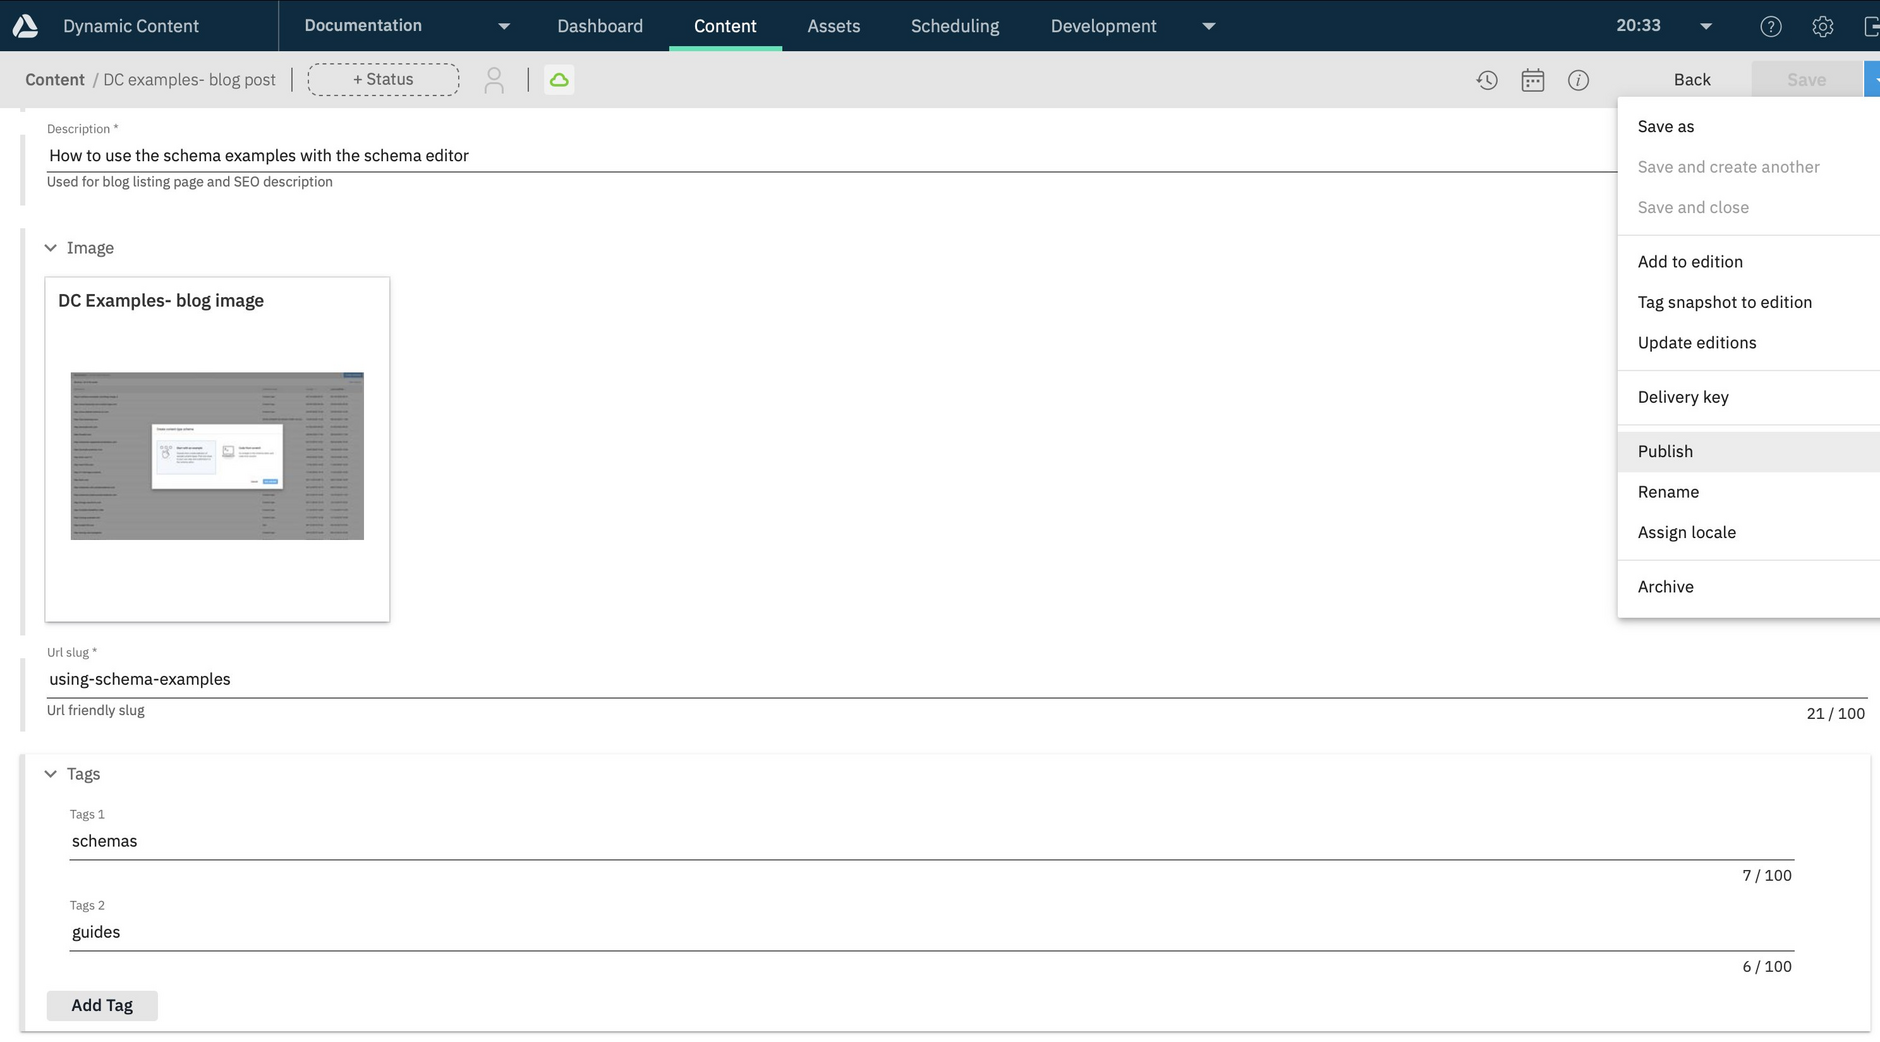
To try out your indexing webhook, publish, create or update a content item of your specified type. In this example we're triggering the webhook on publishing a blog content item.
The indexing webhook will be triggered and a request sent to the Algolia API. Viewing the indexing webhook and open the activity log. The log should show that a request has been successfully sent. Click the "Details" button to view the request.
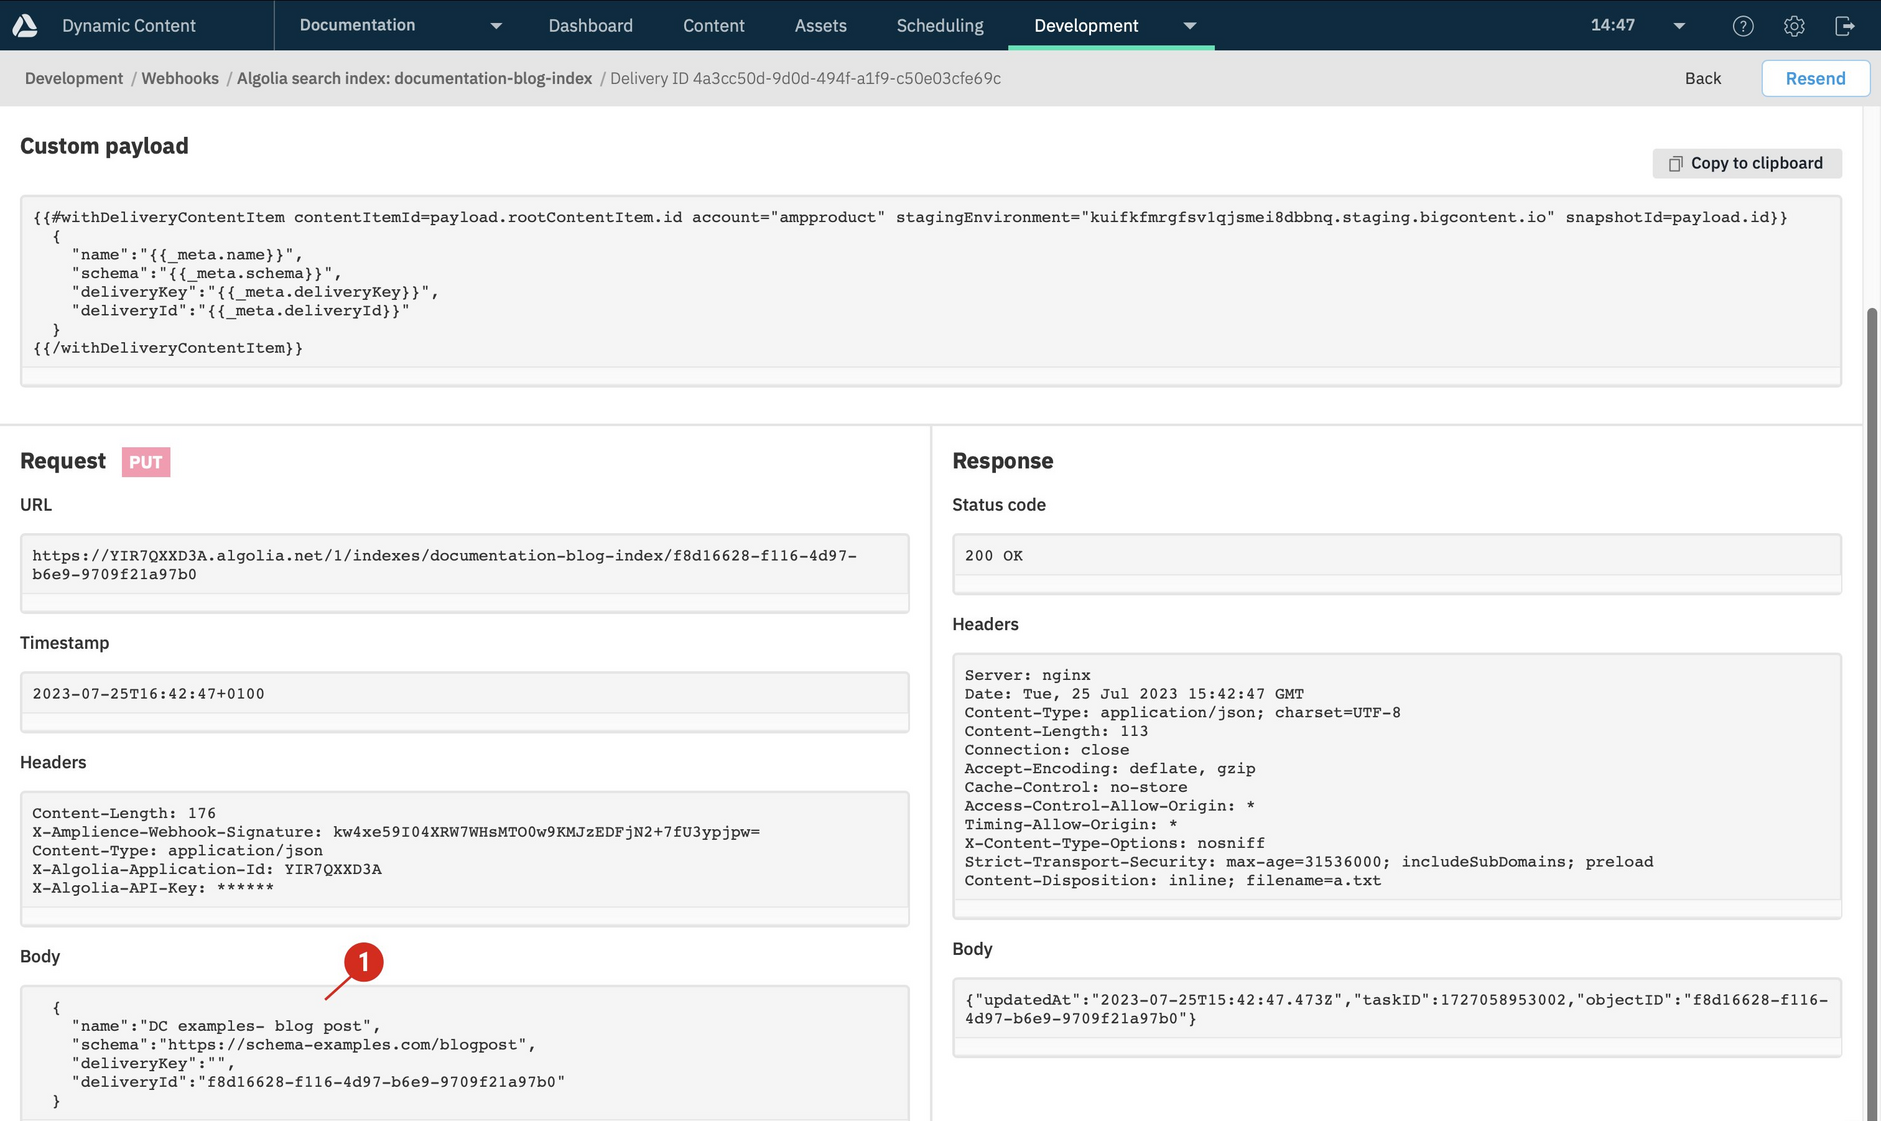
The webhook delivery details should look something like the following and include the request body that was generated from the custom payload.
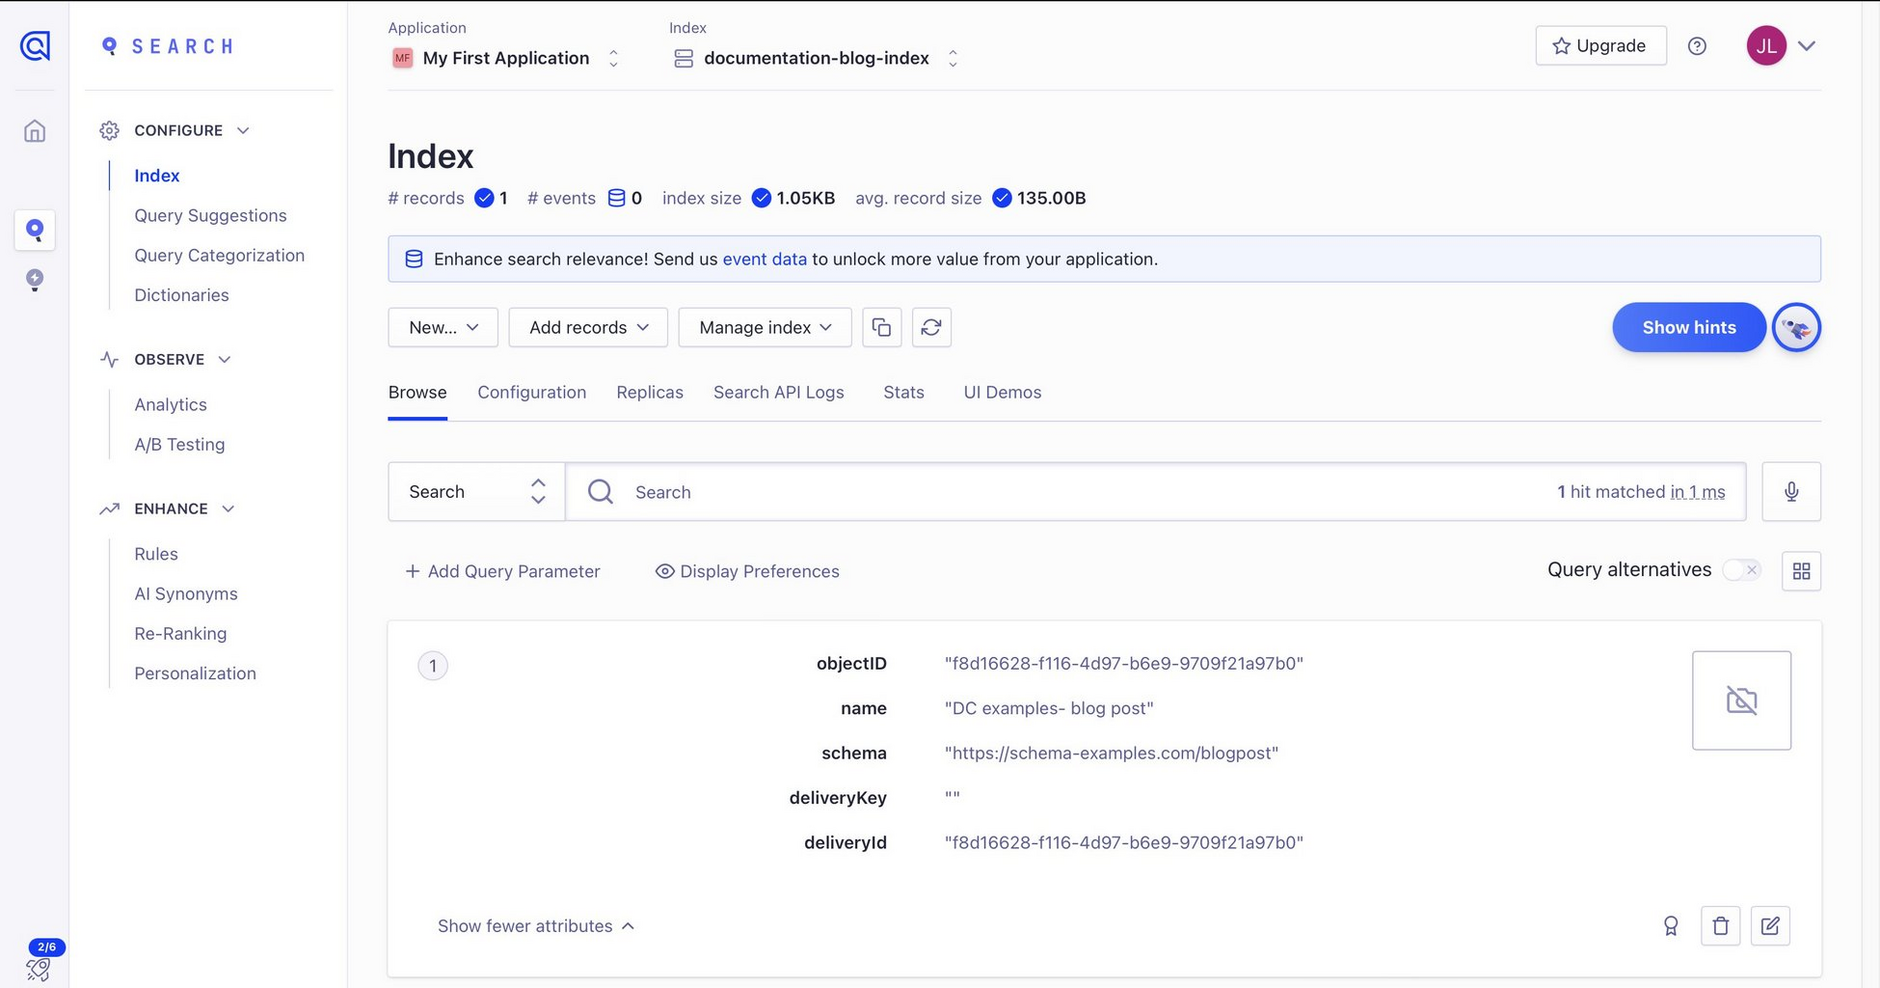
The record will be created or updated in Algolia and available to view from your Algolia dashboard.
The indexing webhookLink copied!
To view the indexing webhook, double-click its label in the webhook list or choose "View" from the ellipsis menu to the right of the webhook.
The indexing webhook is configured based on the information you provided, but you can customize it to meet your needs. To ensure you are indexing the correct data, you will need to update the custom payload. This is the handlebars used to generate the body of the webhook request sent to the Algolia API. See customizing your indexing webhook for more details.
In this section we'll explain the rest of the webhook configuration.
The webhook URL and triggerLink copied!
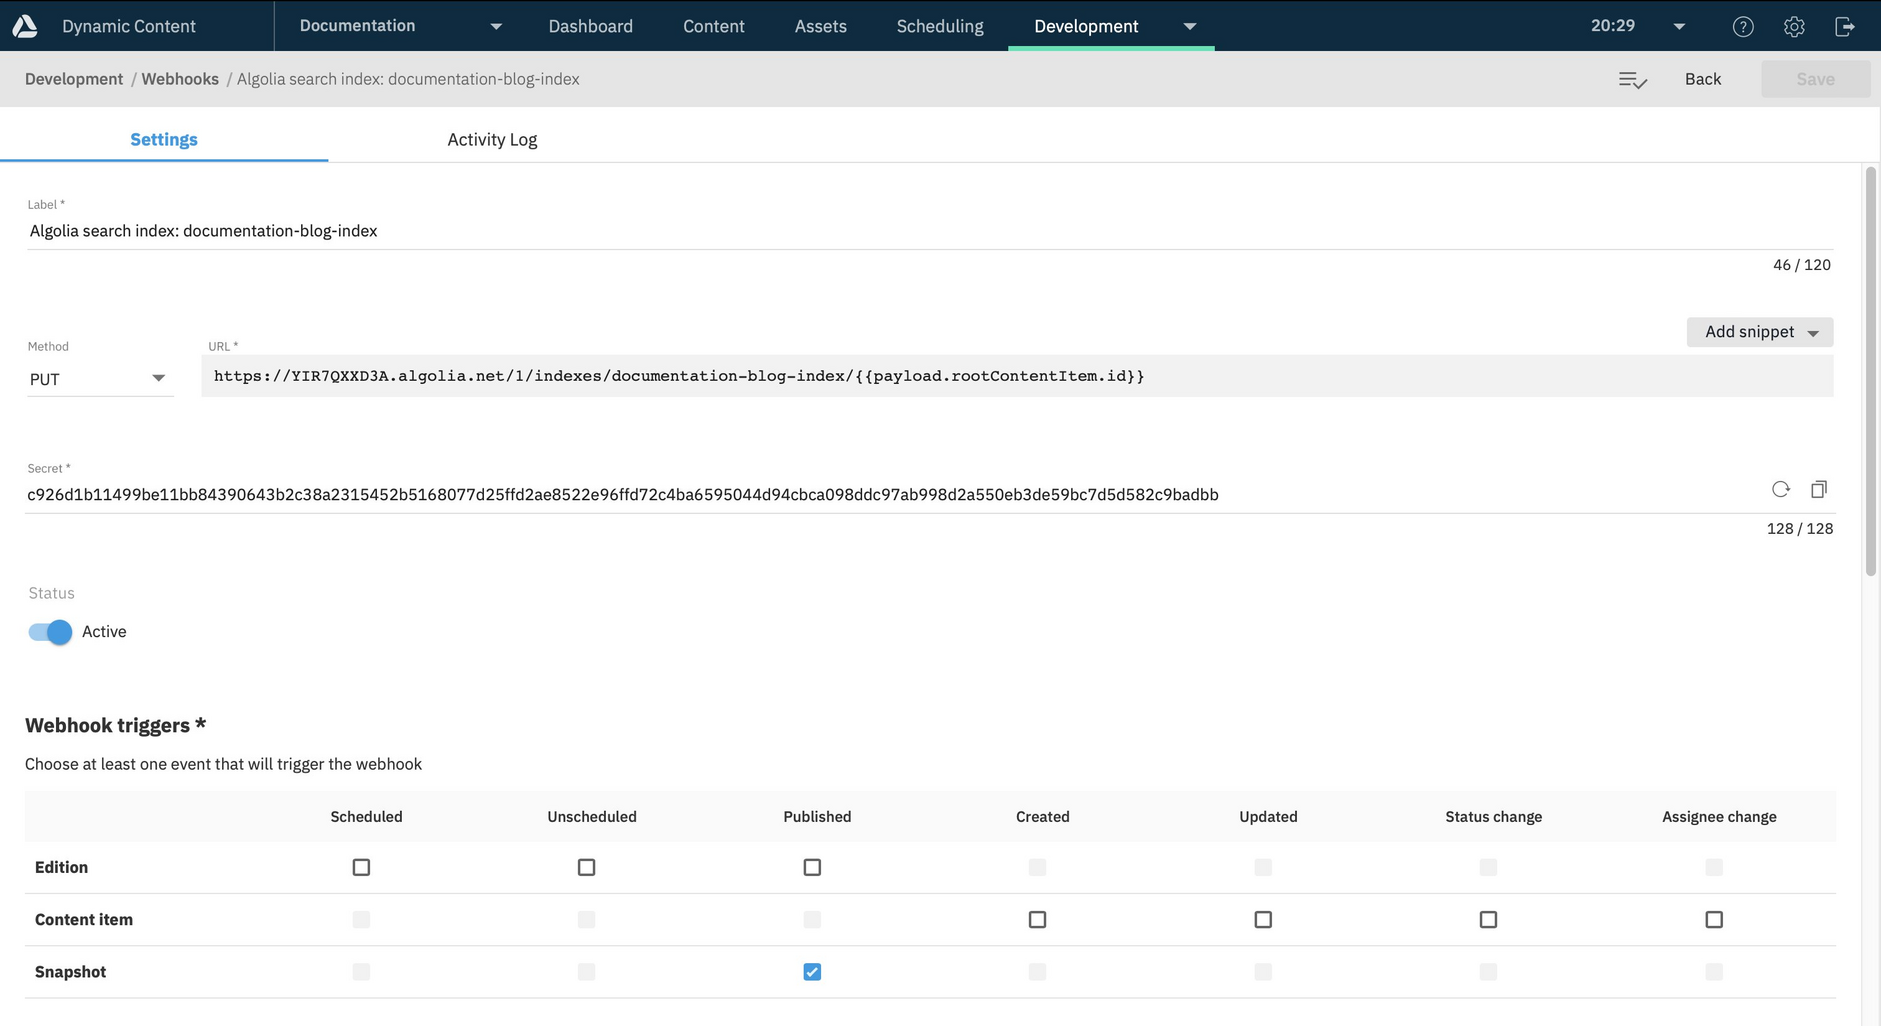
When the webhook is triggered (in this example when a blog content item is published), a PUT request will be sent to Algolia to update the record in the specified index. The URL is already set up for you and includes the Algolia application ID, the index name and a token which will be replaced by the content item id.
Because we chose to update our index when a content item was published, the webhook will be triggered on "snapshot published", as shown in the image below.
When sending a PUT request to Algolia, you need to specify the id of the record to create or update. In the Algolia API this is referred to as the object ID.
The standard payload sent by Dynamic Content when a "snapshot published" webhook event is triggered includes the content item id in {{payload.rootContentItem.id}}. When the webhook request is sent, the content item id is included in the webhook URL and will be used as the Algolia object ID.
If you choose to trigger the webhook on a "content item created" or "content item updated" webhook event, then the webhook payload includes the item id in {{payload.id}} and this will be included in the webhook URL configured for you.
Filtering by content typeLink copied!
The indexing webhook includes a filter to ensure that it is only triggered when a content item of your chosen content type is published, created or updated. The filter will be set up differently depending on whether you have chosen to update the index when a content item is published, or created or updated.
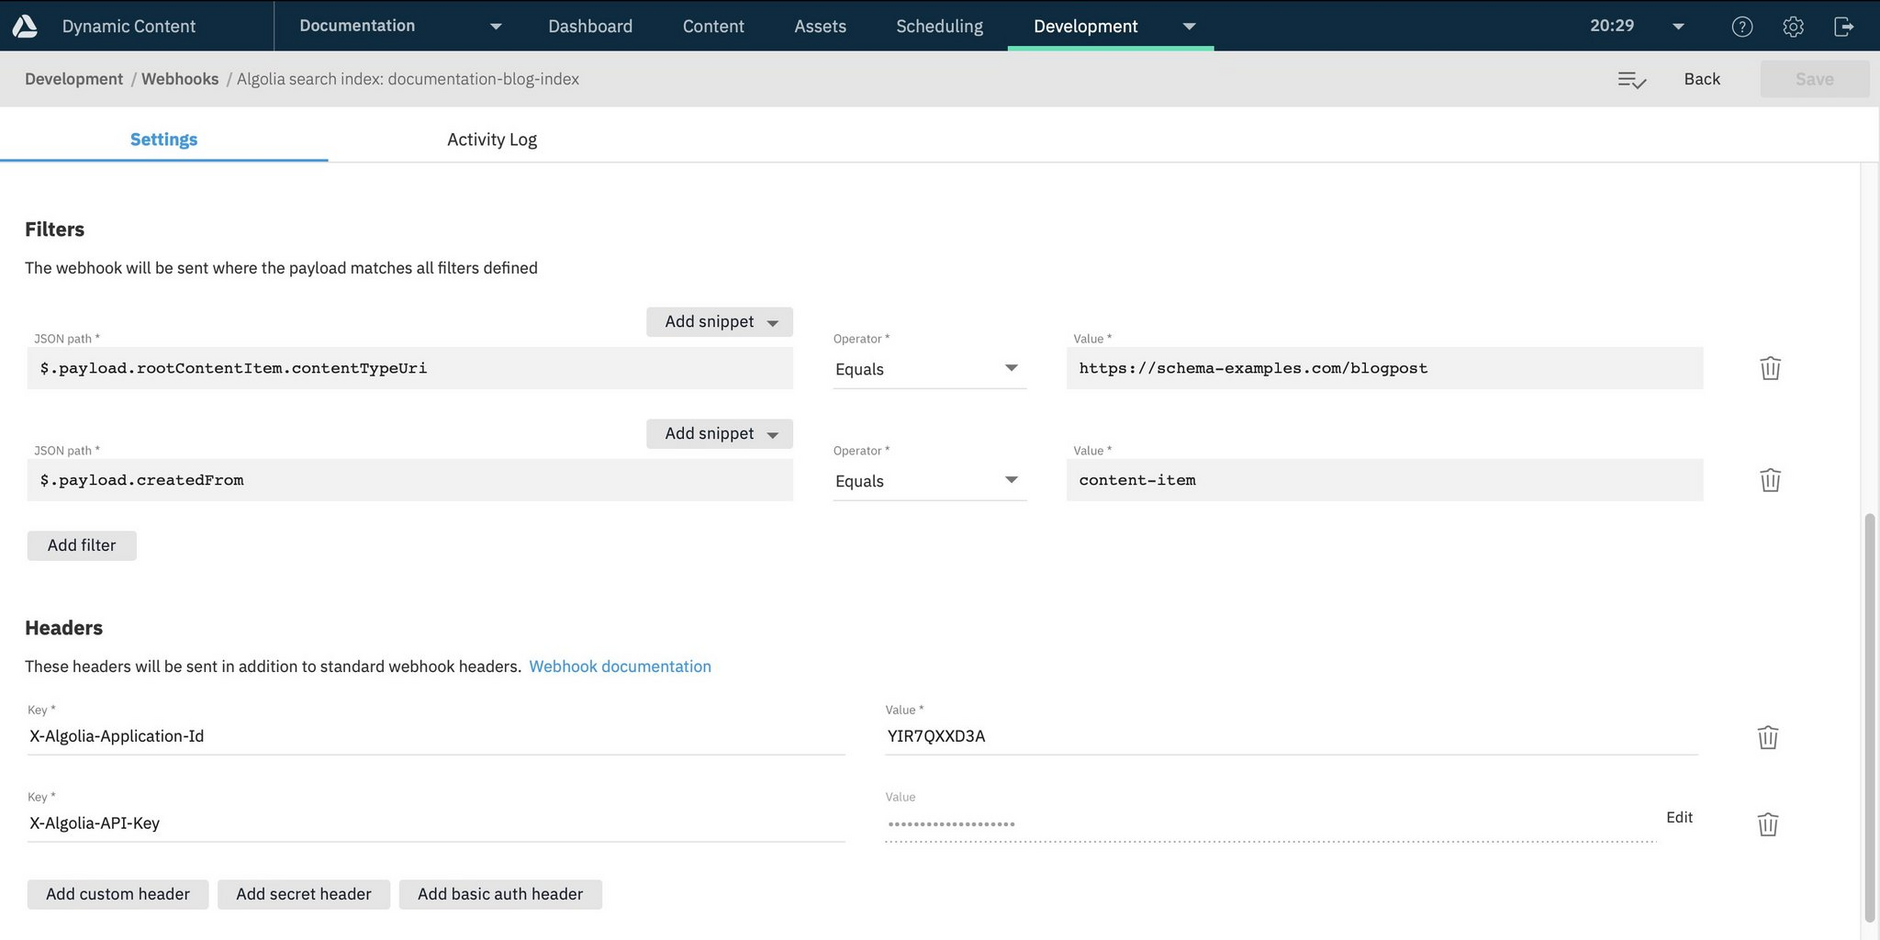
In the example below, the blog content type schema was created with a URL of http://schema-examples.com/blogpost. The webhook will only be triggered if content is published that has been created from a content type registered with this URL.
An additional filter ensures that the webhook is only triggered when a content item is published from the content library, rather than as a result of an edition being published. You can find more information on the standard payloads page.
You can add additional filters. See filters page for more details.
HeadersLink copied!
The indexing webhook is also configured to send your Algolia application id in the header of the request, while your API Key is sent as a secret header that is encrypted during transit.
The custom payloadLink copied!
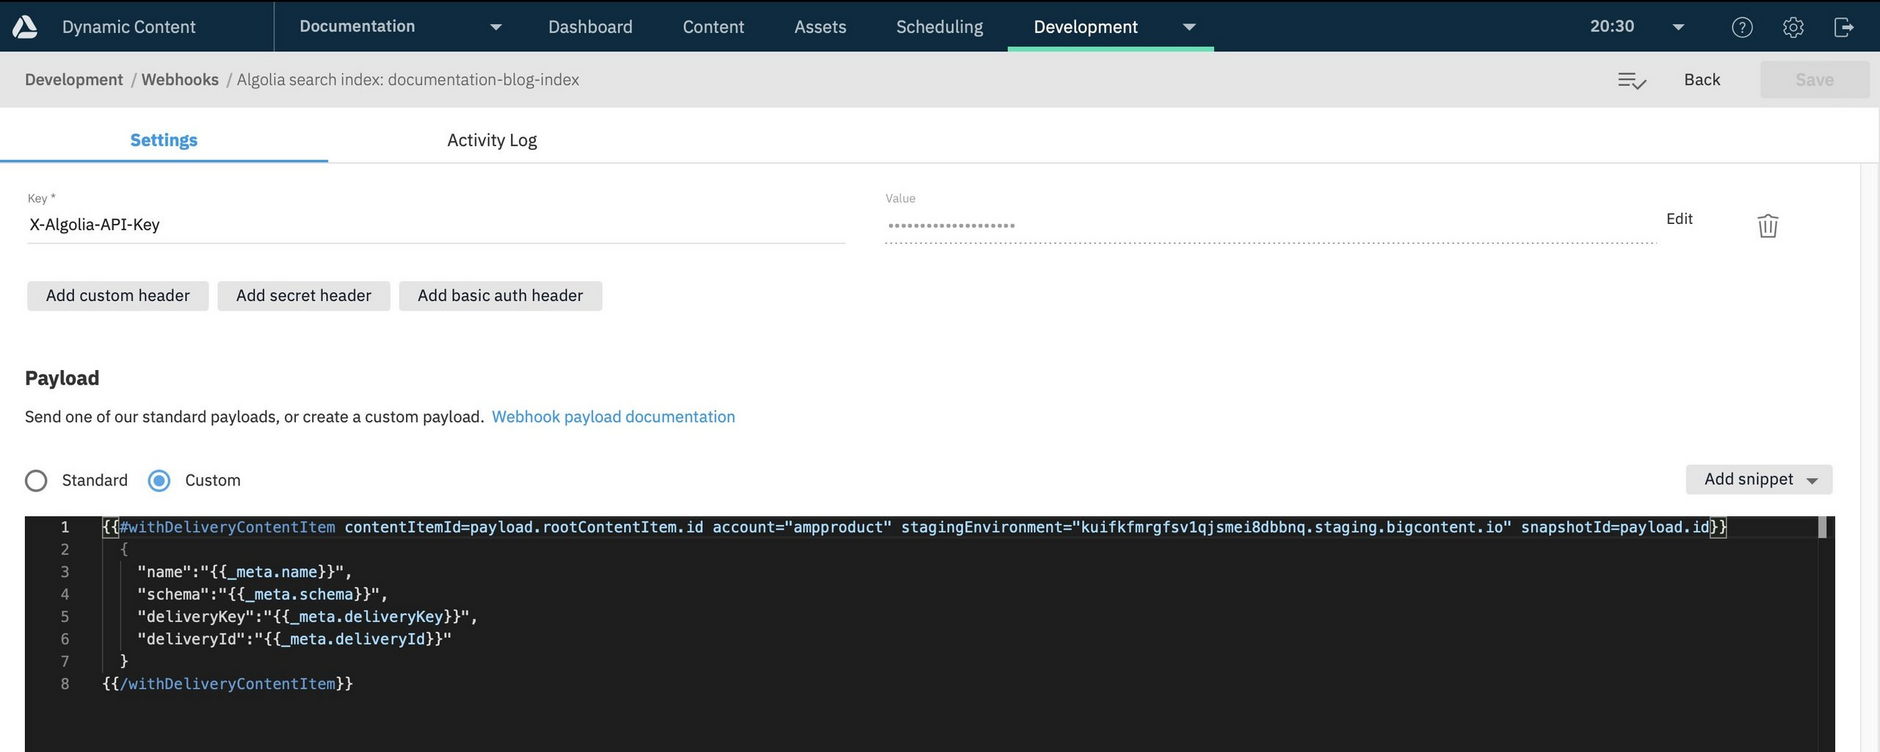
By default, the custom payload is configured to include the content item name, schema, delivery key and delivery id. You will need to update the custom payload to include the properties that you want to index. customizing your indexing webhook for more details.
The archiving webhookLink copied!
The way that the archiving webhook is triggered will depend on the indexing event that you chose. In each case a DELETE request is then sent to the Algolia API to remove the item from the index.
Delete on unpublishLink copied!
If you choose to add a content item to the index when it's published, then the archiving webhook will be triggered when the item is unpublished.
The trigger for this webhook is Content item- updated with a filter of $.payload.publishingStatus EQUALS UNPUBLISHED.
An example webhook configured to delete an item on unpublish is shown below.
Delete on archiveLink copied!
If you choose to add a content item to the index when it's saved, then the archiving webhook will be triggered when the item is archived.
The trigger for this webhook is Content item- updated with a filter of $.payload.status EQUALS ARCHIVED.
See Customizable webhooks for more details of webhook filters.
Related pagesLink copied!
Algolia search webhooks overview
Customizing your indexing webhook
